

Grow Giant Malabar Spinach and unlock the secrets to a thriving, edible landscape right outside your door! Have you ever dreamed of harvesting vibrant, leafy greens that practically burst with flavor and nutrients? I know I have! This isn’t just about gardening; it’s about connecting with nature, nourishing your body, and experiencing the pure joy of growing your own food.
Malabar Spinach, though not a true spinach, boasts a rich history, particularly in Asian cuisine, where it’s been cherished for centuries for its unique texture and health benefits. Imagine the satisfaction of bringing that culinary heritage to your own table! But let’s be honest, sometimes gardening can feel a little daunting, right? That’s where these DIY tricks come in.
Many gardeners struggle with getting the most out of their leafy greens, ending up with small, lackluster harvests. That’s why I’m so excited to share these simple yet effective DIY hacks that will help you grow giant Malabar Spinach. We’ll cover everything from soil preparation to watering techniques, ensuring you have all the knowledge you need to cultivate a bountiful crop. Get ready to impress your friends and family with your gardening prowess and enjoy the delicious rewards of your labor!
Growing Giant Malabar Spinach: A DIY Guide to Lush, Edible Greens
Okay, so you want to grow some seriously impressive Malabar spinach? I’m talking vines that climb, leaves that are thick and juicy, and a harvest that just keeps on giving. Well, you’ve come to the right place! I’m going to walk you through everything you need to know to cultivate your own giant Malabar spinach, from seed to table. Get ready for some serious green goodness!
Understanding Malabar Spinach: Not Your Average Spinach
First things first, let’s clear up a common misconception. Malabar spinach ( *Basella alba* or *Basella rubra*) isn’t actually spinach. It’s a vine that thrives in warm weather, unlike true spinach which prefers cooler temperatures. Think of it as spinach’s heat-loving cousin. It’s known for its thick, slightly succulent leaves and its ability to climb, making it a beautiful and productive addition to any garden. Plus, it’s packed with vitamins and minerals!
Getting Started: Seeds vs. Cuttings
You have two main options for starting your Malabar spinach: seeds or cuttings. I’ve had success with both, but here’s a breakdown to help you decide:
* **Seeds:**
* **Pros:** Readily available online and in some garden centers. More cost-effective if you want to grow a lot of plants.
* **Cons:** Can be slow to germinate. Requires a bit more patience.
* **Cuttings:**
* **Pros:** Faster to establish. Clones the parent plant, ensuring you get the same characteristics.
* **Cons:** Requires access to an existing Malabar spinach plant.
I personally prefer starting from seeds because I enjoy the whole process of watching them sprout and grow. But if you have access to a healthy plant, cuttings are a great way to go!
Starting from Seeds: A Step-by-Step Guide
If you’re going the seed route, here’s how to get those little guys germinating:
1. **Scarification (Optional but Recommended):** Malabar spinach seeds have a tough outer coating, which can make germination a bit tricky. To help them along, you can scarify them. This basically means gently scratching the surface of the seed. I use a nail file or a piece of sandpaper to lightly roughen the seed coat. Be careful not to damage the inside of the seed!
2. **Soaking the Seeds:** After scarifying (or even if you skip that step), soak the seeds in warm water for 24-48 hours. This helps to soften the seed coat and encourages germination. I usually put them in a small bowl and change the water once a day.
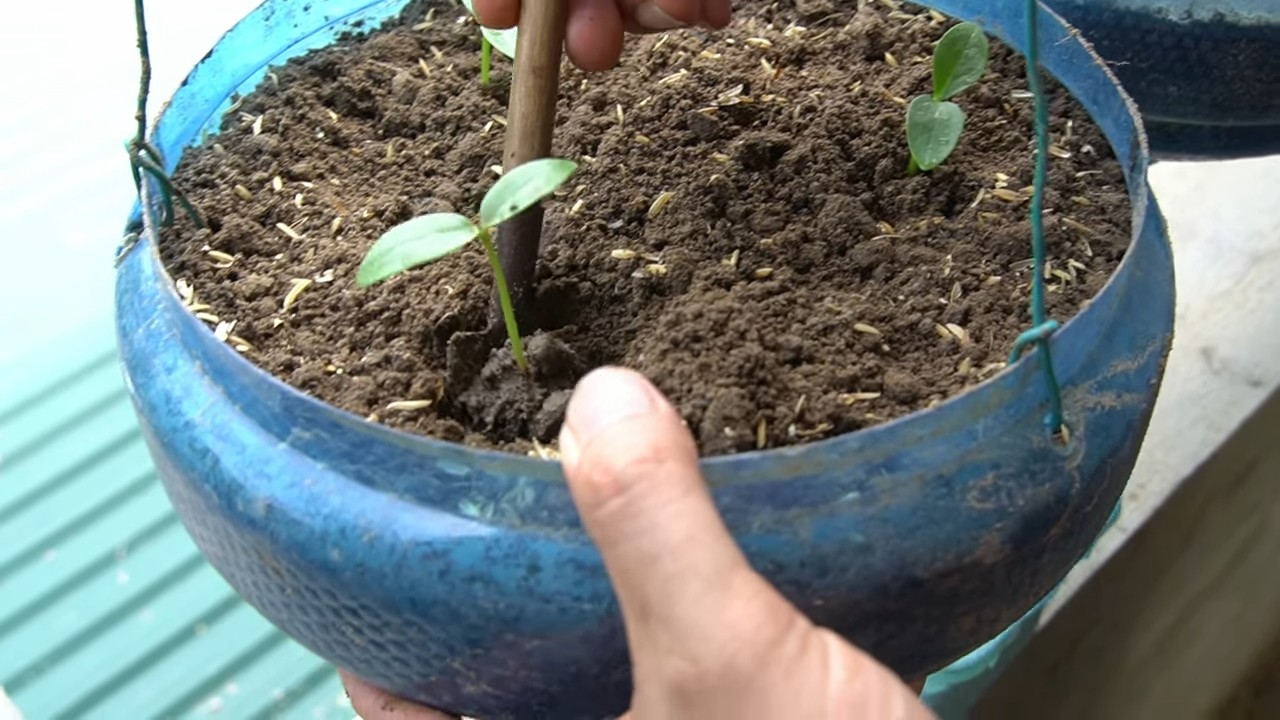
3. **Preparing Your Seed Starting Mix:** Use a well-draining seed starting mix. You can buy this pre-made or make your own by mixing equal parts peat moss (or coconut coir), perlite, and vermiculite.
4. **Planting the Seeds:** Fill small pots or seed trays with your seed starting mix. Moisten the mix thoroughly. Plant the seeds about 1/2 inch deep. I usually plant 2-3 seeds per pot to increase my chances of success.
5. **Providing Warmth and Moisture:** Malabar spinach needs warmth to germinate. Aim for a soil temperature of 70-80掳F (21-27掳C). You can use a heat mat under your seed trays to provide consistent warmth. Cover the pots or trays with a clear plastic lid or plastic wrap to create a humid environment.
6. **Patience is Key:** Germination can take anywhere from 7-21 days, so don’t get discouraged if you don’t see sprouts right away. Keep the soil consistently moist but not soggy.
7. **Providing Light:** Once the seedlings emerge, remove the plastic cover and provide them with plenty of light. A sunny windowsill or a grow light will work well.
8. **Thinning (If Necessary):** If you planted multiple seeds per pot and more than one germinates, thin them out by snipping off the weaker seedlings at the soil line. Leave the strongest seedling in each pot.
Propagating from Cuttings: A Quick and Easy Method
If you have access to a mature Malabar spinach plant, taking cuttings is a super easy way to propagate new plants.
1. **Selecting Your Cuttings:** Choose healthy stems that are about 4-6 inches long. Look for stems with several leaves and nodes (the points where leaves emerge).
2. **Preparing the Cuttings:** Remove the leaves from the bottom 1-2 inches of the stem. This is where the roots will develop.
3. **Rooting in Water or Soil:** You can root the cuttings in water or directly in soil.
* **Water Method:** Place the cuttings in a glass or jar of water, making sure the bottom nodes are submerged. Change the water every few days. Roots should start to appear within a week or two.
* **Soil Method:** Dip the cut end of the stem in rooting hormone (optional but recommended). Plant the cutting in a small pot filled with well-draining potting mix. Keep the soil moist but not soggy.
4. **Providing Humidity:** Whether you’re rooting in water or soil, providing humidity will help the cuttings root faster. You can cover the cuttings with a clear plastic bag or dome to create a mini-greenhouse.
5. **Transplanting:** Once the cuttings have developed a good root system (usually after a few weeks), you can transplant them into larger pots or directly into the garden.
Transplanting Your Seedlings or Cuttings: Giving Them Room to Grow
Whether you started from seeds or cuttings, it’s time to give your Malabar spinach plants some room to spread out.
1. **Choosing the Right Location:** Malabar spinach needs plenty of sunlight (at least 6 hours per day) and well-draining soil. It also needs something to climb on, so choose a location near a trellis, fence, or other support structure.
2. **Preparing the Soil:** Amend the soil with compost or other organic matter to improve drainage and fertility. Malabar spinach prefers slightly acidic soil (pH 6.0-6.8).
3. **Spacing:** Space the plants about 12-18 inches apart. This will give them enough room to grow and climb.
4. **Planting:** Dig a hole that is slightly larger than the root ball of the plant. Gently remove the plant from its pot and place it in the hole. Backfill with soil and water thoroughly.
5. **Providing Support:** Train the vines to climb up the trellis or support structure. You may need to tie them loosely at first.
Caring for Your Malabar Spinach: Keeping it Happy and Healthy
Once your Malabar spinach is planted, here’s how to keep it thriving:
* **Watering:** Water regularly, especially during hot, dry weather. Malabar spinach prefers consistently moist soil.
* **Fertilizing:** Fertilize every few weeks with a balanced fertilizer or compost tea.
* **Mulching:** Apply a layer of mulch around the base of the plants to help retain moisture, suppress weeds, and regulate soil temperature.
* **Pruning:** Prune the vines regularly to encourage branching and bushier growth. You can also prune to control the size and shape of the plant.
* **Pest and Disease Control:** Malabar spinach is generally pest and disease resistant. However, keep an eye out for aphids, spider mites, and fungal diseases. Treat any problems promptly with organic pest control methods.
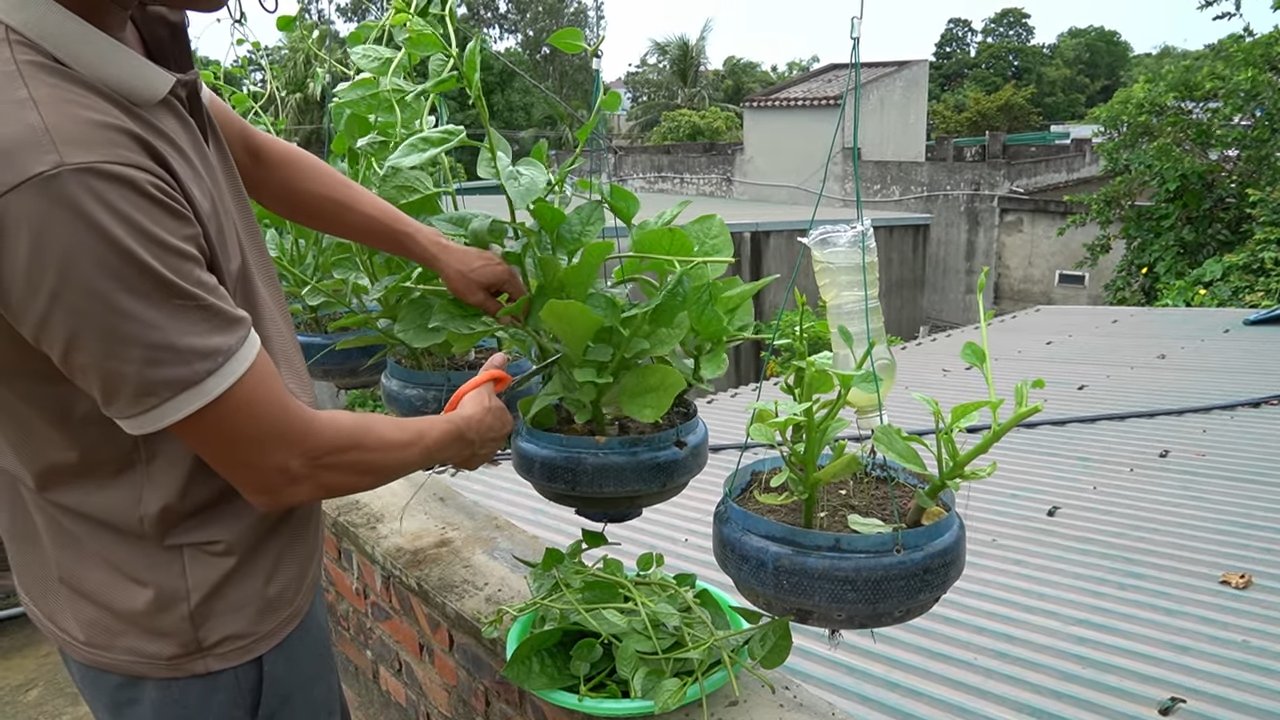
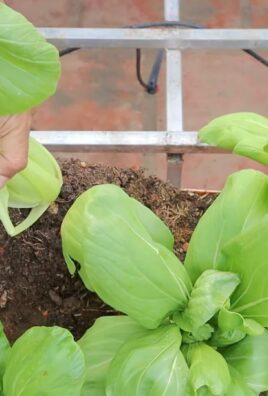
Harvesting Your Malabar Spinach: Enjoying the Fruits (or Leaves!) of Your Labor
The best part of growing Malabar spinach is, of course, harvesting and eating it!
* **When to Harvest:** You can start harvesting leaves as soon as the plant is large enough. The younger leaves are more tender and flavorful.
* **How to Harvest:** Simply snip off the leaves and stems with scissors or pruning shears. You can harvest individual leaves or entire stems.
* **Continuous Harvest:** Malabar spinach is a cut-and-come-again crop, meaning you can harvest it repeatedly throughout the growing season. The more you harvest, the more the plant will produce!
Using Your Malabar Spinach: From Garden to Table
Malabar spinach can be used in a variety of dishes, just like regular spinach. Here are some ideas:
* **Salads:** Use the young, tender leaves in salads.
* **Stir-fries:** Add the leaves and stems to stir-fries.
* **Soups and Stews:** Use the leaves as a thickener in soups and stews.
* **Steamed or Saut茅ed:** Steam or saut茅 the leaves with garlic and olive oil.
* **Smoothies:** Add a handful of leaves to your smoothies for a boost of nutrients.
Troubleshooting: Common Problems and Solutions
Even with the best care, you might encounter some problems while growing Malabar spinach. Here are a few common issues and how to address them:
* **Slow Germination:** If your seeds are slow
Conclusion
So, there you have it! Growing giant Malabar spinach isn’t just a gardening project; it’s an invitation to a world of culinary possibilities and a testament to the rewarding nature of DIY. We’ve walked through the simple steps, from seed to harvest, and hopefully dispelled any myths about this vigorous vine.
Why is this DIY trick a must-try? Because it empowers you to cultivate a unique and nutritious leafy green right in your own backyard. Forget bland, store-bought spinach; with Malabar spinach, you’re getting a vibrant, slightly tangy flavor and a satisfyingly thick texture that elevates any dish. Plus, you’re reducing your carbon footprint by sourcing your food locally and organically.
But the benefits extend beyond the plate. Growing Malabar spinach is a visually stunning addition to any garden. Its twining vines and glossy leaves create a lush, tropical feel, and it can be trained to climb trellises, fences, or even arbors, providing shade and privacy. It’s a conversation starter, a source of pride, and a tangible connection to the natural world.
Don’t be afraid to experiment! Try different trellising methods to see what works best in your space. Consider companion planting with herbs like basil or rosemary to deter pests and enhance the flavor of your spinach. You can even grow Malabar spinach in containers if you have limited space, just ensure they are large enough to accommodate the plant’s vigorous growth.
For a spicier kick, try adding a pinch of cayenne pepper to the soil when planting. This won’t significantly alter the taste of the leaves, but it can help deter pests and promote healthier growth. If you find your Malabar spinach is producing an abundance of leaves, consider drying them for later use in soups and stews. Simply spread the leaves out on a screen in a well-ventilated area until they are completely dry and brittle. Store them in an airtight container in a cool, dark place.
The possibilities are endless, and the rewards are plentiful. So, grab some seeds, prepare your soil, and embark on your own Malabar spinach adventure. We’re confident that you’ll be amazed by the results.
We encourage you to try this DIY trick and share your experiences with us! Post photos of your thriving Malabar spinach plants on social media using #GiantMalabarSpinach or leave a comment below. We’d love to hear your tips, tricks, and favorite recipes. Let’s build a community of Malabar spinach enthusiasts and celebrate the joy of homegrown goodness!
Frequently Asked Questions (FAQ)
What exactly is Malabar spinach, and how is it different from regular spinach?
Malabar spinach (Basella alba or Basella rubra) isn’t actually a true spinach, although it shares a similar name and is used in similar ways in cooking. It’s a heat-loving vine native to tropical Asia, whereas true spinach (Spinacia oleracea) is a cool-season crop. Malabar spinach has thicker, fleshier leaves and a slightly mucilaginous texture when cooked, similar to okra. It’s also more tolerant of hot weather and less prone to bolting (going to seed prematurely) than true spinach. The taste is milder and slightly tangy compared to the earthier flavor of regular spinach.
How do I start growing giant Malabar spinach? Can I start from seeds or cuttings?
You can start Malabar spinach from both seeds and cuttings. Starting from seeds is the most common method. Soak the seeds in warm water for 24 hours before planting to improve germination rates. Plant the seeds about 陆 inch deep in well-draining soil. Keep the soil consistently moist until the seedlings emerge, which can take anywhere from 7 to 21 days.
To propagate from cuttings, take a 4-6 inch cutting from a healthy vine. Remove the lower leaves and place the cutting in water or directly into moist soil. Roots should develop within a week or two. Once the roots are established, you can transplant the cutting into a larger pot or directly into the garden.
What are the ideal growing conditions for giant Malabar spinach?
Malabar spinach thrives in warm, sunny conditions. It needs at least 6 hours of direct sunlight per day. The ideal soil is well-draining, fertile, and slightly acidic to neutral (pH 6.0-7.0). It also needs consistent moisture, especially during hot weather. Provide a trellis or other support structure for the vines to climb.
How often should I water and fertilize my Malabar spinach plants?
Water your Malabar spinach plants regularly, especially during hot, dry weather. The soil should be consistently moist but not waterlogged. Fertilize every 2-3 weeks with a balanced liquid fertilizer or compost tea. Avoid over-fertilizing, as this can lead to excessive foliage growth at the expense of flavor.
What are some common pests and diseases that affect Malabar spinach, and how can I prevent or treat them?
Malabar spinach is relatively pest-resistant, but it can occasionally be affected by aphids, spider mites, or snails. To prevent infestations, inspect your plants regularly and remove any pests you find. You can also use insecticidal soap or neem oil to control pests.
Diseases are less common, but fungal problems can occur in humid conditions. Ensure good air circulation around your plants and avoid overwatering. If you notice any signs of fungal disease, such as leaf spots or mildew, treat with a fungicide.
When and how should I harvest my Malabar spinach?
You can start harvesting Malabar spinach leaves as soon as the plant is established and has produced enough foliage. Simply snip off the leaves as needed, leaving at least a few leaves on each stem to encourage continued growth. Regular harvesting will also help keep the plant from becoming too leggy. The younger leaves are more tender and flavorful than the older ones.
Can I eat the stems and flowers of Malabar spinach?
Yes, both the stems and flowers of Malabar spinach are edible. The stems can be cooked like asparagus or added to stir-fries. The flowers can be used as a garnish or added to salads.
How do I store harvested Malabar spinach?
Store harvested Malabar spinach in the refrigerator in a plastic bag or container. It will keep for several days. For longer storage, you can blanch the leaves for a minute or two and then freeze them.
Is Malabar spinach safe to eat? Are there any precautions I should take?
Malabar spinach is generally safe to eat for most people. However, like other leafy greens, it contains oxalates, which can interfere with calcium absorption. People with kidney problems should consume it in moderation. Cooking the leaves can reduce the oxalate content.
Can I grow giant Malabar spinach indoors?
While Malabar spinach prefers outdoor conditions, it can be grown indoors with sufficient light and space. Choose a large pot and provide a trellis or other support structure. Place the plant in a sunny location or supplement with grow lights. Ensure good air circulation and water regularly.
Leave a Comment