

Grow Dragon Beans Indoors? Absolutely! Imagine harvesting vibrant, exotic Dragon Beans right from your own home, even if you don’t have a sprawling garden. Forget those drab, store-bought veggies – we’re talking about adding a touch of magic and a burst of flavor to your meals with something you’ve nurtured yourself.
For centuries, beans have been a staple in diets around the world, symbolizing prosperity and growth. Dragon Beans, with their striking colors and unique taste, bring a modern twist to this ancient tradition. But let’s face it, not everyone has the space or climate for a traditional garden. That’s where the beauty of indoor gardening comes in!
I know what you’re thinking: “Indoor gardening sounds complicated!” But trust me, it doesn’t have to be. This DIY guide is packed with simple, easy-to-follow tricks and hacks that will have you successfully grow Dragon Beans indoors in no time. We’ll cover everything from choosing the right containers and soil to providing the perfect lighting and support. Why spend money on expensive produce when you can cultivate your own delicious and visually stunning Dragon Beans right on your windowsill? Let’s get started and transform your home into a thriving indoor garden!
Growing Dragon Beans Indoors: Your Comprehensive DIY Guide
Hey plant friends! Have you ever heard of dragon beans? These fascinating climbing plants with their bright red flowers and long, decorative pods are a real eye-catcher. And the best part? You can easily grow them at home yourself! In this article, I’ll show you step-by-step how to grow your own dragon beans indoors. Let’s get started!
What You Need to Grow Dragon Beans Indoors
Before we begin, here is a list of all the materials and tools you will need:
-
Dragon bean seeds: You can get these from specialty stores, online, or perhaps even from a gardening friend. Make sure the seeds are fresh and of good quality.
-
Seed starting pots or trays: Small pots or trays with drainage holes are ideal for starting seeds.
-
Seed starting mix: This is low in nutrients and loose, which makes it easier for the seeds to germinate.
-
Larger pots: Once the seedlings are a bit bigger, they will need more space. Choose pots with a diameter of at least 20 cm.
-
Potting soil: Good potting soil with sufficient nutrients is important for the growth of the plants.
-
Climbing support: Dragon beans are climbing plants and need a support to hold onto. This can be a trellis, a frame, or simply a few stakes.
-
Spray bottle: For moistening the soil.
-
Watering can: For watering the plants.
-
Fertilizer: A liquid fertilizer for flowering plants helps the dragon beans to grow strong and produce many flowers.
-
Optional: A small trowel or spoon for repotting.
Starting the Dragon Beans
Starting the seeds is the first and most important step. Here’s how to get the seeds to germinate:
-
Prepare the seeds: To speed up germination, you can place the seeds in lukewarm water for 24 hours before planting. This softens the hard seed coat.
-
Prepare seed pots: Fill the seed pots or trays with seed starting mix. Press the soil down lightly.
-
Sow the seeds: Place one or two seeds in each pot. Cover them with a thin layer of soil (about 1 cm).
-
Water: Moisten the soil gently with a spray bottle. The soil should be moist, but not wet.
-
Choose a location: Place the seed pots in a warm and bright place. A windowsill is ideal. Avoid direct sunlight, as it can burn the young seedlings.
-
Maintain moisture: Keep the soil evenly moist by spraying it regularly with the spray bottle.
-
Be patient: Germination can take a few days to a few weeks, depending on the temperature and variety. Once the first seedlings appear, you can move the pots to a slightly cooler place.
Repotting the Dragon Beans
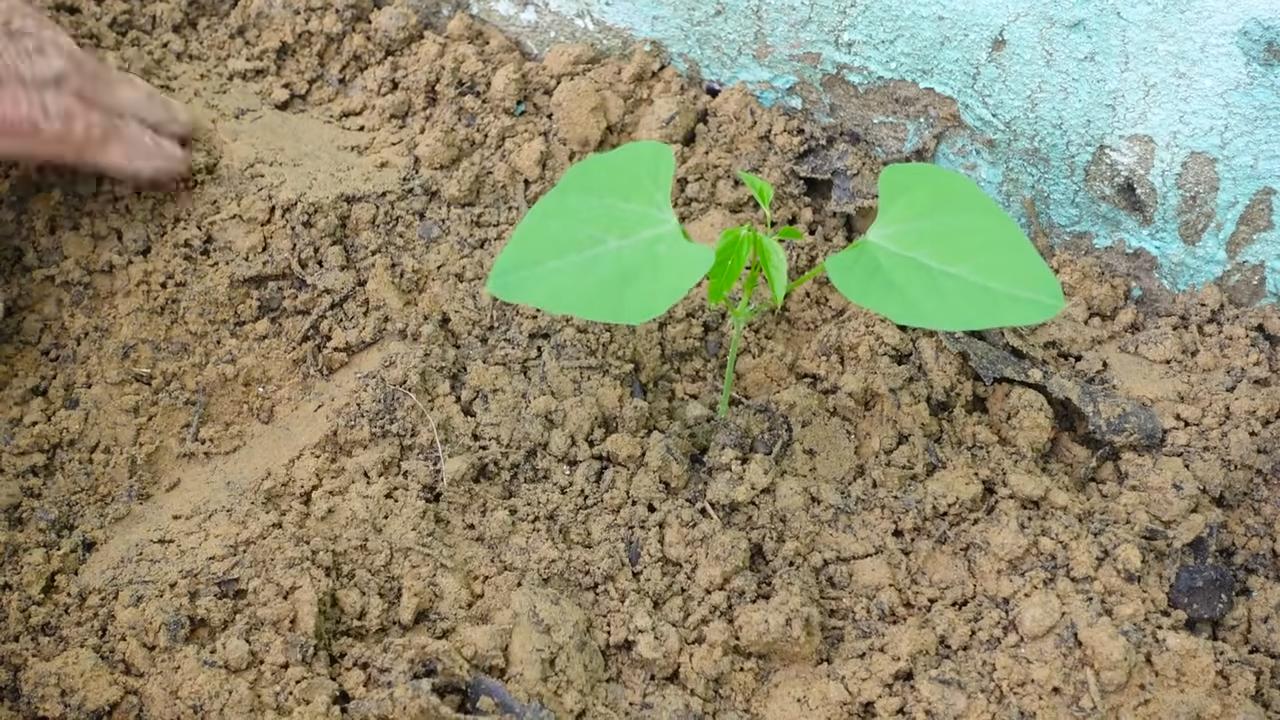
Once the seedlings have developed a few leaves and are large enough to be handled (about 5-10 cm high), it is time to repot them into larger pots.
-
Prepare the pots: Fill the larger pots with potting soil. Leave a rim of about 2-3 cm at the top.
-
Carefully lift the seedlings: Gently remove the seedlings from the seed pots. Be careful not to damage the roots. If the roots are very close together, you can gently pull them apart.
-
Planting: Place each seedling in its own pot. The top of the root ball should be level with the surface of the potting soil.
-
Water: Water the plants thoroughly after repotting.
-
Choose a location: Place the pots in a bright and warm location. Avoid direct midday sun.
The Proper Care of Dragon Beans
For your dragon beans to thrive, proper care is crucial. Here are a few tips:
-
Watering: Water the plants regularly, but avoid waterlogging. The soil should always be slightly moist. In summer, the plants need more water than in winter.
-
Fertilizing: During the growing and flowering season, fertilize the dragon beans every two weeks with a liquid fertilizer for flowering plants.
-
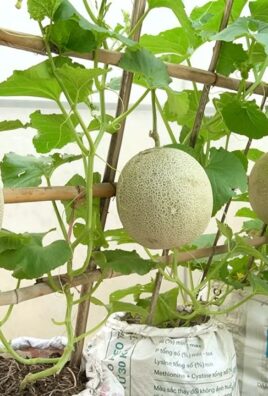
Climbing support: Provide the plants with a climbing support that they can hold onto. You can use a trellis, a frame, or simply a few stakes.
-
Pruning: You can prune the plants regularly to keep them in shape and encourage flowering. Remove withered flowers and leaves.
-
Pests: Watch out for pests such as aphids or spider mites. If infested, you can treat the plants with a natural insecticide.
-
Overwintering: Dragon beans are not winter-hardy. If you have grown them outdoors, you should bring them indoors before the first frost. Place them in a bright and cool place (about 10-15 degrees Celsius) and water them only sparingly. In the spring, you can put them back outside.
Flowering and Harvesting
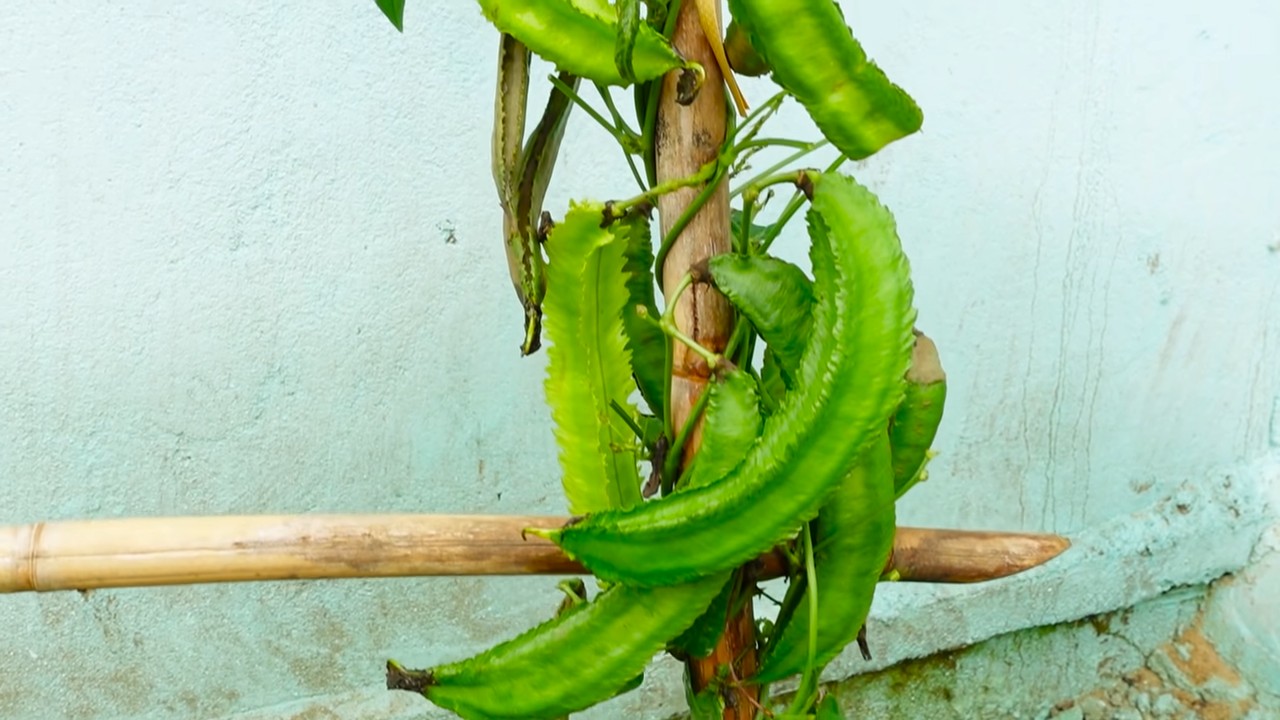
Dragon beans usually flower in the summer. The flowers are bright red and very decorative. After flowering, the long, pod-shaped fruits form.
-
Flowering time: The flowering time can vary depending on the variety and location. As a rule, dragon beans bloom from June to September.
-
Harvest: The pods can be harvested as soon as they are ripe. They are ripe when they can be easily detached from the stem. You can eat the pods fresh or dry them and use them as decoration. The seeds can also be eaten but should be cooked before consumption.
Common Problems and Solutions
Problems can also arise when growing dragon beans. Here are a few common problems and how you can solve them:
-
Yellow leaves: Yellow leaves can be a sign of overwatering, nutrient deficiency, or pest infestation. Check the watering, fertilize the plants, and watch out for pests.
-
No flowers: If the plants do not flower, it may be due to too little light, too little fertilizer, or too much nitrogen in the fertilizer. Move the plants to a brighter location, fertilize them with a fertilizer for flowering plants, and pay attention to the nitrogen content.
-
Pests: Aphids and spider mites are common pests on dragon beans. You can combat them with a natural insecticide.
Additional Tips for Successful Cultivation
Here are a few more tips to help you grow your dragon beans successfully:
-
Choose the right location: Dragon beans need a bright and warm location. Avoid direct midday sun.
-
Use high-quality soil: Good potting soil with sufficient nutrients is important for the growth of the plants.
-
Pay attention to watering: Water the plants regularly, but avoid waterlogging.
-
Fertilize regularly: During the growing and flowering season, fertilize the plants every two weeks with a liquid fertilizer for flowering plants.
-
Provide a climbing support
Conclusion
So, there you have it! Growing dragon beans indoors is not only achievable, but it’s also a deeply rewarding experience. We’ve walked you through the process, from selecting the right seeds and preparing your growing medium to providing the necessary support and care for your burgeoning beanstalk. But why should you embark on this indoor gardening adventure?
Firstly, growing your own dragon beans offers unparalleled freshness. Imagine the satisfaction of harvesting vibrant, crisp beans just moments before adding them to your favorite dishes. The flavor difference between homegrown and store-bought is truly remarkable. Secondly, it’s a fantastic way to connect with nature, even when space or climate limitations prevent you from having a traditional outdoor garden. Nurturing a plant from seed to harvest provides a sense of accomplishment and a calming connection to the natural world.
Furthermore, this DIY project is incredibly versatile. While we’ve focused on the standard dragon bean, feel free to experiment with different varieties. Consider trying purple dragon beans for a visually stunning addition to your garden and plate. You can also adjust the support system to suit your space and aesthetic preferences. A simple trellis works wonders, but you could also get creative with repurposed materials like bamboo poles or even decorative branches.
Don’t be afraid to tweak the growing conditions to optimize your results. If you notice your beans are not thriving, adjust the amount of light they receive or experiment with different watering schedules. Remember, gardening is a learning process, and every plant is unique.
This DIY project is a must-try for anyone looking to add a touch of green to their home, enjoy fresh, homegrown produce, and embark on a fulfilling gardening journey.
We encourage you to take the plunge and try growing dragon beans indoors. It’s easier than you might think, and the rewards are well worth the effort. Once you’ve harvested your first crop, be sure to share your experiences with us! We’d love to see photos of your indoor dragon bean gardens and hear about any tips or tricks you’ve discovered along the way. Share your stories and inspire others to embrace the joy of indoor gardening. Let’s cultivate a community of indoor dragon bean enthusiasts!
Variations and Further Exploration
Beyond the basic techniques, consider exploring these variations to personalize your indoor dragon bean growing experience:
* Hydroponics: For a more advanced approach, try growing your dragon beans hydroponically. This method involves growing plants without soil, using nutrient-rich water solutions. It can lead to faster growth and higher yields.
* Vertical Gardening: Maximize your space by creating a vertical dragon bean garden. Use stacked planters, hanging baskets, or a living wall system to grow your beans upwards.
* Companion Planting: Enhance the growth and flavor of your dragon beans by planting them alongside beneficial companion plants. Marigolds, for example, can help deter pests, while basil can improve the overall health of your plants.
* Seed Saving: Once you’ve successfully grown your dragon beans, consider saving the seeds from your best plants to grow future crops. This is a great way to preserve your favorite varieties and become more self-sufficient.
Remember to document your journey and share your findings with the gardening community. Your experiences can help others succeed in growing dragon beans indoors.
Frequently Asked Questions (FAQ)
Q: What are dragon beans, and why should I grow them indoors?
A: Dragon beans, also known as dragon tongue beans or borlotti beans, are a type of heirloom bean prized for their beautiful markings and delicious flavor. They are typically cream-colored with striking purple streaks, making them a visually appealing addition to any garden or plate. Growing them indoors allows you to enjoy fresh, homegrown beans regardless of the weather or available outdoor space. You’ll have access to a fresher, more flavorful product than what you typically find in stores, and you’ll have the satisfaction of nurturing your own food from seed to harvest. Plus, it’s a great way to add some greenery and life to your indoor environment.
Q: What kind of light do dragon beans need when grown indoors?
A: Dragon beans need plenty of light to thrive. Ideally, they require at least 6-8 hours of direct sunlight per day. If you don’t have a sunny windowsill, you can supplement with grow lights. Position the grow lights about 6-12 inches above the plants and keep them on for 12-16 hours a day. LED grow lights are a great option as they are energy-efficient and produce very little heat. Insufficient light can lead to leggy growth, weak stems, and reduced bean production.
Q: What type of soil is best for growing dragon beans indoors?
A: Dragon beans prefer well-draining soil that is rich in organic matter. A good potting mix for indoor growing should contain a blend of peat moss, perlite, and vermiculite. You can also amend your potting mix with compost or aged manure to provide additional nutrients. Avoid using garden soil, as it can be too heavy and may contain pests or diseases. Ensure your container has drainage holes to prevent waterlogging, which can lead to root rot.
Q: How often should I water my indoor dragon beans?
A: Water your dragon beans regularly, keeping the soil consistently moist but not waterlogged. Check the soil moisture level by sticking your finger about an inch deep into the soil. If it feels dry, it’s time to water. Water deeply, allowing the excess water to drain out of the drainage holes. Avoid overhead watering, as this can promote fungal diseases. During hot weather or when the plants are actively growing, you may need to water more frequently.
Q: Do dragon beans need support when grown indoors?
A: Yes, dragon beans are climbing plants and require support to grow properly. You can use a trellis, stakes, or even a tomato cage to provide support. Install the support system when the plants are young to avoid damaging the roots later on. As the plants grow, gently train them to climb the support structure. This will help them stay upright, prevent them from sprawling, and improve air circulation.
Q: How long does it take to harvest dragon beans after planting?
A: Dragon beans typically take about 60-70 days to mature and be ready for harvest. You can start harvesting the beans when they are plump and the pods are still tender. Regular harvesting will encourage the plants to produce more beans. To harvest, simply snap the pods off the plant. You can eat the entire pod when the beans are young and tender, or you can shell the beans and use them in your favorite recipes.
Q: What are some common pests and diseases that affect dragon beans, and how can I prevent them?
A: Common pests that can affect dragon beans include aphids, spider mites, and bean beetles. To prevent pest infestations, inspect your plants regularly and remove any pests you find. You can also use insecticidal soap or neem oil to control pests. Common diseases that can affect dragon beans include powdery mildew and bean rust. To prevent diseases, ensure good air circulation around your plants, avoid overhead watering, and remove any infected leaves.
Q: Can I grow dragon beans in containers? What size container is needed?
A: Yes, dragon beans are well-suited for container gardening. Choose a container that is at least 12 inches deep and 12 inches in diameter to provide enough room for the roots to grow. Make sure the container has drainage holes to prevent waterlogging. You can grow multiple plants in a larger container, but be sure to space them adequately to allow for proper growth.
Q: How do I know when my dragon beans are ready to harvest?
A: Dragon beans are ready to harvest when the pods are plump and the beans inside are well-developed. The pods should still be tender and easy to snap. If the pods become tough or the beans inside are too large, they may be overripe. Regular harvesting will encourage the plants to produce more beans.
Q: Can I save seeds from my dragon beans to plant next year?
A: Yes, you can save seeds from your dragon beans to plant next year. Allow some of the pods to mature fully on the plant until they are dry and brown. Then, shell the beans and allow them to dry completely before storing them in an airtight container in a cool, dark place. Be aware that if you grew multiple varieties of beans, there is a chance of cross-pollination, which could result in different traits in the next generation.

Leave a Comment