

Grow Clean Carrots, and say goodbye to muddy, misshapen roots! Have you ever dreamt of pulling perfectly formed, vibrant orange carrots straight from your own backyard? I know I have! There’s something incredibly satisfying about nurturing your own food, and carrots are a fantastic place to start. But let’s be honest, sometimes the reality doesn’t quite match the dream. We end up with carrots that are forked, cracked, or covered in so much dirt they’re barely recognizable.
Carrots have a rich history, cultivated for centuries, initially for their aromatic leaves and seeds rather than the roots we enjoy today. The vibrant orange variety we’re most familiar with is actually a relatively recent development, popularized in the Netherlands in the 17th century! But regardless of their color, the desire for clean, healthy carrots has always been there.
That’s where these DIY tricks and hacks come in. I’m going to share some simple, yet effective techniques to help you grow clean carrots that are not only delicious but also visually appealing. Imagine serving a salad with carrots you grew yourself, knowing exactly where they came from and how they were nurtured. These tips will help you avoid common pitfalls, improve your soil, and ultimately, harvest a bounty of beautiful, clean carrots. So, grab your gardening gloves, and let’s get started!
Growing Clean Carrots: My DIY Guide for a Flawless Harvest
Hello, dear gardening friends! Are you also tired of carrots that look like they’ve been in a mud fight? I know that all too well! For years, I was annoyed when I pulled my homegrown carrots out of the ground and they looked as if they had sprung directly from a bog. But don’t worry, I’ve found the solution! With a few simple tips and tricks, you too can harvest sparkling clean carrots that are not only delicious but also a real eye-catcher. Let’s dive into the world of carrot cultivation together!
Preparation is Everything: The Right Soil for Clean Carrots
The key to clean carrots lies in the soil. Carrots love loose, sandy soil that drains well. Heavy, clayey soil tends to clump and stick to the carrots, leading to dirty and deformed roots. Here are my tips for perfect soil preparation:
- Soil Analysis: Before you start, you should conduct a soil analysis. This will tell you exactly which nutrients are missing and how you can best improve the soil.
- Loosening: Loosen the soil thoroughly. I prefer to use a digging fork or a cultivator for this. Make sure the soil is loose to a depth of at least 30 cm.
- Add Sand: If your soil is too clayey, mix in plenty of sand. I recommend construction sand or quartz sand, as it doesn’t decompose as quickly.
- Incorporate Compost: Compost is a true all-rounder in the garden. It improves soil structure, retains moisture, and provides plants with important nutrients. Work plenty of compost into the soil.
- Remove Stones: Carrots don’t like stones! They hinder growth and can lead to deformed roots. Remove all stones and coarse clumps from the soil.
- Check pH Value: Carrots prefer a slightly acidic to neutral pH value between 6.0 and 7.0. Check the pH of your soil and adjust it if necessary.
Sowing: The Foundation for a Clean Harvest
Sowing is another important factor for clean carrots. Here are my tips for successful sowing:
- The Right Time: Carrots can be sown directly outdoors from April onwards. Make sure the ground is no longer frozen.
- Sowing Depth: Carrots are light germinators, meaning they need light to germinate. Therefore, sow the seeds only about 1 cm deep.
- Row Spacing: Maintain a row spacing of about 20-30 cm.
- Thinning: When the seedlings are about 5 cm high, you need to thin them out. Leave about 5-7 cm of space between the individual plants. This gives the carrots enough room to grow and they won’t crowd each other out.
- Even Watering: Carrots need consistent watering, especially during germination and growth. Make sure the soil is always slightly moist.
Care: How to Keep Your Carrots Clean and Healthy
Proper care is crucial for a clean and bountiful harvest. Here are my most important care tips:
- Regular Watering: As mentioned, carrots need consistent watering. Water regularly, especially during dry spells. Avoid waterlogging, as this can lead to root rot.
- Weeding: Weeds compete with carrots for nutrients and water. Weed regularly to ensure the carrots are optimally supplied.
- Mulching: A layer of mulch made of straw or grass clippings helps to keep the soil moist, suppress weeds, and keep the carrots clean.
- Loosen the Soil: Regularly loosen the soil between the rows to improve aeration and promote water absorption.
- Pest Control: Carrots can be infested by various pests, such as the carrot fly. Watch for signs of pest infestation and combat them with appropriate means if necessary. I prefer natural methods like neem oil or garlic spray.
- Fertilizing: Carrots are heavy feeders and require sufficient nutrients. Fertilize the plants regularly with an organic fertilizer. I prefer to use compost tea or diluted nettle manure.
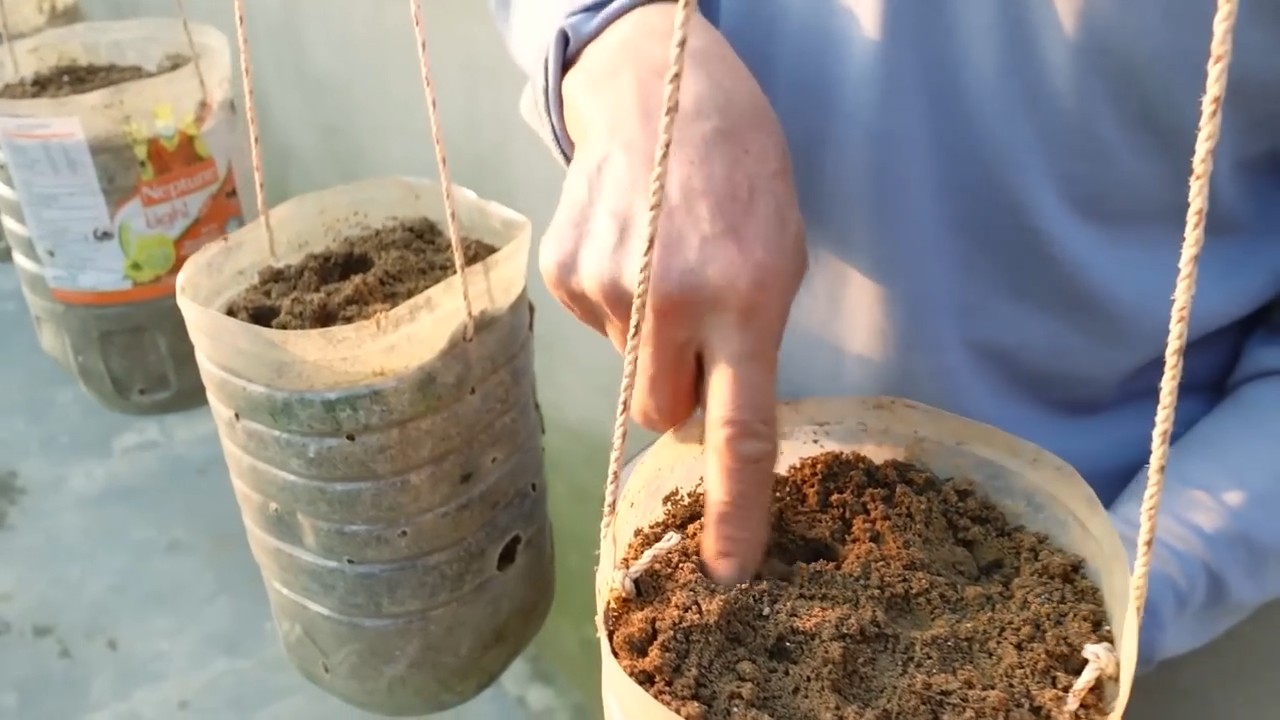
Special Tip: Growing in Raised Beds or Pots
If you don’t have a garden or the soil in your garden is not ideal for growing carrots, you can also grow them in a raised bed or in pots. This has the advantage that you can optimally control the soil conditions.
- Raised Bed: Fill the raised bed with a mixture of compost, sand, and garden soil. Make sure the soil is loose and well-draining.
- Pots: Use pots with a diameter of at least 20 cm. Fill the pots with a similar mixture as for the raised bed.
- Variety Selection: For growing in pots or raised beds, it’s best to choose short carrot varieties like ‘Paris Market’ or ‘Rondo’.
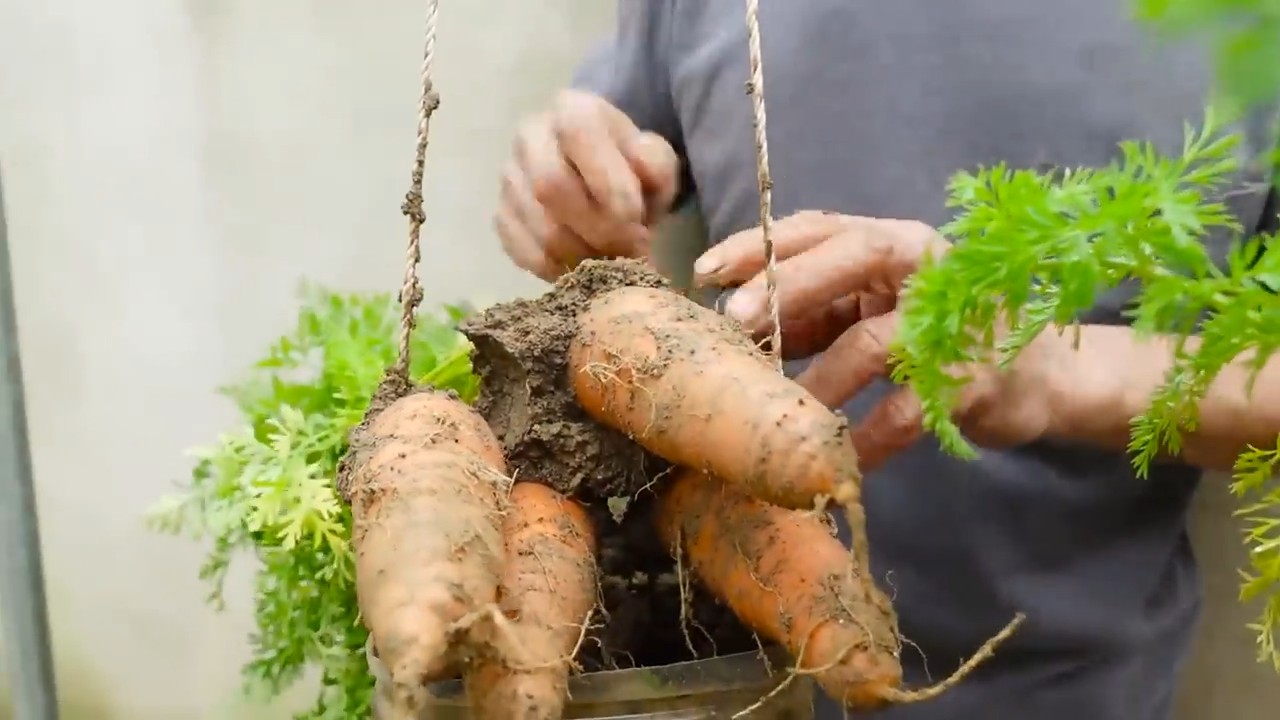
The Harvest: The Reward for Your Effort
After about 2-3 months, you can harvest your carrots. The exact time depends on the variety and weather conditions.
- Harvest Time: The carrots are ready to harvest when they have reached the desired size. You can gently pull one carrot out of the ground to check its maturity.
- Harvesting Method: Loosen the soil around the carrots with a digging fork. Gently pull the carrots out of the ground by their leaves.
- Cleaning: Knock the soil off the carrots. If they are very dirty, you can rinse them briefly under running water. But be careful: don’t leave them in the water for too long, as they can lose their flavor.
Additional Tips for Extra Clean Carrots
- Avoid Walking on the Bed: Stepping on the bed compacts the soil, which can hinder carrot development and lead to dirty roots. Lay down boards to walk on the bed or work from the sides.
- Use a Watering Can with a Rose: A watering can with a rose head distributes water evenly and prevents the soil from being churned up.
- Harvest in Dry Weather: If you harvest in dry weather, less soil will cling to the carrots.
- Store Carrots Properly: Store the carrots in a cool, dark, and damp place. It’s best to wrap them in a damp cloth or place them in a box with damp sand.
I hope my tips help you to harvest clean and delicious carrots. Happy gardening!
Conclusion
So, there you have it! Growing clean, unblemished carrots doesn’t have to be a gardener’s pipe dream. By implementing this simple yet effective DIY trick – the sand and coffee grounds soil amendment – you’re setting yourself up for a harvest of sweet, crisp carrots that are the envy of the neighborhood. Forget wrestling with rocky soil and battling those pesky forked roots. This method provides the perfect environment for your carrots to thrive, resulting in smoother, more uniform vegetables.
This isn’t just about aesthetics, though. While picture-perfect carrots are certainly a bonus, the real benefit lies in the improved texture and flavor. Carrots grown in loose, well-draining soil are less likely to be stressed, leading to a sweeter, more satisfying taste. Plus, the coffee grounds add a gentle boost of nitrogen, further enhancing their growth and overall health.
Don’t be afraid to experiment with variations! If you don’t have coffee grounds readily available, consider using other organic materials like finely shredded leaves or composted vegetable scraps. The key is to create a light, airy soil mix that allows the carrots to easily push through without encountering resistance. You can also adjust the ratio of sand to soil based on your existing garden conditions. If your soil is already relatively loose, you might need less sand. Conversely, if it’s heavy clay, you might need to increase the sand content.
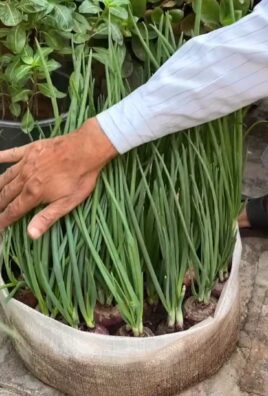
Consider companion planting alongside your carrots. Marigolds, for example, are known to deter nematodes, which can damage carrot roots. Onions and garlic can also help repel carrot flies, another common pest. These natural pest control methods, combined with the improved soil conditions, will give your carrots the best possible chance of success.
We understand that gardening can sometimes feel daunting, but this DIY trick is incredibly accessible, even for beginners. It requires minimal effort and yields impressive results. The satisfaction of pulling perfectly formed, clean carrots from your own garden is truly unparalleled.
We wholeheartedly encourage you to give this method a try. You’ll be amazed at the difference it makes. And more importantly, we want to hear about your experience! Share your photos, tips, and any variations you’ve tried in the comments below. Let’s build a community of carrot-growing enthusiasts and learn from each other. Together, we can all achieve the dream of harvesting beautiful, delicious, and clean carrots right from our own backyards. So, grab your gardening gloves, gather your supplies, and get ready to experience the joy of growing your own perfect carrots! Remember, the secret to success lies in creating the ideal environment, and this DIY trick is the key to unlocking that potential. Happy gardening!
Frequently Asked Questions (FAQ)
What type of sand should I use for this DIY trick?
The best type of sand to use is horticultural sand or coarse sand. Avoid using play sand or fine sand, as it can compact and hinder drainage, which is the opposite of what we’re trying to achieve. Horticultural sand is specifically designed for gardening and provides excellent drainage and aeration. Coarse sand, available at most hardware stores, is a good alternative. The key is to ensure the sand particles are large enough to create air pockets in the soil.
How much sand and coffee grounds should I mix with the soil?
A good starting point is a 1:1 ratio of sand to soil. For example, if you’re planting carrots in a raised bed, you might mix one part sand with one part existing garden soil. As for coffee grounds, a generous handful per square foot of planting area is usually sufficient. You can mix the coffee grounds directly into the sand and soil mixture. Remember to use spent coffee grounds, not fresh ones. Adjust the ratios based on your soil type. If your soil is already sandy, use less sand. If it’s heavy clay, use more.
Are coffee grounds acidic? Will they affect the pH of my soil?
While coffee grounds are slightly acidic, they generally don’t significantly alter the pH of the soil, especially when used in moderation. As they decompose, they release nutrients that benefit plant growth. However, if you’re concerned about soil pH, you can test your soil before and after adding coffee grounds. Carrots prefer a slightly acidic to neutral soil pH (around 6.0 to 7.0). If your soil is already very acidic, you might want to use coffee grounds sparingly or consider adding lime to balance the pH.
Can I use this method for other root vegetables besides carrots?
Yes, this method can be beneficial for other root vegetables like radishes, parsnips, and turnips. These vegetables also prefer loose, well-draining soil to develop properly. The sand and coffee grounds amendment will help create the ideal growing conditions for them as well. Just be sure to adjust the amount of sand and coffee grounds based on the specific needs of each vegetable.
How often should I water my carrots after planting them using this method?
Water your carrots regularly, especially during dry periods. The sand in the soil mix will help with drainage, but it also means the soil might dry out faster. Aim to keep the soil consistently moist, but not waterlogged. A good rule of thumb is to water deeply when the top inch of soil feels dry to the touch. Mulching around the carrots can also help retain moisture and suppress weeds.
What are the best carrot varieties to grow using this method?
This method works well for most carrot varieties. However, shorter, rounder varieties like ‘Parisian’ or ‘Thumbelina’ are particularly well-suited for growing in containers or raised beds where space might be limited. Longer, thinner varieties like ‘Nantes’ or ‘Imperator’ will also thrive in the loose soil created by this method, allowing them to grow to their full potential without encountering resistance.
How long does it take for carrots to mature using this method?
The time it takes for carrots to mature depends on the variety and growing conditions. Generally, carrots take between 60 and 80 days to mature. However, you can start harvesting baby carrots as early as 50 days. The sand and coffee grounds amendment can potentially speed up the growth process by providing optimal growing conditions.
What if I don’t have access to sand? Are there any alternatives?
If you don’t have access to sand, you can use other materials to improve soil drainage and aeration. Perlite, vermiculite, or even finely shredded bark can be used as alternatives. These materials will help create air pockets in the soil and prevent compaction. Just be sure to choose materials that are free of harmful chemicals and suitable for gardening.
How do I know when my carrots are ready to harvest?
You can tell when carrots are ready to harvest by checking the size and color of the roots. The seed packet will usually indicate the expected size of the mature carrots. You can also gently brush away some of the soil around the base of the plant to get a better look at the root. Carrots are typically ready to harvest when they have reached the desired size and have a vibrant orange color.
Can I use this method in containers?
Yes, this method is perfect for growing carrots in containers. In fact, it’s often recommended to grow carrots in containers using a well-draining soil mix like the one described above. Choose a container that is at least 12 inches deep to accommodate the carrot roots. Be sure to provide adequate drainage holes in the bottom of the container.


Leave a Comment