

Grow Chinese Cabbage Home and unlock a world of fresh, flavorful possibilities right in your backyard! Have you ever dreamed of harvesting your own crisp, juicy Chinese cabbage for stir-fries, salads, or even homemade kimchi? Well, dream no more! This DIY guide is packed with simple, effective tricks and hacks that will transform your garden into a thriving haven for this versatile vegetable.
Chinese cabbage, also known as Napa cabbage, boasts a rich history, deeply rooted in Asian culinary traditions. For centuries, it has been a staple ingredient, prized for its delicate flavor and nutritional benefits. From the bustling markets of Beijing to the cozy kitchens of Korea, Chinese cabbage has nourished families and communities.
But why should you bother growing it yourself? In today’s world, where access to fresh, organic produce can be challenging and expensive, cultivating your own food is more important than ever. Plus, store-bought vegetables often lack the vibrant flavor and nutritional value of homegrown varieties. By learning how to grow Chinese Cabbage Home, you’ll not only save money but also enjoy the satisfaction of nurturing your own food from seed to table. This DIY guide will empower you to overcome common gardening challenges and reap a bountiful harvest of delicious, healthy Chinese cabbage. Let’s get started!
Growing Napa Cabbage Yourself: Your DIY Guide for Your Own Garden
Hey garden friends! Napa cabbage is not only super delicious and versatile in the kitchen, but also surprisingly easy to grow yourself. I’ll show you how to harvest your own Napa cabbage with a few simple steps – no green thumb diploma required!
What you need for growing Napa Cabbage
Before we get started, here’s a little checklist with everything you’ll need:
- Napa cabbage seeds: It’s best to choose organic seeds.
- Seed starting pots or trays: For starting seeds indoors.
- Seed starting mix: Special soil for seedlings, low in nutrients and loose.
- Garden soil: For the garden bed or container.
- Compost or organic fertilizer: For a good supply of nutrients.
- Watering can or garden hose: For watering.
- Trowel or spade: For repotting and planting.
- Snail bait (optional): To protect against snails.
- Fleece or netting (optional): To protect against pests and frost.
The Right Time for Sowing
The timing of sowing is crucial for a successful harvest. Napa cabbage doesn’t like it too hot, so sowing in spring or late summer is ideal.
- Spring sowing: From March/April for a summer harvest.
- Late summer sowing: From July/August for a fall harvest.
I personally prefer the late summer sowing, as the temperatures are milder then and the risk of pest infestation is lower.
Start Napa Cabbage Indoors or Sow Directly?
You have two options: either you start the Napa cabbage plants indoors or you sow them directly into the garden bed. I recommend starting them indoors, as you have control over germination and can better protect the young plants from pests.
Starting Napa Cabbage Indoors – Step by Step
- Prepare seed pots: Fill the seed starting pots or trays with seed starting mix. Press the soil down lightly.
- Sow seeds: Place 2-3 seeds in each pot. Cover the seeds with a thin layer of soil (approx. 0.5 cm).
- Water: Moisten the soil carefully with a watering can or a sprayer. The soil should be moist, but not wet.
- Choose a location: Place the seed pots in a bright and warm place (approx. 18-20°C). A windowsill or a greenhouse are ideal.
- Maintain moisture: Keep the soil evenly moist. Avoid waterlogging.
- Observe germination: After approx. 5-10 days, the first seedlings should appear.
- Prick out: As soon as the seedlings have 2-3 leaves, you can prick them out. This means you transplant the strongest plants into individual pots.
Direct Sowing in the Garden Bed – How It’s Done
- Prepare the bed: Loosen the soil in the bed and remove weeds. Work in compost or organic fertilizer.
- Make seed drills: Make seed drills with a stick or a rake at a distance of approx. 30-40 cm.
- Sow seeds: Place the seeds in the seed drills at a distance of approx. 5-10 cm. Cover the seeds with a thin layer of soil.
- Water: Moisten the soil carefully with a watering can or a sprayer.
- Thin out: As soon as the plants are a little larger, thin them to a distance of approx. 30-40 cm.
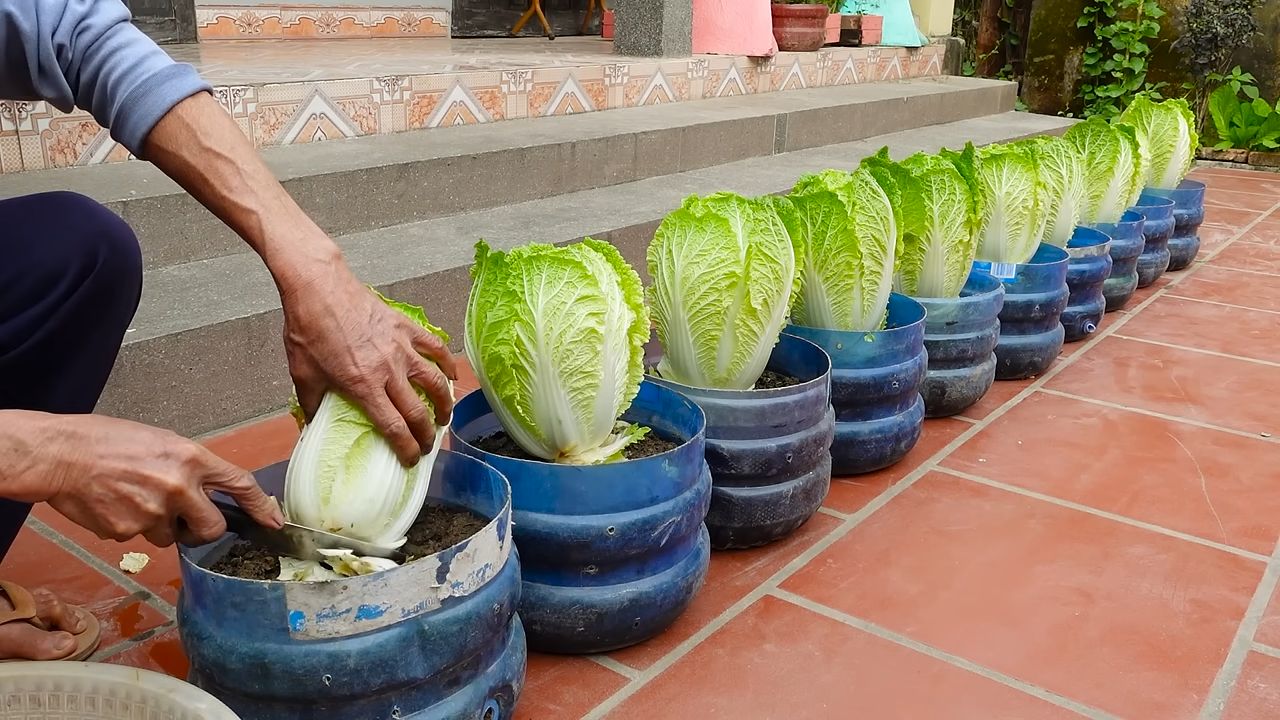
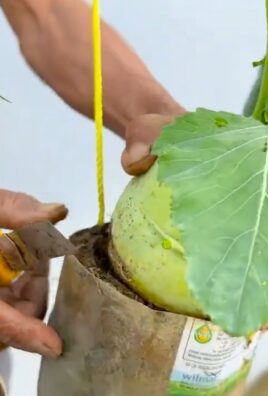
Planting Napa Cabbage in the Garden Bed
After approx. 4-6 weeks, the pre-grown Napa cabbage plants are ready for the garden bed.
- Prepare the bed: Loosen the soil in the bed and remove weeds. Work in compost or organic fertilizer.
- Dig planting holes: Dig planting holes at a distance of approx. 30-40 cm.
- Insert plants: Carefully place the Napa cabbage plants in the planting holes. Make sure that the root ball is not damaged.
- Water in: Water the plants thoroughly after planting.
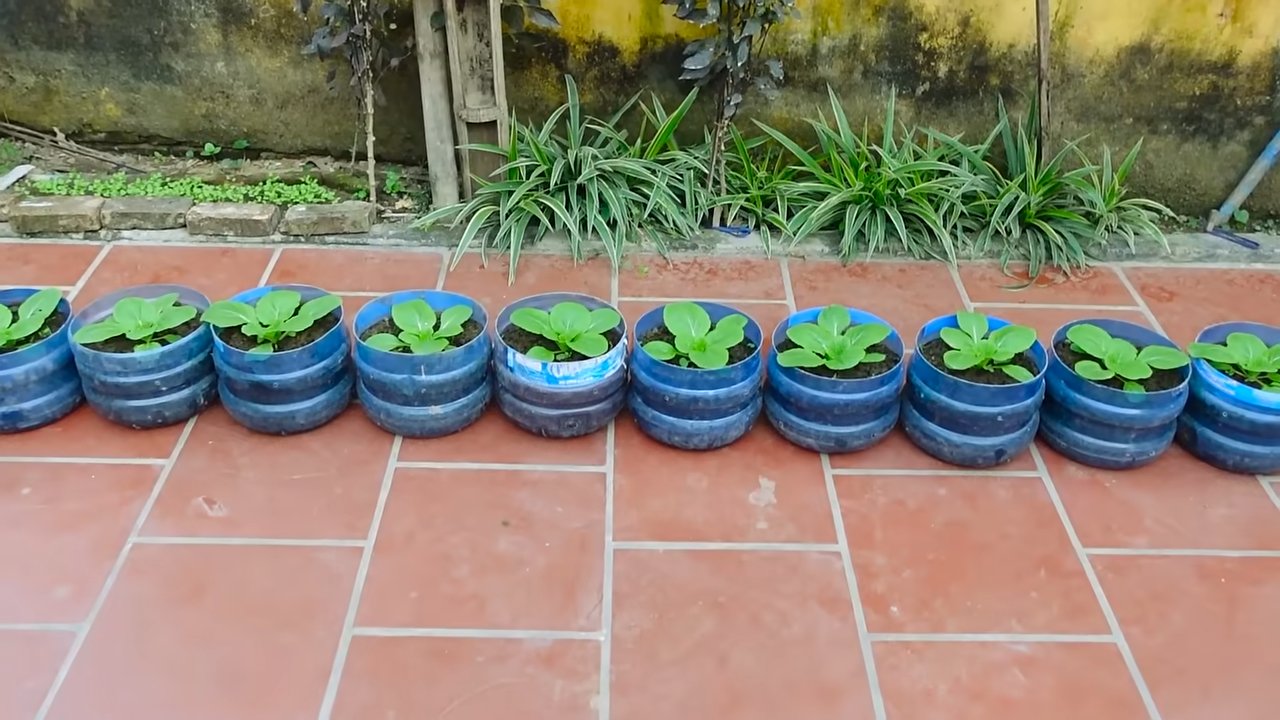
The Right Care for Your Napa Cabbage
Napa cabbage is relatively easy to care for, but you should pay attention to a few things:
- Watering: Napa cabbage needs regular water, especially during head formation. Make sure the soil is always moist.
- Fertilizing: Fertilize the Napa cabbage regularly with compost or organic fertilizer.
- Weed removal: Keep the bed free of weeds so that the Napa cabbage gets enough nutrients.
- Pest protection: Napa cabbage is susceptible to snails and cabbage whites. Protect the plants with snail bait or a fleece.
- Frost protection: If frost is threatening, you can cover the plants with a fleece.
Pests and Diseases of Napa Cabbage
Unfortunately, even Napa cabbage is not immune to pests and diseases. Here are the most common problems and how you can combat them:
- Snails: Snails love Napa cabbage. Protect the plants with snail bait or collect the snails.
- Cabbage whites: The caterpillars of the cabbage white butterfly eat the leaves of the Napa cabbage. Protect the plants with a net or collect the caterpillars.
- Clubroot: A fungal disease that affects the roots. Ensure good crop rotation and use resistant varieties.
- Downy mildew: A fungal disease that manifests as yellowish spots on the leaves. Ensure good ventilation and avoid waterlogging.
The Harvest – Finally Napa Cabbage!
Depending on the sowing time, you can harvest the Napa cabbage after approx. 2-3 months.
- Harvest time: The Napa cabbage is ripe when the head is firm and closed.
- Harvesting method: Cut the Napa cabbage with a sharp knife just above the ground.
Storing Napa Cabbage – How It Stays Fresh
Napa cabbage can be stored in the refrigerator for approx. 1-2 weeks. It is best to wrap it in a damp cloth. You can also freeze the Napa cabbage, blanch it briefly beforehand.
Napa Cabbage in the Kitchen – Versatile and Delicious
Napa cabbage is a real all-rounder in the kitchen. You can eat it raw in a salad, cook it, steam it, fry it, or ferment it. Here are a few ideas:
- Napa cabbage salad: With carrots, peppers, and a delicious dressing.
- Napa cabbage vegetables: Steamed with soy sauce and ginger.
- Napa cabbage soup: With minced meat and vegetables.
- Kimchi: Fermented Napa cabbage, a Korean national dish.
Summary: Your Path to Your Own Napa Cabbage
Combat pests:
Choose seeds: Prefer organic seeds.
Note the sowing time: Spring or late summer.
Start indoors or sow directly: Starting indoors is recommended.
Prepare the bed: Loosen soil, work in compost.
Insert plants: Pay attention to spacing.
Care: Water, fertilize, remove weeds.
Conclusion
So, there you have it! Growing Chinese cabbage at home is not only achievable but also incredibly rewarding. From the satisfaction of nurturing a plant from seed to the delicious, crisp leaves gracing your dinner table, this DIY project offers a unique connection to your food. We’ve walked you through the essential steps, from selecting the right seeds and preparing the soil to providing optimal care and harvesting your bounty.
But why is this DIY trick a must-try? Beyond the obvious benefit of having fresh, organic Chinese cabbage readily available, growing your own allows you to control every aspect of the process. You can avoid harmful pesticides and herbicides, ensuring that your family is consuming the healthiest possible produce. Furthermore, it’s a fantastic way to reduce your carbon footprint by minimizing transportation and packaging waste.
And the possibilities don’t end there! Feel free to experiment with different varieties of Chinese cabbage. Try growing Napa cabbage for its mild flavor and versatility in salads and stir-fries, or explore the bolder taste of Bok Choy for soups and steamed dishes. You can also adjust the planting schedule to extend your harvest season, ensuring a continuous supply of fresh greens throughout the year. Consider companion planting with herbs like dill or chamomile to deter pests and enhance the flavor of your cabbage.
Don’t be afraid to get your hands dirty and embrace the learning process. Gardening is a journey, and there will be challenges along the way. But with a little patience and attention, you’ll be amazed at what you can achieve. The taste of homegrown Chinese cabbage is simply unparalleled, and the sense of accomplishment you’ll feel is truly priceless.
We wholeheartedly encourage you to give this DIY trick a try. Whether you have a sprawling garden or a small balcony, there’s a way to incorporate Chinese cabbage into your growing space. Start small, learn as you go, and most importantly, have fun!
Once you’ve harvested your first head of homegrown Chinese cabbage, we’d love to hear about your experience. Share your tips, triumphs, and even your challenges in the comments below. Let’s create a community of home gardeners who are passionate about growing their own food and sharing their knowledge with others. Your insights could inspire someone else to embark on this rewarding journey. So, grab your seeds, prepare your soil, and get ready to enjoy the delicious taste of homegrown Chinese cabbage!
Frequently Asked Questions (FAQ)
What is the best time of year to plant Chinese cabbage?
The ideal time to plant Chinese cabbage depends on your climate. Generally, it’s best to plant in late summer or early fall for a fall or winter harvest. This allows the cabbage to mature in cooler temperatures, which are essential for preventing bolting (premature flowering). In warmer climates, you might be able to get away with a late winter planting for an early spring harvest. However, be mindful of potential heat waves that could stress the plants. Check your local planting calendar for specific recommendations based on your region’s average temperatures and frost dates. Remember, Chinese cabbage thrives in cooler weather, so avoid planting during the hottest months of the year.
How much sunlight does Chinese cabbage need?
Chinese cabbage requires at least 6 hours of direct sunlight per day to thrive. While it can tolerate some partial shade, especially during the hottest part of the day, insufficient sunlight can lead to leggy growth and reduced head formation. Choose a planting location that receives ample sunlight throughout the day. If you’re growing in containers, you can easily move them to follow the sun. If you live in an area with limited sunlight, consider using grow lights to supplement natural light, especially during the seedling stage. Adequate sunlight is crucial for healthy growth and a bountiful harvest.
What kind of soil is best for growing Chinese cabbage?
Chinese cabbage prefers well-drained, fertile soil that is rich in organic matter. The ideal soil pH is between 6.0 and 7.5. Before planting, amend your soil with compost, well-rotted manure, or other organic materials to improve drainage, fertility, and water retention. Avoid heavy clay soils, as they can become waterlogged and inhibit root growth. If you have clay soil, consider adding sand or perlite to improve drainage. A soil test can help you determine the pH and nutrient levels of your soil, allowing you to make necessary amendments to create the optimal growing environment for your Chinese cabbage.
How often should I water Chinese cabbage?
Chinese cabbage needs consistent moisture to thrive, especially during head formation. Water deeply and regularly, aiming to keep the soil consistently moist but not waterlogged. The frequency of watering will depend on the weather conditions, soil type, and stage of growth. Check the soil moisture regularly by sticking your finger about an inch into the soil. If it feels dry, it’s time to water. Avoid overhead watering, as this can increase the risk of fungal diseases. Instead, water at the base of the plants using a soaker hose or drip irrigation system. Mulching around the plants can also help to retain moisture and suppress weeds.
What are some common pests and diseases that affect Chinese cabbage, and how can I prevent them?
Chinese cabbage is susceptible to several pests and diseases, including aphids, cabbage worms, flea beetles, clubroot, and downy mildew. To prevent these problems, practice good garden hygiene, such as removing plant debris and weeds that can harbor pests and diseases. Use row covers to protect young plants from pests. Inspect your plants regularly for signs of infestation or disease, and take action promptly. For aphids, you can use a strong stream of water or insecticidal soap. For cabbage worms, handpick them off the plants or use Bacillus thuringiensis (Bt), a biological insecticide. To prevent clubroot, ensure good soil drainage and avoid planting cabbage in the same location year after year. For downy mildew, improve air circulation and avoid overhead watering. Consider using disease-resistant varieties of Chinese cabbage.
How do I know when my Chinese cabbage is ready to harvest?
Chinese cabbage is typically ready to harvest when the head is firm and compact. The exact size and shape of the head will vary depending on the variety. Gently squeeze the head to check for firmness. If it feels solid and dense, it’s likely ready to harvest. You can also check the maturity date on the seed packet as a general guideline. To harvest, use a sharp knife to cut the head at the base of the plant. Leave a few outer leaves intact to protect the head during storage.
Can I grow Chinese cabbage in containers?
Yes, Chinese cabbage can be successfully grown in containers, especially smaller varieties like Bok Choy. Choose a container that is at least 12 inches in diameter and 12 inches deep to provide enough room for the roots to grow. Use a well-draining potting mix and ensure that the container has drainage holes. Water regularly and fertilize as needed. Place the container in a location that receives at least 6 hours of direct sunlight per day. Container gardening is a great option for those with limited space or poor soil conditions.
How do I store Chinese cabbage after harvesting?
To store Chinese cabbage, wrap the head loosely in plastic wrap or place it in a perforated plastic bag. Store it in the refrigerator crisper drawer. Properly stored Chinese cabbage can last for several weeks. Avoid washing the cabbage before storing it, as this can promote spoilage. Only wash it right before you’re ready to use it.
Can I save seeds from my Chinese cabbage plants?
Saving seeds from Chinese cabbage can be challenging, as it is a biennial plant, meaning it typically flowers and produces seeds in its second year. In order to save seeds, you would need to overwinter the plants and allow them to flower the following spring. However, Chinese cabbage is also prone to cross-pollination with other members of the Brassica family, such as broccoli and kale, which can result in hybrid seeds that may not produce true-to-type plants. For best results, it’s generally recommended to purchase seeds from a reputable source each year.
Leave a Comment