

Grow Cherry Tomatoes like a pro, even if you think you have a “brown thumb”! Have you ever dreamed of plucking juicy, sun-ripened cherry tomatoes straight from your own garden, popping them into your mouth for that burst of sweet, tangy flavor? I know I have! For centuries, cultivating tomatoes, including these delightful little gems, has been a source of joy and sustenance for cultures around the world. From their origins in South America to their adoption into Italian cuisine and beyond, tomatoes have become a global staple.
But let’s be honest, sometimes gardening feels more like a chore than a joy, especially when you’re battling pests, diseases, or just plain struggling to get your plants to thrive. That’s where these DIY tricks and hacks come in! I’m here to share some simple, effective, and budget-friendly ways to help you grow cherry tomatoes successfully, no matter your experience level. Imagine the satisfaction of serving a salad made entirely from your own homegrown produce, or sharing a basket of these vibrant fruits with friends and family.
This article is packed with insider tips to help you avoid common pitfalls and maximize your harvest. We’ll cover everything from choosing the right varieties and preparing your soil to providing the perfect support and protecting your plants from unwanted visitors. So, grab your gardening gloves, and let’s get ready to transform your backyard (or balcony!) into a cherry tomato paradise!
Growing Cherry Tomatoes: A Beginner’s Guide to a Bountiful Harvest
Okay, so you want to grow cherry tomatoes? Awesome! They’re super rewarding, delicious, and surprisingly easy to cultivate, even if you don’t have a huge garden. I’m going to walk you through everything you need to know, from choosing the right variety to harvesting your juicy little gems. Let’s get started!
Choosing Your Cherry Tomato Variety
First things first, you need to decide what kind of cherry tomato you want to grow. There are tons of options, each with its own unique flavor, size, and color. Here are a few popular choices:
* Sungold: These are my absolute favorite! They’re incredibly sweet and have a beautiful golden-orange color. They’re known for being prolific producers.
* Sweet Million: As the name suggests, these are super sweet and produce tons of small, red tomatoes. They’re a reliable choice for beginners.
* Black Cherry: These have a rich, complex flavor with a hint of smokiness. They’re a beautiful dark purple color.
* Yellow Pear: These are adorable little pear-shaped tomatoes with a mild, sweet flavor. They’re great for adding visual interest to salads.
* Grape Tomato: These are oblong and slightly larger than typical cherry tomatoes. They’re firm and have a good shelf life.
Consider what you’ll be using the tomatoes for. If you want something super sweet for snacking, Sungold or Sweet Million are great choices. If you want something with more depth of flavor for sauces or salads, Black Cherry might be a better option.
Getting Started: Seeds vs. Seedlings
You have two main options for starting your cherry tomato plants: seeds or seedlings (also known as transplants).
* Seeds: Starting from seed gives you more control over the entire process and allows you to choose from a wider variety of options. However, it requires more time and effort. You’ll need to start your seeds indoors about 6-8 weeks before the last expected frost.
* Seedlings: Buying seedlings is a quicker and easier option, especially if you’re a beginner. You can find them at most garden centers and nurseries. Just make sure to choose healthy-looking plants with strong stems and no signs of disease.
For this guide, I’ll cover both methods.
Starting from Seeds (Indoor Method)
If you’re going the seed route, here’s what you’ll need:
* Cherry tomato seeds
* Seed starting trays or small pots
* Seed starting mix (a light, sterile potting mix)
* A spray bottle
* A heat mat (optional, but helpful)
* A grow light (optional, but recommended)
Here’s the step-by-step process:
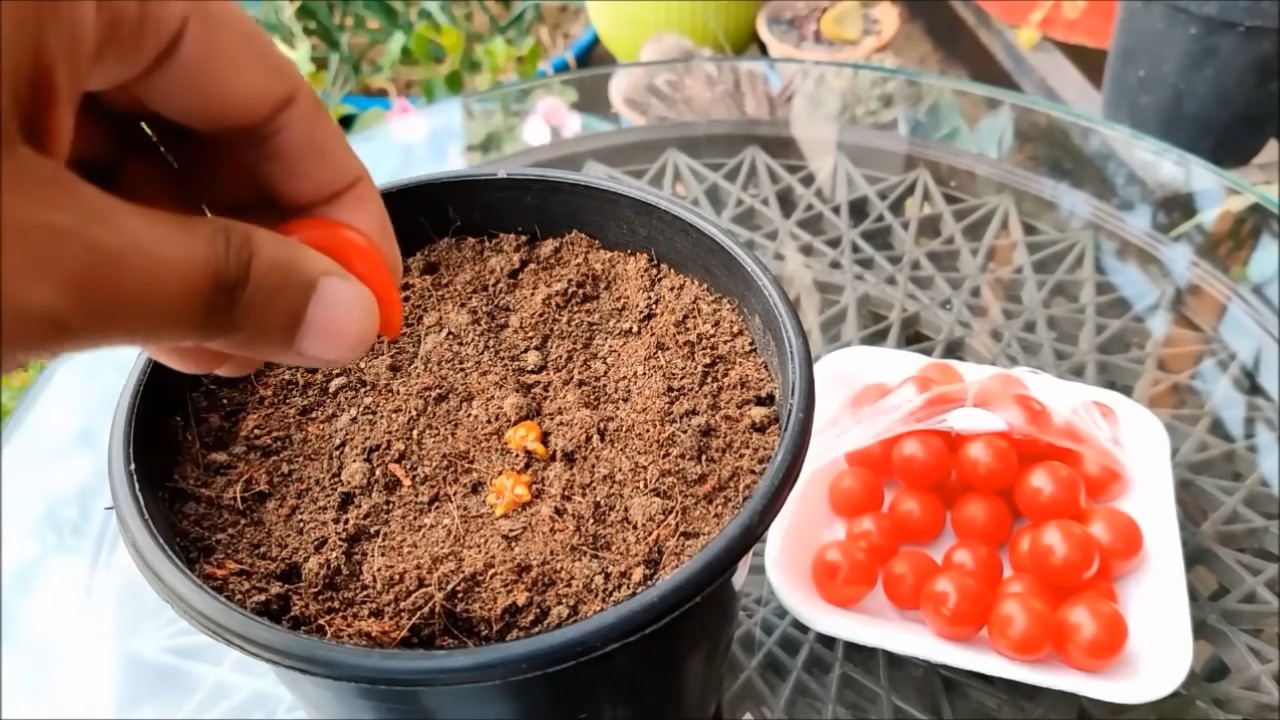
1. Sow the seeds: Fill your seed starting trays or pots with seed starting mix. Moisten the mix with a spray bottle until it’s damp but not soggy. Sow 2-3 seeds per cell or pot, about 1/4 inch deep. Gently cover the seeds with more seed starting mix.
2. Water gently: Use a spray bottle to water the seeds again, being careful not to dislodge them.
3. Provide warmth: Place the trays or pots on a heat mat (if using) and cover them with a clear plastic dome or plastic wrap to create a humid environment. This will help the seeds germinate.
4. Provide light: Place the trays or pots under a grow light (if using) or in a sunny window. If using a window, rotate the trays or pots regularly to prevent the seedlings from leaning towards the light.
5. Monitor and water: Keep the seed starting mix consistently moist, but not soggy. Check the trays or pots daily and water as needed.
6. Remove the cover: Once the seeds have germinated (usually within 5-10 days), remove the plastic dome or plastic wrap.
7. Thin the seedlings: Once the seedlings have developed their first true leaves (the leaves that look like miniature tomato leaves), thin them to one seedling per cell or pot. Choose the strongest, healthiest-looking seedling and snip off the others at the soil line.
8. Harden off the seedlings: About a week before you plan to transplant the seedlings outdoors, you’ll need to “harden them off.” This means gradually exposing them to outdoor conditions to help them adjust. Start by placing the seedlings outdoors in a sheltered spot for an hour or two each day, gradually increasing the amount of time they spend outdoors over the course of a week.
Transplanting Seedlings (Whether Grown from Seed or Purchased)
Whether you started your plants from seed or bought seedlings, the transplanting process is the same. Here’s what you’ll need:
* Your cherry tomato seedlings
* A sunny spot in your garden (at least 6-8 hours of sunlight per day)
* Well-draining soil
* Compost or other organic matter
* A trowel or shovel
* Tomato cages or stakes
* Water
Here’s the step-by-step process:
1. Prepare the soil: Choose a sunny spot in your garden with well-draining soil. Amend the soil with compost or other organic matter to improve its fertility and drainage.
2. Dig the holes: Dig holes that are slightly larger than the root balls of your seedlings. Space the holes about 2-3 feet apart, depending on the variety of cherry tomato you’re growing. Check the plant tag for specific spacing recommendations.
3. Plant the seedlings: Gently remove the seedlings from their pots or trays. If the roots are tightly bound, gently loosen them with your fingers. Place the seedlings in the holes, making sure the top of the root ball is level with the soil surface.
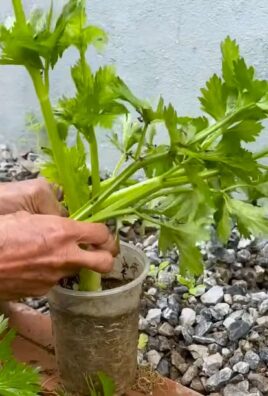
4. Bury the stem (optional, but recommended): Cherry tomatoes can develop roots along their stems, so you can bury the stem up to the first set of leaves. This will encourage a stronger root system.
5. Fill the holes: Fill the holes with soil, gently firming it around the seedlings.
6. Water thoroughly: Water the seedlings thoroughly after planting.
7. Add support: Install tomato cages or stakes to support the plants as they grow. Cherry tomatoes can get quite tall and heavy, so they’ll need support to prevent them from falling over.
8. Mulch (optional): Add a layer of mulch around the plants to help retain moisture, suppress weeds, and regulate soil temperature.
Caring for Your Cherry Tomato Plants
Once your cherry tomato plants are in the ground, they’ll need regular care to thrive. Here are some key things to keep in mind:
* Watering: Water your cherry tomato plants deeply and regularly, especially during hot, dry weather. Aim to water at the base of the plants to avoid wetting the foliage, which can lead to disease.
* Fertilizing: Fertilize your cherry tomato plants every 2-3 weeks with a balanced fertilizer. Follow the instructions on the fertilizer package.
* Pruning: Pruning can help improve air circulation and encourage fruit production. Remove any suckers (the small shoots that grow between the main stem and the branches) to direct the plant’s energy towards fruit production.
* Pest and disease control: Keep an eye out for pests and diseases. Common pests include aphids, tomato hornworms, and spider mites. Common diseases include early blight, late blight, and blossom end rot. Treat any problems promptly with appropriate organic or chemical controls.
* Sunlight: Ensure your plants are getting at least 6-8 hours of sunlight per day.
Harvesting Your Cherry Tomatoes
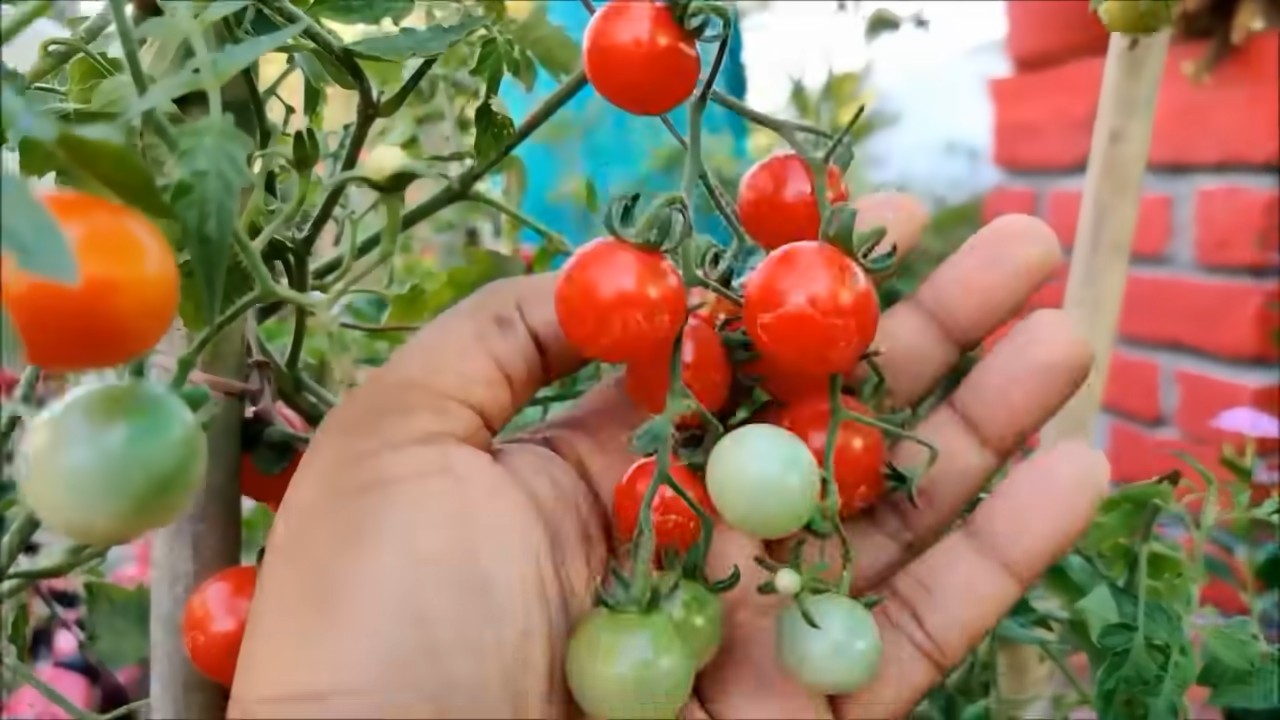
The best part! You’ll know your cherry tomatoes are ready to harvest when they’re fully colored and slightly soft to the touch. Gently twist or snip the tomatoes from the vine. Harvest regularly to encourage continued production.
* Timing is key: Don’t wait too long to harvest, as overripe tomatoes can become soft and mushy.
* Gentle handling: Handle the tomatoes gently to avoid bruising them.
* Storage: Store your cherry tomatoes at room temperature for the best flavor. If you need to store them for longer, you can refrigerate them, but they may lose some of their flavor.
Troubleshooting Common Problems
Even with the best care, you might encounter some problems along the way. Here are a few common issues and how to address them:
* Blossom end rot: This is caused by a calcium deficiency and results in a dark, leathery spot on the bottom of the tomato. To prevent blossom end rot, make sure your soil is well-drained and that you’re watering consistently. You can also add calcium to the soil by amending it with bone meal or crushed eggshells.
* Early blight: This is a fungal disease that causes dark spots on the leaves. To prevent early blight, avoid wetting the foliage when watering and provide good air circulation. Treat infected plants
Conclusion
So, there you have it! Growing cherry tomatoes at home, even without a sprawling garden, is not only achievable but incredibly rewarding. We’ve walked you through the simple yet effective DIY trick of creating the perfect self-watering container, a method that minimizes effort while maximizing your yield of those sweet, juicy bursts of summer flavor.
Why is this a must-try? Because it democratizes gardening. It removes the barriers of space, time, and even experience. Whether you’re a seasoned gardener or a complete novice, this method offers a high success rate with minimal investment. Imagine plucking sun-ripened cherry tomatoes straight from your balcony or patio, adding them to salads, pasta dishes, or simply enjoying them as a healthy snack. The taste difference between homegrown and store-bought is undeniable, and the satisfaction of nurturing your own food is immeasurable.
But the beauty of this DIY project lies in its adaptability. Feel free to experiment with different container sizes to accommodate varying numbers of plants. Consider using recycled materials like old buckets or plastic bins to further reduce your environmental impact. You can also tailor the soil mix to your specific climate and the needs of your cherry tomato variety. For example, if you live in a particularly hot and dry area, adding more water-retentive materials like vermiculite or coconut coir to your soil mix can be beneficial.
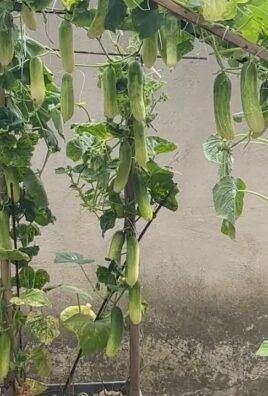
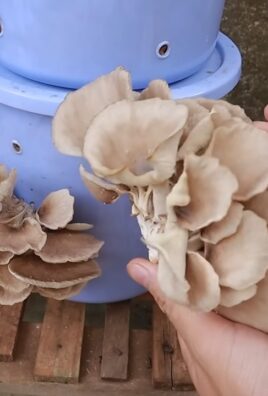
And don’t limit yourself to just cherry tomatoes! This self-watering container method works wonders for other small fruiting vegetables like peppers, strawberries, and even herbs. Think of the possibilities! A vibrant, edible garden right outside your door, providing fresh ingredients for your meals and a touch of green to your living space.
We wholeheartedly encourage you to give this DIY trick a try. It’s a simple, cost-effective, and incredibly satisfying way to enjoy the taste of homegrown cherry tomatoes. The self-watering container method is a game-changer for urban gardeners and anyone looking for a low-maintenance way to grow their own food.
Once you’ve set up your self-watering container and started harvesting your delicious cherry tomatoes, we’d love to hear about your experience! Share your photos, tips, and any variations you’ve tried in the comments below. Let’s create a community of thriving home gardeners, all enjoying the fruits (or vegetables!) of our labor. Happy gardening!
Frequently Asked Questions (FAQ)
What type of cherry tomato is best for container gardening?
Determinate varieties, which grow to a compact size, are generally better suited for containers than indeterminate varieties, which can grow very tall and require extensive staking. Popular determinate cherry tomato varieties include ‘Tiny Tim,’ ‘Roma,’ and ‘Patio Princess.’ However, even some indeterminate varieties can thrive in containers if properly supported with a sturdy cage or trellis. ‘Sungold’ and ‘Sweet Million’ are popular indeterminate choices known for their exceptional flavor. Consider your space limitations and desired yield when selecting your variety.
How often should I water my self-watering cherry tomato container?
The beauty of a self-watering container is that it significantly reduces the frequency of watering. Initially, you’ll need to water from the top until the roots establish themselves and reach the water reservoir. After that, you’ll primarily need to refill the reservoir. The frequency of refilling depends on several factors, including the size of the container, the weather conditions, and the size of the plant. Check the reservoir level every few days, especially during hot and dry periods. A good rule of thumb is to refill the reservoir when it’s about half empty. Avoid letting it completely dry out, as this can stress the plant.
What kind of soil should I use for growing cherry tomatoes in a container?
A well-draining potting mix is crucial for container gardening. Avoid using garden soil, as it tends to compact in containers and doesn’t provide adequate drainage. A good potting mix should consist of a blend of peat moss, perlite, and vermiculite. You can also add compost to enrich the soil and provide essential nutrients. Look for a potting mix specifically formulated for vegetables, or create your own blend by combining equal parts peat moss, perlite, vermiculite, and compost. Ensure the pH of the soil is between 6.0 and 6.8 for optimal cherry tomato growth.
How much sunlight do cherry tomatoes need?
Cherry tomatoes require at least 6-8 hours of direct sunlight per day to thrive. Choose a location for your self-watering container that receives ample sunlight throughout the day. If you don’t have a sunny spot, you can supplement with grow lights. Rotate the container regularly to ensure all sides of the plant receive equal sunlight. Insufficient sunlight can lead to leggy growth, reduced fruit production, and bland-tasting tomatoes.
Do I need to fertilize my cherry tomato plants in a self-watering container?
Yes, fertilizing is essential for healthy growth and abundant fruit production. While the potting mix may contain some initial nutrients, these will be depleted over time. Use a balanced fertilizer specifically formulated for tomatoes, following the instructions on the package. You can use a slow-release fertilizer at planting time or a liquid fertilizer every 2-3 weeks. Avoid over-fertilizing, as this can lead to excessive foliage growth and reduced fruit production. Look for fertilizers with a higher phosphorus content (the middle number) to promote flowering and fruiting.
How do I prevent pests and diseases from affecting my cherry tomato plants?
Prevention is key when it comes to pests and diseases. Start by using disease-resistant cherry tomato varieties. Inspect your plants regularly for signs of pests or diseases. Common pests include aphids, whiteflies, and tomato hornworms. You can control these pests with insecticidal soap, neem oil, or by hand-picking them off the plants. Common diseases include early blight, late blight, and blossom end rot. Ensure good air circulation around the plants to prevent fungal diseases. Avoid overhead watering, as this can create a humid environment that promotes disease. If you notice signs of disease, remove the affected leaves or branches immediately. For blossom end rot, ensure consistent watering and add calcium to the soil.
How do I prune my cherry tomato plants in a container?
Pruning can help improve air circulation, promote fruit production, and prevent the plants from becoming too crowded. For determinate varieties, minimal pruning is required. Simply remove any suckers (small shoots that grow between the main stem and the branches) below the first flower cluster. For indeterminate varieties, more extensive pruning is necessary. Remove all suckers that grow between the main stem and the branches to encourage the plant to focus its energy on fruit production. You can also prune some of the lower leaves to improve air circulation and prevent disease.
What do I do if my cherry tomatoes are not ripening?
Several factors can contribute to cherry tomatoes not ripening. Insufficient sunlight, cool temperatures, and over-fertilizing with nitrogen can all delay ripening. Ensure your plants are receiving at least 6-8 hours of direct sunlight per day. If temperatures are consistently cool, consider moving the container to a warmer location or using a cloche to protect the plants. Avoid over-fertilizing with nitrogen, as this can promote foliage growth at the expense of fruit ripening. You can also try pruning some of the leaves around the tomatoes to expose them to more sunlight.
Can I grow cherry tomatoes indoors using this self-watering container method?
Yes, you can grow cherry tomatoes indoors using this method, but you’ll need to provide adequate lighting. A sunny windowsill may not be sufficient, especially during the winter months. You’ll need to supplement with grow lights to ensure the plants receive enough light. Choose full-spectrum LED grow lights and position them close to the plants. You’ll also need to pollinate the flowers manually, as there won’t be any bees or other pollinators indoors. You can do this by gently shaking the plants or using a small brush to transfer pollen from one flower to another.
Leave a Comment