

Grow Butternut Squash like a pro, even if you think you have a brown thumb! Have you ever dreamed of harvesting your own creamy, sweet butternut squash right from your backyard? Imagine the delicious soups, roasted veggies, and pies you could create with your homegrown bounty. It’s easier than you think, and this DIY guide is packed with simple tricks and hacks to help you succeed.
Butternut squash has a rich history, originating in Central America and making its way to North America in the early 20th century. It quickly became a staple in autumn cuisine, celebrated for its versatility and nutritional benefits. For generations, gardeners have cherished this winter squash, passing down tips and techniques for cultivating the perfect crop.
In today’s busy world, finding time for gardening can be a challenge. That’s why I’m sharing these time-saving and effective DIY tricks. Whether you’re dealing with limited space, pesky pests, or unpredictable weather, these hacks will empower you to grow butternut squash successfully. I’ll guide you through every step, from seed starting to harvesting, ensuring you enjoy a plentiful harvest. Let’s get started and transform your garden into a butternut squash paradise!
Growing Butternut Squash: A Comprehensive DIY Guide
Hey there, fellow gardening enthusiasts! I’m so excited to share my tried-and-true method for growing beautiful, delicious butternut squash right in your own backyard. It’s easier than you might think, and the reward of harvesting your own homegrown squash is incredibly satisfying. Let’s dive in!
Choosing the Right Variety and Location
Before we get our hands dirty, let’s talk about choosing the right butternut squash variety and finding the perfect spot in your garden.
* Variety Selection: While ‘Waltham’ is a classic and reliable choice, don’t be afraid to experiment! ‘Butterscotch PMR’ is known for its powdery mildew resistance, which can be a lifesaver in humid climates. ‘Early Butternut’ matures faster, perfect if you have a shorter growing season. I personally love ‘Honey Nut’ for its smaller size and intense sweetness.
* Sunlight is Key: Butternut squash needs at least 6-8 hours of direct sunlight each day. The more sun, the better!
* Soil Matters: Well-draining soil that’s rich in organic matter is essential. Butternut squash are heavy feeders, so amending your soil with compost or well-rotted manure is a must.
* Space Considerations: These vines can get BIG! Give each plant at least 2-3 feet of space to sprawl. If you’re short on space, consider growing them vertically on a trellis. I’ve had success training them up sturdy trellises, which also helps with air circulation and prevents diseases.
Starting Your Butternut Squash Journey
You have two options: starting seeds indoors or direct sowing them in the garden. I usually prefer starting indoors, especially if I want a head start on the growing season.
Starting Seeds Indoors (My Preferred Method)
1. Timing is Everything: Start your seeds about 3-4 weeks before the last expected frost in your area. This gives them a good head start without getting too leggy.
2. Choose Your Containers: Use peat pots or biodegradable pots. Butternut squash don’t like their roots disturbed, so these pots allow you to transplant them directly into the garden without shocking the roots. I use pots that are at least 3-4 inches in diameter.
3. Sowing the Seeds: Fill the pots with a good quality seed-starting mix. Make a small hole about 1 inch deep in the center of each pot. Place 2-3 seeds in each hole (just in case some don’t germinate) and cover them gently with soil.
4. Watering and Warmth: Water the pots thoroughly, making sure the soil is evenly moist but not soggy. Place them in a warm location, ideally around 70-75°F (21-24°C). A heat mat can be really helpful for speeding up germination.
5. Light it Up: Once the seedlings emerge (usually within 5-10 days), move them to a sunny windowsill or under grow lights. If using grow lights, keep them a few inches above the seedlings and provide about 14-16 hours of light per day.
6. Thinning the Seedlings: Once the seedlings have their first true leaves (the second set of leaves), thin them to one strong seedling per pot. Snip off the weaker seedlings at the soil line with scissors. Don’t pull them out, as this can disturb the roots of the remaining seedling.
7. Hardening Off: About a week before you plan to transplant them into the garden, you’ll need to “harden off” the seedlings. This means gradually exposing them to outdoor conditions. Start by placing them outside in a sheltered spot for an hour or two each day, gradually increasing the amount of time they spend outdoors. This helps them acclimate to the sun, wind, and temperature changes.
Direct Sowing in the Garden
1. Wait for Warmth: Direct sowing is best done when the soil temperature is consistently above 60°F (15°C). This is usually a few weeks after the last expected frost.
2. Prepare the Soil: Amend the soil with compost or well-rotted manure. Make sure the soil is loose and well-draining.
3. Planting the Seeds: Sow the seeds about 1 inch deep and 2-3 feet apart. Plant 2-3 seeds per hill (a small mound of soil) and thin to one strong seedling per hill once they emerge.
4. Watering: Water the seeds thoroughly after planting. Keep the soil consistently moist until the seedlings emerge.
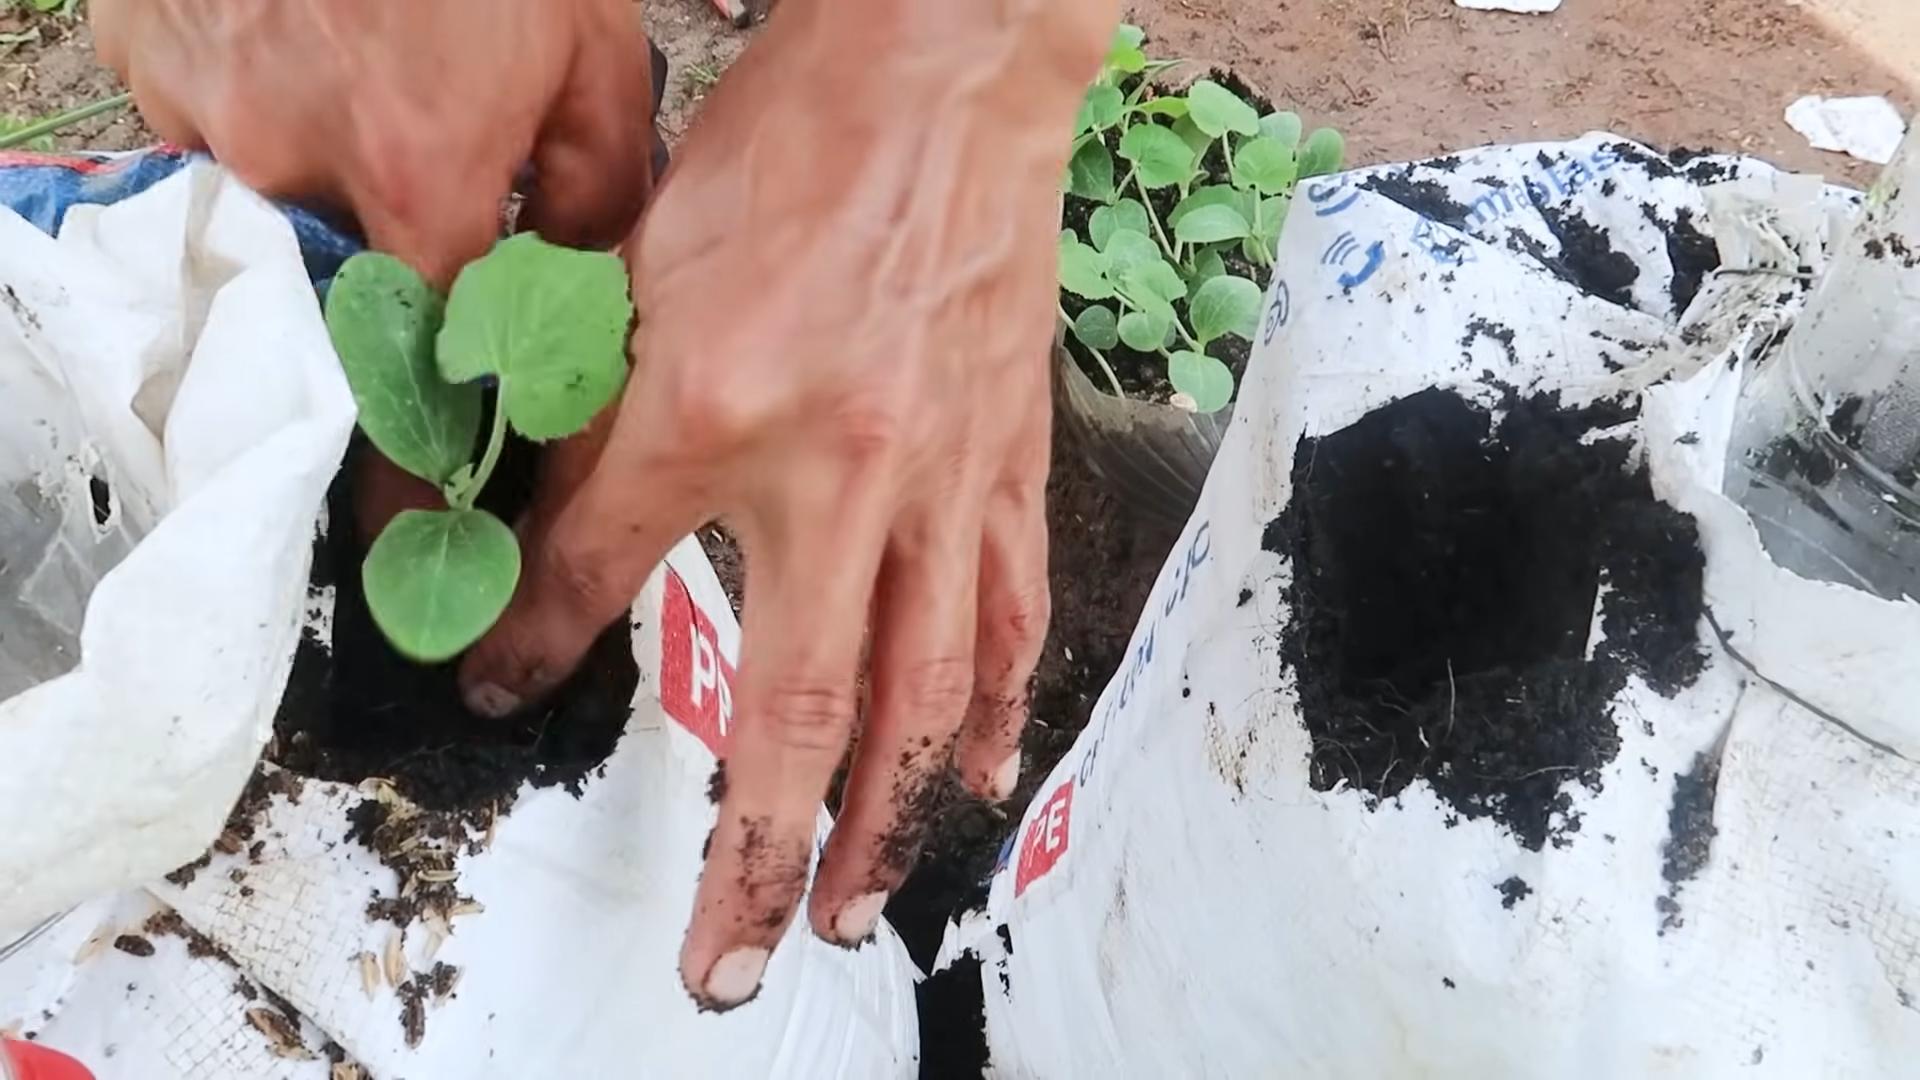
Transplanting Your Seedlings (If You Started Indoors)
1. Choose a Cloudy Day: Transplanting is best done on a cloudy day or in the late afternoon to minimize stress on the seedlings.
2. Prepare the Planting Hole: Dig a hole that’s slightly larger than the pot.
3. Gently Remove the Seedling: If you used peat pots, you can plant the entire pot directly into the ground. If you used plastic pots, gently remove the seedling, being careful not to damage the roots.
4. Planting Depth: Plant the seedling at the same depth it was growing in the pot.
5. Water Thoroughly: Water the seedling thoroughly after planting.
6. Mulch it Up: Apply a layer of mulch around the plant to help retain moisture, suppress weeds, and regulate soil temperature. I like to use straw or shredded leaves.
Caring for Your Butternut Squash Plants
Now that your plants are in the ground, it’s time to give them the TLC they need to thrive.
* Watering: Butternut squash needs consistent watering, especially during hot, dry weather. Water deeply at the base of the plant, avoiding getting the leaves wet, which can lead to fungal diseases. Aim for about 1 inch of water per week. Drip irrigation or soaker hoses are ideal for delivering water directly to the roots.
* Fertilizing: Butternut squash are heavy feeders, so regular fertilization is important. I like to use a balanced organic fertilizer every 2-3 weeks. You can also side-dress with compost or well-rotted manure.
* Weeding: Keep the area around your plants free of weeds. Weeds compete with the squash for nutrients and water.
* Pest Control: Keep an eye out for common pests like squash bugs, squash vine borers, and aphids. Handpicking pests is often effective for small infestations. For larger infestations, you can use insecticidal soap or neem oil. I always try to use organic pest control methods whenever possible.
* Pollination: Butternut squash are monoecious, meaning they have separate male and female flowers on the same plant. Bees are essential for pollination. If you’re not seeing a lot of bee activity, you may need to hand-pollinate the flowers. To do this, use a small paintbrush to transfer pollen from the male flower to the female flower. The female flowers have a small immature squash at the base of the flower.
* Pruning (Optional): While not essential, pruning can help improve air circulation and encourage fruit development. You can prune away some of the excess foliage, especially if the vines are getting too crowded.
Dealing with Common Problems
Even with the best care, you might encounter some problems along the way. Here are a few common issues and how to address them:
* Powdery Mildew: This fungal disease appears as a white, powdery coating on the leaves. To prevent powdery mildew, ensure good air circulation around the plants, avoid overhead watering, and choose powdery mildew-resistant varieties. If you see signs of powdery mildew, you can treat it with a fungicide or a homemade solution of baking soda and water.
* Squash Bugs: These pests can cause significant damage to your plants. They suck the sap from the leaves, causing them to wilt and die. Handpicking squash bugs and their eggs is an effective way to control them. You can also use row covers to protect your plants from squash bugs.
* Squash Vine Borers: These pests bore into the stems of the plants, causing them to wilt and die. Look for small holes in the stems and sawdust-like frass. If you catch them early, you can try to remove the borers by slitting the stem open and pulling them out. You can also wrap the base of the stems with aluminum foil to prevent the borers from entering.
* Blossom End Rot: This condition causes the blossom end of the squash to rot. It’s usually caused by a calcium deficiency or inconsistent watering. To prevent blossom end rot, ensure your soil is rich in calcium and water consistently.
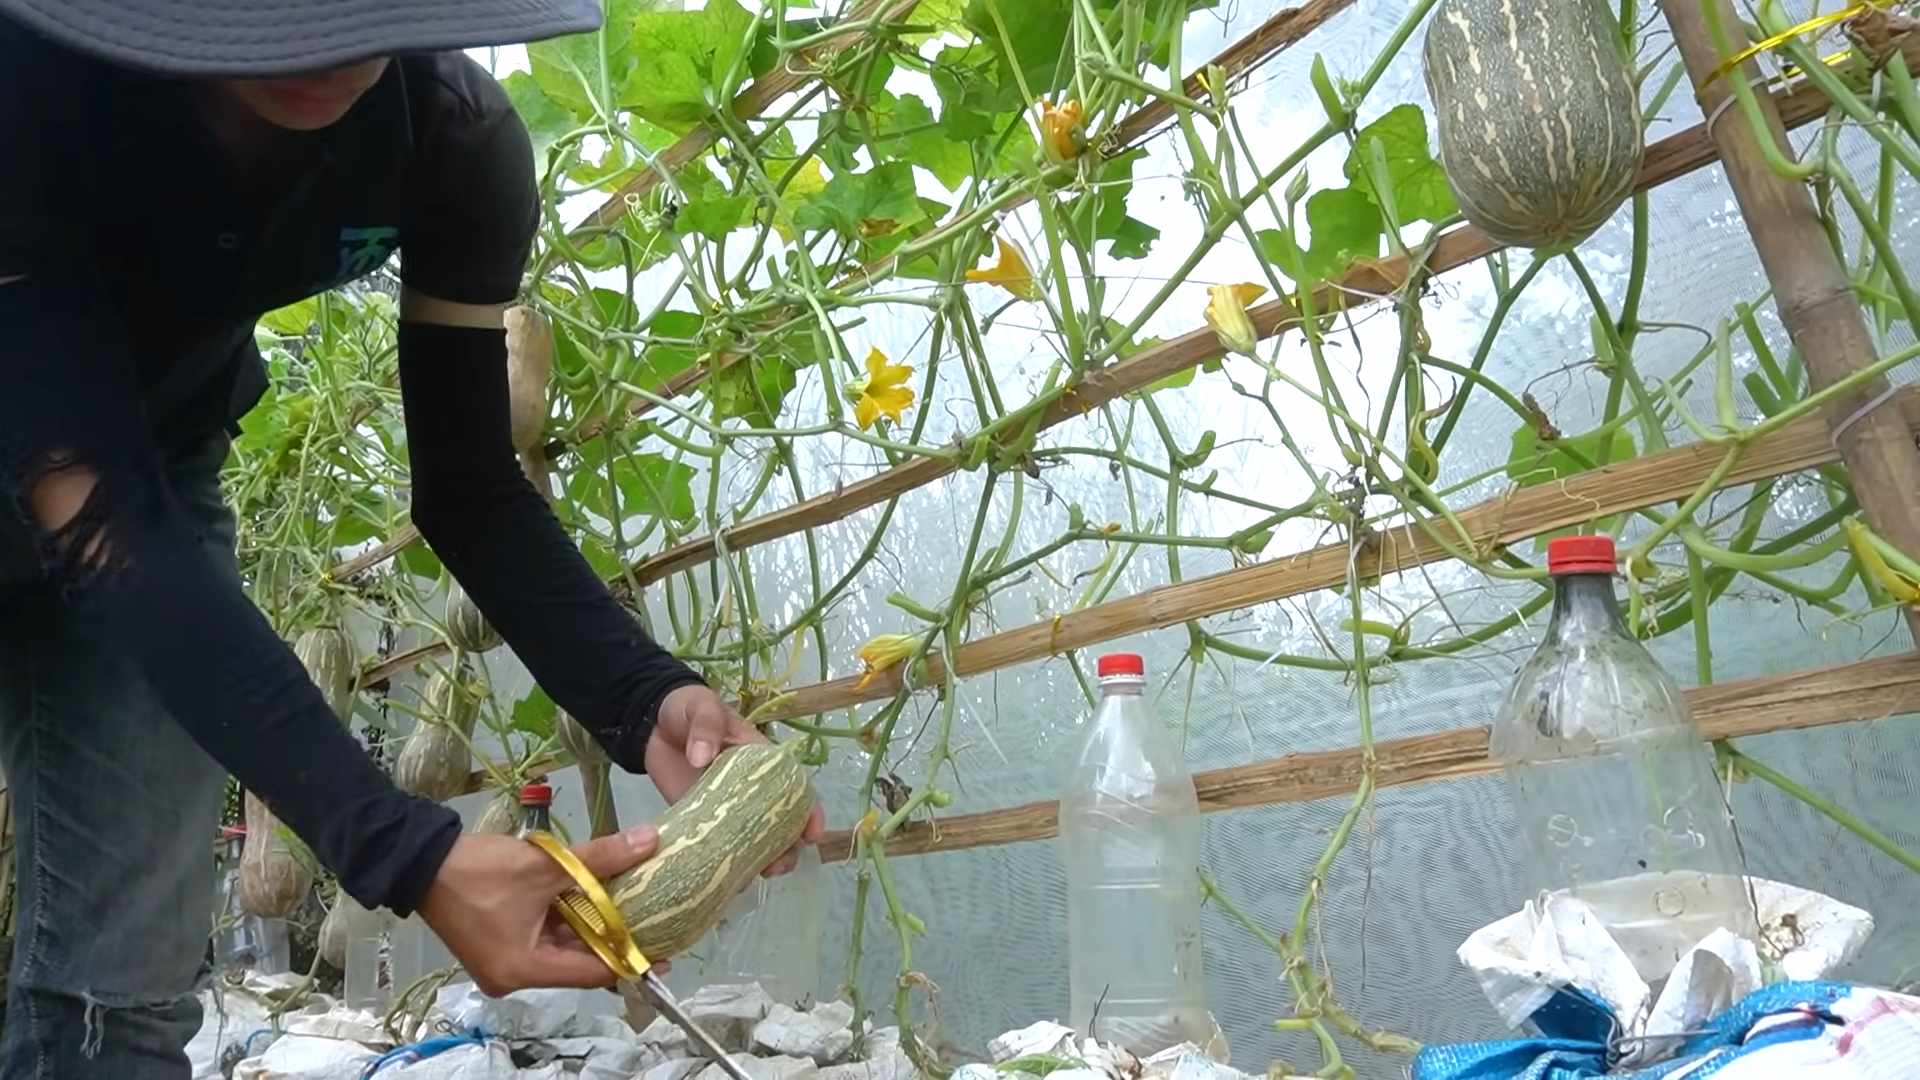
Harvesting Your Butternut Squash
The moment you’ve been waiting for! Knowing when to harvest your butternut squash is crucial for getting the best flavor and storage life.
1. Maturity Signs: Butternut squash are typically ready to harvest about 90-100 days after planting. Look for these signs of maturity:
*
Conclusion
So, there you have it! Growing butternut squash at home, while it might seem daunting at first, is an incredibly rewarding experience. From the satisfaction of nurturing a tiny seed into a sprawling vine laden with delicious, homegrown squash to the unparalleled flavor that surpasses anything you can buy in a store, the benefits are undeniable. We’ve covered everything from seed starting and transplanting to pollination and harvesting, equipping you with the knowledge you need to succeed.
But why is this DIY trick a must-try? Simply put, it’s about control, quality, and connection. You have complete control over the growing environment, ensuring your butternut squash is free from harmful pesticides and herbicides. You get to choose the best varieties for your climate and taste preferences. And perhaps most importantly, you develop a deeper connection to your food and the natural world. There’s something truly special about harvesting a butternut squash that you’ve personally nurtured from seed to table.
Don’t be afraid to experiment! Consider trying different varieties of butternut squash, such as ‘Waltham Butternut’ for its classic flavor or ‘Honeynut’ for a smaller, sweeter option. You can also explore different companion planting strategies to deter pests and improve soil health. Try planting marigolds near your butternut squash to repel squash bugs, or basil to attract pollinators.
For those with limited space, consider growing your butternut squash vertically on a trellis. This not only saves space but also improves air circulation, reducing the risk of fungal diseases. Just be sure to provide adequate support for the heavy fruits as they develop.
Ultimately, the best way to learn is by doing. So, grab some seeds, prepare your garden, and embark on your own butternut squash growing adventure. We’re confident that you’ll be amazed by the results. And remember, even if you encounter challenges along the way, don’t give up! Gardening is a learning process, and every season brings new opportunities to improve your skills.
We encourage you to try this DIY trick and share your experiences with us. Let us know what varieties you’re growing, what challenges you’ve faced, and what successes you’ve celebrated. Share your photos and tips in the comments below. We’re eager to learn from your experiences and build a community of passionate butternut squash growers. Growing butternut squash is not just a gardening project; it’s an investment in your health, your well-being, and your connection to the natural world. So, get growing and enjoy the fruits (or rather, vegetables) of your labor!
Frequently Asked Questions (FAQ)
Q: How much space does a butternut squash plant need?
A: Butternut squash plants are vining plants that require a significant amount of space. Ideally, each plant should have at least 6-8 square feet of growing area. If you’re planting in rows, space the rows 4-6 feet apart. For those with limited space, consider growing butternut squash vertically on a trellis. This will require training the vines and providing support for the heavy fruits. Remember that even with vertical growing, the roots still need adequate space in the soil.
Q: When is the best time to plant butternut squash?
A: Butternut squash is a warm-season crop, so it’s essential to wait until the soil has warmed up and the danger of frost has passed before planting. In most regions, this is typically in late spring or early summer. You can start seeds indoors 3-4 weeks before the last expected frost to get a head start. Transplant seedlings outdoors once the soil temperature reaches at least 60°F (15°C). Check your local frost dates to determine the best planting time for your area.
Q: How often should I water my butternut squash plants?
A: Butternut squash plants need consistent moisture, especially during fruit development. Water deeply and regularly, aiming for about 1 inch of water per week. Avoid overhead watering, as this can promote fungal diseases. Instead, water at the base of the plants, using a soaker hose or drip irrigation system. Check the soil moisture regularly and adjust your watering schedule as needed, depending on the weather conditions. During hot, dry periods, you may need to water more frequently.
Q: What kind of fertilizer should I use for butternut squash?
A: Butternut squash plants are heavy feeders and benefit from regular fertilization. Before planting, amend the soil with compost or well-rotted manure to provide a slow-release source of nutrients. During the growing season, fertilize every 2-3 weeks with a balanced fertilizer, such as a 10-10-10 or 5-5-5. You can also use a fertilizer specifically formulated for vegetables. Avoid over-fertilizing, as this can lead to excessive foliage growth and reduced fruit production. Consider using a fertilizer higher in phosphorus and potassium during fruit development to promote healthy squash.
Q: How do I know when my butternut squash is ripe?
A: Determining when a butternut squash is ripe is crucial for optimal flavor and storage. Look for these signs:
* **Color:** The skin should be a deep, solid tan color.
* **Hardness:** The skin should be hard and resistant to scratching. You shouldn’t be able to easily pierce it with your fingernail.
* **Stem:** The stem should be dry and brown.
* **Sound:** When you tap the squash, it should sound hollow.
Harvest your butternut squash before the first frost. Cut the squash from the vine, leaving a 2-3 inch stem attached. This will help prevent rot during storage.
Q: What are some common pests and diseases that affect butternut squash?
A: Butternut squash plants are susceptible to several pests and diseases, including:
* **Squash bugs:** These pests suck the sap from the leaves and can weaken or kill the plants. Handpick them off the plants or use insecticidal soap.
* **Squash vine borers:** These pests bore into the stems of the plants and can cause them to wilt and die. Wrap the stems with aluminum foil or netting to prevent the borers from entering.
* **Powdery mildew:** This fungal disease causes a white, powdery coating on the leaves. Improve air circulation and use a fungicide if necessary.
* **Downy mildew:** This fungal disease causes yellow spots on the leaves. Improve air circulation and use a fungicide if necessary.
Regularly inspect your plants for signs of pests and diseases and take action promptly to prevent them from spreading.
Q: How do I store butternut squash?
A: Proper storage is essential for preserving the quality of your butternut squash. Store the squash in a cool, dry place with good air circulation. The ideal storage temperature is between 50-55°F (10-13°C). Avoid storing butternut squash in the refrigerator, as this can cause it to become watery and lose flavor. Properly stored butternut squash can last for several months.
Q: Can I save seeds from my butternut squash?
A: Yes, you can save seeds from your butternut squash, but keep in mind that if you grew hybrid varieties, the seeds may not produce plants that are true to type. To save seeds, scoop them out of a ripe squash and rinse them thoroughly. Spread the seeds out on a paper towel to dry completely. Once dry, store the seeds in an airtight container in a cool, dark place.
Q: My butternut squash plant is producing flowers but no fruit. What could be the problem?
A: This is a common issue with squash plants and is often due to a lack of pollination. Butternut squash plants have separate male and female flowers. The male flowers produce pollen, and the female flowers need to be pollinated in order to develop into fruit. If there are not enough pollinators in your area, you may need to hand-pollinate the flowers. To do this, use a small brush to transfer pollen from the male flowers to the female flowers. The female flowers can be identified by the small squash at the base of the flower. Also, ensure the plant is getting enough sunlight and water, as these factors can also affect fruit production.
Leave a Comment