

Grow Asparagus at Home and unlock the secrets to a thriving, delicious garden right outside your door! Have you ever dreamed of snipping fresh, vibrant asparagus spears straight from your own backyard? It’s more achievable than you might think, and this DIY guide is your key to making that dream a reality. For centuries, asparagus has been prized for its delicate flavor and nutritional benefits, gracing the tables of emperors and commoners alike. From ancient Rome, where it was considered a delicacy, to modern-day kitchens, asparagus remains a beloved vegetable.
But why should you bother with growing your own? Well, store-bought asparagus can be expensive and often lacks the freshness and flavor of homegrown varieties. Plus, there’s something incredibly rewarding about nurturing a plant from its humble beginnings to a bountiful harvest. Imagine the satisfaction of serving a meal featuring asparagus you cultivated yourself! This DIY article will provide you with simple, effective tricks and hacks to grow asparagus at home, even if you have limited space or gardening experience. I’ll walk you through everything from selecting the right variety to preparing your soil and protecting your precious spears from pests. So, grab your gardening gloves, and let’s get started on this exciting journey to homegrown asparagus bliss!

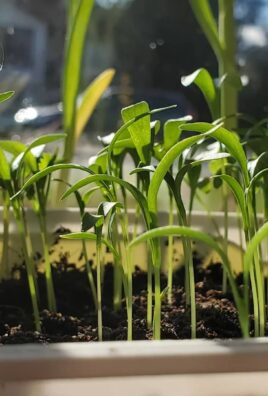
DIY Rooftop Garden: How to Grow Your Own Corn on the Roof!
Hey everyone! Have you ever thought about growing your own vegetables but don’t have a garden? No problem! Today I’m going to show you how to create a small cornfield on your roof. Yes, you read that right, corn! It’s easier than you think and a lot of fun. Plus, it’s totally satisfying to harvest your own ears of corn at the end. Let’s get started!
What you need:
- Suitable containers: Large planters or grow bags (at least 45 cm deep and wide). Corn needs space for its roots!
- High-quality potting soil: A mixture of garden soil, compost, and a little sand for good drainage is best.
- Corn seeds: Choose a variety that is suitable for growing in containers. Dwarf corn or popcorn are good options.
- Fertilizer: A slow-release fertilizer or organic fertilizer such as horn shavings or compost tea.
- Watering can or hose: For regular watering.
- Support material: Bamboo stakes or similar to support the plants if necessary.
- Tools: Shovel, garden shears, maybe a small rake.
- Sunlight: A sunny location is crucial! Corn loves the sun.
- Patience: Corn takes time to grow.
Step-by-Step Guide:
1. Preparing the Containers
- Cleaning: First, you should thoroughly clean your planters or grow bags. Remove all old plant debris and rinse them with water. This will prevent the spread of diseases or pests.
- Drainage: Make sure your containers have drainage holes so that excess water can drain away. If not, it’s best to drill a few holes in the bottom. Good drainage is super important to prevent the roots from rotting. I always put a layer of pebbles or clay shards on the bottom of the container before I add the soil. This improves the drainage even more.
- Filling: Now you can fill the containers with your potting soil. Leave about 5-10 cm of space at the top so you don’t overflow everything when you water. The soil should be loose and airy. I always mix in some compost with the soil to provide the corn with enough nutrients.
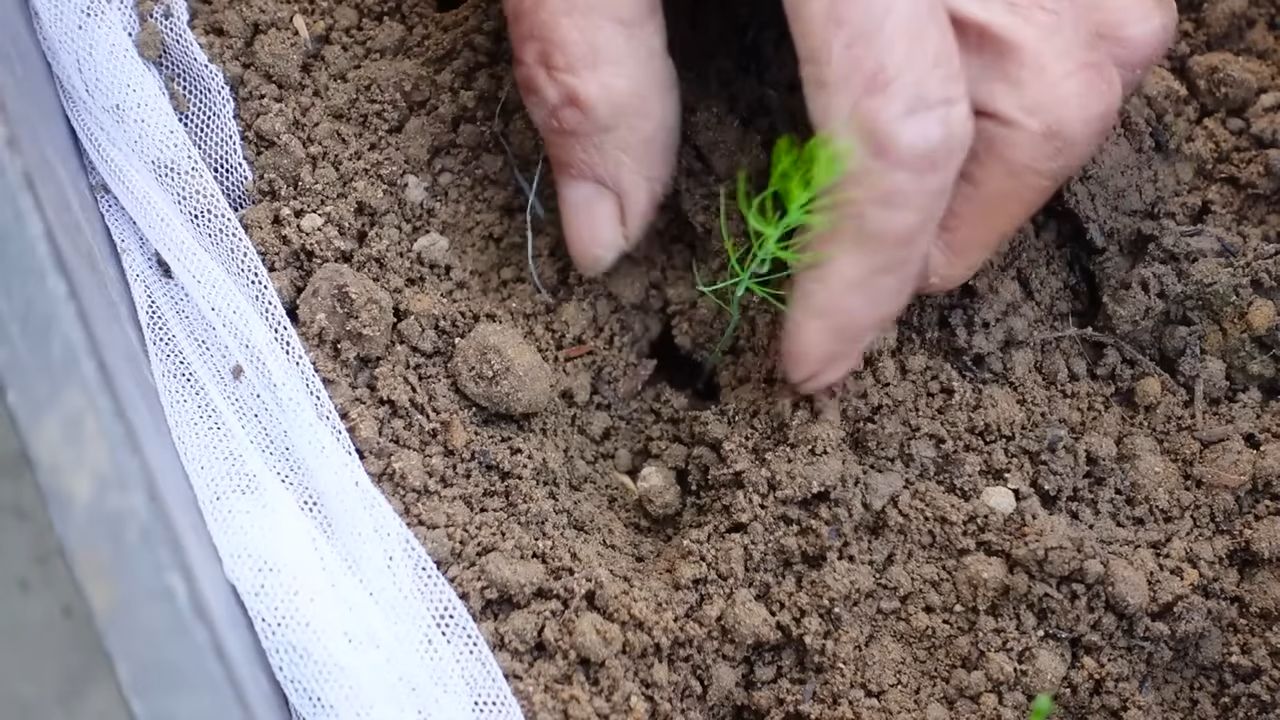
2. Sowing
- Choose your seeds: As I said, it’s best to choose a variety that is suitable for growing in containers. Dwarf corn or popcorn are good options. Read the description on the seed packet carefully to find out the optimal conditions for sowing.
- Sowing time: The best time to sow is in the spring, after the danger of frost has passed. In Germany, this is usually from mid-May. You can also start the seeds indoors to speed up the growing process.
- Sowing depth and spacing: Make small holes in the soil with your finger or a small stick. The holes should be about 2-3 cm deep. Place 2-3 seeds in each hole. This increases the likelihood that at least one seed will germinate. The distance between the holes should be about 15-20 cm.
- Covering and watering: Cover the seeds with soil and press them down lightly. Water the soil gently so that it is well moistened. Be careful not to wash the seeds away.
3. Care
- Watering: Corn needs a lot of water, especially during the growing season. Water regularly, preferably in the morning or evening, so that the water doesn’t evaporate as quickly. The soil should always be slightly moist, but not wet. Avoid waterlogging, as this can lead to root rot.
- Fertilizing: Fertilize your corn plants regularly to provide them with enough nutrients. A slow-release fertilizer that you mix into the soil when planting is a good option. Alternatively, you can also use organic fertilizer such as horn shavings or compost tea. Fertilize about every 2-3 weeks.
- Weed control: Regularly remove weeds that grow in your containers. Weeds compete with the corn for nutrients and water.
- Staking: As your corn plants get taller, they may need support. Bamboo stakes or similar are good for supporting the plants and preventing them from tipping over.
- Pollination: Corn is wind-pollinated. This means that the pollen from the male flowers (which are at the top of the plant) must reach the female flowers (which are on the ears). If you only have a few plants, pollination may not work optimally. You can assist pollination by gently shaking the male flowers or by transferring the pollen to the female flowers with a brush.
4. Harvesting
- Harvest time: The harvest time depends on the corn variety. As a rule, the ears of corn are ripe when the husks turn dry and brown and the corn kernels are plump and juicy. Gently press on a kernel. If it’s milky, the corn is ripe.
- Harvesting process: Carefully break the ears of corn off the plant. Turn them slightly to avoid damaging them.
- Processing: You can eat the ears of corn immediately, grill them, cook them, or freeze them. Popcorn needs to be dried before it can be made into popcorn.
Additional Tips and Tricks:
- Sun protection: It can get very hot on the roof in the summer. Make sure your containers don’t get too hot. You can cover them with light-colored cloths or move them to a shadier spot.
- Wind protection: It can also be very windy on the roof. Place your containers in a sheltered spot or secure them so they don’t fall over.
- Pests: Watch out for pests like aphids or corn borers. If infested, you can use natural pesticides.
- Variety selection: Before sowing, find out about the different corn varieties and choose the one that best suits your conditions.
- Neighbors: Talk to your neighbors before you start growing. Maybe they’d like to join in!
Common Problems and Solutions:
- No germination: If the seeds don’t germinate, there can be various reasons. Maybe the seeds were too old, the soil was too dry or too cold. Make sure to use fresh seeds, keep the soil moist, and only sow the seeds when the temperatures are warm enough.
- Yellow leaves: Yellow leaves can be a sign of a nutrient deficiency. Fertilize your plants regularly to provide them with enough nutrients.
- Root rot: Root rot is caused by waterlogging. Make sure your containers have good drainage and don’t water too much.
- Pests: In case of pest infestation, you can use natural pesticides.
I hope this guide helps you to grow your own corn on the roof. It’s a great feeling to harvest your own ears of corn and know where they come from. Happy gardening! Let me know if you have any questions or want to share your experiences. I look forward to hearing from you!
Conclusion
So, there you have it! Growing asparagus at home isn’t just a gardening project; it’s an investment in years of delicious, healthy harvests. Forget the flimsy, often overpriced asparagus spears at the grocery store. Imagine stepping into your backyard and harvesting plump, vibrant green stalks, bursting with flavor and freshness. This DIY trick transforms your garden into a source of culinary delight, offering a taste experience far superior to anything commercially available.
Why is this a must-try? Because it empowers you to control the quality and freshness of your food. You know exactly what goes into your asparagus patch – no hidden pesticides or questionable farming practices. Plus, the satisfaction of nurturing a plant from crown to table is incredibly rewarding. It’s a connection to nature, a lesson in patience, and a source of pride all rolled into one.
But the benefits don’t stop there. Growing your own asparagus allows for experimentation. Want to try a different variety? Go for it! Jersey Knight, with its high yields and disease resistance, is a popular choice. Or perhaps you’re intrigued by Purple Passion, known for its sweeter flavor and beautiful color. The possibilities are endless.
Consider these variations to personalize your asparagus growing experience:
* **Companion Planting:** Enhance your asparagus patch by planting beneficial companions like tomatoes, basil, or parsley. These plants can deter pests and improve soil health, creating a thriving ecosystem.
* **Raised Beds:** If you have poor soil or limited space, raised beds are an excellent option. They provide better drainage and allow you to create the ideal growing environment for your asparagus.
* **Succession Planting:** Extend your harvest season by planting different asparagus varieties with varying maturity dates. This ensures a continuous supply of fresh spears throughout the spring.
* **Container Gardening:** While asparagus prefers to be in the ground, you can grow it in large containers if you don’t have a garden. Just make sure the container is at least 2 feet deep and wide to accommodate the roots.
Don’t be intimidated by the initial investment of time and effort. Growing asparagus is a long-term commitment, but the rewards are well worth it. With proper planning and care, your asparagus patch will provide you with years of delicious harvests.
We wholeheartedly encourage you to embark on this gardening adventure. Take the plunge, prepare your soil, plant your crowns, and watch your asparagus thrive. And most importantly, share your experience with us! We’d love to hear about your successes, challenges, and any unique tips you discover along the way. Post photos of your harvest, share your favorite asparagus recipes, and let’s build a community of home-grown asparagus enthusiasts. Let’s all learn how to **grow asparagus at home** together!
Frequently Asked Questions (FAQ)
1. How long does it take to harvest asparagus after planting?
Patience is key when growing asparagus. While you might be eager to harvest those first spears, it’s crucial to allow the plants to establish themselves. Generally, you shouldn’t harvest any spears during the first year after planting. In the second year, you can harvest lightly for a few weeks. By the third year, your asparagus patch should be mature enough for a full harvest season, which typically lasts 6-8 weeks in the spring. Harvesting too early can weaken the plants and reduce future yields.
2. What is the best type of soil for growing asparagus?
Asparagus thrives in well-drained, sandy loam soil with a pH between 6.5 and 7.5. Good drainage is essential to prevent root rot. If your soil is heavy clay, amend it with plenty of organic matter, such as compost or well-rotted manure, to improve drainage and aeration. Adding sand can also help to break up the clay. Before planting, it’s a good idea to conduct a soil test to determine the pH and nutrient levels. Amend the soil as needed based on the test results.
3. How much sunlight does asparagus need?
Asparagus requires at least 6-8 hours of direct sunlight per day to thrive. Choose a planting location that receives full sun throughout the growing season. If you live in a particularly hot climate, some afternoon shade may be beneficial to prevent the plants from overheating. Insufficient sunlight can result in weak, spindly spears and reduced yields.
4. How often should I water asparagus?
Asparagus needs consistent moisture, especially during the growing season. Water deeply and regularly, ensuring that the soil remains moist but not waterlogged. Avoid overhead watering, as this can promote fungal diseases. A soaker hose or drip irrigation system is ideal for delivering water directly to the roots. During dry periods, you may need to water more frequently. Mulching around the plants can help to retain moisture and suppress weeds.
5. What are some common pests and diseases that affect asparagus?
Asparagus beetles are a common pest that can damage the spears and foliage. Handpicking the beetles or using insecticidal soap can help to control infestations. Asparagus rust is a fungal disease that can cause orange pustules on the stems and foliage. Proper spacing and good air circulation can help to prevent rust. Fusarium wilt is another fungal disease that can cause the plants to wilt and die. Planting disease-resistant varieties and practicing crop rotation can help to prevent Fusarium wilt.
6. How do I harvest asparagus spears?
Harvest asparagus spears when they are about 6-8 inches tall and the tips are still tightly closed. Use a sharp knife or asparagus knife to cut the spears at or slightly below the soil surface. Avoid damaging the crown when harvesting. Harvest spears every day or two during the peak of the season. As the harvest season progresses, the spears will become thinner and more fibrous. Stop harvesting when the spears become too thin or when the plants begin to fern out.
7. How do I care for asparagus after the harvest season?
After the harvest season, allow the asparagus plants to fern out and grow tall. The ferns will photosynthesize and store energy in the roots for the following year’s growth. Fertilize the plants with a balanced fertilizer in late spring or early summer. Remove any weeds that may compete with the asparagus for nutrients and water. In the fall, cut the ferns back to the ground after they have turned brown and dried out. Mulch the asparagus bed with organic matter to protect the roots from winter cold.
8. Can I grow asparagus in containers?
Yes, you can grow asparagus in containers, but it requires a large container (at least 2 feet deep and wide) to accommodate the roots. Choose a well-draining potting mix and provide the plants with plenty of sunlight and water. Container-grown asparagus may require more frequent fertilization than asparagus grown in the ground. Be sure to protect the containers from freezing temperatures during the winter.
9. What are the best asparagus varieties to grow at home?
There are many different asparagus varieties to choose from, each with its own unique characteristics. Jersey Knight is a popular choice for its high yields and disease resistance. Purple Passion is known for its sweeter flavor and beautiful color. Mary Washington is a classic variety that is reliable and easy to grow. When choosing a variety, consider your climate, soil type, and personal preferences.
10. How do I store harvested asparagus?
Freshly harvested asparagus is best stored in the refrigerator. Wrap the spears in a damp paper towel and place them in a plastic bag or container. Asparagus can also be stored upright in a jar with a few inches of water. Stored properly, asparagus will stay fresh for up to a week.
Leave a Comment