

Free chili propagation – who doesn’t love the sound of that? Imagine turning a single chili pepper into a thriving garden, overflowing with fiery goodness! This isn’t just a gardener’s dream; it’s an achievable reality with a few simple DIY tricks. For centuries, chili peppers have been more than just a spice; they’ve been a symbol of warmth, passion, and even prosperity in many cultures. From the ancient Aztecs using them in rituals to their widespread use in global cuisine today, chilies have a rich and vibrant history.
But let’s be honest, buying chili plants can get expensive, especially if you’re like me and love experimenting with different varieties. That’s where the magic of DIY comes in! This article is your ultimate guide to mastering free chili propagation. I’ll show you easy, cost-effective methods to grow your own chili plants from seeds you already have. Whether you’re a seasoned gardener or just starting out, these hacks will save you money, reduce waste, and give you the satisfaction of nurturing your own chili pepper paradise. Get ready to unleash your inner green thumb and spice up your life – literally!
Chili Propagation Made Easy: Your DIY Guide for a Bountiful Harvest
Hello, dear chili enthusiasts! Have you ever wondered how you can propagate your favorite chili varieties without having to dig deep into your pockets? Today I’m going to show you how you can do it yourself very easily. Whether you’re a beginner or an experienced gardener, this guide is understandable and easy to follow for everyone. Let’s dive into the world of chili propagation together!
What You Need for Chili Propagation
Before we get started, here is a list of the things you’ll need for chili propagation. Don’t worry, you probably have most of them at home already!
- Chili seeds: This is, of course, the most important thing. You can get seeds from store-bought chilies or order special chili seeds from a specialist retailer or online. Make sure the seeds come from ripe and healthy fruits.
- Seed starting mix: Regular potting soil is often too nutrient-rich for the delicate seedlings. Seed starting mix is specially tailored to the needs of young plants.
- Seedling containers: You’re spoiled for choice here. You can use seed pots, multi-pot trays, yogurt cups, or even egg cartons. It’s important that the containers have holes in the bottom so that excess water can drain away.
- Mini-greenhouse or plastic wrap: A mini-greenhouse is ideal for keeping the humidity high. Alternatively, you can also cover the seedling containers with plastic wrap.
- Spray bottle: For moistening the soil.
- A warm location: Chili seeds germinate best at temperatures between 22 and 28 degrees Celsius.
- Dibber or spoon: For separating the seedlings.
- Labels and pen: To identify the different chili varieties. This is especially important if you are growing several varieties at the same time.
- Patience: Chili seeds take some time to germinate. So don’t be discouraged if it doesn’t work right away.
Harvesting Chili Seeds: The First Step to Your Own Chili Garden
If you want to harvest your chili seeds from store-bought chilies, it’s very simple.
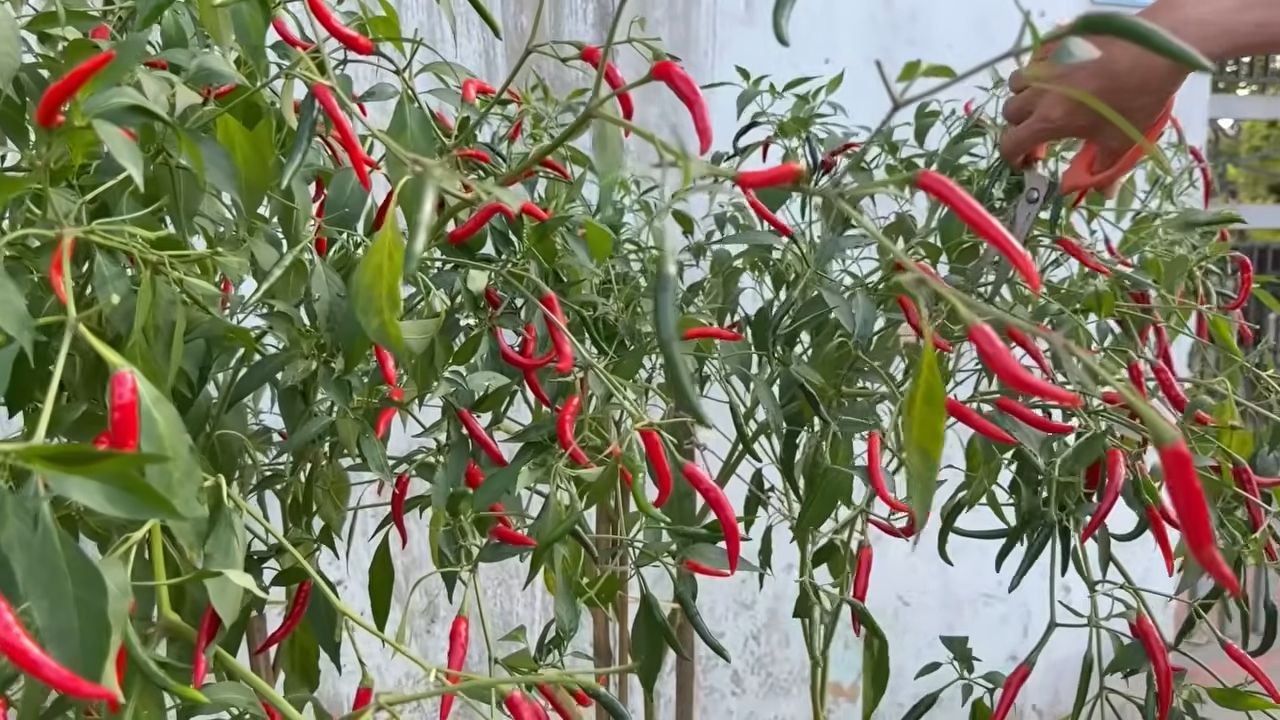
- Choose ripe chilies: The chilies should be fully ripe and intensely colored.
- Cut the chili open: Use a sharp knife to carefully cut the chili open.
- Remove the seeds: Scrape the seeds out with a spoon or knife.
- Dry the seeds: Place the seeds on a piece of paper towel and let them dry in a warm, dry place for a few days. It’s important that the seeds are completely dry before you store them, otherwise they can mold.
- Store the seeds: Keep the dried seeds in an airtight container in a cool, dark, and dry place. This way, they will remain viable for several years.
Sowing the Chili Seeds: The Foundation for a Bountiful Harvest
Now let’s get down to business: sowing the chili seeds.
- Prepare the seedling containers: Fill the seedling containers with seed starting mix. Lightly press the soil down.
- Sow the seeds: Place 2-3 seeds per container on the soil. Cover the seeds with a thin layer of seed starting mix (approx. 0.5 cm).
- Moisten the soil: Gently spray the soil with a spray bottle. The soil should be moist, but not wet.
- Create a humid climate: Place the seedling containers in a mini-greenhouse or cover them with plastic wrap. Make sure the wrap does not rest directly on the soil.
- Place the seedling containers in a warm location: The ideal germination temperature is between 22 and 28 degrees Celsius. A spot on a windowsill above a heater or a heated propagator is ideal.
- Ventilate regularly: To prevent mold, you should regularly ventilate the mini-greenhouse or plastic wrap (about 1-2 times a day).
- Keep the soil moist: Regularly check the moisture of the soil and spray it with a spray bottle if necessary.
Pricking Out the Chili Seedlings: Making Room for Growth
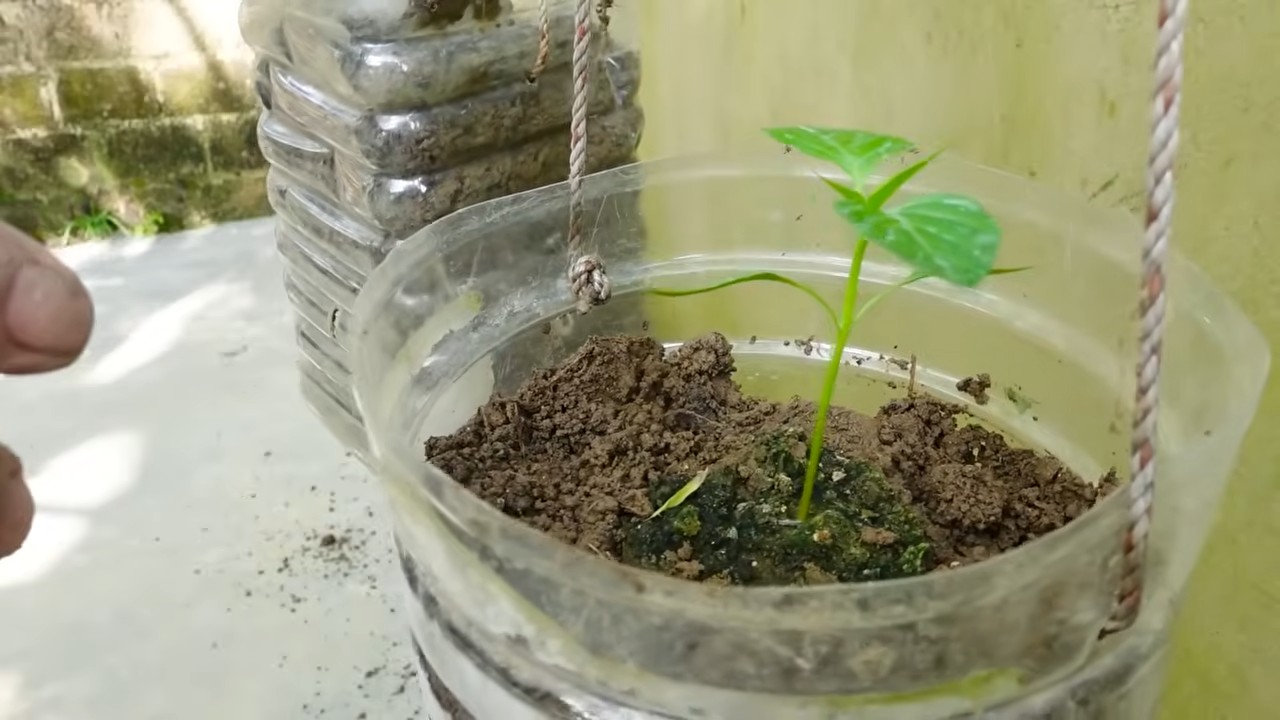
Once the chili seedlings have developed their first true leaves (after the cotyledons), it’s time to prick them out. This means you transplant the seedlings into larger pots so they have enough space to grow.
- Prepare the new pots: Fill small pots (approx. 8-10 cm in diameter) with seed starting mix or a mixture of seed starting mix and potting soil.
- Loosen the soil: Gently loosen the soil in the seedling containers with a dibber or spoon.
- Lift the seedlings out: Carefully lift the seedlings out of the soil with the dibber or spoon. Be careful not to damage the roots.
- Transplant the seedlings: Place each seedling in one of the prepared pots. The seedlings should be planted a little deeper than they were previously in the seed tray.
- Press the soil down: Gently press the soil down around the seedlings.
- Water the seedlings: Gently water the seedlings.
- Place the seedlings in a bright location: Place the pricked-out seedlings in a bright, but not too sunny, location.
Caring for the Chili Plants: The Path to a Bountiful Harvest
After pricking out, it is important to care for the chili plants properly so that they grow healthily and produce many fruits.
- Watering: Water the chili plants regularly, but avoid waterlogging. The soil should always be slightly moist.
- Fertilizing: Fertilize the chili plants regularly with a special chili fertilizer or a tomato fertilizer. Start fertilizing about 2-3 weeks after pricking out.
- Light: Chili plants need a lot of light. Place them in the brightest possible location. If you are growing them indoors, a grow light can be useful.
- Temperature: The ideal temperature for chili plants is between 20 and 25 degrees Celsius.
- Pests: Watch out for pests such as aphids or spider mites. In case of an infestation, you should treat the plants with a suitable agent.
- Planting out: As soon as the temperatures rise and there is no more danger of frost, you can plant the chili plants outdoors. Choose a sunny and sheltered location.
Common Mistakes in Chili Propagation and How to Avoid Them
Mistakes can also happen with chili propagation. Here are some of the most common mistakes and how you can avoid them:
Too little light: Chili plants need a lot of light. Place them in the brightest possible location.
Wrong soil: Do not use normal potting soil for starting seeds. It is often too nutrient-rich and can damage the sensitive seedlings. Use seed starting mix instead.
Too much water: Avoid waterlogging. The soil should be moist, but not wet.
Conclusion
So, there you have it! Mastering the art of free chili propagation is not just a cost-effective way to expand your garden; it’s a deeply rewarding experience that connects you to the natural world. Imagine the satisfaction of nurturing tiny seeds into vibrant, fruit-bearing plants, all without spending a dime on new seedlings. This simple DIY trick unlocks a world of possibilities, allowing you to experiment with different chili varieties, share your bounty with friends and neighbors, and enjoy a continuous supply of fresh, fiery peppers for your culinary creations.
But why is this a must-try? Beyond the obvious financial benefits, propagating your own chili plants offers unparalleled control over the entire growing process. You select the healthiest, most productive plants to propagate from, ensuring that future generations inherit those desirable traits. You can also tailor your growing environment to perfectly suit your local climate and soil conditions, maximizing your chances of success. Plus, it’s an incredibly sustainable practice, reducing your reliance on commercial nurseries and minimizing your environmental footprint.
Don’t be afraid to experiment with variations! Try propagating from different parts of the chili plant, such as stem cuttings or even root divisions (if your plant is mature enough). Explore different rooting mediums, from simple water propagation to more complex soil mixes. Consider using a rooting hormone to accelerate the process, especially if you’re working with more challenging chili varieties. You can even try grafting different chili varieties onto a single rootstock to create a unique and productive plant.
The possibilities are endless, and the learning never stops. The key is to be patient, observant, and willing to adapt your approach as needed. Remember to provide your young chili plants with plenty of sunlight, warmth, and moisture, and protect them from pests and diseases. With a little care and attention, you’ll be rewarded with a thriving chili garden that will provide you with years of delicious peppers.
We wholeheartedly encourage you to give this DIY trick a try. It’s easier than you might think, and the results are truly amazing. Once you’ve experienced the joy of propagating your own chili plants, you’ll never look at a chili pepper the same way again.
And most importantly, we want to hear about your experiences! Share your successes, your challenges, and your tips with us in the comments below. Let’s build a community of chili-loving gardeners who are passionate about sharing their knowledge and helping each other grow. Together, we can unlock the secrets of free chili propagation and create a world filled with delicious, homegrown peppers. So, grab your seeds, your cuttings, and your gardening gloves, and let’s get growing!
FAQ
Frequently Asked Questions About Free Chili Propagation
Q: What is chili propagation, and why should I do it?
A: Chili propagation is the process of creating new chili plants from existing ones, either through seeds, cuttings, or other methods. You should do it because it’s a cost-effective way to expand your chili garden without buying new seedlings, allows you to select the best plants for propagation, gives you control over the growing process, and is a sustainable gardening practice. Plus, it’s incredibly rewarding to nurture new plants from scratch!
Q: What are the different methods of chili propagation?
A: The most common methods are:
* **Seed propagation:** Collecting seeds from mature chili peppers and planting them.
* **Stem cuttings:** Taking cuttings from healthy stems and rooting them in water or soil.
* **Root division:** Separating the root ball of a mature plant into multiple plants (less common for chilis).
* **Air layering:** Encouraging roots to grow on a stem while it’s still attached to the parent plant.
Q: Which method is best for free chili propagation?
A: Seed propagation is the most straightforward and widely used method, especially when starting from existing chili peppers. Stem cuttings are also a great option, particularly if you want to clone a specific plant with desirable traits. The best method depends on your experience level and the resources you have available.
Q: How do I collect seeds from chili peppers?
A: Allow your chili peppers to fully ripen on the plant. Once they are ripe, carefully cut them open and remove the seeds. Spread the seeds out on a paper towel to dry completely for several days. Store the dried seeds in an airtight container in a cool, dark place until you’re ready to plant them.
Q: When is the best time to propagate chili plants?
A: The best time to propagate chili plants is typically in the spring or early summer, when the weather is warm and the days are long. This gives the young plants plenty of time to establish themselves before the colder months arrive. However, you can propagate indoors year-round if you have the right conditions (warmth, light).
Q: What kind of soil should I use for chili propagation?
A: Use a well-draining potting mix that is specifically formulated for seedlings or cuttings. Avoid using garden soil, as it can be too heavy and may contain pests or diseases. A mix of peat moss, perlite, and vermiculite is a good option.
Q: How much light do chili seedlings need?
A: Chili seedlings need plenty of light to thrive. Aim for at least 6-8 hours of direct sunlight per day, or supplement with artificial grow lights if needed. Insufficient light can lead to leggy, weak seedlings.
Q: How often should I water chili seedlings?
A: Keep the soil consistently moist, but not waterlogged. Water when the top inch of soil feels dry to the touch. Avoid overwatering, as this can lead to root rot.
Q: How long does it take for chili seeds to germinate?
A: Chili seeds typically germinate in 7-21 days, depending on the variety and the growing conditions. Keep the soil warm and moist to encourage germination.
Q: How long does it take for chili cuttings to root?
A: Chili cuttings typically root in 2-4 weeks, depending on the variety and the rooting method. Keep the cuttings in a humid environment and provide them with indirect light.
Q: Can I use rooting hormone to propagate chili plants?
A: Yes, rooting hormone can help to accelerate the rooting process, especially for more challenging chili varieties. Simply dip the cut end of the stem in rooting hormone powder or liquid before planting it in the rooting medium.
Q: What are some common problems with chili propagation?
A: Some common problems include:
* **Seed rot:** Caused by overwatering or poor drainage.
* **Damping off:** A fungal disease that can kill seedlings.
* **Lack of germination:** Caused by old seeds, improper soil conditions, or insufficient warmth.
* **Slow rooting:** Can be caused by insufficient humidity, low light, or lack of rooting hormone.
* **Pest infestations:** Aphids, spider mites, and other pests can attack young chili plants.
Q: How can I prevent these problems?
A: To prevent these problems, use fresh seeds, well-draining soil, and provide adequate warmth, light, and humidity. Avoid overwatering and monitor your plants regularly for pests and diseases.
Q: What are some good chili varieties to propagate?
A: Some easy-to-propagate chili varieties include jalapenos, serranos, and cayenne peppers. However, you can propagate almost any chili variety with the right techniques and conditions.
Q: Can I propagate chili plants from store-bought peppers?
A: Yes, you can propagate chili plants from store-bought peppers, but the results may vary. The seeds may not be true to type, meaning that the plants you grow may not be exactly the same as the parent pepper. Also, some store-bought peppers may be hybrids, which means that their seeds may not be viable.
Q: How do I care for my newly propagated chili plants?
A: Once your chili plants have established roots, gradually acclimate them to outdoor conditions before transplanting them into your garden or containers. Provide them with plenty of sunlight, water, and fertilizer. Protect them from pests and diseases.
Q: Can I grow chili plants indoors?
A: Yes, you can grow chili plants indoors, but you will need to provide them with adequate light and warmth. Use grow lights to supplement natural sunlight and keep the temperature between 70-80°F (21-27°C).
Q: How do I know when my chili peppers are ready to harvest?
A: Chili peppers are typically ready to harvest when they have reached their mature color and size. The color will vary depending on the variety. Gently tug on the pepper; if it comes off easily, it’s ready to harvest.
Q: How do I store chili peppers?
A: You can store chili peppers in the refrigerator for up to a week. You can also dry them, freeze them, or pickle them for longer-term storage.
Q: Where can I find more information about chili propagation?
A: There are many resources available online and in libraries about chili propagation. You can also consult with local gardening experts or join a gardening club.
We hope these FAQs have answered your questions about free chili propagation. Happy gardening!
Leave a Comment