

Easy chili growing hacks – that’s what you’re here for, right? And trust me, you’ve come to the right place! Forget those complicated gardening guides that leave you feeling more confused than confident. I’m about to share some seriously simple, yet incredibly effective, DIY tricks to help you cultivate a thriving chili pepper patch, even if you think you have a black thumb.
Chili peppers have a rich history, dating back thousands of years in the Americas. They weren’t just a food source; they held cultural and medicinal significance. Now, they’re a global culinary staple, adding a fiery kick to dishes worldwide. But why buy them at the store when you can grow your own, bursting with flavor and freshness?
Let’s face it, store-bought chilis can be expensive and sometimes lack that intense flavor we crave. Plus, there’s something incredibly satisfying about harvesting your own produce. These easy chili growing hacks will empower you to bypass the grocery store and enjoy a constant supply of fresh, vibrant chilis, tailored to your exact spice preference. Whether you’re a seasoned gardener or a complete beginner, these DIY tips will transform your chili growing game. Get ready to unleash your inner chili farmer!

Grow the Hottest Chilis Ever: My Secret DIY Hacks
Okay, chili lovers, gather ’round! I’m about to spill all my secrets for growing the most fiery, flavorful chilis you’ve ever tasted. Forget those bland supermarket peppers – we’re going to cultivate some serious heat right in your own backyard (or balcony!). These aren’t just tips; they’re tried-and-true hacks I’ve developed over years of chili-growing obsession. Let’s get started!
Choosing Your Chili Varieties
Before we dive into the nitty-gritty, let’s talk about chili selection. This is crucial! Think about what kind of heat you’re after and what you plan to do with your harvest.
* For Beginners: Jalapeños, Anaheim, and Poblano peppers are relatively easy to grow and offer a mild to medium heat. They’re perfect for stuffing, grilling, or adding a subtle kick to your dishes.
* Intermediate Growers: Serrano, Cayenne, and Thai chilis bring a noticeable heat level. These are great for sauces, salsas, and adding a punch to stir-fries.
* Advanced Chili Heads: Habanero, Scotch Bonnet, Ghost Pepper (Bhut Jolokia), and Carolina Reaper. These are the big guns! Handle with care, and only grow them if you’re prepared for some serious fire. Remember to always wear gloves when handling these peppers.
Pro Tip: Order your seeds from a reputable supplier. This ensures you’re getting genuine seeds and healthy plants. I’ve had great success with online seed banks specializing in chili peppers.
Phase 1: Seed Starting – The Foundation of Your Chili Empire
Starting your chili seeds indoors is essential, especially if you live in a region with a shorter growing season. This gives your plants a head start and ensures they’re strong enough to withstand the elements when you transplant them outdoors.
1. Gather Your Supplies:
* Seed starting tray with a humidity dome
* Seed starting mix (a light, well-draining mix is crucial)
* Chili seeds (of course!)
* Spray bottle filled with water
* Heat mat (optional, but highly recommended)
* Grow light (also optional, but provides optimal growth)
* Small labels and a permanent marker
2. Prepare the Seed Starting Tray: Fill each cell of the seed starting tray with the seed starting mix. Gently tap the tray to settle the mix.
3. Sow the Seeds: Place 2-3 chili seeds in the center of each cell. This increases your chances of at least one seed germinating. Cover the seeds with a thin layer of seed starting mix (about 1/4 inch).
4. Water Gently: Use the spray bottle to thoroughly moisten the seed starting mix. Avoid overwatering, as this can lead to damping-off (a fungal disease that kills seedlings).
5. Create a Humid Environment: Cover the seed starting tray with the humidity dome. This helps to retain moisture and create a warm, humid environment that’s ideal for germination.
6. Provide Warmth: Place the seed starting tray on a heat mat. Chili seeds germinate best at temperatures between 80-85°F (27-29°C). If you don’t have a heat mat, place the tray in a warm location, such as on top of your refrigerator.
7. Provide Light: Place the seed starting tray under a grow light. If you don’t have a grow light, place the tray in a sunny window. However, be aware that seedlings grown in a window may become leggy (tall and spindly) due to insufficient light.
8. Monitor and Water: Check the seed starting tray daily. Keep the seed starting mix consistently moist, but not soggy. Water as needed using the spray bottle.
9. Ventilate: Once the seeds start to germinate (usually within 7-14 days), remove the humidity dome for a few hours each day to allow for ventilation. This helps to prevent fungal diseases.
10. Thin the Seedlings: Once the seedlings have developed their first true leaves (the second set of leaves), thin them to one seedling per cell. Choose the strongest, healthiest seedling and snip off the others at the soil line. Don’t pull them out, as this can disturb the roots of the remaining seedling.
Phase 2: Transplanting – Giving Your Chilis Room to Grow
Once your seedlings have grown large enough, it’s time to transplant them into larger pots. This gives them more room to develop a strong root system.
1. Prepare the Pots: Choose pots that are at least 4 inches in diameter. Fill the pots with a high-quality potting mix.
2. Gently Remove the Seedlings: Carefully remove the seedlings from the seed starting tray. Use a small spoon or fork to gently loosen the soil around the roots.
3. Transplant the Seedlings: Make a hole in the center of each pot that’s large enough to accommodate the root ball of the seedling. Gently place the seedling in the hole and fill in around the roots with potting mix.
4. Water Thoroughly: Water the seedlings thoroughly after transplanting.
5. Provide Light and Warmth: Place the transplanted seedlings under a grow light or in a sunny window. Continue to provide warmth, either with a heat mat or by placing the pots in a warm location.
6. Fertilize: Start fertilizing the seedlings with a diluted liquid fertilizer (follow the instructions on the fertilizer label) every 2 weeks.
Phase 3: Hardening Off – Preparing for the Great Outdoors
Before you can plant your chili plants outdoors, you need to “harden them off.” This process gradually acclimates the plants to the outdoor environment, preventing them from being shocked by the sun, wind, and temperature changes.
1. Start Slowly: Begin by placing the plants outdoors in a sheltered location (e.g., a patio or balcony) for just a few hours each day.
2. Gradually Increase Exposure: Over the course of a week or two, gradually increase the amount of time the plants spend outdoors each day. Also, gradually expose them to more direct sunlight and wind.
3. Monitor the Plants: Keep a close eye on the plants during the hardening off process. If they show signs of stress (e.g., wilting, sunburn), bring them back indoors and reduce their exposure to the elements.
Phase 4: Planting Outdoors – Setting the Stage for Success
Now for the exciting part – planting your chili plants in their final home!
1. Choose the Right Location: Chili plants need at least 6-8 hours of direct sunlight per day. Choose a location that’s sunny and well-drained.
2. Prepare the Soil: Amend the soil with compost or other organic matter to improve drainage and fertility. Chili plants prefer slightly acidic soil (pH 6.0-6.8).
3. Planting Time: Wait until the danger of frost has passed and the soil has warmed up before planting your chili plants outdoors.
4. Spacing: Space the plants 18-24 inches apart.
5. Planting Depth: Dig a hole that’s slightly larger than the root ball of the plant. Gently remove the plant from its pot and place it in the hole. Fill in around the roots with soil and water thoroughly.
6. Mulch: Apply a layer of mulch around the plants to help retain moisture, suppress weeds, and regulate soil temperature.
My Secret Chili Growing Hacks: Unleashing the Heat
Okay, here’s where I share the real magic – the hacks that will take your chili growing to the next level!
* Epsom Salt Boost: Magnesium is crucial for chili production. Dissolve 1 tablespoon of Epsom salt in a gallon of water and use it to water your plants every 2-3 weeks. This will result in more flowers and, ultimately, more chilis.
* Coffee Grounds for Acidity: Chili plants love slightly acidic soil. Sprinkle used coffee grounds around the base of your plants to lower the pH and provide a slow-release source of nitrogen.
* Banana Peel Fertilizer: Bury banana peels near your chili plants. As they decompose, they release potassium, which is essential for fruit development.
* Companion Planting: Plant basil, marigolds, or onions near your chili plants. These plants can help to deter pests and attract beneficial insects.
* Pruning for Bushier Plants: Pinch off the growing tips of your chili plants when they’re young. This encourages them to branch out and become bushier, resulting in more chilis.
* Watering Deeply and Infrequently: Water your chili plants deeply and infrequently, rather than shallowly and frequently. This encourages the roots to grow deeper, making the plants more drought-tolerant.
* Sunlight is Key: Remember, the more sunlight, the hotter the chili! Ensure your plants get
Conclusion
So, there you have it! These easy chili growing hacks are more than just shortcuts; they’re a pathway to a more abundant, flavorful, and ultimately, more rewarding chili harvest. We’ve explored simple yet effective techniques, from optimizing your soil with readily available materials to creating a nurturing environment that encourages robust growth and fiery pepper production.
Why is this a must-try? Because growing your own chilis shouldn’t be an intimidating or overly complicated process. These hacks democratize chili cultivation, making it accessible to everyone, regardless of their gardening experience or the size of their growing space. Imagine the satisfaction of harvesting your own vibrant, spicy chilis, knowing you nurtured them from seed to table with your own hands, using simple, cost-effective methods.
Beyond the sheer joy of homegrown produce, these hacks offer practical benefits. You’ll reduce your reliance on store-bought chilis, often laden with pesticides and lacking the freshness of homegrown varieties. You’ll also gain complete control over the growing process, ensuring your chilis are cultivated with care and free from harmful chemicals. Plus, let’s be honest, there’s a certain bragging right that comes with serving a dish made with chilis you grew yourself!
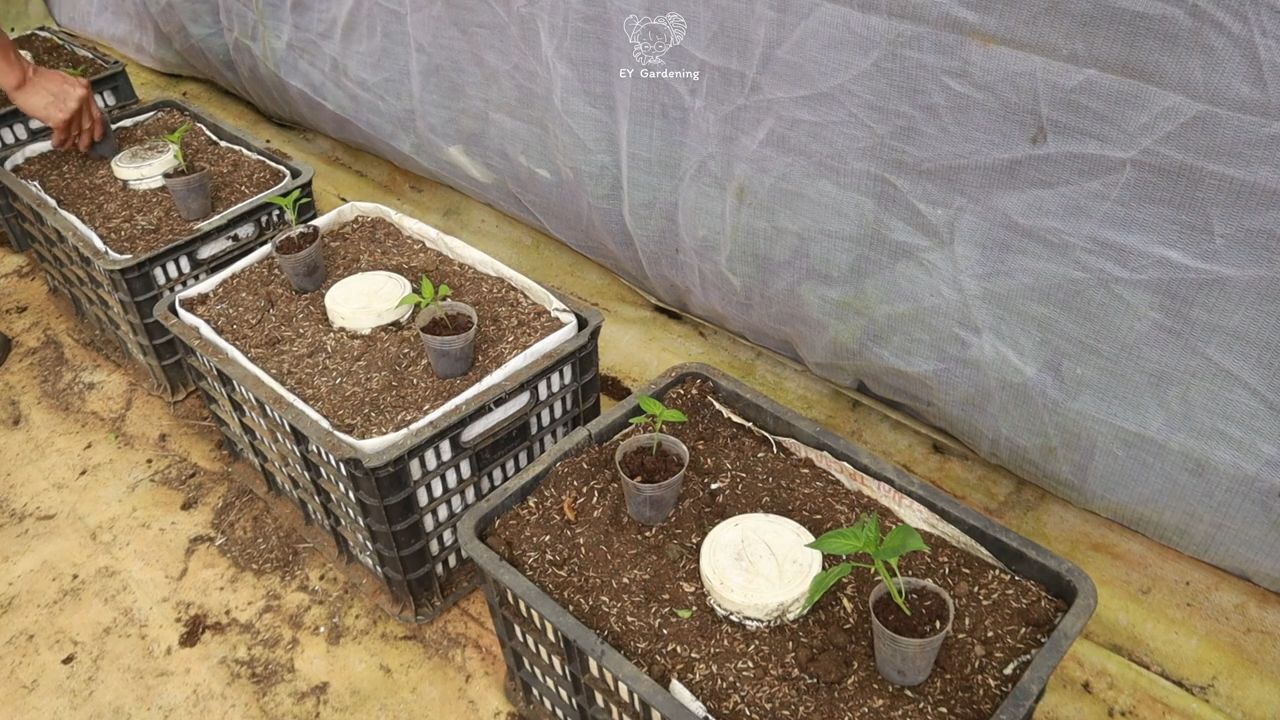
But the beauty of these hacks lies in their adaptability. Feel free to experiment and tailor them to your specific needs and preferences. For example, if you’re short on space, consider growing your chilis in containers on a sunny balcony or patio. You can even create a vertical garden using recycled pallets or hanging planters. If you live in a colder climate, start your seeds indoors early in the season to give them a head start.
Consider these variations to further enhance your chili growing experience:
* Companion Planting: Plant basil or marigolds near your chilis to deter pests and attract beneficial insects.
* Homemade Fertilizer: Use compost tea or diluted fish emulsion to provide your chilis with essential nutrients.
* Seed Saving: Save seeds from your best-performing chili plants to ensure a continuous supply of your favorite varieties.
* Sunlight Optimization: Use reflective surfaces like aluminum foil to maximize sunlight exposure, especially in shaded areas.
Ultimately, the goal is to make chili growing an enjoyable and fulfilling experience. Don’t be afraid to experiment, learn from your mistakes, and adapt these hacks to suit your unique circumstances. The rewards – a bountiful harvest of delicious, homegrown chilis – are well worth the effort.
We wholeheartedly encourage you to try these easy chili growing hacks and witness the difference they can make. Whether you’re a seasoned gardener or a complete novice, these techniques will empower you to cultivate your own thriving chili patch.
And most importantly, we want to hear about your experiences! Share your successes, your challenges, and your own unique chili growing hacks in the comments below. Let’s create a community of chili enthusiasts, sharing our knowledge and inspiring each other to grow the best chilis possible. Your insights could be invaluable to other readers, and together, we can unlock the secrets to a truly exceptional chili harvest. So, get your hands dirty, embrace the spice, and let’s grow some amazing chilis together!
Frequently Asked Questions (FAQ)
What are the best chili varieties to grow for beginners?
For beginners, some of the easiest and most rewarding chili varieties to grow include Jalapeños, Anaheim peppers, and Serrano peppers. These varieties are relatively low-maintenance, produce a good yield, and offer a manageable level of heat. They are also widely available as seeds or seedlings at most garden centers. Habaneros and Scotch Bonnets are more challenging due to their longer growing season and higher heat requirements, so it’s best to start with milder varieties first. Remember to research the specific needs of each variety to ensure optimal growth.
How often should I water my chili plants?
The watering frequency for chili plants depends on several factors, including the climate, soil type, and the size of the plant. As a general rule, water your chili plants deeply when the top inch of soil feels dry to the touch. Avoid overwatering, as this can lead to root rot. During hot, dry weather, you may need to water your plants daily, while in cooler, wetter conditions, you may only need to water them every few days. Container-grown chilis tend to dry out faster than those planted in the ground, so check the soil moisture more frequently. A good way to test the soil moisture is to stick your finger into the soil about an inch deep. If the soil feels dry, it’s time to water.
What kind of soil is best for growing chilis?
Chili plants thrive in well-draining, fertile soil with a slightly acidic to neutral pH (around 6.0 to 7.0). A good soil mix should be rich in organic matter, such as compost or well-rotted manure, to provide essential nutrients and improve drainage. Avoid heavy clay soils, as they can become waterlogged and suffocate the roots. If you have clay soil, amend it with plenty of organic matter and consider growing your chilis in raised beds or containers. You can also purchase a pre-made potting mix specifically formulated for vegetables or peppers. Adding perlite or vermiculite to the soil mix can further improve drainage and aeration.
How much sunlight do chili plants need?
Chili plants require at least 6-8 hours of direct sunlight per day to thrive. Insufficient sunlight can lead to leggy growth, reduced flowering, and smaller, less flavorful peppers. Choose a sunny location for your chili plants, preferably one that receives morning sun, as this helps to dry the leaves and prevent fungal diseases. If you live in a hot climate, some afternoon shade may be beneficial to prevent the plants from overheating. If you don’t have a sunny garden, you can supplement with grow lights, especially when starting seeds indoors.
How do I protect my chili plants from pests and diseases?
Protecting your chili plants from pests and diseases is crucial for a successful harvest. Common pests that affect chili plants include aphids, spider mites, and whiteflies. You can control these pests by spraying your plants with insecticidal soap or neem oil. Regularly inspect your plants for signs of infestation and take action promptly. Fungal diseases, such as powdery mildew and blossom end rot, can also affect chili plants. To prevent these diseases, ensure good air circulation around your plants, avoid overwatering, and water at the base of the plant rather than overhead. You can also use a fungicide if necessary. Companion planting with basil or marigolds can help to deter pests and attract beneficial insects.
When is the best time to harvest my chilis?
The best time to harvest your chilis depends on the variety and your desired level of heat. Most chilis will change color as they ripen, typically from green to red, yellow, or orange. You can harvest chilis at any stage of ripeness, but they will generally be hotter and more flavorful when fully ripe. To harvest, use pruning shears or scissors to cut the chili from the plant, leaving a small stem attached. Avoid pulling the chilis off, as this can damage the plant. Wear gloves when harvesting hot chilis to prevent skin irritation.
Can I grow chilis indoors?
Yes, you can grow chilis indoors, especially if you live in a climate with cold winters. To grow chilis indoors, you will need a sunny windowsill or a grow light to provide adequate light. Choose a pot that is at least 12 inches in diameter and use a well-draining potting mix. Water your plants regularly and fertilize them every few weeks with a balanced fertilizer. You may also need to hand-pollinate the flowers to ensure fruit set. Indoor-grown chilis may not produce as many peppers as those grown outdoors, but they can still provide a satisfying harvest.
How do I store my harvested chilis?
There are several ways to store harvested chilis, depending on how you plan to use them. Fresh chilis can be stored in the refrigerator for up to a week. You can also dry chilis by stringing them together and hanging them in a well-ventilated area or by using a dehydrator. Dried chilis can be stored in an airtight container for several months. Another option is to freeze chilis whole or chopped. You can also pickle chilis or make chili oil or chili paste. Choose the storage method that best suits your needs and preferences.
Leave a Comment