

Easy Cabbage Garden for Homemakers: Imagine stepping outside your back door and harvesting fresh, crisp cabbage for tonight’s dinner. Sounds idyllic, right? Well, it’s more achievable than you think! For centuries, cabbage has been a staple in diets around the world, from the hearty stews of Eastern Europe to the vibrant slaws of Asia. Its versatility and nutritional value have made it a beloved vegetable, and now, I’m going to show you how to cultivate your very own supply, even if you’re a complete beginner.
Let’s face it, store-bought cabbage can sometimes be disappointing – lacking flavor or freshness. But with a little know-how, you can enjoy the unparalleled taste of homegrown cabbage. This DIY guide is designed specifically for busy homemakers like you, offering simple, effective tricks and hacks to create an easy cabbage garden that thrives. We’ll break down the process into manageable steps, covering everything from choosing the right varieties to protecting your precious plants from pests.
Why is this so important? Because growing your own food is incredibly empowering! Not only will you save money and reduce your reliance on grocery stores, but you’ll also gain a deeper connection to nature and enjoy the satisfaction of nurturing something from seed to harvest. Plus, fresh, homegrown cabbage tastes absolutely amazing! So, grab your gardening gloves, and let’s get started on creating your very own easy cabbage garden!

Your Own, Simple Cabbage Patch for Home
Hey dears! Do you also feel like harvesting fresh, crisp vegetables directly from your own garden? Then you’ve come to the right place! I’ll show you how you can easily create a cabbage patch, even if you don’t have a green thumb. Don’t worry, it’s easier than you think! We’ll focus on the basics so that everyone can really succeed. Let’s get started!
What you need for your cabbage patch
Before we get started, we naturally need a few things. Don’t worry, you probably already have most of them at home or can get them inexpensively.
- Cabbage plants: Here you are spoiled for choice! White cabbage, red cabbage, kale, Brussels sprouts, savoy cabbage – choose your favorite varieties. When buying, look for healthy, strong plants. Small seedlings are ideal for starting.
- Gardening tools: A shovel, a rake, a watering can, and possibly a weeder are your best friends.
- Good soil: Cabbage is a heavy feeder, which means it needs nutrient-rich soil. Compost or well-rotted manure are perfect.
- Plant stakes: To support the young plants, especially when it’s windy.
- Pest protection: A slug fence or a net against cabbage white butterflies are highly recommended.
- Patience: Cabbage needs time to grow, so don’t get impatient!
Preparation is key
Before the cabbage plants go into the ground, we need to prepare the soil. This is super important so that they feel comfortable and can grow well.
- The right location: Cabbage loves the sun! Find a sunny spot in the garden that gets at least six hours of sun a day.
- Loosen the soil: Loosen the soil thoroughly. This is best done with a shovel or a digging fork. Remove stones and weeds in the process.
- Improve the soil: Mix compost or well-rotted manure into the soil. This makes the soil richer in nutrients and stores moisture.
- Level the soil: Rake the soil smooth so that it is even.
Step-by-step guide: Planting cabbage
Now for the exciting part: planting! Don’t worry, I’ll guide you through the process step by step.
- Dig planting holes: Use the shovel to dig planting holes that are slightly larger than the root balls of the cabbage plants. The distance between the holes should vary depending on the cabbage variety. It’s best to find out in advance how much space your variety needs. As a rule of thumb: white cabbage and red cabbage need about 50-60 cm of space, while kale and Brussels sprouts need a little more.
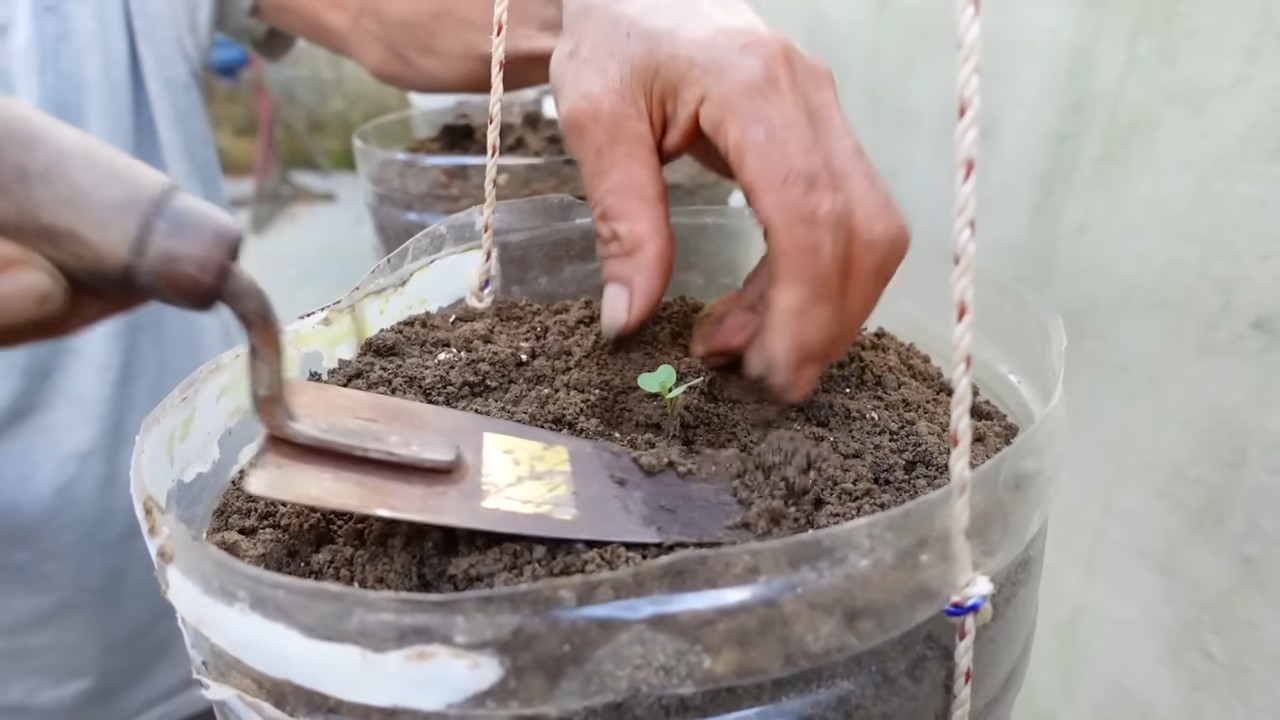
- Prepare the plants: Carefully remove the cabbage plants from their pots. Loosen the root balls slightly so that the roots can grow better.
- Insert the plants: Place the cabbage plants in the planting holes. The top of the root ball should be level with the soil surface.
- Fill the holes: Fill the planting holes with soil and press it down lightly.
- Water: Water the plants thoroughly. This helps them to take root in their new home.
- Place plant stakes: Place plant stakes next to the young plants and tie them loosely to them. This gives them support, especially in the wind.
- Protective measures: Install a slug fence or cover the plants with a net against cabbage white butterflies.
The right care: Keeping your cabbage healthy and strong
After planting comes care! For your cabbage to thrive, it needs regular attention.
- Watering: Cabbage needs a lot of water, especially during dry periods. Water regularly, but avoid waterlogging. It’s best to water in the morning so the leaves can dry by evening.
- Fertilizing: Cabbage is a heavy feeder and needs regular fertilizer. Use organic fertilizer like compost or horn shavings. Fertilize about every two to three weeks.
- Remove weeds: Keep the soil around the cabbage plants weed-free. Weeds rob the cabbage of nutrients and water.
- Control pests: Regularly check the plants for pests such as cabbage white butterflies, aphids, or slugs. If there is an infestation, you can use natural pesticides.
- Loosen the soil: Regularly loosen the soil around the plants. This improves aeration and water absorption.
Special tips for different cabbage varieties
Each type of cabbage has its own needs. Here are a few special tips for the most popular varieties:
- White and red cabbage: These varieties need a lot of space and a good supply of nutrients. Make sure they have a sunny location and fertilize regularly.
- Kale: Kale is very robust and can also tolerate frost. It can be harvested well into the winter.
- Brussels sprouts: Brussels sprouts need a lot of sun and a long growing season. Harvest the sprouts from the bottom up when they are firm and closed.
- Savoy cabbage: Savoy cabbage is a bit more demanding than other cabbage varieties. It needs a humus-rich, moist soil and regular fertilization.
Pests and diseases: What to do when things get tricky?
Unfortunately, even cabbage is not immune to pests and diseases. But don’t panic, there are solutions!
- Cabbage white butterfly: The caterpillars of the cabbage white butterfly eat holes in the leaves. A net over the plants prevents egg-laying. In case of infestation, you can pick off the caterpillars or use biological insecticides.
- Aphids: Aphids suck plant sap and weaken the plants. Spray the plants with a jet of water or introduce beneficial insects like ladybugs.
- Clubroot: Clubroot is a fungal disease that affects the roots. Affected plants wither and die. Ensure good crop rotation and use resistant varieties.
- Slugs: Slugs love cabbage! A slug fence or slug pellets can help.
Harvest time: Finally harvesting!
After all the work, it’s finally time: the harvest! The timing of the harvest depends on the cabbage variety.
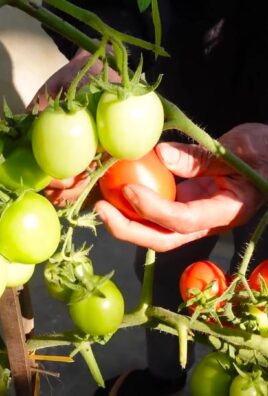
- White and red cabbage: Harvest when the heads are firm and closed.
- Kale: Harvest the leaves from the bottom up when they are large enough.
- Brussels sprouts: Harvest the sprouts from the bottom up when they are firm and closed.
- Savoy cabbage: Harvest when the head is firm and closed.
Cut the heads with a sharp knife. Leave a few leaves on the stalk so that the cabbage stays fresh longer.
Storing cabbage: How to keep it fresh longer
If you have harvested more cabbage than you can eat right away, you can store it.
- Cool and dark: Cabbage keeps best in a cool, dark place, such. as in the cellar or pantry.
- Wrapping: Wrap the heads in newspaper to protect them from drying out.
- Freezing: Cabbage can also be frozen. Blanch it briefly in boiling water beforehand and then freeze it in freezer bags.
- Pickling: Red cabbage can also be pickled. This makes it last longer and gives it a sour taste.
Conclusion: Your own cabbage patch is doable!
Conclusion
So, there you have it! Creating your own easy cabbage garden is not just a rewarding experience; it’s a practical solution for homemakers seeking fresh, healthy produce right at their fingertips. We’ve walked through the simple steps, highlighting the benefits of homegrown cabbage – from its superior flavor and nutritional value to the sheer satisfaction of nurturing your own food source.
This isn’t just about saving money at the grocery store; it’s about connecting with nature, reducing your carbon footprint, and ensuring your family has access to the best possible ingredients. Imagine the vibrant green heads of cabbage flourishing in your backyard, ready to be transformed into delicious slaws, hearty soups, or flavorful stir-fries. The possibilities are endless!
But the real magic lies in the adaptability of this project. Feel free to experiment with different varieties of cabbage. Red cabbage adds a beautiful splash of color to your garden and dishes, while Savoy cabbage offers a milder, more delicate flavor. Consider companion planting with herbs like dill or rosemary to deter pests and enhance the flavor of your cabbage. You can even try succession planting, staggering your planting schedule to ensure a continuous harvest throughout the growing season.
Don’t be afraid to get your hands dirty and personalize your easy cabbage garden! Perhaps you’ll build a raised bed for better drainage, or maybe you’ll incorporate a simple irrigation system to conserve water. The beauty of DIY is that you can tailor it to your specific needs and preferences.
We understand that gardening can seem daunting at first, but trust us, this is a project that’s accessible to everyone, regardless of their experience level. With a little planning, preparation, and patience, you’ll be amazed at what you can achieve.
We wholeheartedly encourage you to give this easy cabbage garden a try. It’s a fantastic way to embrace a more sustainable lifestyle, improve your family’s health, and discover the joys of homegrown produce. And most importantly, we want to hear about your experiences! Share your photos, tips, and challenges in the comments below. Let’s create a community of cabbage enthusiasts, supporting each other and celebrating the bounty of our gardens. Your insights could inspire others to embark on their own cabbage-growing journey. So, grab your gardening gloves, gather your supplies, and get ready to cultivate your own little slice of cabbage paradise! We can’t wait to see what you create.
Frequently Asked Questions (FAQ)
What is the best time of year to plant cabbage?
The timing for planting cabbage largely depends on your climate. Cabbage is a cool-season crop, thriving in temperatures between 60°F and 70°F (15°C and 21°C). For spring harvests, start seeds indoors 6-8 weeks before the last expected frost. Transplant seedlings outdoors 2-3 weeks before the last frost. For fall harvests, sow seeds directly into the garden in mid-summer, about 10-12 weeks before the first expected frost. In warmer climates, you can grow cabbage throughout the winter. Check your local extension office for specific planting dates in your area.
What kind of soil is best for growing cabbage?
Cabbage prefers well-drained, fertile soil that is rich in organic matter. The ideal soil pH is between 6.0 and 7.5. Before planting, amend your soil with compost, aged manure, or other organic materials to improve drainage, fertility, and water retention. If your soil is heavy clay, consider building raised beds to improve drainage. A soil test can help you determine the specific nutrient needs of your soil.
How much sunlight does cabbage need?
Cabbage needs at least 6 hours of direct sunlight per day to thrive. Choose a planting location that receives full sun for optimal growth and head formation. If you live in a particularly hot climate, some afternoon shade can be beneficial to prevent bolting (premature flowering).
How often should I water my cabbage plants?
Cabbage needs consistent moisture to grow properly. Water deeply and regularly, especially during dry periods. Aim to keep the soil consistently moist but not waterlogged. A good rule of thumb is to water when the top inch of soil feels dry to the touch. Mulching around your cabbage plants can help retain moisture and suppress weeds.
What are some common pests and diseases that affect cabbage?
Cabbage is susceptible to several pests and diseases, including cabbage worms, cabbage loopers, aphids, flea beetles, clubroot, and black rot. Regularly inspect your plants for signs of infestation or disease. Use organic pest control methods such as handpicking pests, using insecticidal soap, or applying Bacillus thuringiensis (Bt) to control cabbage worms and loopers. To prevent clubroot, ensure good soil drainage and avoid planting cabbage in the same location year after year. Choose disease-resistant varieties whenever possible.
How do I know when my cabbage is ready to harvest?
Cabbage is ready to harvest when the head is firm and solid to the touch. The size of the head will vary depending on the variety, but generally, heads are ready to harvest when they reach about 6-8 inches in diameter. To harvest, use a sharp knife to cut the head from the stem, leaving a few outer leaves intact.
Can I grow cabbage in containers?
Yes, you can grow cabbage in containers, but you’ll need to choose a large container that is at least 12 inches in diameter and 12 inches deep. Use a high-quality potting mix and ensure the container has good drainage. Water regularly and fertilize every few weeks with a balanced fertilizer. Container-grown cabbage may require more frequent watering and fertilization than cabbage grown in the ground.
What are some good companion plants for cabbage?
Companion planting can help deter pests, attract beneficial insects, and improve the overall health of your cabbage plants. Good companion plants for cabbage include:
* Dill: Attracts beneficial insects that prey on cabbage worms.
* Rosemary: Deters cabbage moths.
* Thyme: Deters cabbage white butterflies.
* Marigolds: Repel nematodes and other soil pests.
* Nasturtiums: Attract aphids away from cabbage plants.
* Garlic: Deters a variety of pests.
* Onions: Deters cabbage root flies.
How can I store harvested cabbage?
Harvested cabbage can be stored in the refrigerator for several weeks. Wrap the head tightly in plastic wrap or store it in a plastic bag to prevent it from drying out. You can also store cabbage in a root cellar or cool, dark place for several months. For longer-term storage, consider fermenting cabbage into sauerkraut or kimchi.
Can I grow cabbage from scraps?
While you can’t grow a full head of cabbage from scraps, you can regrow the root end to produce cabbage greens. Place the root end in a shallow dish of water, keeping the top exposed. Place the dish in a sunny location and change the water every few days. After a few weeks, the root end will start to sprout new leaves. You can then transplant the root end into a pot of soil and continue to grow it for a continuous supply of cabbage greens. This is a fun and easy way to reduce food waste and enjoy fresh greens from your easy cabbage garden.

Leave a Comment