

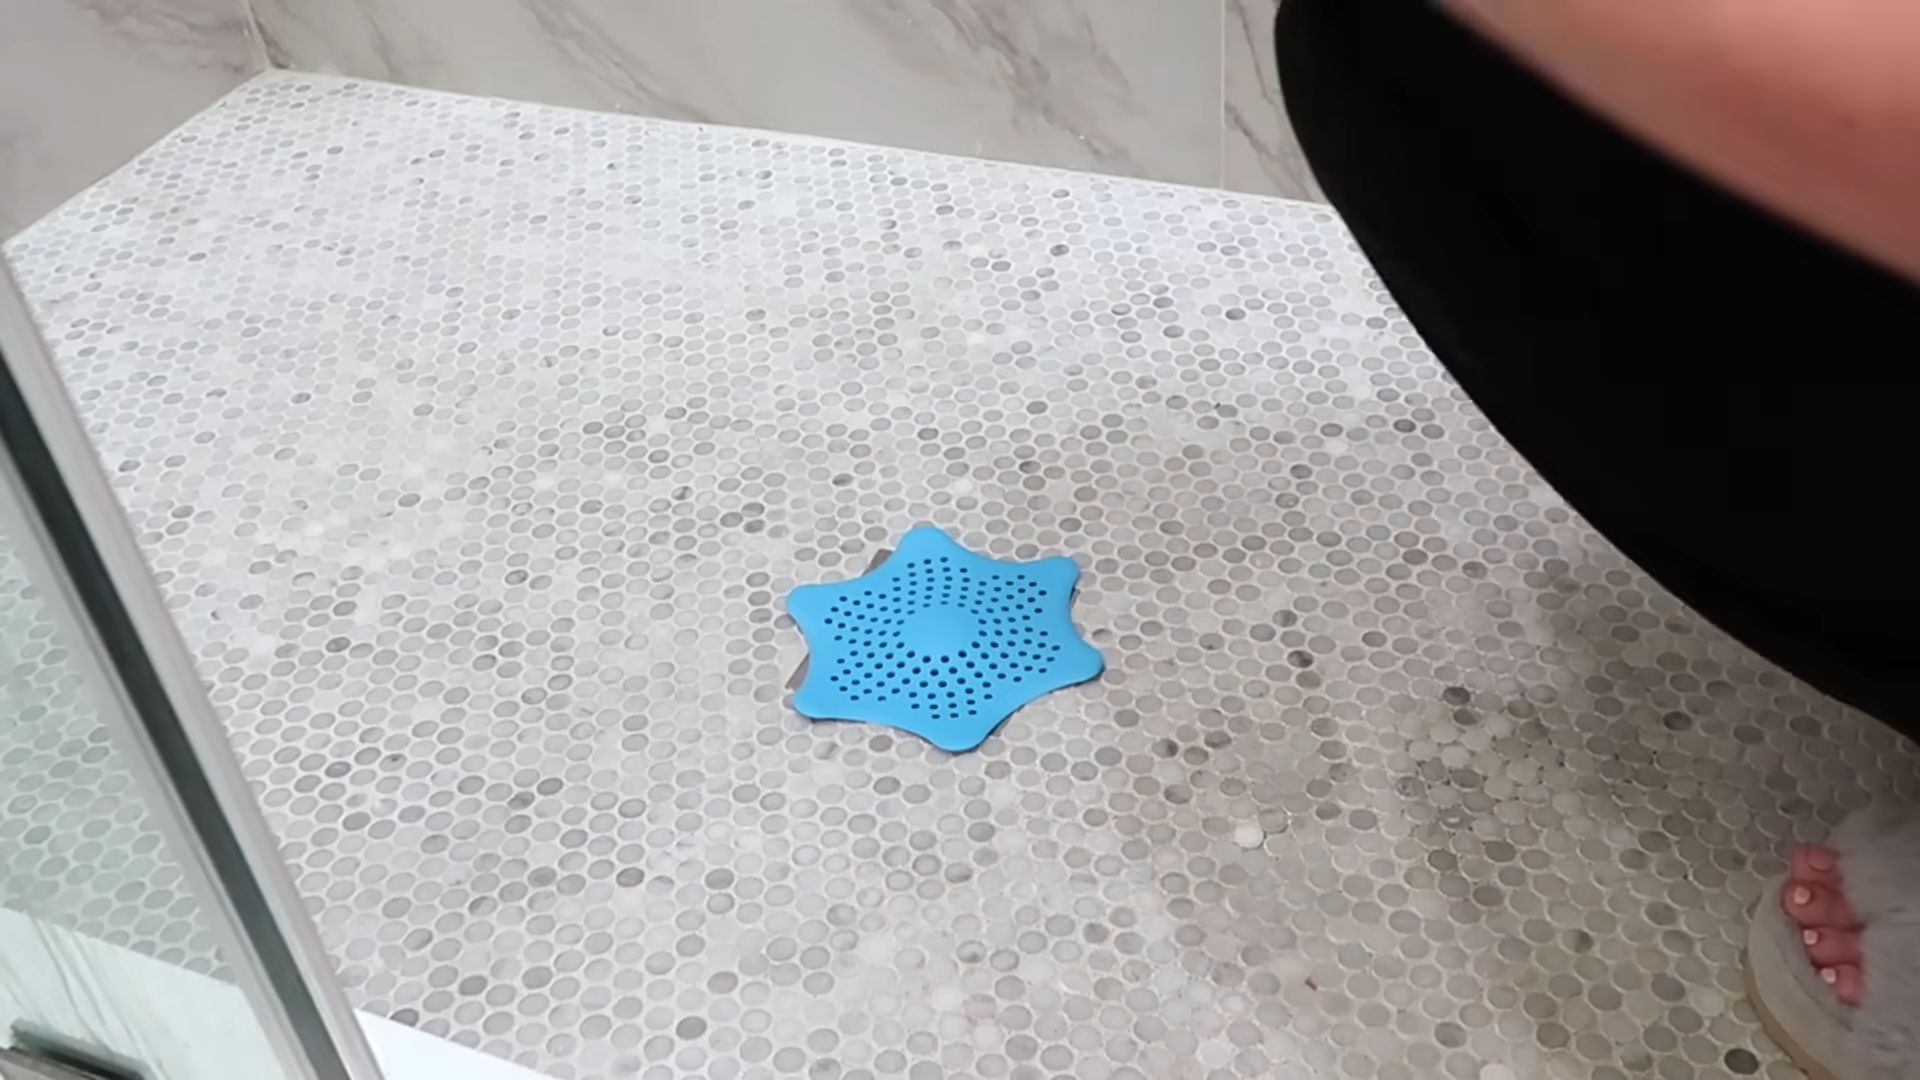
Drain Starfish DIY: Ever stared into your shower drain, a swirling vortex of despair, only to be met with the unwelcome sight of鈥air? And more hair? I know the feeling! It’s a common household woe, and let’s be honest, dealing with clogged drains is nobody’s idea of a good time. But fear not, fellow homeowners and renters, because I’m here to share a simple, effective, and surprisingly satisfying solution: the Drain Starfish DIY!
While the name might conjure images of marine biology gone wrong, the Drain Starfish is actually a clever little device designed to catch hair and debris before they wreak havoc on your plumbing. Think of it as a tiny, silent guardian protecting your pipes from the dreaded clog monster. The concept of preventing drain blockages has been around for ages, with various cultures employing everything from simple grates to elaborate filtration systems. But the beauty of the Drain Starfish lies in its simplicity and affordability.
Why do you need this DIY trick in your life? Because unclogging drains is messy, often requires harsh chemicals, and can be surprisingly expensive if you have to call a plumber. With a Drain Starfish DIY, you can proactively prevent these headaches, saving yourself time, money, and a whole lot of frustration. Plus, it’s a fantastic way to reduce your reliance on chemical drain cleaners, which are harmful to the environment. So, let’s dive in and learn how to create your own drain-saving superhero!
DIY Drain Starfish: Conquer Clogged Drains with Style!
Okay, friends, let’s talk about something we all dread: clogged drains. Hair, soap scum, mysterious gunk 鈥?it all adds up to a slow-draining, sometimes overflowing, nightmare. Store-bought drain cleaners are harsh and often ineffective, and calling a plumber can be expensive. So, what’s a DIY enthusiast to do? We’re going to make our own drain starfish! This little gadget will sit right in your drain and catch all that nasty stuff *before* it becomes a clog. And the best part? It’s super easy and cheap to make!
Materials You’ll Need:
Before we dive in, let’s gather our supplies. Don’t worry, you probably already have most of these lying around:
* **Plastic Canvas:** This is the key ingredient! You can find it at any craft store. Choose a color you like, or even clear if you want it to be discreet. I usually grab a few sheets because I end up making these for all the drains in my house.
* **Scissors:** A good, sharp pair of scissors will make cutting the plastic canvas much easier.
* **Needle-Nose Pliers (Optional but Recommended):** These are helpful for bending the “legs” of our starfish.
* **Ruler or Measuring Tape:** To ensure your starfish fits your drain perfectly.
* **Pencil or Marker:** For marking the plastic canvas.
* **Hot Glue Gun and Glue Sticks (Optional):** For extra reinforcement, especially if you’re using a thinner plastic canvas.
* **Small Beads or Buttons (Optional):** For decoration! Because why not make your drain starfish a little fancy?
Understanding Your Drain
Before we start cutting, let’s take a quick look at your drain. This will help us determine the best size and shape for our starfish.
* **Measure the Diameter:** Use your ruler or measuring tape to measure the inside diameter of your drain opening. This is crucial for making sure your starfish fits snugly but doesn’t get stuck.
* **Consider the Depth:** Think about how deep your drain is. You want the “legs” of the starfish to be long enough to catch debris but not so long that they interfere with the drainpipe.
* **Drain Type:** Is it a standard sink drain, a bathtub drain, or a shower drain? Bathtub drains often have a stopper mechanism, so you’ll need to design your starfish to avoid interfering with that.
Creating the Starfish Base
This is where the magic happens! We’ll start by creating the central part of our starfish.
1. **Cut a Circle:** Using your measurements, cut a circle out of the plastic canvas. The diameter of this circle should be slightly smaller than the diameter of your drain opening. I usually aim for about 1/4 inch smaller to allow for easy insertion and removal. To make a perfect circle, you can trace around a circular object like a glass or a small bowl.
2. **Mark the Center:** Find the center of your circle and mark it with your pencil or marker. This will be the point where we attach the “legs.”
3. **Create the Leg Slots:** Around the center point, cut small slits or holes in the plastic canvas. These will be where we insert the “legs” of our starfish. I usually make 5-8 slits, evenly spaced around the center. The size of the slits will depend on the thickness of your plastic canvas. You want them to be big enough to easily insert the “legs” but not so big that they become loose.
Crafting the Starfish Legs
Now for the fun part 鈥?creating the legs that will actually catch the hair and debris!
1. **Cut Strips of Plastic Canvas:** Cut several strips of plastic canvas. The length of these strips will determine the length of your starfish’s “legs.” Remember to consider the depth of your drain when deciding on the length. I usually cut them about 2-3 inches long. The width of the strips should be about 1/4 to 1/2 inch.
2. **Shape the Legs (Optional):** You can leave the strips as they are, or you can shape them slightly for better debris-catching ability. For example, you could taper the ends of the strips to a point, or you could create a slight curve in the middle.
3. **Insert the Legs:** Insert one end of each strip into the slits or holes you created in the center of the circle. Push them through until they are securely in place.
4. **Secure the Legs (Optional):** If you want to make your starfish extra durable, you can use a hot glue gun to secure the legs to the base. Apply a small dab of hot glue to the base of each leg, where it meets the circle. Be careful not to use too much glue, as you don’t want to block the drain holes.
Finishing Touches and Customization
Now that you have the basic starfish structure, let’s add some finishing touches and personalize it!
1. **Bend the Legs (Optional):** Using your needle-nose pliers (or your fingers), gently bend the “legs” of the starfish outward. This will help them catch more debris and prevent it from slipping past.
2. **Add Decorations (Optional):** If you’re feeling creative, you can add small beads or buttons to the ends of the “legs” for decoration. Simply thread the beads or buttons onto the ends of the strips and secure them with a small dab of hot glue.
3. **Trim Excess (If Necessary):** If any of the “legs” are too long or uneven, trim them with your scissors.
4. **Test the Fit:** Before you start using your drain starfish, test it in your drain to make sure it fits properly and doesn’t interfere with the drainpipe or stopper mechanism.
Using and Maintaining Your Drain Starfish
Congratulations! You’ve created your own drain starfish. Here’s how to use it and keep it working effectively:
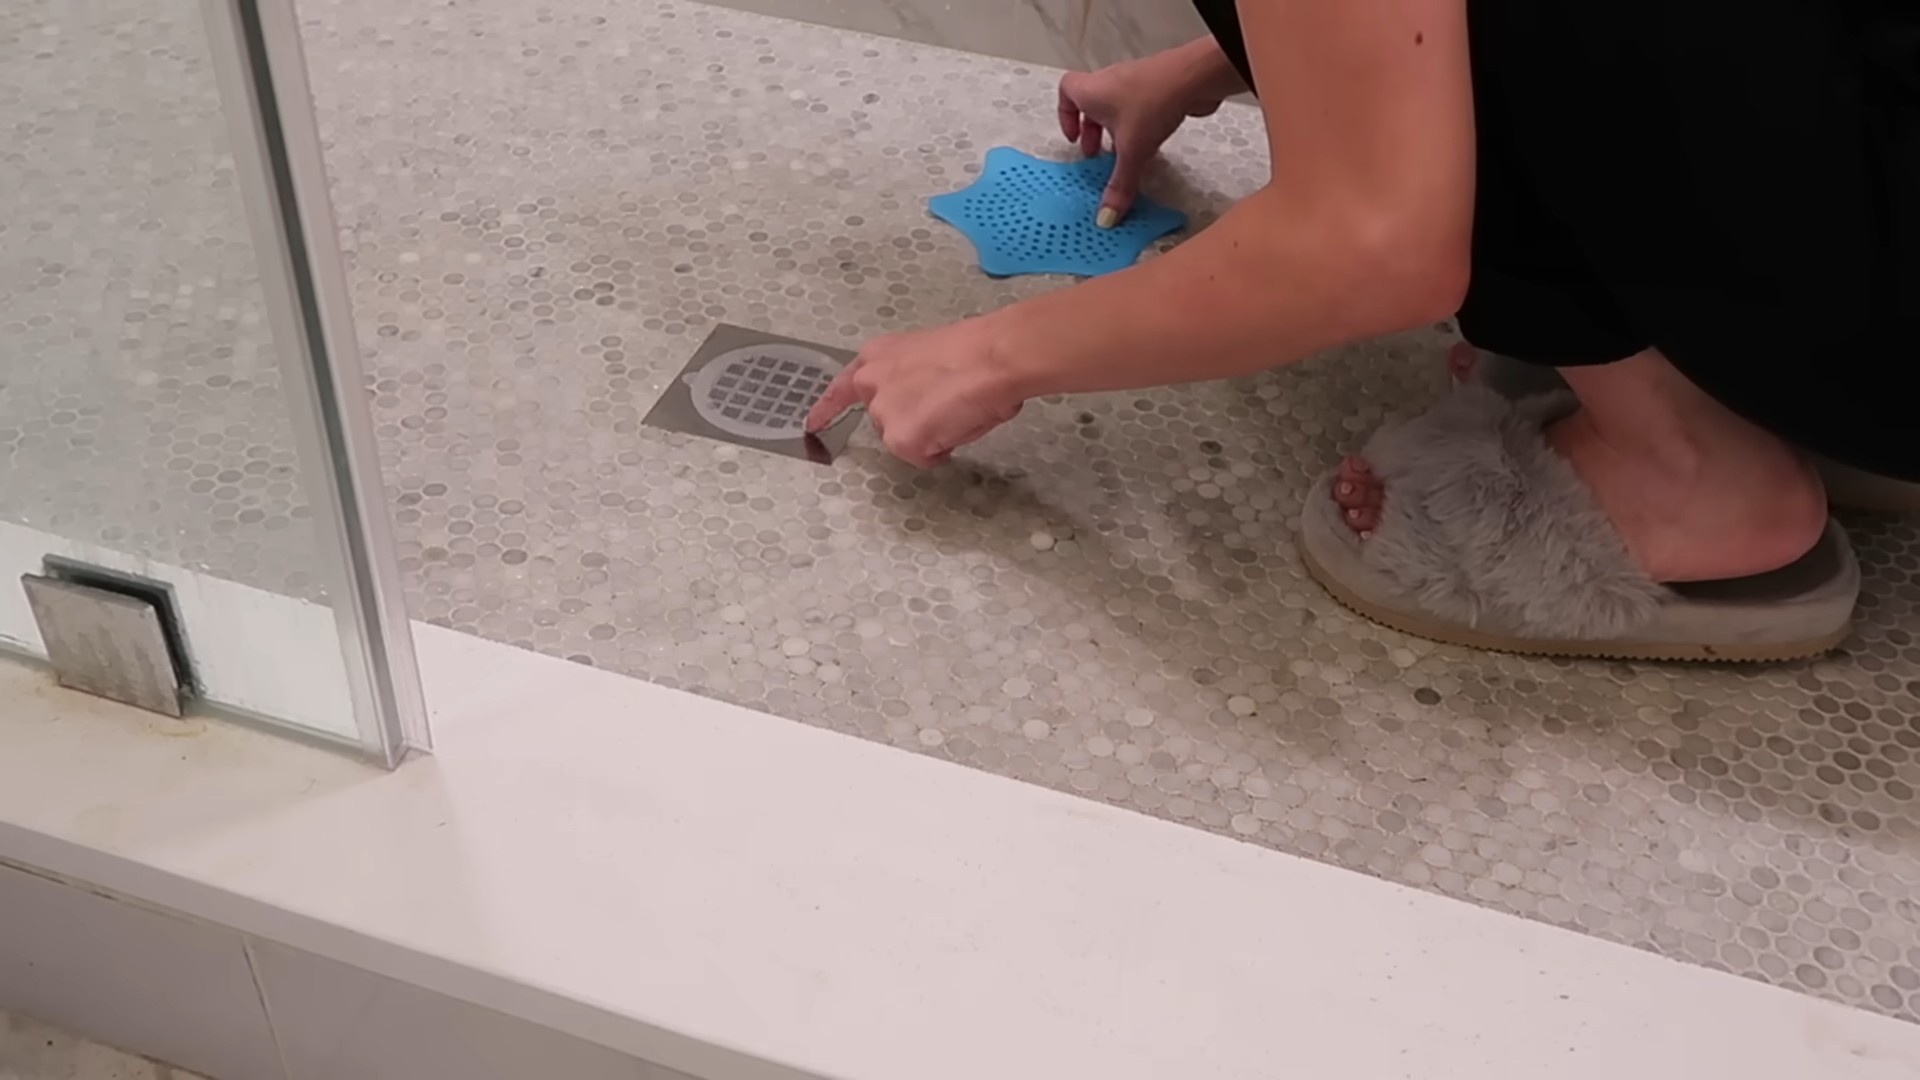
1. **Place in Drain:** Simply place the starfish in your drain opening. Make sure it sits securely and doesn’t wobble.
2. **Regular Cleaning:** The key to preventing clogs is to clean your drain starfish regularly. I usually clean mine once a week, but you may need to clean it more often depending on how much hair and debris accumulates in your drain.
3. **Cleaning Process:** To clean your starfish, simply remove it from the drain and rinse it under running water. Use your fingers or a small brush to remove any trapped hair or debris.
4. **Deep Cleaning (Occasionally):** Every few months, give your drain starfish a deep cleaning. Soak it in a solution of warm water and dish soap for about 30 minutes, then scrub it with a brush to remove any stubborn grime.
5. **Replacement:** Over time, your drain starfish may become worn or damaged. When this happens, simply make a new one! That’s the beauty of this DIY project 鈥?it’s so cheap and easy to replace.
Troubleshooting
Sometimes, things don’t go exactly as planned. Here are a few common issues you might encounter and how to fix them:
* **Starfish Doesn’t Fit:** If your starfish is too big, trim the edges of the circle until it fits comfortably in your drain. If it’s too small, you’ll need to make a new one with a larger circle.
* **Legs Are Too Short:** If the “legs” are too short to catch debris effectively, make new ones that are longer.
* **Legs Are Too Long:** If the “legs” are too long and interfere with the drainpipe, trim them with your scissors.
* **Starfish Gets Stuck:** If your starfish gets stuck in the drain, try gently wiggling it back and forth until it comes loose. If it’s really stuck, you may need to use a pair of pliers to carefully pull it out. To prevent this from happening in the future, make sure your starfish fits properly and doesn’t have any sharp edges that could catch on the drainpipe.
* **Starfish Doesn’t Catch Enough Debris:** If your starfish isn’t catching enough debris, try bending the “legs” outward more or adding more “legs” to the base. You could also try using a different type of plastic canvas with smaller holes.
Variations and Advanced Techniques
Once you’ve mastered the basic drain starfish, you can experiment with different variations and advanced techniques to customize it to your specific needs.
* **Different Shapes:** Instead of a circle, try using a square, triangle, or even a star shape for the base of your starfish.
* **Different Leg Materials:** Experiment with different materials for the “legs,” such as plastic zip ties, pipe cleaners, or even metal wire.
* **Multi-Layer Starfish:** Create a multi-layer starfish by stacking two or more plastic canvas circles on top of each other. This will create a more robust and effective debris-catching device.
* **Drain Stopper Integration:** If you have a drain with a stopper, you can design your starfish to integrate with the stopper mechanism. This will require some careful planning and precise
Conclusion
So, there you have it! This simple yet incredibly effective Drain Starfish DIY solution is more than just a quick fix; it’s a game-changer for maintaining a clean and clog-free drain. We’ve walked you through the easy steps, highlighted the benefits, and hopefully, convinced you that this is a must-try for every homeowner.
Why is this DIY trick a must-try? Because it’s cost-effective, eco-friendly, and incredibly efficient. Forget about harsh chemicals that damage your pipes and the environment. Forget about expensive plumbers for minor clogs. With a few readily available materials and a few minutes of your time, you can create a drain-clearing powerhouse that will keep your drains flowing smoothly. The Drain Starfish DIY method is a proactive approach to drain maintenance, preventing build-up and blockages before they even become a problem.
But the beauty of this DIY solution lies in its adaptability. Feel free to experiment with variations to suit your specific needs and preferences. For instance, if you find that the standard starfish design isn’t quite capturing all the debris, consider adding more “arms” or making them slightly longer. You could also try using different materials, such as thicker gauge wire for added durability, or even incorporating essential oils into the cleaning process for a refreshing scent.
Another variation to consider is the placement of your Drain Starfish. While it’s designed to sit just below the drain opening, you might find that positioning it slightly deeper or shallower yields better results depending on the design of your drain. Don’t be afraid to experiment and find what works best for you.
Perhaps you’re dealing with particularly stubborn grease build-up. In that case, you could pre-treat the drain with a mixture of baking soda and vinegar before inserting your Drain Starfish. The fizzing action will help to loosen the grease, making it easier for the starfish to capture and remove.
Or maybe you’re looking for a more aesthetically pleasing solution. You could try coating your Drain Starfish with a sealant or paint to match your bathroom or kitchen decor. Just be sure to use a non-toxic, waterproof sealant that won’t leach harmful chemicals into your water supply.
The possibilities are endless! The key is to embrace the DIY spirit and tailor this solution to your unique needs and preferences.
We are confident that once you try this Drain Starfish DIY trick, you’ll be amazed at how effective and easy it is. It’s a simple solution that can save you time, money, and a whole lot of frustration.
So, what are you waiting for? Gather your materials, follow the steps, and create your own drain-clearing masterpiece. And most importantly, we want to hear about your experience! Share your tips, variations, and success stories in the comments below. Let’s build a community of DIY enthusiasts who are committed to keeping their drains clean and clog-free. Your feedback will not only help others but also inspire us to continue creating innovative and helpful DIY solutions. Let’s conquer those drain clogs together!
Frequently Asked Questions (FAQ)
What exactly is a Drain Starfish and how does it work?
The Drain Starfish is a DIY drain cleaning tool designed to catch hair, food particles, and other debris before they can clog your drain. It’s typically made from flexible material, shaped like a starfish with multiple “arms” that extend into the drain. As water flows down the drain, the debris gets caught on the arms of the starfish, preventing it from accumulating further down the pipe and causing a blockage. Periodically, you simply remove the starfish, clean off the collected debris, and replace it. It’s a simple, proactive way to maintain a clean and free-flowing drain.
What materials do I need to make a Drain Starfish?
The beauty of this DIY project is that it requires minimal and readily available materials. The most common materials include:
* Flexible wire (such as floral wire or craft wire): This forms the structure of the starfish. Choose a wire that is sturdy enough to hold its shape but flexible enough to bend easily.
* Scissors or wire cutters: For cutting the wire to the desired length.
* Pliers (optional): For bending and shaping the wire more precisely.
* Optional: Beads, plastic charms, or other decorative elements to add weight or visual appeal.
You can also experiment with other materials, such as plastic zip ties or even repurposed plastic containers, as long as they are flexible, durable, and safe for use in drains.
How often should I clean my Drain Starfish?
The frequency of cleaning depends on how often you use your drain and how much debris typically accumulates. As a general guideline, we recommend checking and cleaning your Drain Starfish at least once a week. However, if you notice that it’s becoming heavily clogged with debris more quickly, you may need to clean it more frequently. Regular cleaning is essential to maintain its effectiveness and prevent the debris from breaking down and causing a clog further down the drain.
Will the Drain Starfish damage my pipes?
When made and used correctly, the Drain Starfish should not damage your pipes. However, it’s important to use flexible materials that won’t scratch or scrape the inside of your pipes. Avoid using sharp or abrasive materials that could potentially cause damage. Also, be gentle when inserting and removing the starfish to avoid snagging or pulling on the pipes. If you have any concerns about the compatibility of the Drain Starfish with your specific plumbing system, it’s always best to consult with a qualified plumber.
Can I use this Drain Starfish in all types of drains?
The Drain Starfish is generally suitable for most standard bathroom and kitchen drains. However, it may not be appropriate for drains with unusual shapes or sizes, or for drains that have a built-in stopper or strainer. Before using the Drain Starfish, make sure that it fits comfortably in your drain without obstructing the flow of water or interfering with any existing drain components. If you’re unsure whether the Drain Starfish is suitable for your drain, it’s best to err on the side of caution and consult with a plumber.
What if my drain is already clogged? Will the Drain Starfish help?
The Drain Starfish is primarily designed as a preventative measure to prevent clogs from forming in the first place. If your drain is already severely clogged, the Drain Starfish may not be able to effectively clear the blockage. In this case, you may need to use other methods to clear the clog, such as a plunger, drain snake, or chemical drain cleaner. Once the clog is cleared, you can then use the Drain Starfish to prevent future clogs from forming.
Is the Drain Starfish safe for septic systems?
In general, the Drain Starfish is safe for septic systems, as it helps to prevent solid debris from entering the system. However, it’s important to avoid using harsh chemicals or cleaning agents when cleaning the Drain Starfish, as these can harm the beneficial bacteria in your septic tank. Instead, use mild soap and water to clean the starfish. If you have any concerns about the compatibility of the Drain Starfish with your septic system, it’s always best to consult with a septic system professional.
How do I dispose of a used Drain Starfish?
When your Drain Starfish becomes worn or damaged, you can simply dispose of it in the trash. If you’ve used biodegradable materials, you may be able to compost it. However, it’s important to remove any non-biodegradable components, such as metal wire, before composting.
Can I make a larger or smaller Drain Starfish?
Absolutely! The size of your Drain Starfish should be tailored to the size of your drain. For smaller drains, you’ll want to create a smaller starfish with shorter arms. For larger drains, you can make a larger starfish with longer arms. Just make sure that the starfish fits comfortably in your drain without obstructing the flow of water.
My Drain Starfish keeps getting dislodged. What can I do?
If your Drain Starfish keeps getting dislodged, there are a few things you can try. First, make sure that the arms of the starfish are long enough to grip the sides of the drain. You can also try adding weight to the starfish by attaching beads or plastic charms to the ends of the arms. This will help to keep it in place. Another option is to use a stronger or more rigid material for the starfish, such as thicker gauge wire. Finally, make sure that the drain is clean and free of any obstructions that could be dislodging the starfish.
Leave a Comment