

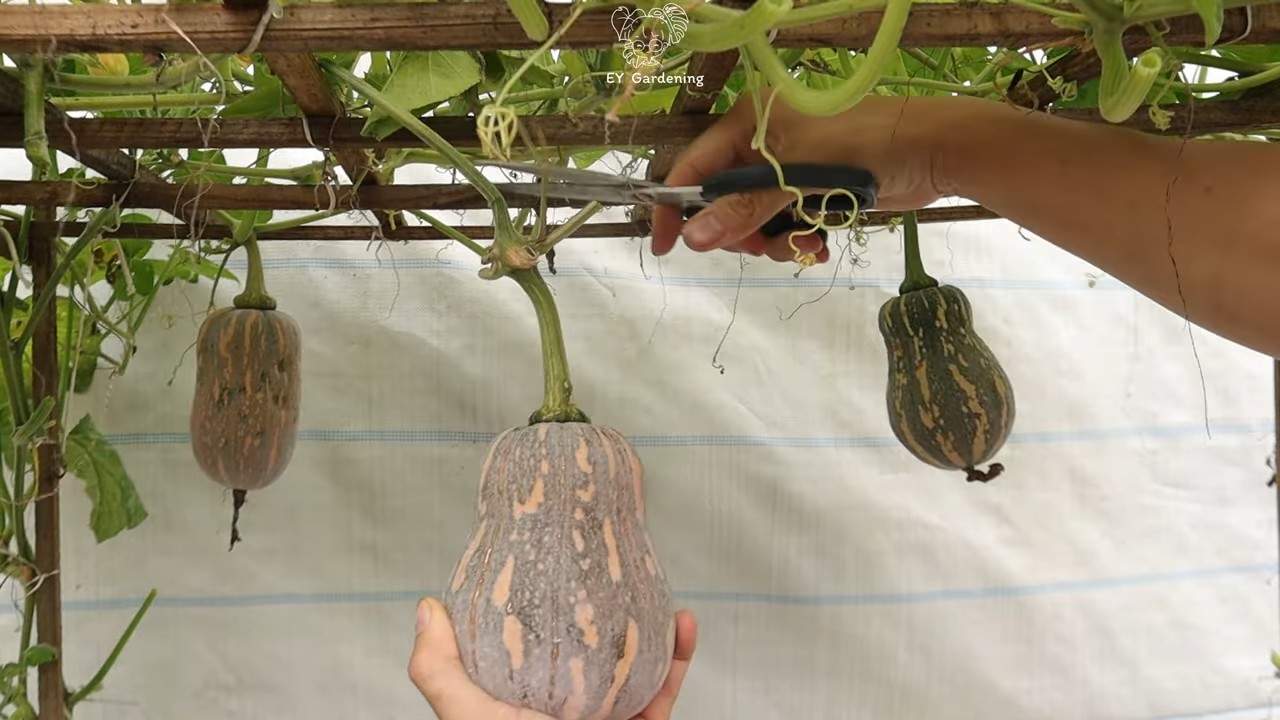
DIY drip system for pumpkins: Imagine plump, vibrant pumpkins gracing your garden this fall, a testament to your green thumb and a source of pride for the whole neighborhood! But let’s be honest, keeping those thirsty gourds adequately watered can feel like a full-time job, especially during the scorching summer months. That’s where a clever DIY solution comes in handy.
For centuries, gardeners have sought innovative ways to optimize water usage, from ancient irrigation canals to modern sprinkler systems. The concept of delivering water directly to the plant’s roots, minimizing waste and maximizing absorption, is a time-honored tradition. Now, we’re bringing that wisdom to your pumpkin patch with a simple, affordable, and incredibly effective DIY drip system for pumpkins.
Why do you need this? Well, inconsistent watering can lead to stunted growth, blossom end rot, and a generally unhappy pumpkin. Nobody wants that! This DIY project not only saves you time and effort but also ensures your pumpkins receive the consistent hydration they need to thrive. Plus, it’s a fantastic way to reduce water waste and be more eco-conscious in your gardening practices. I’m excited to share this easy-to-follow guide that will have you harvesting prize-winning pumpkins in no time!
DIY Drip Irrigation System for Your Prize-Winning Pumpkins
Okay, pumpkin enthusiasts, let’s talk about growing those giant gourds! One of the biggest secrets to success is consistent watering, and that’s where a DIY drip irrigation system comes in. Forget hauling buckets – we’re going to build a system that delivers water directly to the roots, keeping your pumpkins happy and hydrated. This project is totally doable, even if you’re not a plumbing pro. I promise!
Materials You’ll Need
Before we dive in, let’s gather our supplies. Here’s what you’ll need:
* Main Water Line: ½-inch or ¾-inch polyethylene tubing (poly tubing). The length will depend on the distance from your water source to your pumpkin patch. Measure carefully!
* Drip Line Tubing: ¼-inch drip line tubing. This is the smaller tubing that will actually deliver the water to your plants. Again, measure the length you’ll need based on the number of pumpkin plants you have and their spacing.
* Drip Emitters: These regulate the flow of water. Choose emitters with a flow rate that suits your soil type and pumpkin’s water needs (e.g., 1 gallon per hour, 2 gallons per hour). I usually go with 1 GPH for my clay-ish soil.
* Connectors:
* Main Line Connectors: These connect your main water line to your water source (usually a hose bib). You’ll need a connector that fits your hose bib size.
* T-Connectors: These connect the ¼-inch drip line tubing to the ½-inch or ¾-inch main line.
* Elbow Connectors: These are useful for making turns with your main line.
* End Caps: These seal off the ends of your main line.
* Hole Punch: Specifically designed for punching holes in poly tubing. Trust me, you’ll want this. Trying to use a knife is a recipe for disaster.
* Timer (Optional but Recommended): A timer will automate your watering schedule, ensuring consistent hydration even when you’re away. I highly recommend investing in one!
* Pressure Regulator (Optional but Recommended): This helps maintain a consistent water pressure, preventing damage to your drip system and ensuring even water distribution. Especially important if your water pressure is high.
* Filter (Optional but Recommended): A filter will prevent debris from clogging your drip emitters. This will save you a lot of headaches down the road.
* Stakes or Anchors: To secure the tubing in place and prevent it from moving around.
* Measuring Tape: For accurate measurements.
* Scissors or Tubing Cutter: For cutting the tubing.
* Gloves: To protect your hands.
Planning Your Drip System Layout
Before you start cutting and connecting, it’s crucial to plan your layout. This will save you time and frustration in the long run.
* Assess Your Pumpkin Patch: Determine the number of plants you need to water and their spacing. Pumpkins need a lot of space, so factor that in.
* Map Out Your Main Line: Decide where your main line will run. It should be close to your water source and easily accessible to all your plants.
* Plan Your Drip Line Placement: Determine where you’ll place the drip lines around each plant. I like to create a small loop around the base of each pumpkin plant, ensuring even watering.
* Calculate Tubing Lengths: Measure the lengths of tubing you’ll need for the main line and each drip line. Add a little extra to account for mistakes or adjustments.
Building Your Drip Irrigation System: Step-by-Step
Alright, let’s get our hands dirty! Here’s how to build your DIY drip irrigation system:
1. Connect to Your Water Source: Attach the main line connector to your hose bib. Make sure it’s securely tightened to prevent leaks. I like to use Teflon tape on the threads for extra security.
2. Lay Out the Main Line: Unroll the main line tubing and lay it out along your planned route. Use stakes or anchors to secure it in place. This will prevent it from kinking or moving around.
3. Install the Pressure Regulator and Filter (Optional): If you’re using a pressure regulator and filter, install them in line with the main line, following the manufacturer’s instructions. They usually go right after the connection to the water source.
4. Punch Holes for T-Connectors: Using the hole punch, create holes in the main line where you want to connect the ¼-inch drip line tubing. Space the holes according to your plant spacing. Make sure the holes are clean and free of debris.
5. Insert T-Connectors: Insert the T-connectors into the holes you just punched. Make sure they’re securely seated. Sometimes, they can be a little tough to push in, so use a little elbow grease!
6. Attach Drip Line Tubing: Cut the ¼-inch drip line tubing to the desired lengths and attach them to the T-connectors. Run the drip line tubing to each pumpkin plant.
7. Install Drip Emitters: Insert the drip emitters into the ends of the ¼-inch drip line tubing, near the base of each pumpkin plant. Make sure the emitters are securely in place.
8. Create Loops (Optional): If you want to create loops around the base of each plant, connect the ends of the drip line tubing back to the T-connector using a small connector. This will provide more even watering.
9. Cap the End of the Main Line: Attach an end cap to the end of the main line to seal it off. This will prevent water from leaking out.
10. Test Your System: Turn on the water and check for leaks. Adjust the drip emitters as needed to ensure each plant is receiving the correct amount of water. Watch the water flow and make sure it’s consistent.
11. Set Your Timer (Optional): If you’re using a timer, program it to water your pumpkins according to your desired schedule. I usually water mine early in the morning to minimize evaporation.
Fine-Tuning and Maintenance
Once your system is up and running, it’s important to fine-tune it and perform regular maintenance to ensure it’s working properly.
* Adjust Emitter Flow Rates: Monitor your plants and adjust the emitter flow rates as needed. If your plants are wilting, they may need more water. If the soil is constantly soggy, they may need less.
* Check for Leaks: Regularly inspect your system for leaks and repair them promptly. Even small leaks can waste a lot of water.
* Clean Emitters: Periodically clean your drip emitters to remove any debris that may be clogging them. You can usually do this by soaking them in vinegar or using a small brush.
* Flush the System: Occasionally flush the entire system to remove any sediment or algae that may have accumulated. You can do this by removing the end cap and letting the water run for a few minutes.
* Winterize Your System: If you live in an area with freezing temperatures, you’ll need to winterize your system to prevent damage. Disconnect the system from the water source, drain all the water from the tubing, and store the components in a frost-free location.
Troubleshooting Common Problems
Even with careful planning and installation, you may encounter some problems with your drip irrigation system. Here are some common issues and how to fix them:
* Clogged Emitters: This is a common problem, especially if you have hard water or a lot of debris in your water. Clean the emitters as described above. You may also need to install a filter to prevent future clogging.
* Low Water Pressure: This can be caused by a variety of factors, such as a kink in the tubing, a clogged filter, or low water pressure from your water source. Check for kinks in the tubing and clean the filter. If your water pressure is consistently low, you may need to install a pressure booster.
* Leaks: Leaks can occur at the connections between the tubing and the connectors. Make sure the connections are tight and secure. You may also need to replace any damaged connectors.
* Uneven Water Distribution: This can be caused by clogged emitters, variations in water pressure, or differences in elevation. Clean the emitters, check the water pressure, and adjust the emitter flow rates as needed.
Benefits of a Drip Irrigation System for Pumpkins
Why go through all this trouble? Well, a drip irrigation system offers several benefits for growing pumpkins:
* Water Conservation: Drip irrigation delivers water directly to the roots of the plants, minimizing water waste through evaporation and runoff.
* Improved Plant Health: Consistent watering promotes healthy growth and reduces the risk of diseases.
* Reduced Weed Growth: By delivering water directly to the plants, drip irrigation helps
Conclusion
So, there you have it! Creating your own DIY drip system for pumpkins is not just a fun project; it’s a game-changer for your pumpkin patch. Forget the daily watering grind and say hello to thriving, healthy pumpkins that will be the envy of the neighborhood. This simple, cost-effective method delivers water directly to the roots, minimizing water waste and maximizing growth potential.
Why is this a must-try? Because it’s efficient, eco-friendly, and incredibly rewarding. Imagine watching your pumpkin plants flourish, knowing you’ve provided them with the perfect amount of hydration without lifting a heavy watering can every day. The consistent moisture provided by a drip system prevents the common issues of overwatering and underwatering, leading to stronger plants and bigger, more vibrant pumpkins. Plus, it reduces the risk of fungal diseases that can plague pumpkins when their leaves are constantly wet.
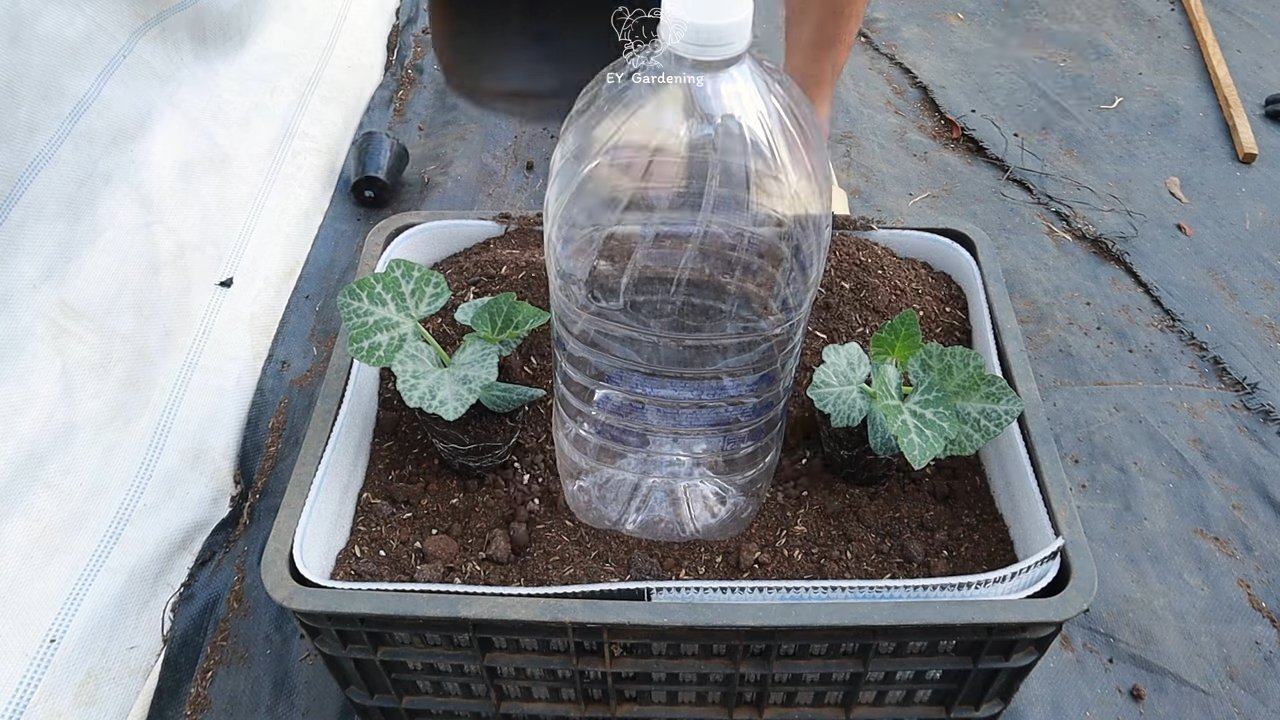
But the beauty of this DIY project lies in its adaptability. Feel free to experiment with different container sizes for your water reservoir, depending on the number of plants you’re watering and the frequency you want to refill it. You can also adjust the drip rate by using different sized needles or adjusting the height of the water reservoir. Consider adding a timer to your system for even greater automation, ensuring your pumpkins receive water at optimal times, even when you’re away.
For those looking to take it a step further, consider incorporating a nutrient solution into your water reservoir. A diluted liquid fertilizer can be added to the water, providing your pumpkins with a constant stream of essential nutrients for even more impressive growth. Just be sure to monitor your plants closely and adjust the fertilizer concentration as needed.
Don’t be afraid to get creative with your setup. Use recycled materials whenever possible to make your system even more sustainable. Old plastic bottles, buckets, or even repurposed garden hoses can all be incorporated into your DIY drip system. The possibilities are endless!
We wholeheartedly encourage you to give this DIY drip system for pumpkins a try. It’s a simple project that yields incredible results. Not only will you save time and water, but you’ll also be rewarded with a bountiful harvest of beautiful pumpkins.
Once you’ve built your system and seen the magic happen, we’d love to hear about your experience! Share your photos, tips, and variations in the comments below. Let’s create a community of pumpkin-growing enthusiasts and help each other cultivate the best pumpkins possible. Happy growing!
Frequently Asked Questions (FAQ)
What are the benefits of using a DIY drip system for pumpkins compared to traditional watering methods?
A DIY drip system offers several advantages over traditional watering. Firstly, it’s far more efficient. It delivers water directly to the roots, minimizing water loss through evaporation and runoff. This means you use less water overall, which is both environmentally friendly and cost-effective. Secondly, it promotes healthier plant growth. Consistent moisture levels prevent the stress caused by overwatering or underwatering, leading to stronger, more resilient plants. Thirdly, it reduces the risk of fungal diseases. By keeping the foliage dry, a drip system minimizes the conditions that favor fungal growth. Finally, it saves you time and effort. Once the system is set up, you can automate the watering process, freeing you from the daily chore of hand-watering.
How often should I refill the water reservoir for my DIY drip system?
The frequency of refilling depends on several factors, including the size of your reservoir, the drip rate, the weather conditions, and the size of your pumpkin plants. Start by monitoring the water level in your reservoir daily. If the reservoir is emptying quickly, you may need to increase its size or reduce the drip rate. During hot, dry weather, you’ll likely need to refill more frequently than during cooler, wetter periods. As your pumpkin plants grow larger, they’ll require more water, so you may need to adjust your refilling schedule accordingly. A good rule of thumb is to check the soil moisture around your plants regularly. If the soil feels dry to the touch, it’s time to refill the reservoir.
Can I use any type of container for the water reservoir?
While you can use various containers, some are better suited than others. Opt for containers made of food-grade plastic to avoid leaching harmful chemicals into the water. Dark-colored containers are preferable as they help to prevent algae growth. Make sure the container is clean and free of any residues before using it. Consider the size of the container based on the number of plants you’re watering and the frequency you want to refill it. A container with a wide opening will make refilling easier. Avoid using containers that have previously held toxic substances.
What size needle should I use for the drip emitters?
The size of the needle will determine the drip rate. Smaller needles will result in a slower drip, while larger needles will produce a faster drip. Start with a small needle and observe the soil moisture around your plants. If the soil is consistently dry, you may need to increase the needle size. You can also adjust the drip rate by raising or lowering the water reservoir. A higher reservoir will increase the water pressure and result in a faster drip. Experiment with different needle sizes and reservoir heights until you find the optimal drip rate for your plants.
Can I add fertilizer to the water in my DIY drip system?
Yes, you can add fertilizer to the water, but it’s crucial to do so carefully. Use a diluted liquid fertilizer specifically formulated for pumpkins. Follow the instructions on the fertilizer label and start with a lower concentration than recommended. Monitor your plants closely for any signs of over-fertilization, such as leaf burn or stunted growth. If you notice any of these symptoms, reduce the fertilizer concentration or discontinue its use altogether. It’s generally best to fertilize less frequently and at a lower concentration than to over-fertilize. Consider using a slow-release fertilizer in addition to the liquid fertilizer for a more balanced nutrient supply.
How do I prevent algae growth in my water reservoir?
Algae growth can clog your drip emitters and reduce the efficiency of your system. To prevent algae growth, use a dark-colored container for your water reservoir. This will block sunlight, which is essential for algae growth. You can also add a small amount of hydrogen peroxide to the water to kill algae. Use a concentration of about 1 tablespoon of 3% hydrogen peroxide per gallon of water. Be careful not to use too much hydrogen peroxide, as it can harm your plants. Regularly clean your water reservoir to remove any algae buildup.
What if my drip emitters get clogged?
Clogged drip emitters are a common problem, especially if you’re using unfiltered water or adding fertilizer to the water. To unclog a drip emitter, try soaking it in vinegar or lemon juice. You can also use a small needle or wire to clear any debris from the emitter. If the emitter is severely clogged, you may need to replace it. To prevent clogging, use filtered water in your system and clean your water reservoir regularly.
How do I protect my DIY drip system from freezing temperatures?
Freezing temperatures can damage your drip system, causing the water reservoir to crack and the emitters to break. If you live in an area with freezing temperatures, you’ll need to take steps to protect your system. Disconnect the system and drain all the water from the reservoir and tubing. Store the components in a frost-free location, such as a garage or shed. You can also insulate the water reservoir with blankets or insulation to prevent it from freezing.
Can I use this DIY drip system for other plants besides pumpkins?
Absolutely! This DIY drip system is versatile and can be used for a wide variety of plants, including vegetables, flowers, and herbs. The principles are the same: deliver water directly to the roots, minimize water waste, and promote healthy plant growth. You may need to adjust the drip rate and refilling frequency depending on the specific needs of the plants you’re watering.

Leave a Comment