

DIY Counter Cleaner: Are you tired of battling stubborn stains and lingering odors on your kitchen counters? Do you cringe at the thought of harsh chemicals seeping into your food preparation surfaces? I know I do! For generations, resourceful homemakers have sought natural and effective ways to keep their homes sparkling, and the quest for the perfect counter cleaner is a tale as old as time. From ancient civilizations using vinegar and herbs to modern-day eco-conscious consumers, the desire for a safe and powerful cleaning solution remains constant.
But why spend a fortune on store-bought cleaners packed with questionable ingredients when you can whip up your own amazing DIY counter cleaner with items you probably already have in your pantry? Not only is it incredibly cost-effective, but you’ll also have complete control over what goes into your cleaning solution, ensuring a healthier and safer environment for you and your family. In this article, I’m going to share my favorite DIY counter cleaner recipe, along with some handy tips and tricks to tackle even the toughest messes. Get ready to say goodbye to harsh chemicals and hello to a sparkling clean kitchen, naturally!

DIY Counter Cleaner: Sparkling Clean Without the Harsh Chemicals!
Hey everyone! I’m so excited to share my go-to recipe for a DIY counter cleaner that’s not only incredibly effective but also super gentle on your surfaces and the environment. I’ve been using this for years, and I swear, my counters have never looked better. Plus, knowing exactly what’s in my cleaning products gives me serious peace of mind. Let’s get started!
What You’ll Need: The Essential Ingredients
Before we dive into the mixing, let’s gather our supplies. This recipe is incredibly simple, and you probably already have most of these items in your pantry!
* Spray Bottle: A clean, empty spray bottle is a must. I prefer a 16-ounce bottle, but anything similar will work. Make sure it’s properly cleaned and dried before using.
* White Vinegar: This is the star of our show! White vinegar is a fantastic natural disinfectant and degreaser.
* Water: Distilled water is best to avoid mineral buildup, but tap water works just fine too.
* Rubbing Alcohol (Isopropyl Alcohol): This helps to cut through grease and grime, and it also aids in quick drying, preventing streaks.
* Essential Oils (Optional): These are purely for fragrance, but they can also add some extra cleaning power. I love using lemon, tea tree, or lavender.
* Measuring Cups and Spoons: For accurate measurements, grab your measuring cups and spoons.
* Funnel (Optional): A funnel can make pouring liquids into the spray bottle much easier and less messy.
The Recipe: Mixing Your Magic Cleaner
Okay, now for the fun part! This recipe is super easy to follow, and you can adjust the essential oils to your liking.
1. Prepare Your Spray Bottle: Make sure your spray bottle is clean and dry. This will prevent any unwanted contamination or dilution of your cleaner.
2. Add White Vinegar: Pour 1/2 cup of white vinegar into the spray bottle. Vinegar is a natural disinfectant and helps to remove grime and hard water stains.
3. Add Rubbing Alcohol: Next, add 1/4 cup of rubbing alcohol (isopropyl alcohol) to the spray bottle. This will help to cut through grease and allow the cleaner to dry quickly without leaving streaks.
4. Add Water: Now, fill the rest of the spray bottle with water, leaving a little space at the top. This will dilute the vinegar and alcohol to a safe and effective concentration.
5. Add Essential Oils (Optional): If you’re using essential oils, add about 10-20 drops of your favorite scent. I personally love lemon for its fresh, clean smell and its added degreasing properties. Tea tree oil is great for its antibacterial properties, and lavender adds a calming aroma.
6. Shake Well: Secure the spray nozzle onto the bottle and shake well to combine all the ingredients. Make sure everything is thoroughly mixed for optimal cleaning power.
Using Your DIY Counter Cleaner: A Step-by-Step Guide
Now that you’ve created your amazing DIY counter cleaner, let’s put it to work!
1. Spray the Surface: Lightly spray the counter surface with your cleaner. You don’t need to saturate the area; a light mist is sufficient.
2. Let it Sit (Optional): For tougher stains or grime, let the cleaner sit on the surface for a minute or two. This will give the vinegar and alcohol time to break down the dirt and grease.
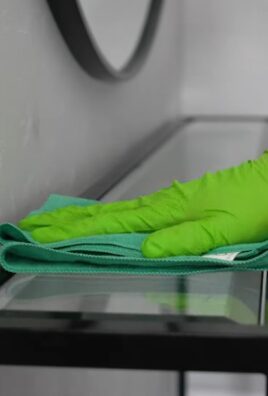
3. Wipe Clean: Use a clean microfiber cloth to wipe the surface clean. Microfiber cloths are excellent for picking up dirt and grime without leaving streaks.
4. Dry (If Necessary): In most cases, the cleaner will dry quickly on its own. However, if you notice any streaks or dampness, you can use a dry microfiber cloth to buff the surface.
Where to Use Your DIY Counter Cleaner: Versatility is Key!
One of the best things about this cleaner is how versatile it is. I use it on a variety of surfaces throughout my home.
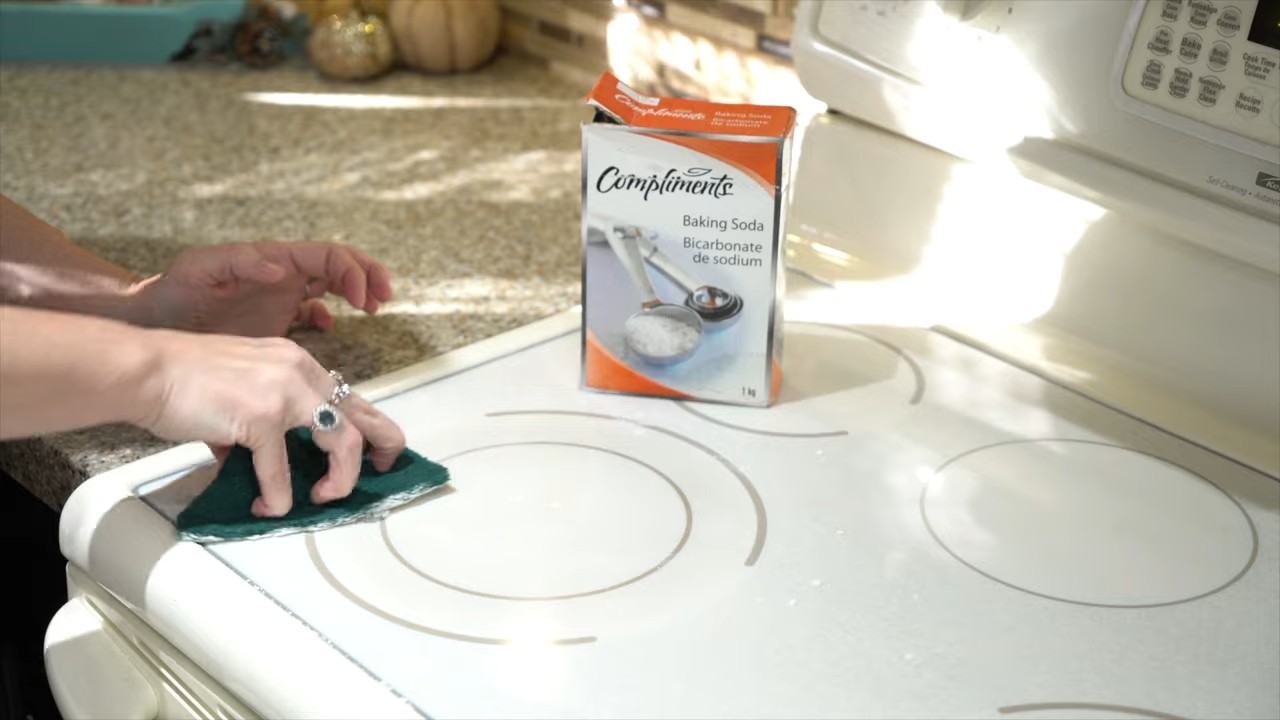
* Kitchen Counters: This is where I use it the most! It’s perfect for cleaning up spills, grease splatters, and food residue. It works great on granite, laminate, tile, and even sealed wood counters. Always test in an inconspicuous area first, especially on natural stone.
* Bathroom Counters: It’s also fantastic for cleaning bathroom counters, removing toothpaste splatters, and soap scum.
* Sinks: I use it to clean my kitchen and bathroom sinks, leaving them sparkling and fresh.
* Appliances: You can use it to wipe down the exterior of your appliances, such as your refrigerator, microwave, and dishwasher.
* Other Surfaces: I’ve even used it on my dining table, coffee table, and other hard surfaces.
Important Considerations: Safety First!
While this cleaner is generally safe, there are a few things to keep in mind:
* Test on an Inconspicuous Area: Before using the cleaner on a large surface, always test it on a small, inconspicuous area first to ensure it doesn’t damage or discolor the material. This is especially important for natural stone surfaces like marble or granite.
* Avoid Porous Surfaces: Avoid using this cleaner on porous surfaces like unsealed grout or unfinished wood, as it can seep into the material and cause damage.
* Don’t Mix with Bleach: Never mix this cleaner with bleach, as it can create harmful fumes.
* Keep Out of Reach of Children and Pets: As with all cleaning products, keep this cleaner out of reach of children and pets.
* Ventilation: Ensure adequate ventilation when using the cleaner, especially in enclosed spaces.
Troubleshooting: Common Issues and Solutions
Sometimes, things don’t go exactly as planned. Here are a few common issues you might encounter and how to fix them:
* Streaky Surfaces: If you’re experiencing streaks, try using a clean, dry microfiber cloth to buff the surface after wiping. You can also try reducing the amount of rubbing alcohol in the recipe.
* Strong Vinegar Smell: The vinegar smell will dissipate quickly, but if you find it too strong, you can add more essential oils or reduce the amount of vinegar in the recipe.
* Cloudy Cleaner: If your cleaner appears cloudy, it could be due to hard water. Try using distilled water instead.
* Residue: If you notice a residue on your surfaces, it could be due to using too much cleaner. Try using less cleaner and wiping the surface with a damp cloth after cleaning.
Essential Oil Blends: Experiment with Scents!
One of the best things about making your own cleaner is that you can customize the scent to your liking. Here are a few of my favorite essential oil blends:
* Lemon & Tea Tree: This blend is perfect for disinfecting and degreasing. The lemon adds a fresh, clean scent, while the tea tree oil provides antibacterial properties.
* Lavender & Eucalyptus: This blend is calming and refreshing. The lavender adds a soothing aroma, while the eucalyptus provides a clean, invigorating scent.
* Orange & Cinnamon: This blend is warm and inviting. The orange adds a bright, citrusy scent, while the cinnamon provides a cozy, spicy aroma.
* Peppermint & Rosemary: This blend is energizing and uplifting. The peppermint adds a cool, refreshing scent, while the rosemary provides a stimulating aroma.
Why I Love This DIY Cleaner: My Personal Testimony
I’ve been using this DIY counter cleaner for years, and I can honestly say that it’s one of the best cleaning products I’ve ever used. Not only is it incredibly effective at cleaning and disinfecting my counters, but it’s also safe for my family and the environment. I love knowing exactly what’s in my cleaning products, and I appreciate that this cleaner is made with simple, natural ingredients. Plus, it’s so much cheaper than buying store-bought cleaners!
I hope you enjoy this DIY counter cleaner as much as I do! Happy cleaning!
Conclusion
So, there you have it! Ditching those expensive, chemical-laden store-bought cleaners and embracing this simple, effective, and eco-friendly DIY counter cleaner is a game-changer for your home. We’ve walked you through the easy steps, highlighted the benefits, and hopefully, convinced you that a sparkling clean kitchen doesn’t require a trip to the cleaning aisle and a hefty bill.
But why is this DIY trick a must-try? Beyond the cost savings, you’re gaining control over the ingredients that come into contact with your food preparation surfaces. You know exactly what’s in your cleaner – no hidden chemicals, no harsh fumes, just natural ingredients working their magic. This is especially important for families with young children or pets who are more susceptible to the effects of harsh chemicals. Plus, you’re contributing to a more sustainable lifestyle by reducing plastic waste and minimizing your environmental footprint. Every little bit helps!
The beauty of this DIY counter cleaner also lies in its versatility. Feel free to experiment with different essential oils to create a scent that you love. Lavender, lemon, tea tree, and eucalyptus are all excellent choices, each offering their own unique antibacterial and antiviral properties. For a more powerful cleaning boost, especially on stubborn stains or greasy surfaces, consider adding a tablespoon of borax to the mixture. However, remember to use borax with caution and always wear gloves when handling it.
Another variation you might want to explore is using vinegar infused with citrus peels. Simply save your orange, lemon, or grapefruit peels, stuff them into a jar, and cover them with white vinegar. Let it steep for a few weeks, shaking occasionally. The citrus oils will infuse the vinegar, creating a more pleasant scent and adding extra cleaning power. Strain the vinegar before using it in your DIY counter cleaner recipe.
Don’t be afraid to adjust the ratios of ingredients to suit your specific needs and preferences. If you find the vinegar scent too strong, simply reduce the amount and increase the water. The key is to find a balance that works for you and your kitchen.
We truly believe that once you try this DIY counter cleaner, you’ll never go back to store-bought alternatives. It’s effective, affordable, eco-friendly, and customizable – what’s not to love?
So, we wholeheartedly encourage you to give it a try! Gather your ingredients, follow the simple steps, and experience the satisfaction of creating your own powerful and natural cleaning solution. And most importantly, we want to hear about your experience! Share your tips, variations, and results in the comments below. Let’s build a community of DIY cleaning enthusiasts and help each other create healthier and happier homes. We can’t wait to see what you create!
Frequently Asked Questions (FAQ)
What types of counters can I use this DIY counter cleaner on?
This DIY counter cleaner is generally safe for most non-porous surfaces, including granite (sealed), quartz, laminate, tile, and stainless steel. However, it’s crucial to test it in an inconspicuous area first, especially on natural stone surfaces like marble or unsealed granite. The acidity of vinegar can etch or dull these surfaces over time. If you’re unsure about your countertop material, consult the manufacturer’s recommendations before using any cleaning product. For wood countertops, use a very diluted solution and wipe dry immediately to prevent water damage.
How long will the DIY counter cleaner last?
The shelf life of your DIY counter cleaner depends on the ingredients you use. A mixture of vinegar, water, and essential oils will typically last for several months when stored in a cool, dark place. However, if you add fresh ingredients like lemon juice, it’s best to use the cleaner within a week or two to prevent spoilage. Always label your spray bottle with the date you made the cleaner so you know how long it’s been sitting. If you notice any discoloration, separation, or unusual odors, discard the cleaner and make a fresh batch.
Can I use different types of vinegar?
While white vinegar is the most commonly recommended type for cleaning due to its high acidity and lack of color, you can experiment with other types of vinegar, such as apple cider vinegar. Apple cider vinegar has a slightly milder scent and contains beneficial enzymes and minerals. However, be aware that it may leave a slight residue on some surfaces, so you may need to rinse with water after cleaning. Avoid using balsamic vinegar or red wine vinegar, as they can stain light-colored countertops.
What essential oils are best for cleaning?
Many essential oils have antibacterial, antiviral, and antifungal properties, making them excellent additions to your DIY counter cleaner. Some of the most popular and effective choices include:
* **Lemon:** A powerful degreaser and disinfectant with a refreshing scent.
* **Tea Tree:** Known for its strong antibacterial and antifungal properties.
* **Lavender:** Offers a calming scent and has antiseptic properties.
* **Eucalyptus:** A natural disinfectant with a refreshing and invigorating aroma.
* **Peppermint:** Provides a cooling sensation and has antibacterial properties.
* **Orange:** A natural degreaser with a cheerful and uplifting scent.
Feel free to experiment with different combinations of essential oils to create a scent that you enjoy. Just be sure to use pure, therapeutic-grade essential oils for the best results.
Is this DIY counter cleaner safe for pets and children?
While this DIY counter cleaner is generally safer than conventional cleaners, it’s still important to exercise caution when using it around pets and children. Keep the spray bottle out of their reach and avoid spraying directly onto surfaces where they eat or play. If you’re concerned about potential sensitivities, you can omit the essential oils altogether or use pet-friendly options like lavender or chamomile. Always supervise children when they are helping with cleaning and teach them about the importance of using cleaning products safely.
How do I clean up spills with this DIY counter cleaner?
For everyday spills, simply spray the DIY counter cleaner onto the affected area and wipe clean with a damp cloth or sponge. For tougher stains or sticky messes, let the cleaner sit for a few minutes before wiping. You may need to scrub gently with a non-abrasive sponge or brush to remove stubborn residue. For grease spills, consider adding a few drops of dish soap to the cleaner for extra degreasing power.
What if I don’t have essential oils? Can I still make this cleaner?
Yes, you can definitely make this DIY counter cleaner without essential oils. The vinegar and water mixture itself is an effective cleaning solution. The essential oils are primarily added for their fragrance and additional antibacterial properties, but they are not essential for the cleaner to work. If you don’t have essential oils, simply omit them from the recipe. You can also add a few drops of lemon juice for a fresh scent.
How often should I clean my counters with this DIY cleaner?
The frequency of cleaning your counters depends on how often you use them and the types of messes they encounter. In general, it’s a good idea to wipe down your counters after each meal preparation to prevent the buildup of food residue and bacteria. For a more thorough cleaning, aim to clean your counters at least once a week, or more often if needed.
Leave a Comment