

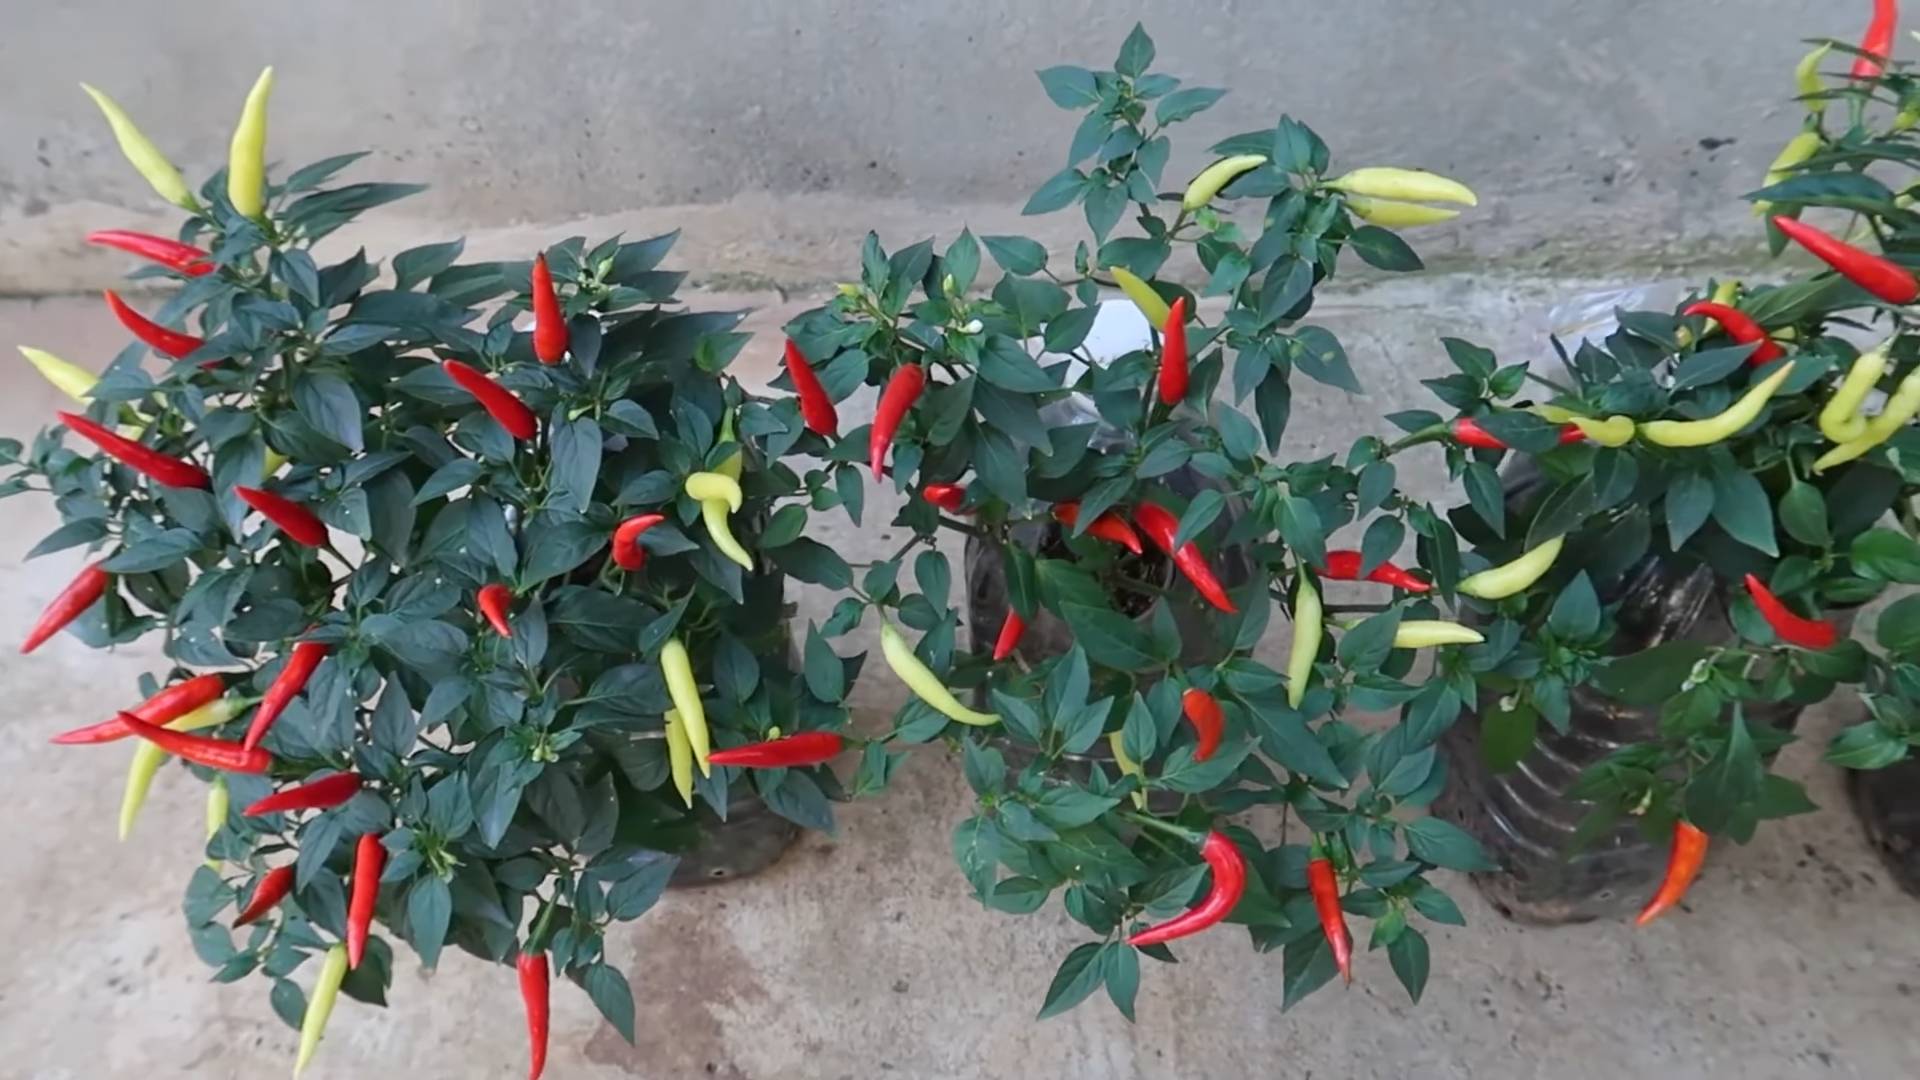
DIY chili pepper garden: Ready to turn up the heat in your backyard? Forget bland meals – imagine stepping outside and plucking fresh, fiery chili peppers whenever you need a flavor boost! For centuries, chili peppers have been more than just food; they’ve been used in traditional medicine, religious ceremonies, and even as a form of currency. From the ancient Aztecs to modern-day chefs, the allure of the chili pepper has remained constant.
But let’s be honest, buying chili peppers at the store can be expensive, and you never quite know how fresh they are. That’s where this DIY guide comes in! I’m going to show you simple, effective tricks and hacks to create your very own thriving DIY chili pepper garden, even if you have limited space or a less-than-green thumb.
This isn’t just about saving money; it’s about experiencing the joy of growing your own food, connecting with nature, and adding a personal touch to your culinary creations. Plus, who wouldn’t want to impress their friends with a homemade hot sauce made from peppers they grew themselves? Let’s get started and transform your garden into a chili pepper paradise!
Growing Your Own Fiery Friends: A DIY Chili Pepper Garden Guide
Hey there, fellow spice enthusiasts! Ever dreamt of having a constant supply of fresh, flavorful chili peppers right at your fingertips? Well, dream no more! I’m going to walk you through creating your very own chili pepper garden, whether you have a sprawling backyard or just a sunny windowsill. Trust me, it’s easier than you think, and the rewards are oh-so-delicious!
Choosing Your Chili Pepper Varieties
Before we get our hands dirty, let’s talk peppers! The world of chili peppers is vast and exciting, ranging from mild and fruity to scorching hot. Here’s a quick rundown to help you choose the perfect varieties for your garden:
* Mild & Fruity: Poblano, Anaheim, Shishito. These are great for stuffing, roasting, or adding a subtle kick to your dishes.
* Medium Heat: Jalapeño, Serrano, Cayenne. These are your everyday workhorses, perfect for salsas, sauces, and adding a noticeable zing.
* Hot & Fiery: Thai Chili, Habanero, Scotch Bonnet. Proceed with caution! These pack a serious punch and are best used sparingly.
* Extreme Heat: Ghost Pepper (Bhut Jolokia), Carolina Reaper, Trinidad Scorpion. Only for the truly brave! Handle with care and use gloves when harvesting.
Consider your taste preferences, the space you have available, and the climate you live in when making your selections. I personally love growing a mix of Jalapeños for everyday use and a few Habaneros for when I’m feeling adventurous.
Getting Started: Seeds vs. Seedlings
You have two main options for starting your chili pepper garden: from seeds or from seedlings (small starter plants).
* Starting from Seeds: This is the more economical option, and it gives you a wider variety of choices. However, it requires more time and effort, as you’ll need to start the seeds indoors several weeks before the last frost.
* Buying Seedlings: This is the easier and faster option, especially if you’re a beginner. You can find seedlings at most garden centers in the spring.
I usually start some of my peppers from seed and buy seedlings of other varieties to get a head start.
Phase 1: Starting Chili Peppers from Seed (Optional)
If you’re going the seed route, here’s how to do it:
1. Gather Your Supplies: You’ll need:
* Chili pepper seeds
* Seed starting trays or small pots
* Seed starting mix (a light, sterile potting mix)
* A spray bottle
* A heat mat (optional, but recommended)
* A grow light (optional, but recommended)
2. Sow the Seeds: Fill your seed starting trays or pots with seed starting mix. Moisten the mix with the spray bottle. Sow the seeds about ¼ inch deep, placing 2-3 seeds per cell or pot.
3. Provide Warmth and Moisture: Cover the trays or pots with a clear plastic lid or plastic wrap to create a humid environment. Place them on a heat mat to maintain a soil temperature of around 80-85°F (27-29°C). Mist the soil regularly to keep it moist but not soggy.
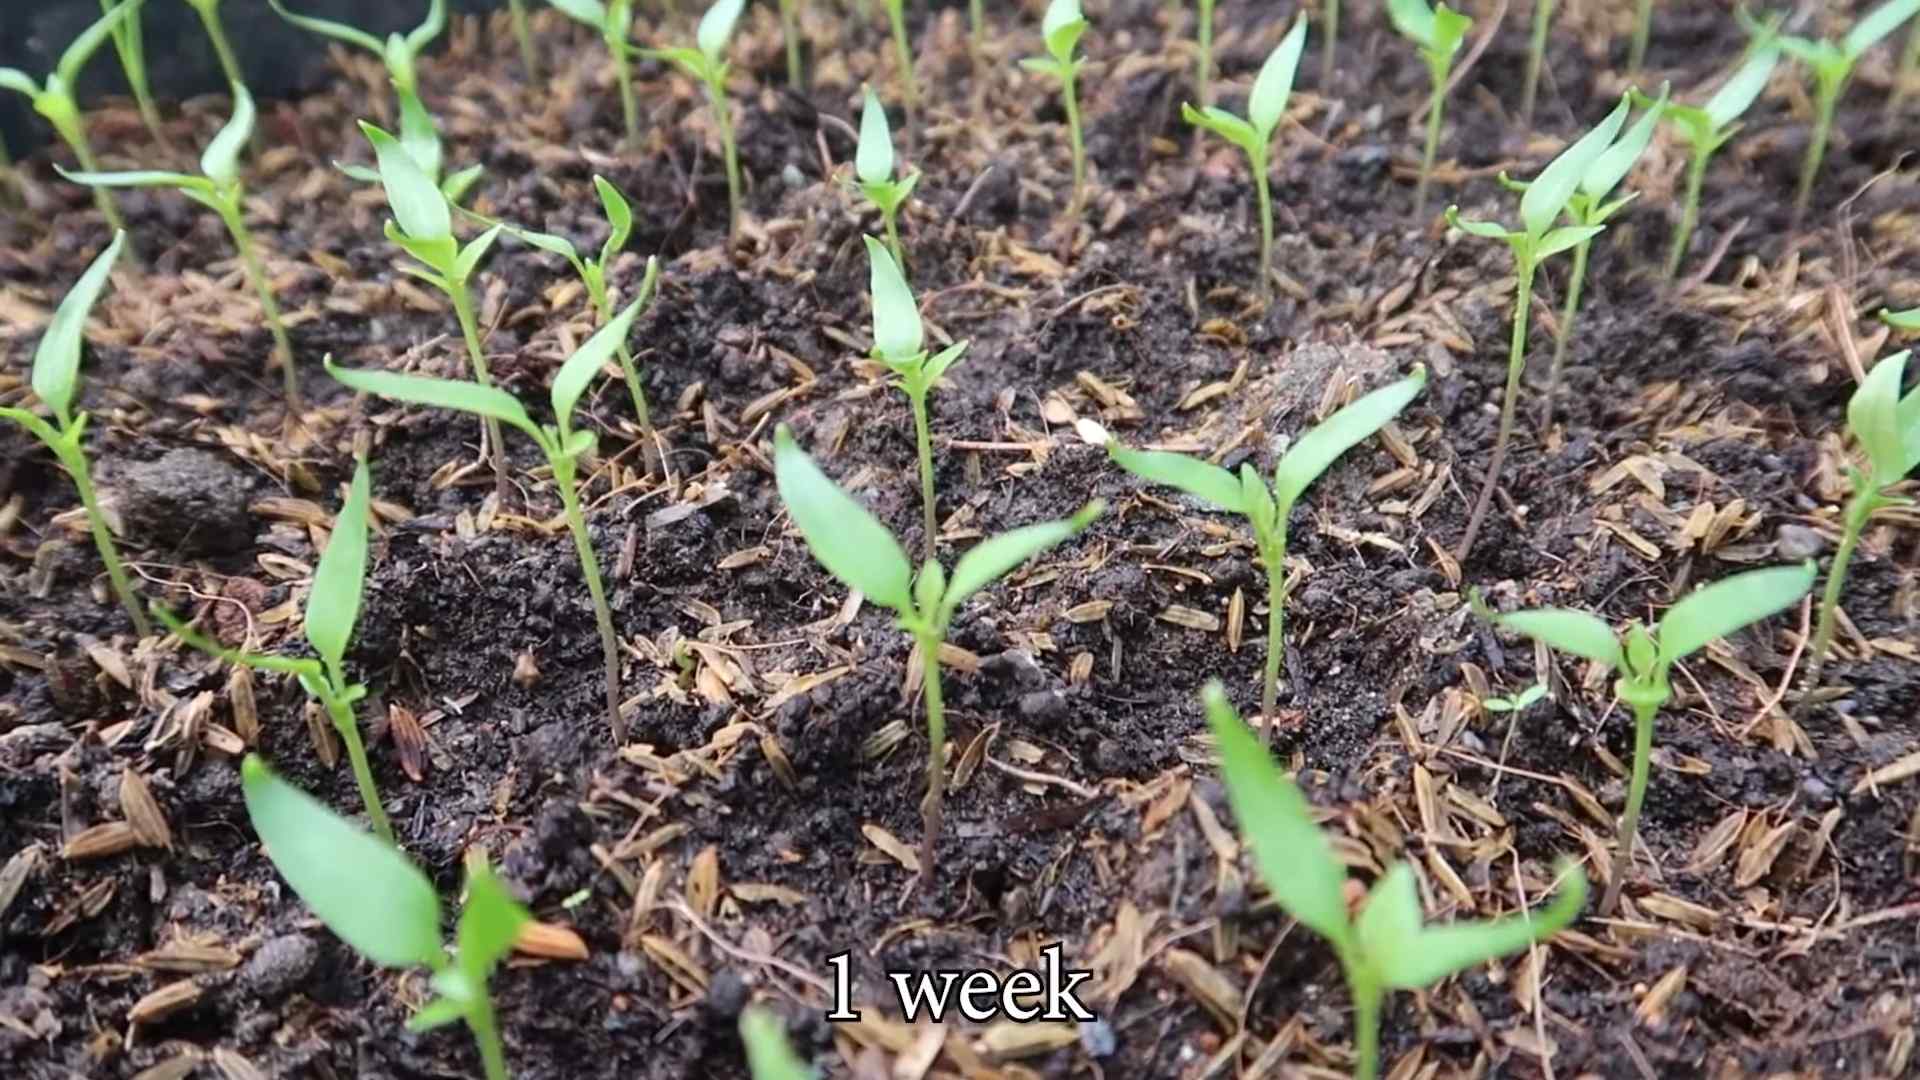
4. Provide Light: Once the seeds germinate (usually within 7-14 days), remove the plastic lid or wrap and place the seedlings under a grow light. If you don’t have a grow light, place them in a sunny window, but be sure to rotate them regularly to prevent them from becoming leggy.
5. Thin the Seedlings: Once the seedlings have their first true leaves (the second set of leaves), thin them to one seedling per cell or pot. Choose the strongest, healthiest-looking seedling and snip off the others at the soil line.
6. Harden Off the Seedlings: Before transplanting the seedlings outdoors, you’ll need to “harden them off” to acclimate them to the outdoor environment. Gradually expose them to increasing amounts of sunlight and wind over a period of 7-10 days. Start by placing them outdoors for just an hour or two each day, and gradually increase the time until they can tolerate a full day outdoors.
Phase 2: Preparing Your Garden Bed or Containers
Whether you’re using seeds or seedlings, you’ll need to prepare your garden bed or containers before planting.
1. Choose a Sunny Location: Chili peppers need at least 6-8 hours of sunlight per day to thrive. Choose a location that receives plenty of sun.
2. Prepare the Soil: Chili peppers prefer well-drained soil that is rich in organic matter. If you’re planting in a garden bed, amend the soil with compost or well-rotted manure. If you’re planting in containers, use a high-quality potting mix.
3. Choose the Right Size Container: If you’re growing chili peppers in containers, choose pots that are at least 5 gallons in size. Larger pots are better, as they will provide more room for the roots to grow.
4. Ensure Proper Drainage: Make sure your containers have drainage holes to prevent the soil from becoming waterlogged.
Phase 3: Planting Your Chili Peppers
Now for the fun part – planting!
1. Dig the Holes: Dig holes that are slightly larger than the root balls of your seedlings. Space the holes about 18-24 inches apart.
2. Gently Remove the Seedlings: Carefully remove the seedlings from their pots or trays. Gently loosen the roots if they are tightly bound.
3. Plant the Seedlings: Place the seedlings in the holes and backfill with soil. Gently firm the soil around the base of the plants.
4. Water Thoroughly: Water the plants thoroughly after planting.
5. Mulch: Apply a layer of mulch around the base of the plants to help retain moisture and suppress weeds. I like to use straw or wood chips.
Phase 4: Caring for Your Chili Pepper Plants
Once your chili pepper plants are in the ground, it’s important to provide them with proper care to ensure a bountiful harvest.
1. Watering: Water your chili pepper plants regularly, especially during hot, dry weather. Aim to keep the soil consistently moist but not soggy. Water deeply and less frequently, rather than shallowly and more often.
2. Fertilizing: Chili peppers are heavy feeders and benefit from regular fertilization. Use a balanced fertilizer (e.g., 10-10-10) every 2-3 weeks. You can also use a fertilizer specifically formulated for peppers and tomatoes.
3. Pruning: Pruning is not essential for chili peppers, but it can help to improve air circulation and promote bushier growth. You can prune off any yellowing or dead leaves, as well as any suckers (small shoots that grow from the base of the plant).
4. Pest and Disease Control: Chili peppers can be susceptible to various pests and diseases, such as aphids, spider mites, and fungal diseases. Inspect your plants regularly for signs of infestation or disease. If you find any problems, treat them promptly with an appropriate insecticide or fungicide. I prefer to use organic pest control methods whenever possible, such as insecticidal soap or neem oil.
5. Support: As your chili pepper plants grow, they may need support to prevent them from toppling over, especially if they are loaded with fruit. You can use stakes, cages, or trellises to provide support.
Phase 5: Harvesting Your Chili Peppers
The moment you’ve been waiting for!
1. When to Harvest: The time it takes for chili peppers to mature depends on the variety. Generally, they are ready to harvest when they have reached their mature size and color. The color will vary depending on the variety, but it’s usually red, yellow, orange, or brown.
2. How to Harvest: Use pruning shears or scissors to cut the peppers from the plant. Be careful not to damage the plant.
3. Handling Hot Peppers: If you’re harvesting hot peppers, wear gloves to protect your skin from the capsaicin (the compound that makes peppers hot). Avoid touching your eyes or face after handling hot peppers.
4. Storing Your Harvest: Fresh chili peppers can be stored in the refrigerator for up to a week. You can also dry them, freeze them, or pickle them for longer storage.
Bonus Tip: Saving Chili Pepper Seeds
If you want to save seeds from your chili peppers to plant next year, choose peppers that are fully ripe and healthy. Cut the peppers open and remove the seeds. Spread the seeds out on a paper towel and let them dry completely. Once they are dry, store them in an airtight container in a cool, dark place.
And there you have it! Your very own chili pepper garden. With a little care and attention, you’ll be enjoying a bountiful harvest of fiery friends in no time. Happy gardening!
Conclusion
So, there you have it! Creating your own DIY chili pepper garden is not just a fun project; it’s a gateway to a world of flavor, freshness, and fiery culinary adventures. Forget those bland, store-bought chili powders and lackluster sauces. Imagine plucking vibrant, sun-ripened chili peppers straight from your own backyard (or balcony!) and infusing your dishes with an unparalleled level of heat and complexity.
This isn’t just about saving money (although that’s a definite perk!). It’s about connecting with your food, understanding where it comes from, and experiencing the satisfaction of nurturing something from seed to table. It’s about having the power to control the heat level of your meals, from a gentle warmth to a scorching inferno, all thanks to your own homegrown peppers.
But the benefits extend beyond the kitchen. A chili pepper garden is a beautiful and rewarding addition to any space. The vibrant colors of the peppers, the delicate blossoms, and the lush foliage create a visually stunning display. Plus, chili peppers are known to attract pollinators like bees and butterflies, adding a touch of ecological diversity to your garden.
And the possibilities are endless! Experiment with different varieties of chili peppers to discover your favorites. Try growing jalapeños for nachos and poppers, habaneros for fiery salsas, or cayenne peppers for homemade chili oil. You can even dry your peppers and grind them into your own custom chili powder blends.
Don’t be afraid to get creative! Consider companion planting your chili peppers with herbs like basil and oregano, which can help deter pests and enhance the flavor of your peppers. You can also try growing your chili peppers in containers, making it easy to move them indoors during colder months.
We understand that starting a garden can seem daunting, but trust us, it’s easier than you think. With a little bit of planning, some basic supplies, and a whole lot of enthusiasm, you can create a thriving DIY chili pepper garden that will provide you with years of delicious and rewarding harvests.
So, what are you waiting for? Grab some seeds, get your hands dirty, and embark on your own chili pepper growing adventure. We’re confident that you’ll be amazed by the results. And most importantly, don’t forget to share your experiences with us! We’d love to see photos of your gardens, hear about your favorite chili pepper varieties, and learn about your creative culinary creations. Share your tips, tricks, and triumphs in the comments below. Let’s build a community of chili pepper enthusiasts and inspire others to discover the joys of homegrown heat!
Now, let’s address some frequently asked questions to help you get started on your DIY chili pepper garden journey.
Frequently Asked Questions (FAQ)
What are the best chili pepper varieties for beginners?
That’s a great question! For beginners, we recommend starting with chili pepper varieties that are relatively easy to grow and offer a good balance of flavor and heat. Jalapeños are a classic choice, known for their mild to medium heat and versatility in cooking. Poblano peppers are another excellent option, offering a mild, smoky flavor that’s perfect for stuffing. Anaheim peppers are also a good choice, with a mild heat and a slightly sweet flavor. These varieties are generally more forgiving and less prone to problems than some of the hotter, more exotic chili peppers. Remember to check the specific growing requirements for each variety, as some may prefer slightly different conditions.
How much sunlight do chili peppers need?
Chili peppers thrive in full sun, meaning they need at least 6-8 hours of direct sunlight per day. If you’re growing your chili peppers indoors, you’ll need to supplement with grow lights to ensure they get enough light. Insufficient sunlight can lead to leggy growth, reduced flowering, and smaller, less flavorful peppers. When choosing a location for your chili pepper garden, be sure to select a spot that receives plenty of sunlight throughout the day. If you live in a particularly hot climate, you may need to provide some afternoon shade to prevent the peppers from getting scorched.
What kind of soil is best for chili peppers?
Chili peppers prefer well-draining soil that is rich in organic matter. A good potting mix for chili peppers should contain a blend of peat moss, perlite, and vermiculite. You can also amend your garden soil with compost or aged manure to improve its drainage and fertility. Avoid using heavy clay soil, as it can retain too much moisture and lead to root rot. The ideal pH for chili pepper soil is between 6.0 and 7.0. You can test your soil pH using a soil testing kit and adjust it accordingly.
How often should I water my chili peppers?
Water your chili peppers regularly, especially during hot, dry weather. The soil should be kept consistently moist, but not waterlogged. Overwatering can lead to root rot, while underwatering can cause the peppers to wilt and drop their blossoms. A good rule of thumb is to water your chili peppers when the top inch of soil feels dry to the touch. When watering, be sure to water deeply, so that the water reaches the roots. Avoid getting water on the leaves, as this can promote fungal diseases.
How do I fertilize my chili peppers?
Chili peppers are heavy feeders and benefit from regular fertilization. Use a balanced fertilizer with an NPK ratio of 10-10-10 or 14-14-14. Apply the fertilizer according to the package directions, typically every 2-3 weeks during the growing season. You can also supplement with organic fertilizers, such as compost tea or fish emulsion. Avoid over-fertilizing, as this can lead to excessive foliage growth and reduced pepper production.
How do I protect my chili peppers from pests and diseases?
Chili peppers can be susceptible to a variety of pests and diseases, including aphids, spider mites, whiteflies, and fungal diseases. To prevent problems, start by choosing disease-resistant varieties. Inspect your plants regularly for signs of pests or diseases. If you find any problems, treat them promptly with an appropriate insecticide or fungicide. You can also use organic pest control methods, such as insecticidal soap or neem oil. Good air circulation and proper watering practices can also help prevent fungal diseases.
When should I harvest my chili peppers?
The timing of harvest depends on the variety of chili pepper and your personal preference. Generally, chili peppers are ready to harvest when they have reached their mature size and color. The color will vary depending on the variety, but most chili peppers will turn from green to red, yellow, or orange when ripe. You can also harvest chili peppers when they are still green, but they will be less flavorful and less spicy. To harvest, simply cut the pepper from the plant using a sharp knife or scissors.
Can I grow chili peppers indoors?
Yes, you can absolutely grow chili peppers indoors! In fact, it’s a great way to extend the growing season and enjoy fresh chili peppers year-round. When growing chili peppers indoors, be sure to provide them with plenty of light, either from a sunny window or grow lights. You’ll also need to use a well-draining potting mix and water them regularly. Choose a pot that is at least 12 inches in diameter to give the roots plenty of room to grow. With a little bit of care, you can enjoy a bountiful harvest of chili peppers from your indoor garden.
How do I dry chili peppers?
Drying chili peppers is a great way to preserve them for later use. There are several ways to dry chili peppers, including air drying, oven drying, and using a dehydrator. Air drying is the simplest method, but it can take several weeks. To air dry chili peppers, simply string them together and hang them in a warm, dry place with good air circulation. Oven drying is faster, but it requires careful monitoring to prevent the peppers from burning. To oven dry chili peppers, spread them out on a baking sheet and bake them at a low temperature (around 150 degrees Fahrenheit) for several hours, until they are completely dry. A dehydrator is the most efficient way to dry chili peppers, as it provides consistent heat and air circulation. Follow the manufacturer’s instructions for drying chili peppers in a dehydrator.
What can I do with my homegrown chili peppers?
The possibilities are endless! You can use your homegrown chili peppers to make salsas, sauces, chili, stews, and many other dishes. You can also dry them and grind them into your own custom chili powder blends. Experiment with different varieties of chili peppers to discover your favorites and create your own unique recipes. Don’t be afraid to get creative and have fun!

Leave a Comment