

Cucumber garden trick: Ever dream of harvesting baskets overflowing with crisp, juicy cucumbers, but end up with a few sad, misshapen fruits instead? You’re not alone! Growing cucumbers can be tricky, but I’m here to let you in on a little secret – a simple DIY trick that can transform your cucumber patch from a disappointment to a thriving, vine-ripened paradise.
For centuries, cucumbers have been cultivated across the globe, from their origins in India to their adoption in ancient Greece and Rome. They’ve been prized not only for their refreshing taste but also for their medicinal properties. But even with all that history, sometimes getting a good harvest feels like a modern-day mystery!
That’s where this DIY article comes in. We’re diving deep into a game-changing cucumber garden trick that addresses a common problem: pollination. Poor pollination leads to misshapen, bitter cucumbers, and nobody wants that! This simple hack is inexpensive, easy to implement, and can dramatically increase your yield. I’m going to show you how to take control of your cucumber crop and enjoy a bountiful harvest of delicious, perfectly formed cucumbers all season long. Get ready to unleash your inner gardener and say goodbye to cucumber woes!
Unlock a Bumper Cucumber Harvest: My Secret DIY Garden Trick!
Hey fellow gardeners! Are you tired of cucumber plants that promise the world but deliver only a handful of sad, spiky fruits? I was too! That’s why I spent years experimenting and tweaking my cucumber growing strategy. And guess what? I finally cracked the code! This DIY trick is simple, affordable, and has boosted my cucumber yield like crazy. Get ready to be amazed!
This isn’t just about throwing some seeds in the ground and hoping for the best. We’re going to create the *perfect* environment for our cucumber plants to thrive. Think of it as a cucumber spa – they’ll be so happy, they’ll practically shower you with delicious cucumbers!
The Secret Weapon: Vertical Trellising and Strategic Pruning
The key to this whole operation is combining vertical trellising with a specific pruning technique. Most people let their cucumber plants sprawl all over the ground, which leads to several problems:
* Poor Air Circulation: This creates a breeding ground for fungal diseases like powdery mildew.
* Reduced Sunlight: The dense foliage blocks sunlight from reaching all the developing cucumbers.
* Difficult Harvesting: It’s hard to find the cucumbers hiding under all those leaves, and they can easily rot if you miss them.
* Increased Pest Problems: Slugs, snails, and other pests love hiding in the damp, dark environment under sprawling cucumber plants.
Vertical trellising solves all these problems, and the pruning technique I’m about to share will maximize your plant’s energy, directing it towards fruit production instead of unnecessary leaf growth.
Building Your Cucumber Trellis: Simple and Effective
You don’t need to be a master carpenter to build a cucumber trellis. Here are a few options, from super simple to slightly more involved:
* Option 1: The Tomato Cage Hack (Easiest): If you already have tomato cages, you can repurpose them for your cucumbers! Just place the cage over your cucumber seedling when you plant it. As the plant grows, gently guide the vines up the cage. This works best for bush varieties of cucumbers.
* Option 2: The Simple Netting Trellis: This is my go-to method because it’s cheap and effective. You’ll need:
* Two sturdy stakes (wooden or metal)
* Garden netting with 4-6 inch squares
* Zip ties or garden twine
* Option 3: The A-Frame Trellis (Most Sturdy): This option requires a bit more effort but provides excellent support and stability. You’ll need:
* Six wooden boards (2x4s are ideal)
* Screws or nails
* Wire or twine
Step-by-Step Instructions: Building the Simple Netting Trellis
This is the method I use most often, so let’s dive into the details.
1. Gather Your Materials: Make sure you have your stakes, netting, zip ties (or twine), and a hammer or mallet.
2. Position Your Stakes: Drive the stakes into the ground about 4-6 feet apart, depending on the length of your garden bed. Make sure they are securely anchored, as the cucumber vines will become quite heavy. I usually aim for at least 1 foot of the stake to be buried in the ground.
3. Attach the Netting: Unroll the netting and attach it to the stakes using zip ties or garden twine. Start at the bottom and work your way up, making sure the netting is taut. You want the netting to be securely attached to the stakes, so the cucumber vines have something to grab onto. I like to use zip ties because they’re quick and easy, but twine works just as well.
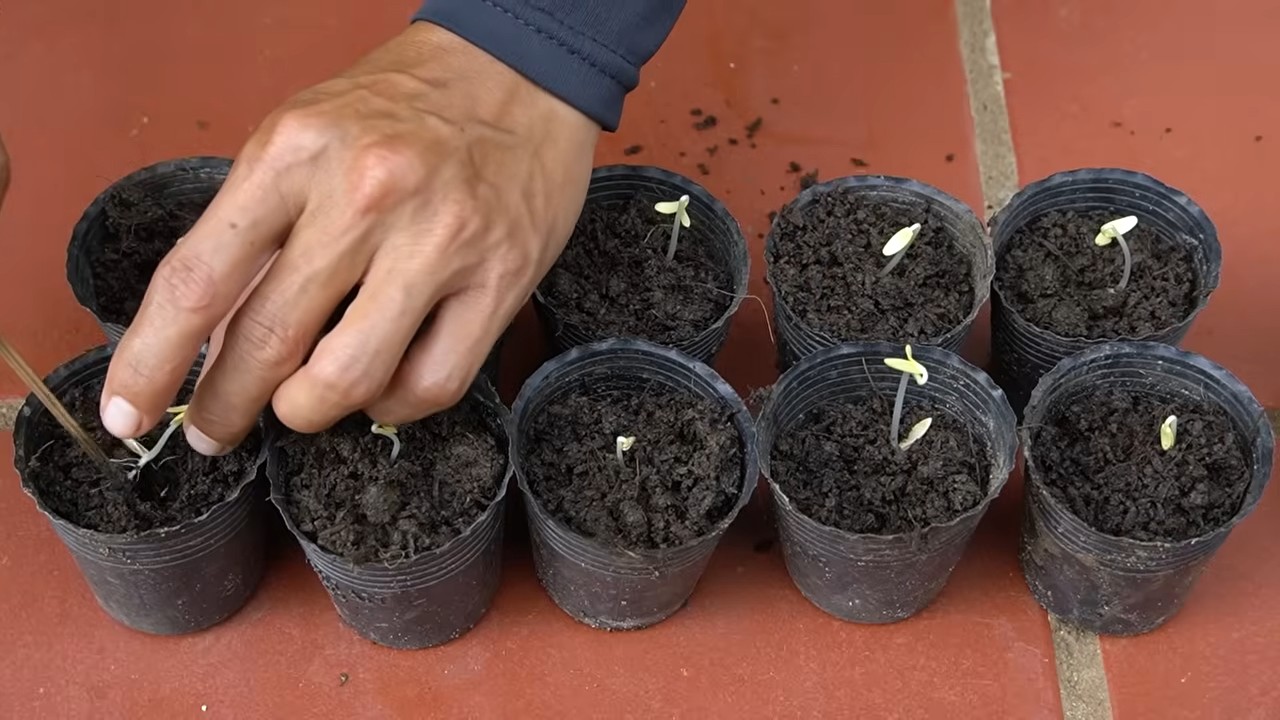
4. Plant Your Cucumbers: Plant your cucumber seedlings (or sow seeds) at the base of the trellis, spacing them about 12-18 inches apart.
Strategic Pruning: The Key to Cucumber Abundance
Now for the magic ingredient: pruning! This is where we’ll really focus the plant’s energy on producing cucumbers.
* Understanding Cucumber Growth: Cucumber plants produce both main vines and side shoots (also called laterals). The side shoots are where most of the female flowers (and therefore, the cucumbers) will appear.
* The Pruning Technique: The goal is to encourage the plant to produce more side shoots and to keep the plant from becoming too dense.
Step-by-Step Instructions: Pruning Your Cucumber Plants
1. Wait for the Plant to Establish: Don’t start pruning until your cucumber plant has reached about 1-2 feet in height and has started to climb the trellis.
2. Remove the Bottom Leaves: Remove any leaves that are touching the ground. These leaves are prone to disease and don’t contribute much to the plant’s overall health.
3. Prune the Side Shoots (First 5-6 Nodes): Up to the first 5-6 nodes (the points where leaves emerge from the main stem), remove *all* the side shoots. This forces the plant to focus its energy on vertical growth and developing a strong main stem. Use clean pruning shears or scissors to make a clean cut close to the main stem.
4. Prune Side Shoots Above the 5-6 Node Mark: Above the 5-6 node mark, things get a little different. Here’s what I do:
* Pinch off the growing tip of each side shoot *after* it has produced 2-3 leaves and one cucumber. This encourages the side shoot to focus on developing the cucumber and prevents it from becoming too long and unruly.
* Remove any yellowing or diseased leaves.
5. Maintain Air Circulation: Throughout the growing season, continue to prune any leaves that are becoming overcrowded or blocking sunlight from reaching the cucumbers. Good air circulation is crucial for preventing fungal diseases.
6. Monitor for Suckers: Sometimes, small shoots (suckers) will emerge from the base of the plant. Remove these as soon as you see them, as they will steal energy from the main plant.
Watering and Feeding Your Thriving Cucumber Plants
Now that we’ve got the structure and pruning down, let’s talk about the basics: water and nutrients.
* Watering: Cucumbers need consistent moisture, especially when they are fruiting. Water deeply and regularly, aiming for about 1 inch of water per week. Avoid overhead watering, as this can promote fungal diseases. Drip irrigation or soaker hoses are ideal. I usually water early in the morning so the foliage has time to dry before nightfall.
* Feeding: Cucumbers are heavy feeders, meaning they need a lot of nutrients to produce a bountiful harvest. I like to use a balanced organic fertilizer (like a 5-10-10) every 2-3 weeks. You can also side-dress your plants with compost or aged manure.
Troubleshooting Common Cucumber Problems
Even with the best care, you might encounter a few challenges along the way. Here are some common cucumber problems and how to deal with them:
* Powdery Mildew: This fungal disease appears as a white, powdery coating on the leaves. To prevent it, ensure good air circulation and avoid overhead watering. If you see signs of powdery mildew, you can treat it with a fungicide or a homemade solution of baking soda and water.
* Cucumber Beetles: These pesky beetles can damage leaves and spread diseases. Handpick them off the plants or use an organic insecticide like neem oil.
* Blossom End Rot: This is caused by a calcium deficiency and results in the end of the cucumber rotting. Ensure your soil has adequate calcium and water consistently.
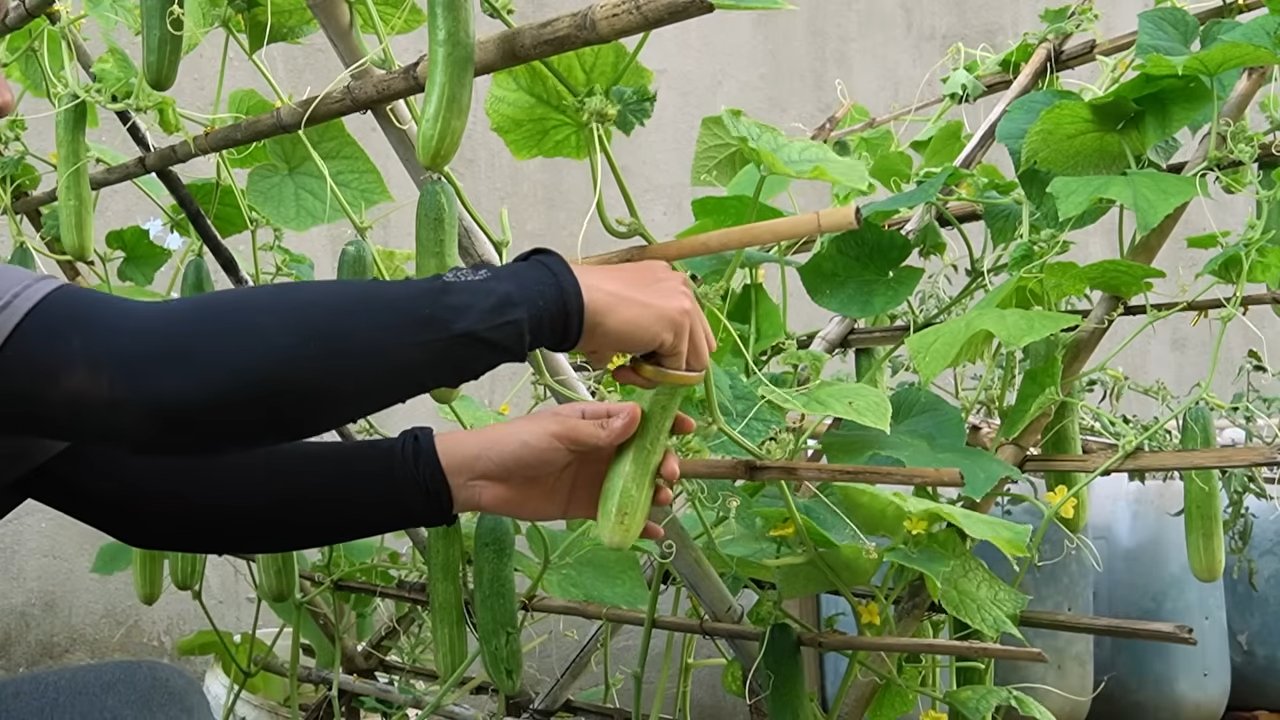
* Lack of Pollination: If your cucumber plants are producing flowers but no fruit, it could be a pollination issue. Cucumbers need to be pollinated by bees or other insects. You can hand-pollinate the flowers yourself by transferring pollen from the male flowers to the female flowers. Female flowers have a small cucumber behind the flower, while male flowers do not.
Harvesting Your Bumper Crop!
The best part! Once your cucumbers start to mature, harvest them regularly. This encourages the plant to produce even more fruit. The size and color of the cucumber will depend on the variety you are growing. Generally, you want to harvest them when they are firm and have reached the desired size. Don’t let them get too big, as they can become bitter.
With this DIY trick, you’ll be swimming in cucumbers in no time! Get ready to enjoy fresh salads, pickles, and all sorts of delicious cucumber creations. Happy gardening!
Conclusion
So, there you have it! This simple, yet incredibly effective cucumber garden trick is a game-changer for anyone looking to maximize their harvest and minimize common cucumber growing woes. We’ve walked you through the process, highlighting how this method can combat issues like powdery mildew, blossom end rot, and pest infestations, all while promoting healthier, more productive plants.
But why is this DIY approach a must-try? It’s more than just a gardening fad; it’s a practical solution rooted in sound horticultural principles. By elevating your cucumbers, you’re dramatically improving air circulation around the plants. This increased airflow helps to dry out the leaves quickly after rain or watering, significantly reducing the risk of fungal diseases like powdery mildew, a common nemesis of cucumber growers. Furthermore, keeping the cucumbers off the soil prevents them from coming into contact with soilborne pathogens and pests, leading to healthier, more robust fruits.
Beyond disease prevention, this method also aids in pollination. The improved air circulation can attract more pollinators to your garden, ensuring a better fruit set. And let’s not forget the sheer convenience of harvesting! No more bending down and searching through dense foliage to find your ripe cucumbers. They’ll be hanging neatly, easily accessible, and less likely to be damaged by slugs or other ground-dwelling pests.
Variations and Suggestions:
While we’ve focused on using simple trellises or netting, feel free to get creative with your setup. Consider using repurposed materials like old ladders, tomato cages, or even sturdy branches to create your cucumber support system. The key is to ensure that the structure is strong enough to support the weight of the mature plants and developing fruits.
Another variation involves companion planting. Consider planting basil, marigolds, or nasturtiums near your cucumbers. These plants can help to deter pests and attract beneficial insects, further enhancing the health and productivity of your cucumber patch. You can also experiment with different types of trellises, such as A-frame trellises or vertical towers, to maximize space in your garden.
For those growing cucumbers in containers, a smaller trellis or even a simple stake can provide the necessary support. Just make sure the container is large enough to accommodate the mature plant and its root system. Remember to choose a well-draining potting mix and provide regular watering and fertilization to ensure optimal growth.
And don’t be afraid to experiment with different cucumber varieties! Some varieties, like bush cucumbers, are naturally more compact and may not require as much support. Others, like vining cucumbers, will thrive with a sturdy trellis system. Research different varieties and choose the ones that best suit your garden space and growing conditions.
Your Turn!
We’re confident that this cucumber garden trick will revolutionize your cucumber growing experience. It’s a simple, cost-effective, and highly rewarding method that will yield healthier plants, bigger harvests, and fewer headaches.
So, what are you waiting for? Give this DIY trick a try and see the difference it makes in your own garden. We encourage you to share your experiences with us! Post photos of your cucumber setups, share your tips and tricks, and let us know how this method has worked for you. Together, we can create a community of thriving cucumber gardeners! Happy growing!
Frequently Asked Questions (FAQ)
What type of trellis is best for cucumbers?
The best type of trellis for cucumbers depends on your garden space, cucumber variety, and personal preference. Vertical trellises, such as netting or wire mesh attached to posts, are a popular choice for vining cucumbers as they maximize vertical space. A-frame trellises offer a wider base and can support heavier yields. Tomato cages can work for smaller bush varieties, but may not be sturdy enough for larger vining types. Consider the mature size of your cucumber plants and choose a trellis that can adequately support their weight and growth.
How high should my cucumber trellis be?
The height of your cucumber trellis should be determined by the variety of cucumber you are growing. Vining cucumbers can grow quite tall, so a trellis that is 6-8 feet high is generally recommended. Bush cucumbers, on the other hand, may only need a trellis that is 3-4 feet high. Ensure the trellis is sturdy enough to support the weight of the mature plants and developing fruits.
When should I start training my cucumbers to climb the trellis?
Start training your cucumbers to climb the trellis as soon as they develop tendrils, which are small, thread-like structures that they use to grip onto surfaces. Gently guide the tendrils towards the trellis and encourage them to wrap around the support. You may need to manually attach the vines to the trellis using plant ties or clips, especially when the plants are young. Regularly check the plants and continue to guide them as they grow.
Can I use this trick for other vining plants?
Yes, this trick can be adapted for other vining plants such as squash, melons, and even some types of beans. The principle of improving air circulation and preventing soil contact applies to many vining crops. However, you may need to adjust the type and size of the trellis to accommodate the specific needs of each plant. For example, melons may require a sturdier trellis to support their heavier fruits.
What if my cucumbers still get powdery mildew even with a trellis?
While using a trellis significantly reduces the risk of powdery mildew, it doesn’t eliminate it entirely. Other factors, such as humidity, temperature, and plant density, can also contribute to the development of this fungal disease. If you’re still experiencing powdery mildew, consider these additional measures:
* Improve Air Circulation: Ensure there is adequate spacing between plants to promote airflow. Prune away any overcrowded or yellowing leaves.
* Water Properly: Water at the base of the plants to avoid wetting the foliage. Water in the morning so the leaves have time to dry before nightfall.
* Apply Fungicides: If the problem persists, consider using a fungicide specifically formulated for powdery mildew. Choose a product that is safe for use on edible plants and follow the instructions carefully.
* Choose Resistant Varieties: Some cucumber varieties are more resistant to powdery mildew than others. Consider planting these varieties in future seasons.
* Neem Oil: Applying neem oil can help to control powdery mildew and other fungal diseases.
How often should I water my cucumbers when they are trellised?
The watering frequency for trellised cucumbers depends on several factors, including the weather, soil type, and stage of plant growth. Generally, cucumbers need consistent moisture to thrive. Water deeply and regularly, especially during hot, dry periods. Check the soil moisture regularly and water when the top inch feels dry to the touch. Avoid overwatering, as this can lead to root rot. Using a soaker hose or drip irrigation can help to deliver water directly to the roots and minimize water loss through evaporation.
What kind of fertilizer should I use for trellised cucumbers?
Cucumbers are heavy feeders and benefit from regular fertilization. Use a balanced fertilizer with equal amounts of nitrogen, phosphorus, and potassium (e.g., 10-10-10) or a fertilizer specifically formulated for vegetables. Apply the fertilizer according to the package instructions. You can also supplement with compost or other organic matter to improve soil fertility and drainage. Avoid over-fertilizing, as this can lead to excessive foliage growth and reduced fruit production.
How do I prevent blossom end rot in my trellised cucumbers?
Blossom end rot is a common problem in cucumbers caused by a calcium deficiency. To prevent blossom end rot, ensure that your soil has adequate calcium levels. You can amend the soil with lime or bone meal before planting. Also, maintain consistent soil moisture, as fluctuations in watering can interfere with calcium uptake. Avoid over-fertilizing with nitrogen, as this can also contribute to blossom end rot. If you notice blossom end rot developing, you can apply a calcium foliar spray to the affected plants.
Will this cucumber garden trick really increase my yield?
Yes, this cucumber garden trick can significantly increase your yield. By providing support for the plants, you are allowing them to grow more efficiently and produce more fruits. The improved air circulation reduces the risk of disease, while the prevention of soil contact minimizes pest damage. All of these factors contribute to healthier, more productive plants and a larger harvest.


Leave a Comment