

Cowpea garden DIY projects are a fantastic way to cultivate your own delicious and nutritious harvest right in your backyard! Have you ever dreamed of plucking fresh, vibrant cowpeas straight from the vine for your next meal? It’s more achievable than you might think, and this article is your ultimate guide to making that dream a reality.
Cowpeas, also known as black-eyed peas, have a rich history, dating back thousands of years in Africa. They’ve since become a staple in cuisines around the world, particularly in the Southern United States. Beyond their culinary appeal, cowpeas are incredibly beneficial for your garden. They’re nitrogen-fixing legumes, meaning they enrich the soil, reducing the need for synthetic fertilizers. That’s a win-win for you and the environment!
But why embark on a cowpea garden DIY journey? Well, store-bought produce can be expensive and often lacks the freshness and flavor of homegrown vegetables. Plus, there’s immense satisfaction in nurturing a plant from seed to harvest. This article will provide you with simple, effective DIY tricks and hacks to ensure your cowpea garden thrives, even if you’re a complete beginner. I’ll share my personal experiences and proven techniques to help you avoid common pitfalls and maximize your yield. Get ready to roll up your sleeves and discover the joy of growing your own cowpeas!
DIY Cowpea Garden: Your Guide to a Bountiful Harvest
Hello garden friends! I’m so excited to show you today how to start your own cowpea garden. Cowpeas are not only super delicious but also incredibly nutritious and easy to care for. This guide is packed with tips and tricks so you too can soon bring in a rich harvest. Let’s get started!
What You Need for Your Cowpea Garden
Before we begin, here is a list of everything you’ll need:
- Cowpea seeds: Choose a variety that suits your climate. There are bush beans and pole beans – depending on how much space you have.
- Gardening tools: Spade, rake, garden shears, and possibly a dibber.
- Soil amendments: Compost, well-rotted manure, or other organic materials.
- Trellis (optional): For pole beans, you’ll need a trellis, poles, or another sturdy frame.
- Watering can or garden hose: For watering.
- Mulch material: Straw, wood chips, or grass clippings to retain moisture in the soil and suppress weeds.
- Natural fertilizer (optional): For an additional supply of nutrients.
- Protective measures (optional): Nets or fleece to protect the plants from pests.
The Preparation: The Key to Success
Well-prepared soil is the be-all and end-all for a successful cowpea harvest. Here are the steps you should follow:
- Choose the right location: Cowpeas love the sun! Find a spot in your garden that gets at least 6-8 hours of direct sunlight per day.
- Soil analysis: Test the pH of your soil. Cowpeas prefer a slightly acidic to neutral soil (pH between 6.0 and 7.0). You can buy a soil test kit at a garden center or send a sample to a lab.
- Soil cultivation: Loosen the soil with a spade or digging fork. Remove stones, roots, and weeds. Dig the soil at least 30 cm deep.
- Soil improvement: Work plenty of compost or well-rotted manure into the soil. This improves the soil structure, drainage, and nutrient supply. I always use a good portion of compost; it really makes a difference!
- Leveling: Rake the soil smooth to create a level surface. This makes planting and watering easier.
Sowing: The Start of the Season
Now for the exciting part: sowing the cowpea seeds!
- The right time: Cowpeas are heat-loving and should only be sown after the last frost when the soil temperature is at least 15°C. In colder regions, you can also start the seeds in pots and transplant the seedlings later.
- Sowing method:
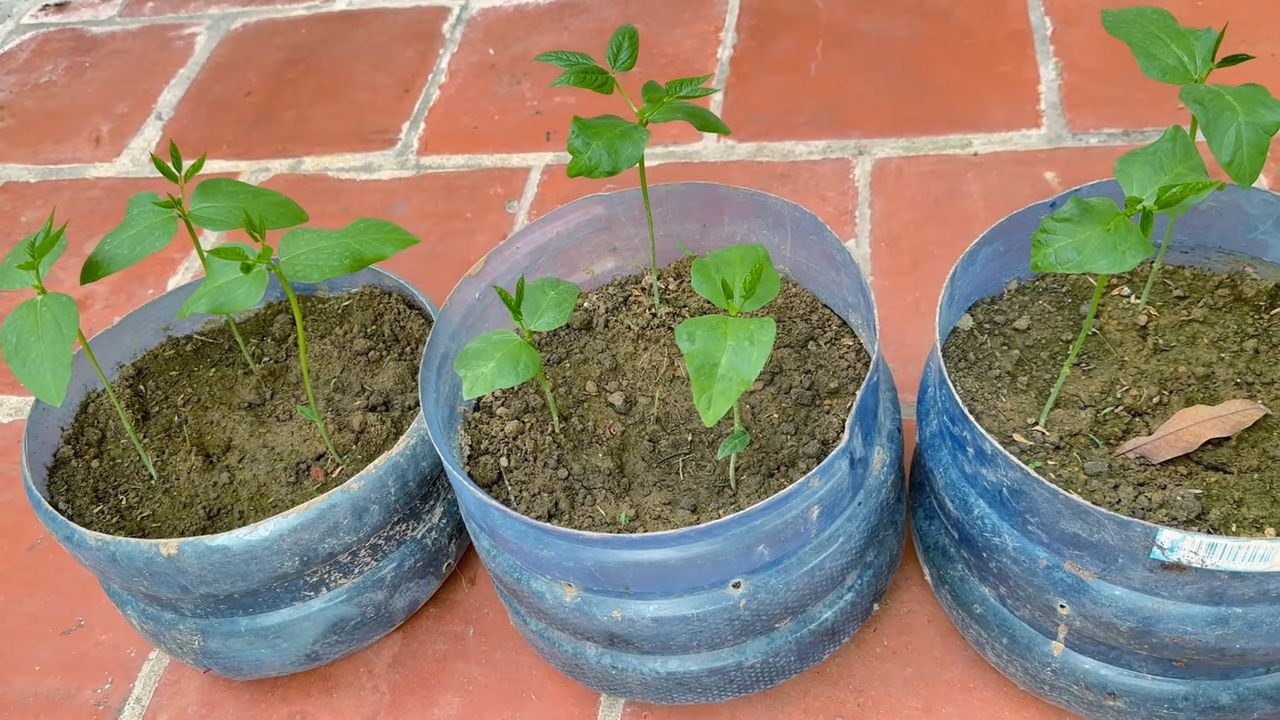
- Direct sowing: Sow the seeds directly into the bed. Make small holes with a dibber or your finger at a distance of 5-10 cm (for bush beans) or 15-20 cm (for pole beans). The holes should be about 2-3 cm deep. Place 2-3 seeds in each hole, cover them with soil, press the soil down lightly, and water gently.
- Starting indoors: Sow the seeds in pots or seed trays. Use seed-starting mix and keep it moist. Place the pots in a warm and bright location. After about 2-3 weeks, when the seedlings are strong enough, you can transplant them into the garden bed. Be careful not to damage the roots.
- Row spacing: If you plant multiple rows, maintain a distance of 60-90 cm between the rows.
- Labeling: Label the rows or pots with the name of the cowpea variety and the sowing date. This helps you keep track.
Care: So Your Cowpeas Thrive
Caring for your cowpeas is relatively simple but important for a good harvest.
- Watering: Water the plants regularly, especially during flowering and pod formation. The soil should always be slightly moist, but not wet. Avoid watering the leaves to prevent fungal diseases. It is best to water early in the morning or late in the evening.
- Weed control: Keep the bed free of weeds. Weeds compete with the cowpeas for nutrients and water. Weeding by hand is most effective, but you can also use mulch to suppress weed growth.
- Mulching: Cover the soil around the plants with a layer of mulch. This keeps the moisture in the soil, suppresses weeds, and protects the roots from extreme temperatures.
- Fertilizing: Cowpeas are relatively undemanding, but additional fertilization can improve the harvest. Use an organic fertilizer that is rich in phosphorus and potassium. I like to fertilize my cowpeas with compost tea or diluted nettle tea.
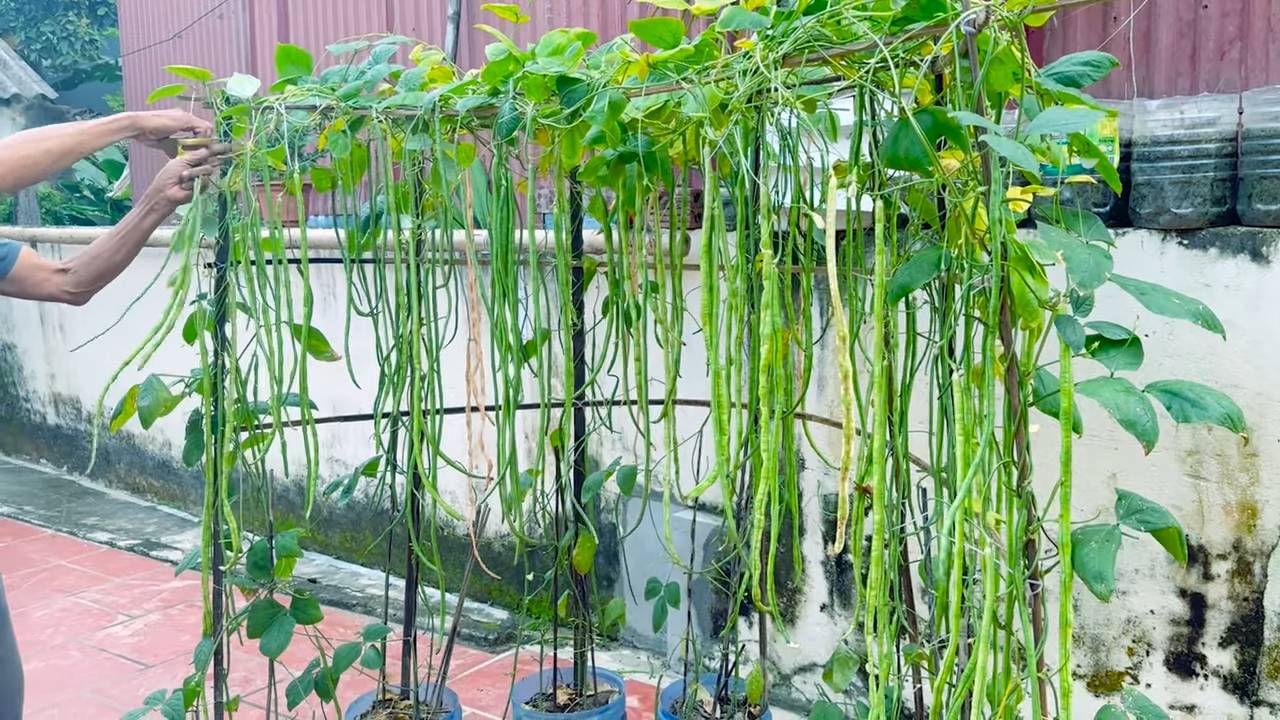
- Trellis (for pole beans): If you have planted pole beans, make sure they have a sturdy trellis. The plants love to climb it. You can use a trellis, poles, or another frame.
- Pest control: Check the plants regularly for pests such as aphids, bean beetles, or snails. In case of an infestation, you can use natural pesticides, e.g., neem oil or insecticidal soap. I have had good experiences with hand-picking snails in the evening.
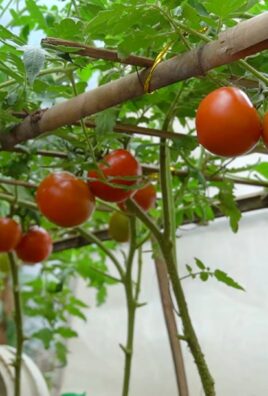
Harvest: The Reward for Your Hard Work
Finally, it’s time: harvest season!
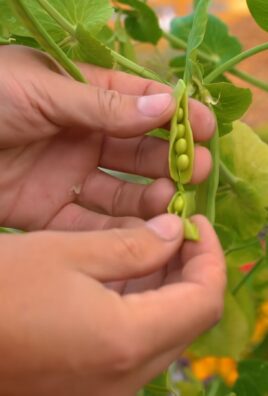
- The right time: Cowpeas can be harvested when the pods are plump and full, but not yet dry and hard. The seeds should be well-developed but not yet fully mature.
- Harvesting method: Carefully pick the pods from the plant. Be careful not to damage the plant.
- Regular harvesting: Harvest the pods regularly to encourage the production of new pods. The more often you harvest, the more cowpeas you will get.
- Storage: Fresh cowpeas can be stored in the refrigerator for a few days. You can also freeze or dry them to make them last longer.
Additional Tips for a Successful Harvest
- Crop rotation: Do not plant cowpeas in the same location every year. Rotate plant species to prevent diseases and pests.
- Companion planting: Plant cowpeas together with other plants that support each other. Good companion plants are, for example, corn, carrots, cucumbers, or marigolds.
- Heirloom seeds: Use heirloom seeds to save your own seeds for next year.
- Observation: Observe your plants regularly and react quickly to problems such as diseases or pests.
Common Problems and Solutions
Bean beetles: Hand-pick the beetles or use a biological insecticide.
Yellow leaves: Can indicate a nutrient deficiency or overwatering. Fertilize the plants or adjust the watering.
Aphids: Spray the plants with insecticidal soap or neem oil.
Conclusion
So, there you have it! Transforming your backyard into a thriving cowpea garden is not only achievable but also incredibly rewarding. We’ve explored a simple yet effective DIY trick that bypasses common gardening hurdles and sets you up for a bountiful harvest. This isn’t just about growing food; it’s about connecting with nature, understanding the life cycle of plants, and enjoying the unparalleled flavor of homegrown produce.
Why is this DIY trick a must-try? Because it simplifies the process, making cowpea cultivation accessible to everyone, regardless of their gardening experience or the size of their outdoor space. It addresses common challenges like poor soil quality, limited sunlight, and pest infestations head-on, offering practical solutions that yield impressive results. Imagine stepping outside your door and picking fresh, delicious cowpeas for your next meal – a truly satisfying experience!
But the beauty of gardening lies in its adaptability. Feel free to experiment with variations on this DIY trick. For instance, if you’re dealing with particularly heavy clay soil, consider adding more organic matter like composted leaves or aged manure to improve drainage and aeration. If space is truly limited, explore vertical gardening techniques using trellises or hanging planters to maximize your yield. You could even try companion planting, pairing your cowpeas with beneficial herbs like basil or rosemary to deter pests naturally.
Consider different varieties of cowpeas too! While we’ve focused on a general approach, exploring different cultivars can lead to exciting discoveries. Some varieties are more drought-tolerant, while others are better suited for cooler climates. Researching the specific needs of your chosen variety will further enhance your success.
Don’t be afraid to get your hands dirty and embrace the learning process. Gardening is a journey, not a destination. There will be successes and setbacks along the way, but each experience will teach you something valuable. The most important thing is to start, experiment, and have fun!
We are confident that this DIY trick will empower you to create a flourishing cowpea garden, providing you with a sustainable source of fresh, nutritious food. So, gather your supplies, follow the steps outlined, and prepare to be amazed by the results.
We wholeheartedly encourage you to try this DIY trick and share your experiences with us! We’d love to hear about your successes, challenges, and any variations you’ve implemented. Share your photos, tips, and stories in the comments section below. Let’s build a community of passionate gardeners, supporting each other and celebrating the joys of homegrown cowpeas! Your insights could inspire others to embark on their own gardening adventures. Happy gardening!
Frequently Asked Questions (FAQ)
What exactly are cowpeas, and why should I grow them?
Cowpeas, also known as black-eyed peas, are legumes packed with protein, fiber, and essential nutrients. They are relatively easy to grow, even in less-than-ideal soil conditions, making them a great choice for beginner gardeners. Plus, they’re incredibly versatile in the kitchen, lending themselves to a wide range of dishes from soups and stews to salads and side dishes. Growing your own ensures you have access to fresh, organic cowpeas whenever you want them.
What kind of soil is best for growing cowpeas?
While cowpeas are adaptable, they thrive in well-drained soil with a slightly acidic to neutral pH (around 6.0 to 7.0). If your soil is heavy clay, amend it with plenty of organic matter like compost, aged manure, or peat moss to improve drainage and aeration. Sandy soil can be improved by adding organic matter to help retain moisture and nutrients. A soil test can provide valuable insights into your soil’s composition and nutrient levels, allowing you to make informed amendments.
How much sunlight do cowpeas need?
Cowpeas require at least 6-8 hours of direct sunlight per day to thrive. Choose a location in your garden that receives ample sunlight throughout the day. If you live in a particularly hot climate, some afternoon shade can be beneficial to prevent the plants from scorching.
When is the best time to plant cowpeas?
The best time to plant cowpeas is after the last frost in spring, when the soil has warmed up to at least 65°F (18°C). Cowpeas are warm-season crops and are sensitive to cold temperatures. Check your local weather forecast and planting calendar for specific recommendations for your region.
How often should I water my cowpea plants?
Water your cowpea plants regularly, especially during dry periods. Aim to keep the soil consistently moist but not waterlogged. Water deeply and less frequently, rather than shallowly and more often, to encourage deep root growth. Mulching around the plants can help retain moisture in the soil and reduce the need for frequent watering.
What are some common pests and diseases that affect cowpeas, and how can I prevent them?
Common pests that can affect cowpeas include aphids, bean beetles, and nematodes. Diseases include fungal infections like powdery mildew and root rot. To prevent these problems, practice good garden hygiene, such as removing weeds and debris that can harbor pests and diseases. Consider using organic pest control methods like insecticidal soap or neem oil to control infestations. Ensure proper drainage to prevent root rot. Crop rotation can also help prevent the buildup of soilborne pests and diseases.
Can I grow cowpeas in containers?
Yes, you can grow cowpeas in containers, especially bush varieties. Choose a large container with good drainage holes and fill it with a well-draining potting mix. Provide adequate sunlight and water regularly. You may need to fertilize container-grown cowpeas more frequently than those grown in the ground, as nutrients can leach out of the soil more quickly.
How long does it take for cowpeas to mature?
Cowpeas typically mature in 60-90 days, depending on the variety and growing conditions. You can start harvesting the pods when they are plump and filled with beans.
How do I know when my cowpeas are ready to harvest?
The best time to harvest cowpeas depends on how you plan to use them. For fresh shelling peas, harvest the pods when they are plump and green, but before they start to dry out. For dried peas, allow the pods to dry completely on the vine before harvesting.
Can I save seeds from my cowpeas for next year?
Yes, you can save seeds from your cowpeas for next year. Allow the pods to dry completely on the vine, then shell the peas and store them in an airtight container in a cool, dry place. Be sure to label the seeds with the variety and date. Keep in mind that if you grew hybrid varieties, the seeds may not produce plants that are true to type.
What are some delicious ways to use my homegrown cowpeas?
Cowpeas are incredibly versatile in the kitchen. They can be used in soups, stews, salads, side dishes, and even dips. Some popular dishes include Hoppin’ John (a traditional Southern dish made with cowpeas, rice, and pork), black-eyed pea salad, and cowpea fritters. Experiment with different recipes and flavor combinations to discover your favorite ways to enjoy your homegrown cowpeas.
How can I improve the yield of my cowpea garden?
To maximize your cowpea yield, ensure proper soil preparation, adequate sunlight and water, and protection from pests and diseases. Consider using a balanced fertilizer to provide essential nutrients. Support climbing varieties with trellises or stakes. Regularly harvest the pods to encourage continued production. And most importantly, enjoy the process! A well-tended and loved garden will always reward you with a bountiful harvest. Remember, mastering the art of the **cowpea garden DIY** is a journey, and each season brings new learning opportunities.
Leave a Comment