

Carrot Growing Soil Sack: Imagine biting into a crisp, sweet carrot, bursting with flavor, that you grew yourself – right in your backyard, or even on your balcony! Forget the sprawling garden; we’re diving into the wonderful world of container gardening with a clever twist. This isn’t just about growing carrots; it’s about unlocking a simple, space-saving, and incredibly rewarding way to enjoy fresh produce, no matter where you live.
For centuries, humans have cultivated carrots, tracing their origins back to Afghanistan. From their humble beginnings as wild, forked roots, they’ve evolved into the vibrant orange delights we know and love. But traditional gardening can be daunting, requiring ample space and meticulous soil preparation. That’s where our DIY carrot growing soil sack comes in!
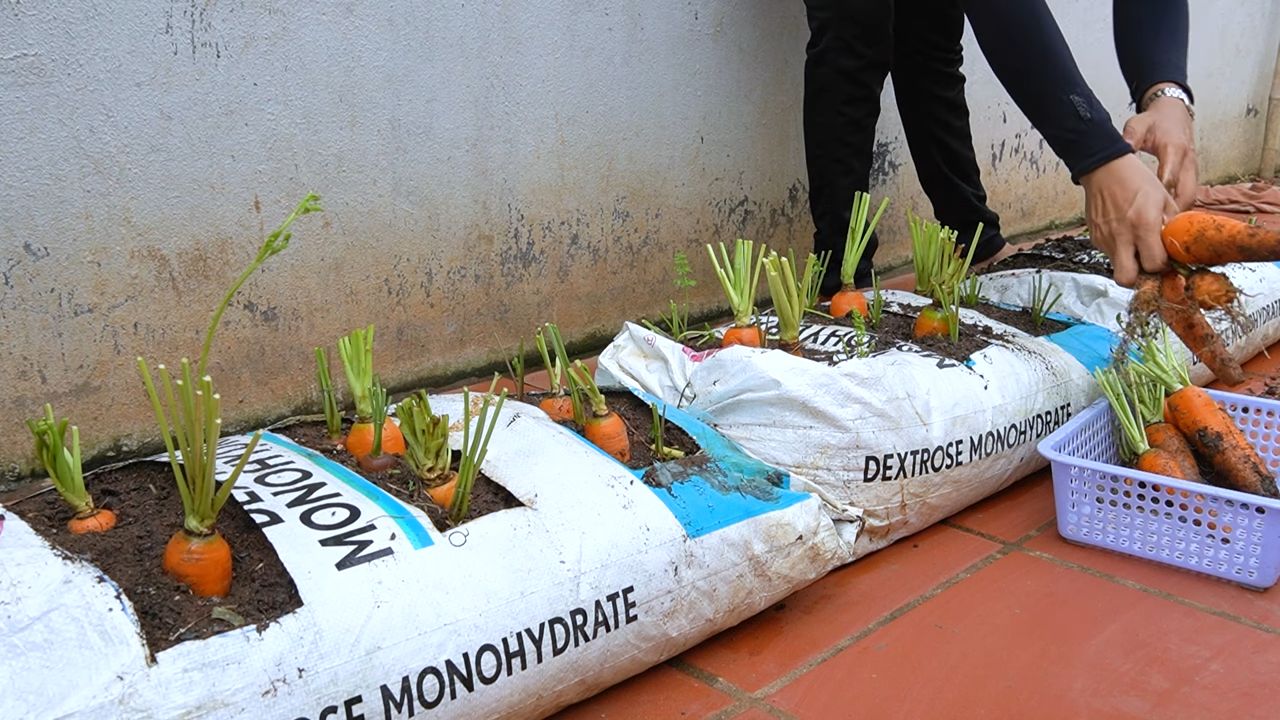
Let’s face it, not everyone has the luxury of a sprawling garden. Apartment dwellers, urbanites with limited space, and even those with back problems can find traditional gardening challenging. That’s why this DIY trick is a game-changer. A carrot growing soil sack offers a compact, portable, and cost-effective solution. It allows you to control the soil quality, ensuring your carrots get the nutrients they need to thrive. Plus, it’s a fun and engaging project that brings the joy of gardening to everyone. I’m excited to show you how easy it is to create your own bountiful harvest, one soil sack at a time!
DIY Upside-Down Carrot Growing Soil Sack
Hey there, fellow gardening enthusiasts! Ever dreamt of harvesting a bounty of vibrant, perfectly formed carrots without battling rocky soil, pesky pests, or space constraints? Well, I’m here to tell you that dream can become a reality with this super fun and surprisingly easy DIY project: the Upside-Down Carrot Growing Soil Sack!
This method is fantastic because it allows you to grow carrots even in small spaces like balconies or patios. Plus, it’s a great way to avoid common carrot problems like forking and stunted growth caused by compacted soil. Let’s get started!
What You’ll Need
Before we dive in, let’s gather our supplies. Here’s a list of everything you’ll need to create your own upside-down carrot growing soil sack:
* A sturdy woven polypropylene bag: Think of the kind you get animal feed or potting soil in. These are strong, durable, and perfect for holding the weight of the soil. Aim for a bag that’s at least 3 feet tall.
* Potting soil specifically formulated for vegetables: This is crucial! Don’t skimp on the quality of your soil. Carrots need loose, well-draining soil to thrive. I recommend a mix specifically designed for root vegetables.
* Carrot seeds: Choose your favorite variety! Nantes, Chantenay, and Danvers are all excellent choices for container gardening. Consider a shorter variety to make harvesting easier.
* A sharp knife or scissors: For cutting holes in the bag.
* Measuring tape or ruler: To ensure even spacing of the holes.
* A sturdy hook or rope: For hanging your soil sack. Make sure it can support the weight of the filled bag.
* Watering can or hose with a gentle spray nozzle: For watering your carrots.
* Gloves: To keep your hands clean.
* Optional: Landscape fabric or burlap: To line the inside of the bag for extra support and moisture retention.
* Optional: Small pebbles or gravel: To improve drainage at the bottom of the bag.
Preparing the Soil Sack
This is where we transform a simple bag into a carrot-growing haven!
1. Clean the bag: Give your woven polypropylene bag a good shake to remove any loose debris or leftover material. If it’s particularly dirty, you can rinse it out with water and let it dry completely.
2. (Optional) Line the bag: If you’re using landscape fabric or burlap, cut a piece large enough to line the inside of the bag. This will help retain moisture and prevent soil from escaping through the weave of the bag. Secure the lining with a few stitches or staples if needed.
3. Mark the planting holes: This is a crucial step for even carrot distribution. Using your measuring tape or ruler, mark evenly spaced circles around the bag. I recommend spacing them about 6-8 inches apart, both horizontally and vertically. The number of holes will depend on the size of your bag.
4. Cut the planting holes: Carefully cut out the circles you marked. Make the holes about 2-3 inches in diameter. You want them large enough to easily plant your carrot seeds, but not so large that the soil will fall out.
5. Reinforce the top of the bag: Fold the top edge of the bag over a few times to create a reinforced rim. This will help prevent the bag from tearing when you hang it. Secure the fold with staples or stitches.
6. Attach the hanging mechanism: Depending on your chosen method, attach the hook or rope securely to the reinforced top of the bag. Make sure it’s strong enough to support the weight of the filled bag.
Planting Your Carrot Seeds
Now for the fun part – planting those tiny seeds that will eventually become delicious carrots!
1. (Optional) Add drainage: Place a layer of small pebbles or gravel at the bottom of the bag to improve drainage. This will help prevent the roots from becoming waterlogged.
2. Fill the bag with soil: Gradually fill the bag with your potting soil, gently patting it down as you go. Leave a few inches of space at the top of the bag.
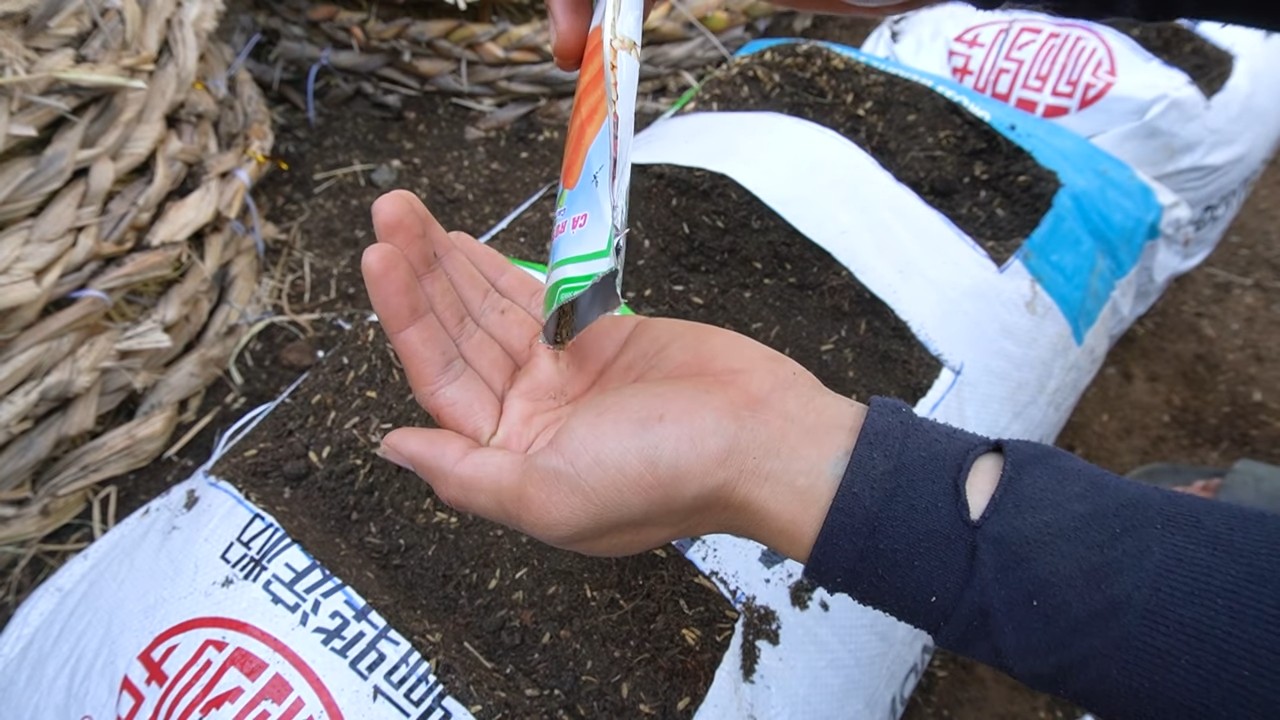
3. Plant the seeds in the holes: Carefully insert a few carrot seeds into each of the holes you cut. Follow the instructions on your seed packet for the recommended planting depth. Usually, it’s just a light covering of soil.
4. Plant seeds at the top: Don’t forget to plant some seeds in the top of the bag as well! This will maximize your carrot yield.
5. Water gently: Use your watering can or hose with a gentle spray nozzle to thoroughly water the soil. Be careful not to wash away the seeds.
Hanging and Caring for Your Carrot Sack
Almost there! Now it’s time to hang your carrot sack and provide the care it needs to flourish.
1. Hang the bag: Carefully lift the filled soil sack and hang it in a sunny location. Carrots need at least 6 hours of sunlight per day. Make sure the hanging mechanism is secure and can support the weight of the bag.
2. Water regularly: Carrots need consistent moisture to thrive. Water your soil sack regularly, especially during hot, dry weather. Check the soil moisture by sticking your finger into the soil. If it feels dry to the touch, it’s time to water.
3. Fertilize (optional): If you notice your carrots are not growing as vigorously as you’d like, you can fertilize them with a balanced liquid fertilizer. Follow the instructions on the fertilizer label.
4. Thin the seedlings: Once the seedlings emerge, thin them out so that only one or two plants are growing in each hole. This will give the carrots enough space to develop properly.
5. Rotate the bag: To ensure even sunlight exposure, rotate the bag occasionally. This will help prevent the carrots from leaning towards the sun.
6. Watch for pests: Keep an eye out for common carrot pests like carrot rust flies and aphids. If you spot any pests, take action immediately to prevent them from damaging your crop. Organic pest control methods are always a good option.
Harvesting Your Carrots
The moment you’ve been waiting for! Harvesting your homegrown carrots is incredibly rewarding.
1. Check for maturity: Carrots are typically ready to harvest when they reach the size specified on the seed packet. You can also gently pull back the soil around the top of the carrot to check its size.
2. Harvest carefully: To harvest, gently pull the carrots out of the holes. If they’re difficult to pull, you can loosen the soil around them with a trowel.
3. Enjoy your harvest: Wash your freshly harvested carrots and enjoy them in salads, soups, or as a healthy snack!
Troubleshooting Tips
Even with the best planning, sometimes things don’t go exactly as expected. Here are a few troubleshooting tips to help you overcome common challenges:
* Carrots are stunted or forked: This is usually caused by compacted soil or rocks in the soil. Make sure you’re using a high-quality potting mix specifically formulated for vegetables.
* Carrots are pale or yellow: This could be a sign of nutrient deficiency. Fertilize your carrots with a balanced liquid fertilizer.
* Carrots are being eaten by pests: Identify the pest and take appropriate action. Organic pest control methods are often the best option.
* Soil is drying out too quickly: Consider adding more organic matter to the soil to improve water retention. You can also try lining the bag with landscape fabric or burlap.
* Bag is tearing: Reinforce the bag with extra stitching or duct tape. You can also try using a stronger bag.
Additional Tips for Success
Here are a few extra tips to help you maximize your carrot-growing success:
* Choose the right carrot variety: Shorter varieties like Nantes and Chantenay are well-suited for container gardening.
* Start with fresh seeds: Carrot seeds have a relatively short shelf life, so it’s important to use fresh seeds.
* Don’t overwater: Overwatering can lead to root rot. Allow the soil to dry out slightly between waterings.
* Protect from extreme weather: If you live in an area with extreme weather conditions, protect your soil sack from frost or excessive heat.
* Succession planting: Plant new seeds every few weeks to ensure a continuous harvest throughout the growing season.
Growing carrots upside down in a soil sack is a fun, rewarding, and space-saving way to enjoy fresh, homegrown carrots. With a little bit of effort and these helpful tips, you’ll be harvesting a bountiful crop in no time! Happy gardening!
Conclusion
So, there you have it! Transforming a simple sack into a thriving haven for your carrot crop is not just a cost-effective solution, it’s a rewarding experience that connects you directly to the food you eat. This DIY carrot growing soil sack method offers a multitude of benefits, from superior drainage and aeration compared to traditional garden beds, to the sheer portability that allows you to chase the sun or protect your precious carrots from unexpected frosts. Forget back-breaking digging and weeding in vast garden plots; this method brings the garden to you, making it accessible even if you have limited space or mobility.
But the real magic lies in the control you have over the growing environment. By crafting your own soil mix, you can tailor it specifically to the needs of your carrots, ensuring they receive the perfect balance of nutrients and drainage for optimal growth. This is especially crucial for carrots, which thrive in loose, well-drained soil that allows their roots to penetrate deeply without resistance. Store-bought potting mixes can sometimes be too dense or retain too much moisture, leading to stunted growth or even root rot. With our DIY approach, you eliminate these risks and create the ideal conditions for your carrots to flourish.
Beyond the practical advantages, creating your own carrot growing soil sack is also an incredibly satisfying project. There’s something deeply fulfilling about nurturing life from seed to harvest, and this method allows you to be intimately involved in every step of the process. Imagine the pride you’ll feel when you pull your first plump, vibrant carrot from your very own homemade growing sack!
Ready to take your carrot growing to the next level? Don’t be afraid to experiment with different soil amendments to find the perfect blend for your local climate and carrot varieties. Consider adding composted manure for extra nutrients, or perlite for enhanced drainage. You can even try companion planting herbs like rosemary or sage around the base of your sack to deter pests naturally.
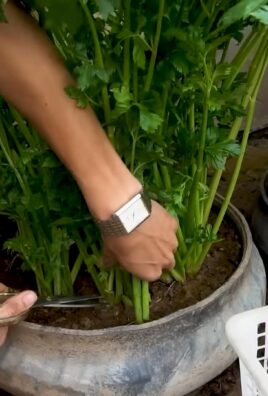
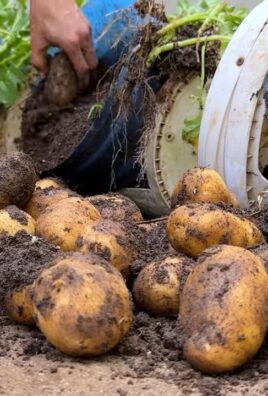
And the possibilities don’t stop there! Once you’ve mastered the art of the carrot growing soil sack, you can adapt the technique to grow other root vegetables like radishes, beets, or even potatoes. The principles remain the same: create a well-draining, nutrient-rich environment in a portable container, and watch your garden thrive.
We wholeheartedly encourage you to give this DIY trick a try. It’s a fun, affordable, and incredibly rewarding way to grow your own delicious carrots, regardless of your gardening experience or available space. And most importantly, don’t forget to share your experiences with us! We’d love to see your creations, hear about your successes (and even your challenges), and learn from your unique perspectives. Post photos of your carrot growing soil sacks on social media using #DIYCarrotSack and tag us so we can celebrate your gardening journey with you. Happy growing!
Frequently Asked Questions (FAQ)
What kind of sack should I use for my carrot growing soil sack?
The ideal sack is made of a breathable material like burlap, jute, or even a heavy-duty landscape fabric. These materials allow for proper air circulation and drainage, preventing the soil from becoming waterlogged. Avoid using plastic bags or non-breathable materials, as they can trap moisture and lead to root rot. The size of the sack will depend on the number of carrots you want to grow, but a sack that is at least 18 inches in diameter and 24 inches deep is generally recommended. You can also repurpose large animal feed bags, just be sure to thoroughly clean them before use.
What is the best soil mix for growing carrots in a sack?
Carrots thrive in loose, well-drained soil that is rich in organic matter. A good soil mix for your carrot growing soil sack would consist of equal parts:
* **Compost:** Provides essential nutrients and improves soil structure.
* **Sand:** Enhances drainage and prevents compaction. Horticultural sand is preferred.
* **Topsoil:** Provides a base for the soil mix. Ensure it is free of rocks and debris.
* **Peat Moss or Coco Coir:** Helps retain moisture and improves aeration.
You can also add amendments like bone meal or rock phosphate to provide extra phosphorus, which is essential for root development. Avoid using soil that is too heavy or clay-based, as it can restrict root growth and lead to misshapen carrots.
How often should I water my carrot growing soil sack?
Watering frequency will depend on the weather conditions and the type of soil mix you are using. Generally, you should water your carrot growing soil sack when the top inch of soil feels dry to the touch. Water deeply and thoroughly, ensuring that the entire sack is moistened. Avoid overwatering, as this can lead to root rot. During hot, dry weather, you may need to water more frequently. A good way to check the moisture level is to insert your finger into the soil a few inches deep. If the soil feels dry, it’s time to water.
How much sunlight do carrots need when grown in a sack?
Carrots need at least 6-8 hours of direct sunlight per day to thrive. Choose a location for your carrot growing soil sack that receives plenty of sunlight throughout the day. If you live in a particularly hot climate, you may need to provide some afternoon shade to prevent the soil from drying out too quickly. The portability of the sack allows you to easily move it to follow the sun or provide protection from extreme weather.
What are some common problems when growing carrots in a sack and how can I prevent them?
Some common problems when growing carrots include:
* **Forked or misshapen carrots:** This is often caused by rocks or compacted soil in the growing medium. Ensure your soil mix is loose and free of debris.
* **Root rot:** This is caused by overwatering or poor drainage. Use a well-draining soil mix and avoid overwatering.
* **Pests:** Carrot rust flies and nematodes can damage carrot roots. Use companion planting (e.g., marigolds) or row covers to deter pests.
* **Bolting:** This occurs when carrots are exposed to extreme temperature fluctuations, causing them to flower prematurely. Provide consistent watering and protect plants from extreme heat or cold.
Regularly inspect your plants for signs of pests or disease and take appropriate action promptly.
Can I reuse the soil from my carrot growing soil sack?
Yes, you can reuse the soil from your carrot growing soil sack, but it’s important to amend it before planting again. Remove any remaining plant debris and add fresh compost and other amendments to replenish nutrients and improve soil structure. You may also want to sterilize the soil to kill any potential pathogens or pests. This can be done by baking the soil in the oven or solarizing it in a black plastic bag.
What varieties of carrots are best suited for growing in a sack?
Shorter, rounder carrot varieties like ‘Thumbelina’ or ‘Parisian’ are particularly well-suited for growing in containers or sacks, as they don’t require as much depth as longer varieties. However, you can still grow longer varieties like ‘Nantes’ or ‘Danvers’ in a sack, as long as the sack is deep enough to accommodate their root length. Consider the size of your sack and choose varieties accordingly.
How do I know when my carrots are ready to harvest from the soil sack?
Carrots are typically ready to harvest when they reach the desired size and color. Check the seed packet for specific maturity dates for your chosen variety. You can also gently brush away some of the soil around the base of the plant to check the size of the carrot. Harvest carrots on a dry day to prevent them from rotting. Gently loosen the soil around the carrot and pull it straight up from the sack.
Leave a Comment