

Bottle garden peppers: sounds intriguing, right? I’m so excited to share this incredibly simple and rewarding DIY project with you! Forget sprawling gardens and back-breaking labor; we’re bringing the vibrant flavors of fresh peppers right to your windowsill, balcony, or even your kitchen counter using recycled bottles.
The concept of container gardening, while seemingly modern, actually has deep roots. Throughout history, people have cultivated plants in pots and other vessels, from the hanging gardens of Babylon to the intricate bonsai of Japan. This resourcefulness allowed communities to grow food and beauty even in limited spaces. But what makes this particular method so appealing? Well, in today’s fast-paced world, not everyone has the time, space, or resources for a traditional garden. That’s where the magic of bottle garden peppers comes in!
Imagine plucking a ripe, juicy pepper straight from a bottle you repurposed yourself. No more trips to the grocery store for subpar produce! This DIY trick is perfect for apartment dwellers, busy professionals, or anyone who wants to add a touch of green (and a dash of spice!) to their lives. Plus, it’s a fantastic way to reduce waste and teach kids about sustainability. So, grab your empty bottles, some soil, and let’s get growing! I promise, you’ll be amazed at how easy and fulfilling this project is.
DIY Bottle Garden for Peppers: Grow Your Own Spicy Delights!
Hey there, fellow gardening enthusiasts! Ever dreamed of having fresh, flavorful peppers right at your fingertips, even if you’re short on space? Well, I’m here to tell you that dream can become a reality with a super simple and surprisingly effective DIY: a bottle garden for peppers! This project is perfect for beginners, apartment dwellers, or anyone who wants to add a touch of green (and spice!) to their lives. Let’s get started!
What You’ll Need: The Supply List
Before we dive in, let’s gather our supplies. Don’t worry, most of these are easily accessible and probably already lying around your house!
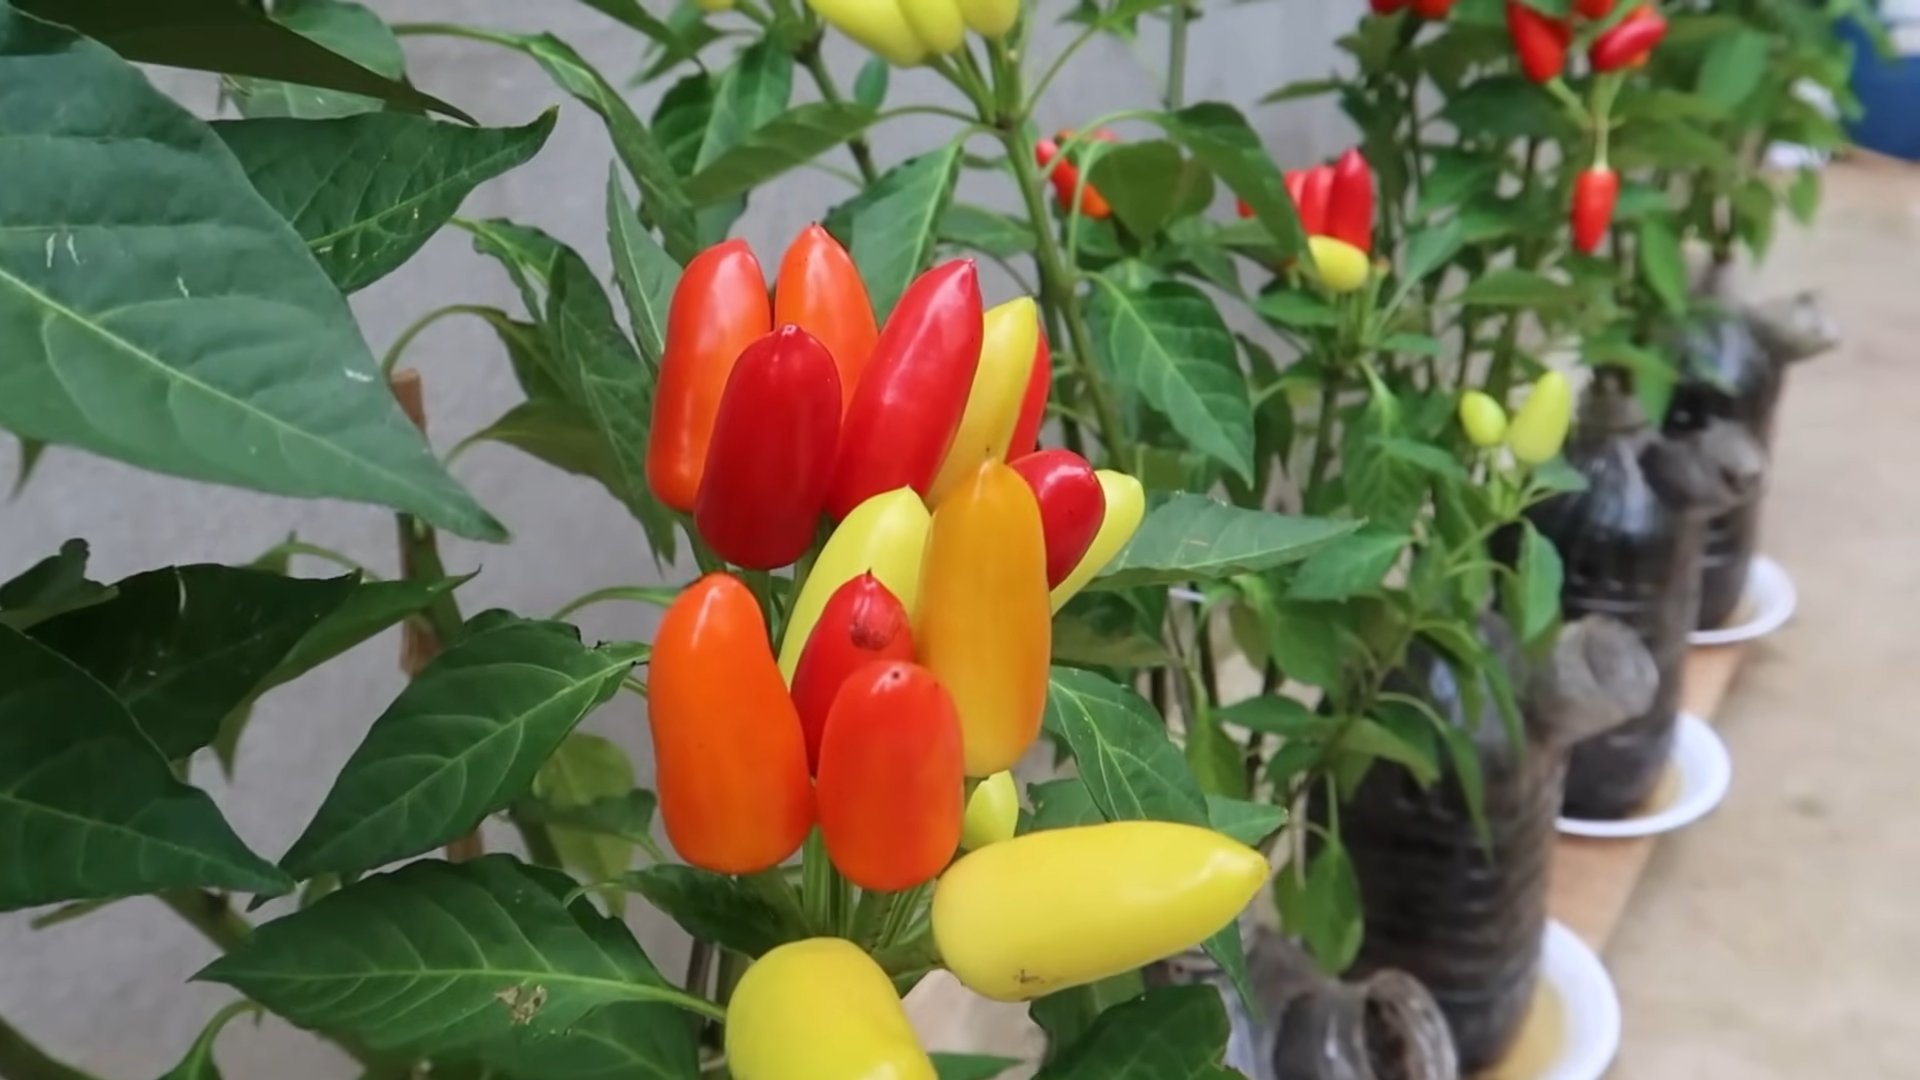
* Plastic Bottles: This is the star of the show! I recommend using 2-liter soda bottles or larger water bottles. The bigger, the better, as it gives your pepper plants more room to grow. You’ll need at least two bottles per plant.
* Scissors or Utility Knife: For cutting the plastic bottles. Be careful and always cut away from yourself!
* Potting Soil: Choose a well-draining potting mix specifically formulated for vegetables. This will ensure your peppers get the nutrients they need.
* Pepper Seeds or Seedlings: You can start from seeds or buy small pepper seedlings from your local garden center. If you’re a beginner, seedlings are generally easier to manage. I personally love growing jalapenos and bell peppers in my bottle gardens.
* Water: Essential for keeping your pepper plants hydrated.
* Gravel or Small Stones: For drainage at the bottom of the bottle.
* Optional:
* Gloves: To keep your hands clean.
* Measuring Cup: To accurately measure the potting soil.
* Permanent Marker: To label your bottles.
* Spray Paint (Optional): To decorate your bottles and make them look more appealing.
Preparing the Bottles: The Foundation of Your Garden
This is where we transform those ordinary plastic bottles into mini-gardening havens!
1. Clean the Bottles: Thoroughly wash the plastic bottles with soap and water to remove any residue. Rinse them well and let them dry completely. This is crucial for preventing mold and bacteria growth.
2. Cut the Bottles: For each bottle, you’ll need to cut it into two sections.
* Bottle 1 (Top Section – Planting Container): Cut the bottle approximately 6-8 inches from the top, creating a funnel-shaped piece. This will be the top section where you’ll plant your pepper.
* Bottle 2 (Bottom Section – Water Reservoir): Cut the second bottle about 4-6 inches from the bottom. This will serve as the water reservoir.
3. Prepare the Top Section (Planting Container):
* Drill Drainage Holes (Optional but Recommended): If you have a drill, carefully drill a few small drainage holes in the bottom of the top section. This will prevent waterlogging and root rot. If you don’t have a drill, you can skip this step, but be extra careful not to overwater.
* Invert the Top Section: Turn the top section upside down so that the bottle cap is facing down. This will act as a wick to draw water from the reservoir.
4. Prepare the Bottom Section (Water Reservoir):
* Add Gravel or Stones: Place a layer of gravel or small stones at the bottom of the bottom section. This will improve drainage and prevent the soil from becoming waterlogged.
Planting Your Peppers: Bringing Life to Your Bottle Garden
Now for the fun part – planting your peppers!
1. Add Potting Soil to the Top Section: Slowly fill the top section (the inverted bottle) with potting soil. Leave about an inch of space at the top. Gently tap the bottle to settle the soil.
2. Plant Your Pepper Seeds or Seedlings:
* From Seeds: If you’re starting from seeds, follow the instructions on the seed packet for planting depth and spacing. I usually plant 2-3 seeds per bottle and thin them out later if necessary.
* From Seedlings: Gently remove the seedling from its container and loosen the roots slightly. Dig a small hole in the center of the potting soil and place the seedling in the hole. Backfill with potting soil and gently pat it down.
3. Water Thoroughly: Water the potting soil thoroughly until water drains out of the bottom (if you drilled drainage holes) or until the soil is evenly moist.
4. Place the Top Section into the Bottom Section: Carefully place the top section (the planting container) into the bottom section (the water reservoir). The bottom of the inverted bottle should be submerged in the water.
Caring for Your Pepper Plants: Nurturing Your Spicy Friends
Now that your pepper plants are nestled in their bottle gardens, it’s time to provide them with the care they need to thrive.
1. Sunlight: Pepper plants need at least 6-8 hours of sunlight per day. Place your bottle garden in a sunny location, such as a windowsill, balcony, or patio. If you don’t have enough natural sunlight, you can supplement with a grow light.
2. Watering: The beauty of the bottle garden is that it’s self-watering! The inverted bottle acts as a wick, drawing water from the reservoir as needed. Check the water level in the reservoir regularly and refill it when it gets low. Avoid overwatering, as this can lead to root rot.
3. Fertilizing: Pepper plants are heavy feeders and need regular fertilization to produce abundant fruit. Use a balanced liquid fertilizer specifically formulated for vegetables. Follow the instructions on the fertilizer label for application rates and frequency. I usually fertilize my pepper plants every 2-3 weeks.
4. Pruning: Pruning your pepper plants can help to improve air circulation and encourage bushier growth. Remove any yellowing or dead leaves. You can also pinch off the tips of the branches to encourage more branching.
5. Pest Control: Keep an eye out for common pepper plant pests, such as aphids, spider mites, and whiteflies. If you spot any pests, treat them with an insecticidal soap or neem oil.
Troubleshooting: Addressing Common Issues
Even with the best care, you might encounter some challenges along the way. Here are some common issues and how to address them:
* Yellowing Leaves: This can be caused by overwatering, underwatering, nutrient deficiencies, or pests. Check the soil moisture and adjust your watering accordingly. Fertilize your plants regularly. Inspect your plants for pests and treat them as needed.
* Drooping Leaves: This can be caused by underwatering, heat stress, or root rot. Water your plants thoroughly. Move your plants to a cooler location if they are experiencing heat stress. Check for signs of root rot and take steps to prevent it.
* Lack of Fruit Production: This can be caused by insufficient sunlight, nutrient deficiencies, or poor pollination. Make sure your plants are getting enough sunlight. Fertilize your plants regularly. Hand-pollinate your plants by gently shaking the flowers or using a small paintbrush to transfer pollen from one flower to another.
* Root Rot: This is a fungal disease that can be caused by overwatering. Make sure your soil is well-draining. Avoid overwatering. If you suspect root rot, remove the affected plant from the bottle and trim away any rotten roots. Repot the plant in fresh potting soil.
Harvesting Your Peppers: The Sweet Reward
After all your hard work, it’s finally time to harvest your peppers!
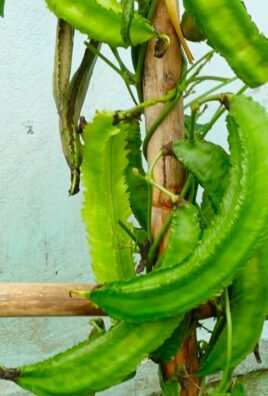
1. When to Harvest: The timing of your harvest will depend on the type of pepper you’re growing. Generally, peppers are ready to harvest when they have reached their mature size and color. For example, jalapenos are typically harvested when they are about 2-3 inches long and dark green. Bell peppers are harvested when they are fully colored and firm to the touch.
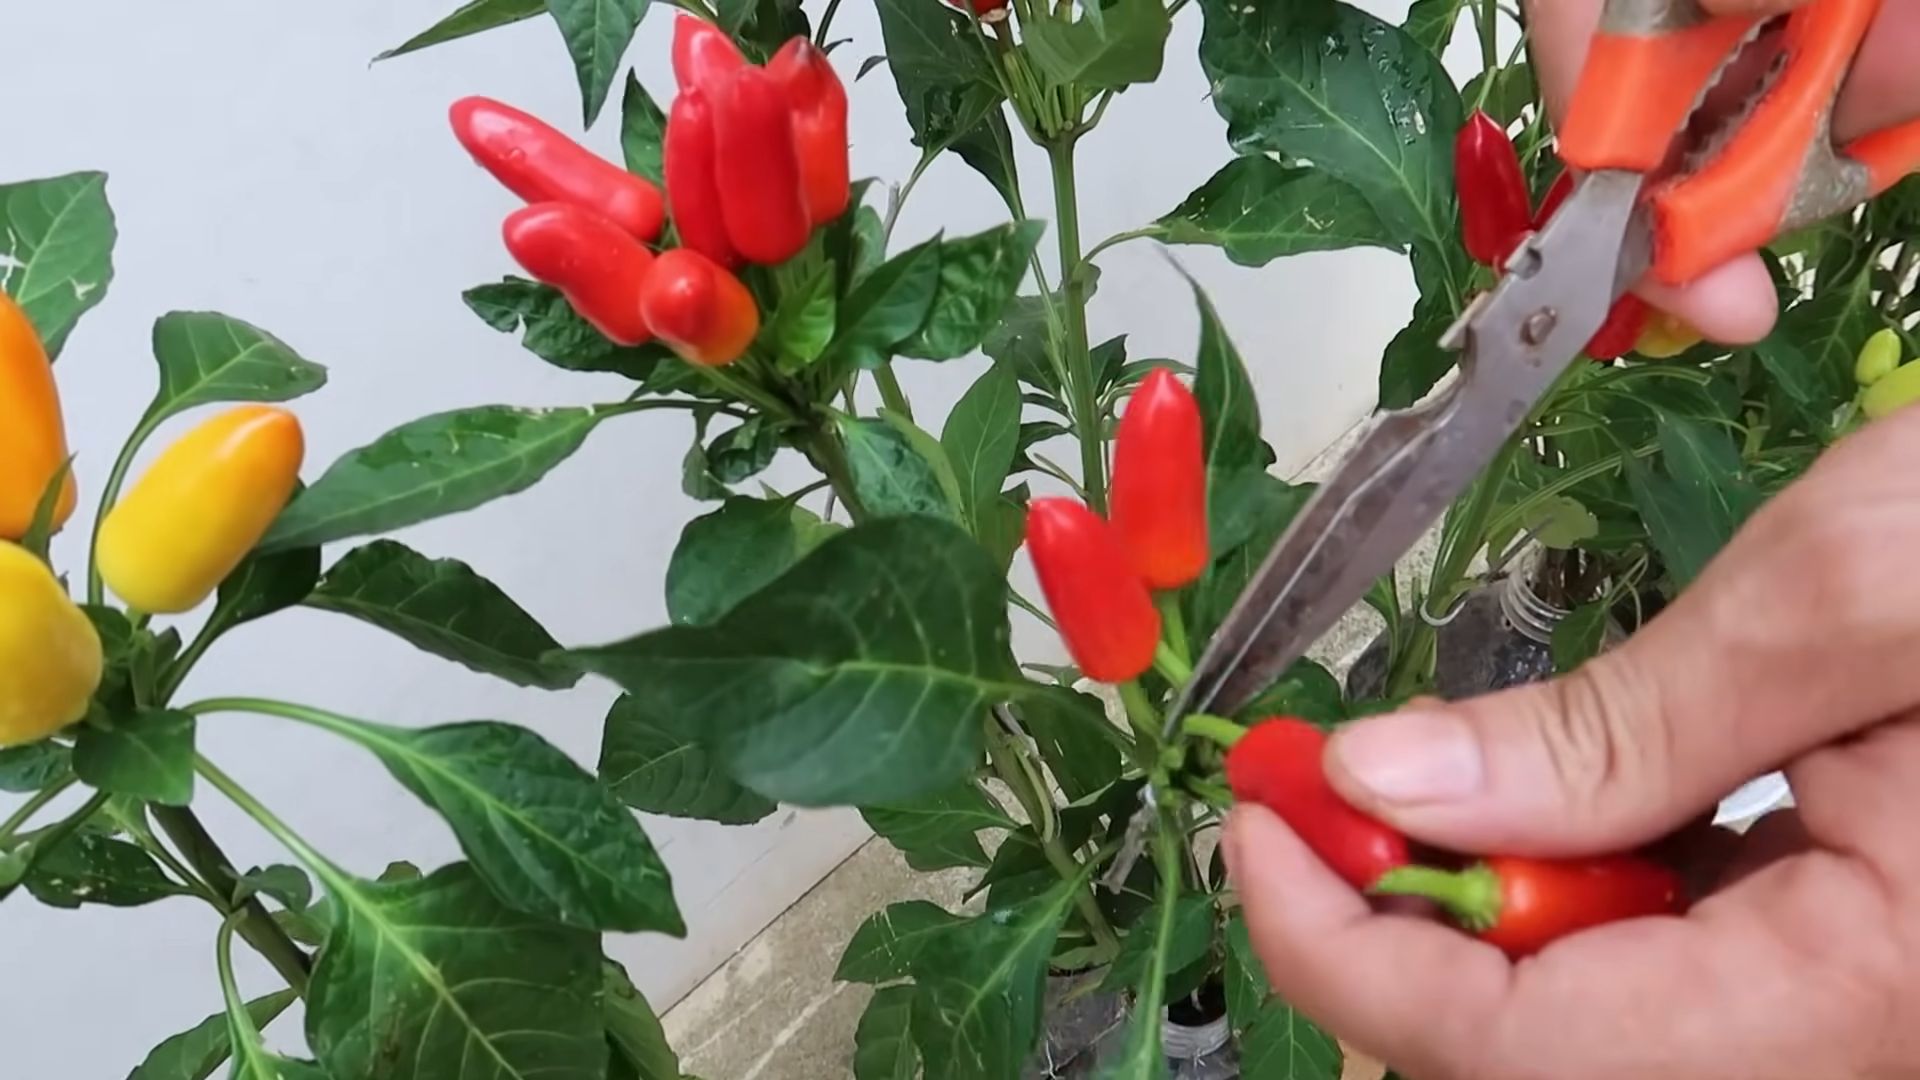
2. How to Harvest: Use a sharp knife or scissors to cut the peppers from the plant. Be careful not to damage the plant.
3. Enjoy Your Harvest: Now you can enjoy the fruits (or rather, peppers!) of your labor. Use your fresh peppers in your favorite recipes, or preserve them for later use.
Extra Tips and Tricks: Level Up Your Bottle Garden
* Label Your Bottles: Use a permanent marker to label your bottles with the type of pepper you’re growing. This will help you keep track of your plants.
* Decorate Your Bottles: Get creative and decorate your bottles with paint, stickers, or other embellishments. This will add a personal touch to your bottle garden.
* Rotate Your Plants: Rotate your plants regularly to ensure that all sides receive equal sunlight.
* Use Different Types of Bottles: Experiment with different types of bottles to see what works best for you. You can use soda bottles, water bottles
Conclusion
So, there you have it! Transforming ordinary plastic bottles into thriving miniature gardens for your peppers is not just a fun project; it’s a game-changer for anyone looking to maximize space, recycle creatively, and enjoy fresh, homegrown produce. This DIY bottle garden peppers method offers a sustainable and cost-effective way to cultivate your favorite spicy or sweet varieties, regardless of whether you have a sprawling backyard or a tiny balcony.
Why is this a must-try? Because it’s incredibly versatile! Imagine the satisfaction of snipping off a perfectly ripe pepper, grown with your own hands, from a plant that started its life in a repurposed plastic bottle. It’s a tangible connection to the food you eat, a step towards a more sustainable lifestyle, and a visually appealing addition to any home. Plus, the self-watering nature of some bottle garden designs makes them surprisingly low-maintenance, perfect for busy individuals or those new to gardening.
But the benefits don’t stop there. Bottle gardens are naturally protected from some ground-dwelling pests, and the contained environment allows you to control the soil composition and watering schedule more precisely. This can lead to healthier, more productive pepper plants, yielding a bountiful harvest that will spice up your meals for months to come.
Ready to take it to the next level? Consider experimenting with different types of bottles. Larger bottles can accommodate larger pepper varieties, while smaller bottles are perfect for compact chili peppers. You can also explore different soil mixes to optimize growth for specific pepper types. For example, adding a bit of bone meal to the soil can encourage strong root development and abundant fruiting.
Another variation is to create a vertical bottle garden by hanging multiple bottles from a frame or wall. This not only saves even more space but also creates a stunning visual display. Get creative with the bottle design itself! Paint them, decorate them with twine, or even add drainage holes in artistic patterns.
Don’t be afraid to experiment with companion planting. Basil, for example, is a great companion plant for peppers, as it repels pests and can even improve the flavor of the peppers. Plant a small basil seedling in the same bottle as your pepper plant for a mutually beneficial relationship.
We wholeheartedly encourage you to give this DIY bottle garden peppers project a try. It’s a rewarding experience that combines creativity, sustainability, and the joy of growing your own food. Once you’ve created your own bottle garden, we’d love to hear about your experience! Share your photos, tips, and challenges in the comments below. Let’s build a community of bottle garden enthusiasts and inspire others to embrace this innovative and eco-friendly gardening technique. Your success stories and insights will help others discover the magic of growing peppers in bottles and contribute to a greener, more sustainable future. Happy gardening!
Frequently Asked Questions (FAQ)
What types of peppers are best suited for bottle gardens?
Almost any pepper variety can be grown in a bottle garden, but smaller to medium-sized peppers tend to thrive best. Chili peppers, bell peppers (smaller varieties), and jalapeños are all excellent choices. Consider the size of the bottle when selecting your pepper variety. Larger bottles can accommodate larger pepper plants, while smaller bottles are better suited for compact varieties. Also, consider the climate you live in. Some pepper varieties are more heat-tolerant than others. Research which peppers grow best in your region for optimal results.
What kind of soil should I use for my bottle garden peppers?
A well-draining potting mix is essential for successful bottle garden peppers. Avoid using garden soil, as it can become compacted in the bottle and hinder drainage. A good mix consists of equal parts potting soil, perlite, and compost. The potting soil provides nutrients, the perlite improves drainage, and the compost adds organic matter. You can also add a slow-release fertilizer to the mix to provide a steady supply of nutrients to your pepper plants. Consider adding a small amount of bone meal to the soil mix to encourage strong root development and abundant fruiting.
How often should I water my bottle garden peppers?
The watering frequency will depend on the size of the bottle, the type of pepper, and the climate. Generally, you should water your bottle garden peppers when the top inch of soil feels dry to the touch. Avoid overwatering, as this can lead to root rot. If you’re using a self-watering bottle design, you’ll need to refill the water reservoir regularly. Check the reservoir every few days and refill it as needed. During hot weather, you may need to water your bottle garden peppers more frequently.
How much sunlight do bottle garden peppers need?
Peppers need at least 6-8 hours of direct sunlight per day to thrive. Place your bottle garden in a sunny location, such as a south-facing window or balcony. If you don’t have enough natural sunlight, you can supplement with grow lights. LED grow lights are energy-efficient and provide the full spectrum of light that peppers need to grow. Rotate your bottle garden regularly to ensure that all sides of the plants receive adequate sunlight.
How do I fertilize my bottle garden peppers?
You can fertilize your bottle garden peppers with a liquid fertilizer diluted to half strength. Apply the fertilizer every 2-3 weeks during the growing season. Choose a fertilizer that is specifically formulated for vegetables or tomatoes, as these fertilizers contain the nutrients that peppers need to thrive. Avoid over-fertilizing, as this can burn the roots of the plants. You can also add compost tea to the soil to provide a boost of nutrients.
How do I protect my bottle garden peppers from pests and diseases?
Bottle gardens are naturally protected from some ground-dwelling pests, but they can still be susceptible to aphids, spider mites, and other common garden pests. Inspect your plants regularly for signs of pests or diseases. If you find any pests, you can try spraying them with insecticidal soap or neem oil. For diseases, remove any affected leaves and treat the plants with a fungicide. Good air circulation can also help prevent diseases. Make sure to space your bottle gardens adequately to allow for good airflow.
Can I grow bottle garden peppers indoors?
Yes, you can grow bottle garden peppers indoors, but you’ll need to provide them with adequate sunlight or grow lights. Choose a sunny location near a window or supplement with LED grow lights. Indoor pepper plants may also require more frequent watering and fertilization than outdoor plants. Be sure to monitor the soil moisture and nutrient levels regularly.
How do I transplant my pepper seedlings into the bottle garden?
When your pepper seedlings are about 4-6 inches tall, they’re ready to be transplanted into the bottle garden. Gently remove the seedlings from their starter pots and loosen the roots. Dig a hole in the soil in the bottle garden and carefully place the seedling in the hole. Backfill with soil and water thoroughly. Be careful not to damage the roots of the seedlings during transplanting.
What do I do if my bottle garden peppers are not producing fruit?
There are several reasons why your bottle garden peppers may not be producing fruit. One common reason is lack of pollination. Peppers are self-pollinating, but they may need some help from you. Gently shake the plants or use a small paintbrush to transfer pollen from one flower to another. Other reasons for lack of fruit production include insufficient sunlight, overwatering, underwatering, and lack of nutrients. Make sure your plants are getting enough sunlight, water, and fertilizer.
How long will my bottle garden peppers last?
With proper care, your bottle garden peppers can last for several months or even years. Peppers are perennial plants, but they are often grown as annuals in colder climates. If you live in a cold climate, you can bring your bottle garden peppers indoors during the winter to protect them from frost. Prune the plants back in the fall and provide them with adequate light and water throughout the winter. In the spring, you can move them back outdoors.
Leave a Comment