

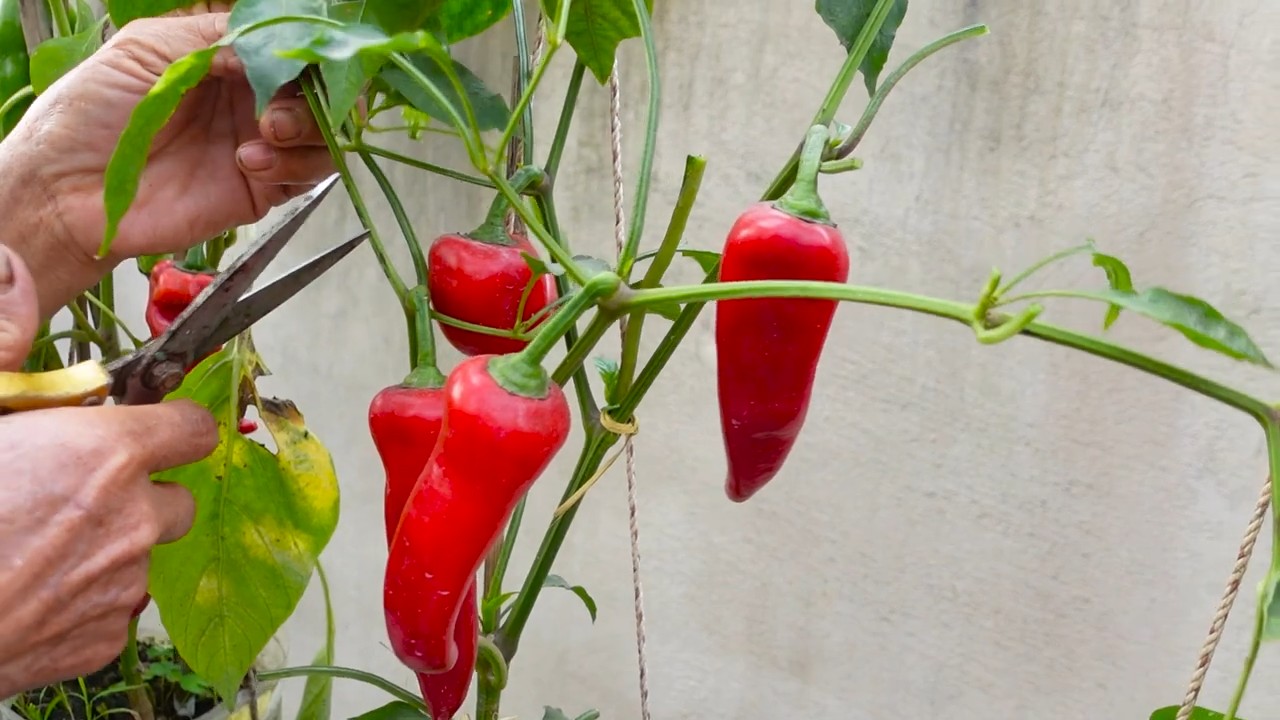
Balcony chili pepper gardening, even in the smallest of spaces, is absolutely achievable, and I’m here to show you how! Imagine plucking fresh, fiery chilies right from your own balcony to spice up your next meal. Forget those bland, store-bought peppers – we’re talking about homegrown flavor that packs a punch!
Growing chilies has a rich history, dating back thousands of years in South America. They were prized not only for their culinary uses but also for their medicinal properties and even as a form of currency. Today, the love for chilies has spread worldwide, and thankfully, you don’t need a sprawling farm to cultivate your own.
Many people shy away from gardening, especially in urban environments, thinking they lack the space or the “green thumb.” But that’s simply not true! Balcony chili pepper gardening is a fantastic way to bring a touch of nature to your home, even if you only have a tiny balcony. Plus, it’s incredibly rewarding to nurture a plant from seed to harvest. This DIY guide will provide you with simple, effective tricks and hacks to maximize your yield and overcome common challenges. I’ll walk you through everything from choosing the right chili varieties for container gardening to pest control and harvesting techniques. Get ready to transform your balcony into a vibrant, chili-filled oasis!
Balcony Chili Garden: Your DIY Guide for a Hot Harvest
Hey chili lovers! Do you also dream of your own chili harvest right on your balcony? Then you’ve come to the right place! I’ll show you how to turn your balcony into a small chili paradise with a few simple steps and tricks. Don’t worry, it’s easier than you think!
What You Need for Your Chili Balcony
Before we get started, let’s make sure we have everything we need. Here is a list of the things you’ll need:
- Chili seeds or young plants: Choose varieties that you like and are suitable for growing in pots. There are mild, hot, small, large – the selection is huge!
- Pots or planters: Make sure they are large enough (at least 10 liters per plant) and have good drainage.
- High-quality potting soil: Special chili soil is ideal, but good vegetable soil will also do the job.
- Fertilizer: Chili plants are hungry! A special chili fertilizer or a good tomato fertilizer is perfect.
- Watering can or hose: For regular watering.
- Plant labels: So you don’t forget which variety is growing where.
- Optional: Support/Trellis: For varieties that need a little support.
- Optional: Spray bottle: For foliar feeding and pest prevention.
- Optional: Gloves: To protect your hands when repotting.
The Right Chili Variety for Your Balcony
Choosing the right chili variety is crucial for your success. Not every variety feels at home on a balcony. Here are a few tips:
- Balcony-suitable varieties: Many breeders offer special chili varieties that grow compactly and thrive well in pots. Look for designations like “balcony chili” or “pot chili.”
- Heat level: Think about how hot you want your chilies to be. From mild, pepper-like varieties to extremely hot habaneros, everything is possible.
- Growth height: Find out the expected growth height of the plant. Tall varieties may need a support.
- Popular varieties for the balcony:
- Jalapeño: Versatile and relatively mild.
- Cayenne: Hot and good for sauces and spices.
- Habanero: Extremely hot, only for the tough ones!
- Pimientos de Padrón: Mild, Spanish chili, ideal for frying.
- Thai Chili: Small, hot chilies, perfect for Asian dishes.
Sowing or Young Plants?
You have two options: either you start your chilies from seed yourself, or you buy already grown young plants. Both options have their pros and cons:
- Sowing:
- Advantages: Greater variety of types, cheaper, you have the entire life cycle of the plant in your hands.
- Disadvantages: More effort, longer waiting time until harvest, requires a warm and bright place for starting seeds.
- Young plants:
- Advantages: Less effort, faster harvest, ideal for beginners.
- Disadvantages: Less variety, more expensive.
I personally prefer to sow my chilies myself. It’s just fun to watch the little plants grow!
Sowing: How to Start Your Chili Plants Yourself
If you have decided to sow, here is a step-by-step guide:
- The right time: It’s best to start sowing in February or March. This gives the plants enough time to grow big and strong by summer.
- The right substrate: Use seed starting mix. It is low in nutrients and loose, which promotes germination.
- Sowing: Fill small seed pots or a seed tray with soil. Place the seeds about 0.5 cm deep in the soil and cover them lightly.
- Watering: Moisten the soil carefully with a spray bottle. Avoid waterlogging!
- Location: Place the seed pots in a warm and bright place. A windowsill over a heater or a heated greenhouse is ideal. The germination temperature should be between 22 and 28 degrees Celsius.
- Germination: After about 1-3 weeks, the first seedlings should be visible.
- Care: Keep the soil moist, but not wet. Provide enough light. If the seedlings are too close together, prick them out into separate pots.
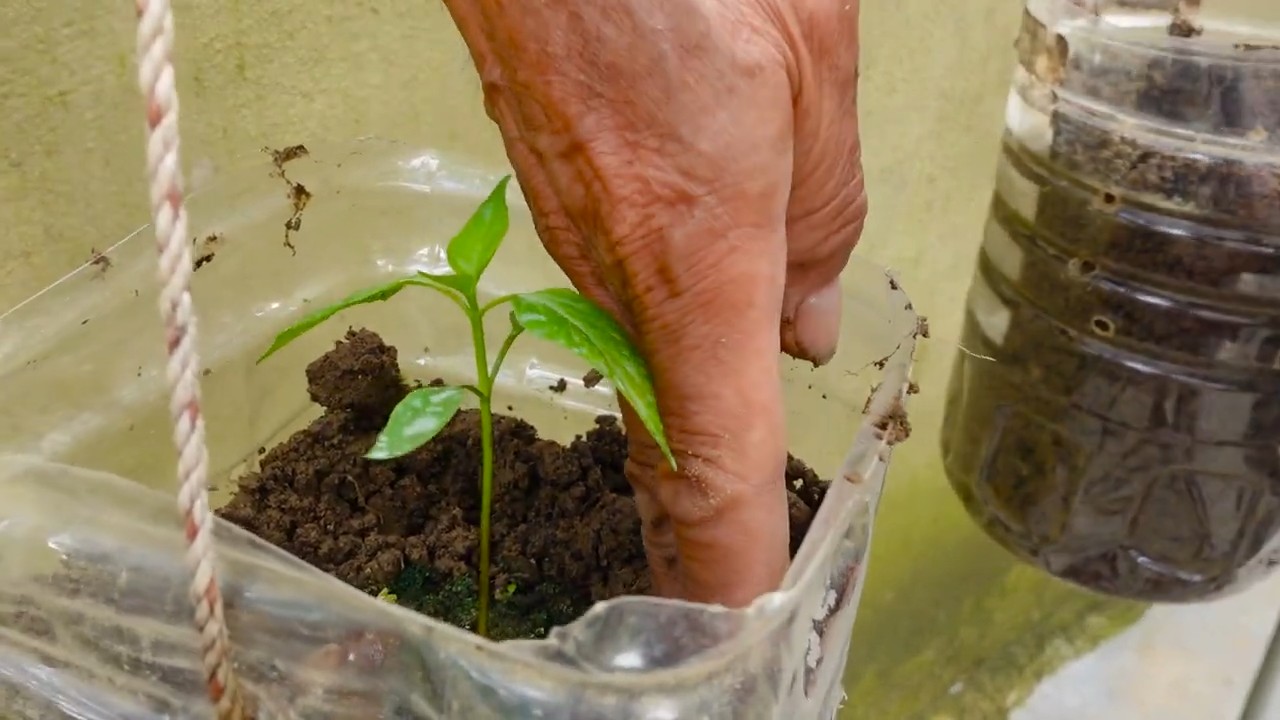
Repotting: Give Your Chili Plants More Space
Once your chili plants are large enough (about 10-15 cm high), it’s time to repot them into larger pots.
- The right time: Wait until the plants are strong enough and the roots have well-filled the pot.
- Preparation: Fill the new pots with potting soil. Ensure good drainage.
- Repotting: Carefully remove the chili plant from the old pot. Loosen the roots a little.
- Planting: Place the plant in the new pot and fill it with soil. Press the soil down lightly.
- Watering: Water the plant thoroughly after repotting.
The Right Location on the Balcony
Chili plants love the sun! Choose a sunny and warm location on your balcony.
- Sunshine: At least 6 hours of sun per day is ideal.
- Wind protection: Protect the plants from strong wind.
- Orientation: A south-facing balcony is perfect, but an east or west-facing balcony can also work.
Watering and Fertilizing: How to Keep Your Chilis Healthy
Chili plants need regular care to thrive.
- Watering: Water regularly, but avoid waterlogging. The soil should always be slightly moist. On hot days, it may be necessary to water daily.
- Fertilizing: Fertilize your chili plants regularly with a special chili fertilizer or a tomato fertilizer. Start about 2-3 weeks after repotting. Follow the instructions on the fertilizer package.
- Foliar feeding: Occasionally spray the leaves with a diluted fertilizer solution. This helps the plants absorb nutrients better.
Pests and Diseases: What to Do When There Are Problems?
Even on the balcony, chili plants can be infested with pests and diseases. Here are a few tips for prevention and control:
Spider mites: Ensure high humidity and combat them with a special…
Prevention:
- Ensure good ventilation.
- Do not water the plants from above, but directly at the roots.
- Regularly remove dead leaves.
- Check the plants regularly for pests.
Common pests:
Aphids: Combat them with a jet of water or with a biological insecticide.
Conclusion
So, there you have it! Transforming your balcony into a vibrant, chili pepper paradise is not only achievable but incredibly rewarding. We’ve explored the ins and outs of balcony chili pepper gardening, from selecting the perfect varieties to nurturing them to fiery perfection. This isn’t just about growing plants; it’s about cultivating a connection with nature, adding a splash of color and spice to your urban life, and enjoying the unparalleled satisfaction of harvesting your own homegrown chilies.
Why is this DIY trick a must-try? Because it empowers you to control the quality and freshness of your chilies, ensuring you always have the perfect ingredient on hand to elevate your culinary creations. Store-bought chilies simply can’t compare to the vibrant flavor and intense heat of freshly picked, homegrown peppers. Plus, it’s a fantastic way to reduce your carbon footprint and contribute to a more sustainable lifestyle.
But the beauty of balcony chili pepper gardening lies in its adaptability. Feel free to experiment with different varieties to discover your personal favorites. Perhaps you’re drawn to the smoky sweetness of Poblano peppers, the fiery kick of Habaneros, or the manageable heat of Jalapeños. The possibilities are endless!
Consider exploring companion planting to enhance your chili pepper garden. Basil, for example, is known to repel pests and improve the flavor of chilies. Marigolds can also deter unwanted insects and add a touch of beauty to your balcony.
Don’t be afraid to get creative with your container choices. While terracotta pots are classic and provide excellent drainage, you can also repurpose old buckets, baskets, or even grow bags. Just ensure that your chosen container has adequate drainage holes to prevent waterlogging.
And remember, balcony chili pepper gardening is a journey, not a destination. There will be challenges along the way, but with patience, persistence, and a little bit of love, you’ll be rewarded with a bountiful harvest of delicious chilies.
We wholeheartedly encourage you to embark on this exciting adventure. Start small, learn as you go, and don’t be discouraged by setbacks. The joy of nurturing your own chili peppers and the satisfaction of adding their fiery flavor to your meals is well worth the effort.
So, grab your seeds, prepare your soil, and get ready to transform your balcony into a chili pepper haven. We can’t wait to hear about your experiences! Share your photos, tips, and triumphs with us in the comments below. Let’s create a community of balcony chili pepper gardeners and inspire others to embrace the joys of homegrown spice. Happy gardening!
Frequently Asked Questions (FAQ)
What are the best chili pepper varieties to grow on a balcony?
The best chili pepper varieties for balcony gardening are those that are compact and well-suited to container growing. Some excellent choices include:
* **Jalapeños:** These are relatively easy to grow and produce a moderate level of heat. They are also versatile in the kitchen.
* **Serranos:** Similar to Jalapeños but with a bit more heat. They are also compact and productive.
* **Thai Chilies:** These small, fiery chilies are perfect for adding a kick to Asian-inspired dishes. They thrive in containers and produce a prolific harvest.
* **Poblano Peppers:** While larger than some other varieties, Poblano peppers can still be grown in larger containers. They have a mild heat and a rich, smoky flavor.
* **Habaneros:** For those who crave intense heat, Habaneros are a great option. However, be sure to handle them with care and wear gloves when harvesting.
* **Cayenne Peppers:** These long, slender chilies are known for their fiery heat and are often used to make chili powder.
Ultimately, the best variety for you will depend on your personal preferences and the amount of space you have available.
How much sunlight do chili peppers need?
Chili peppers thrive in full sun, which means they need at least 6-8 hours of direct sunlight per day. If your balcony doesn’t receive enough sunlight, you may need to supplement with grow lights.
What type of soil is best for chili peppers?
Chili peppers prefer well-draining soil that is rich in organic matter. A good potting mix specifically formulated for vegetables is a great option. You can also amend your soil with compost or other organic materials to improve its drainage and fertility.
How often should I water my chili peppers?
Water your chili peppers regularly, especially during hot, dry weather. The soil should be kept consistently moist but not waterlogged. Check the soil moisture by sticking your finger into the soil. If the top inch feels dry, it’s time to water.
Do chili peppers need fertilizer?
Yes, chili peppers benefit from regular fertilization. Use a balanced fertilizer specifically formulated for vegetables, following the instructions on the package. Fertilize every 2-3 weeks during the growing season.
How do I protect my chili peppers from pests and diseases?
Inspect your plants regularly for signs of pests or diseases. Common pests that affect chili peppers include aphids, spider mites, and whiteflies. You can control these pests with insecticidal soap or neem oil. Diseases such as powdery mildew and blossom end rot can also affect chili peppers. Prevent these diseases by providing good air circulation and avoiding overwatering.
When should I harvest my chili peppers?
The timing of harvest will depend on the variety of chili pepper you are growing and your personal preferences. Generally, chili peppers are ready to harvest when they have reached their mature color and size. You can harvest them at any stage of ripeness, but the flavor and heat will intensify as they ripen.
Can I grow chili peppers indoors?
Yes, you can grow chili peppers indoors, but you will need to provide them with adequate light and warmth. Place your plants near a sunny window or use grow lights to supplement the natural light.
How do I overwinter my chili pepper plants?
If you live in a climate with cold winters, you can overwinter your chili pepper plants indoors. Before the first frost, prune back your plants and move them to a cool, bright location. Water them sparingly during the winter months and fertilize them occasionally. In the spring, you can move them back outdoors after the last frost.
What if my chili peppers aren’t producing fruit?
There are several reasons why your chili peppers may not be producing fruit. Some common causes include:
* **Lack of pollination:** Chili peppers are self-pollinating, but they may need some help from the wind or insects. You can hand-pollinate your plants by gently shaking the flowers or using a small paintbrush to transfer pollen from one flower to another.
* **Insufficient sunlight:** Chili peppers need at least 6-8 hours of direct sunlight per day to produce fruit.
* **Overwatering or underwatering:** Inconsistent watering can stress your plants and prevent them from fruiting.
* **Nutrient deficiencies:** Make sure your plants are getting enough nutrients by fertilizing them regularly.
* **High temperatures:** Extreme heat can also prevent chili peppers from fruiting.
By addressing these potential issues, you can increase your chances of a successful harvest.
Leave a Comment