

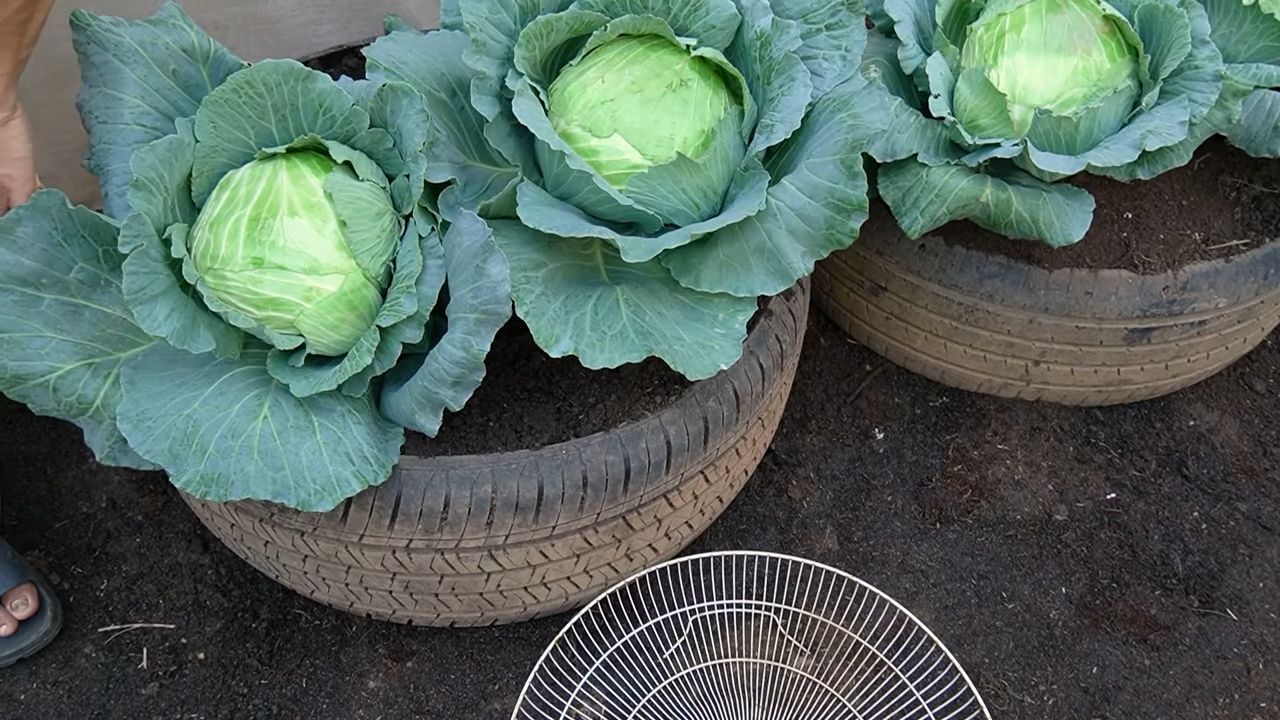
Backyard Free Cabbage Growing: Imagine harvesting crisp, delicious cabbages from your own backyard, without spending a dime on seedlings! Sounds too good to be true? It’s not! For generations, resourceful gardeners have passed down clever techniques to propagate new plants from kitchen scraps, and cabbage is surprisingly easy to regrow.
The practice of regrowing vegetables from scraps has roots in necessity and ingenuity. Historically, during times of scarcity or economic hardship, people learned to maximize their resources, turning what others might discard into a source of sustenance. This tradition continues today, fueled by a desire for sustainable living and a connection to the earth.
Why should you try this DIY trick? Well, for starters, it’s incredibly budget-friendly! Who doesn’t love saving money? More importantly, it’s a fantastic way to reduce food waste and contribute to a greener lifestyle. Plus, there’s something incredibly satisfying about nurturing new life from something you would have otherwise thrown away. I’m excited to share my favorite tips and tricks for successful backyard free cabbage growing, so you can enjoy fresh, homegrown cabbage all season long. Let’s get started!
Growing Cabbage for Free in Your Backyard: A DIY Guide
Hey there, fellow gardening enthusiasts! Ever dreamt of having a constant supply of fresh, crisp cabbage right in your backyard, without spending a dime on seedlings? Well, you’ve come to the right place! I’m going to walk you through a super simple, budget-friendly method to grow cabbage from kitchen scraps. Yes, you read that right – kitchen scraps! This is a fantastic way to reduce waste, save money, and enjoy the satisfaction of growing your own food.
What You’ll Need
Before we dive in, let’s gather our supplies. The beauty of this method is that you probably already have most of these items:
* Cabbage stump: The base of a cabbage head after you’ve used the leaves for cooking. Make sure it has a good, solid base and some visible nodes (those little bumps where leaves used to be).
* A sharp knife or pruning shears: For trimming and preparing the stump.
* A container with drainage holes: A plastic pot, an old yogurt container, or even a repurposed milk jug will work perfectly.
* Potting mix: A good quality potting mix will provide the necessary nutrients for your cabbage to thrive.
* Watering can or hose: For keeping your cabbage stump hydrated.
* A sunny spot in your garden: Cabbage loves sunshine!
* Optional: Rooting hormone powder: This can help speed up the rooting process, but it’s not essential.
* Optional: A larger pot or garden bed: For transplanting your cabbage once it’s established.
Phase 1: Preparing the Cabbage Stump
This is a crucial step to ensure your cabbage stump has the best chance of success. We need to encourage root growth and prevent rotting.
1. Clean the Stump: Carefully remove any loose or decaying outer leaves from the cabbage stump. You want to expose the healthy, firm part of the base. Use your fingers or a soft brush to gently clean off any dirt or debris.
2. Trim the Base: Using your sharp knife or pruning shears, trim the bottom of the stump. Make a clean, even cut. This will help the stump absorb water and nutrients more efficiently.
3. Optional: Apply Rooting Hormone: If you have rooting hormone powder, lightly dust the cut end of the stump. This will encourage root development. Follow the instructions on the rooting hormone package.
4. Let it Dry (Slightly): Allow the cut end of the stump to air dry for a few hours. This helps prevent rot. Don’t let it dry out completely, just enough for the cut surface to callous over a bit.
Phase 2: Planting the Cabbage Stump
Now comes the fun part – planting your cabbage stump!
1. Fill the Container: Fill your chosen container with potting mix, leaving about an inch of space at the top. Gently pat down the soil to remove any air pockets.
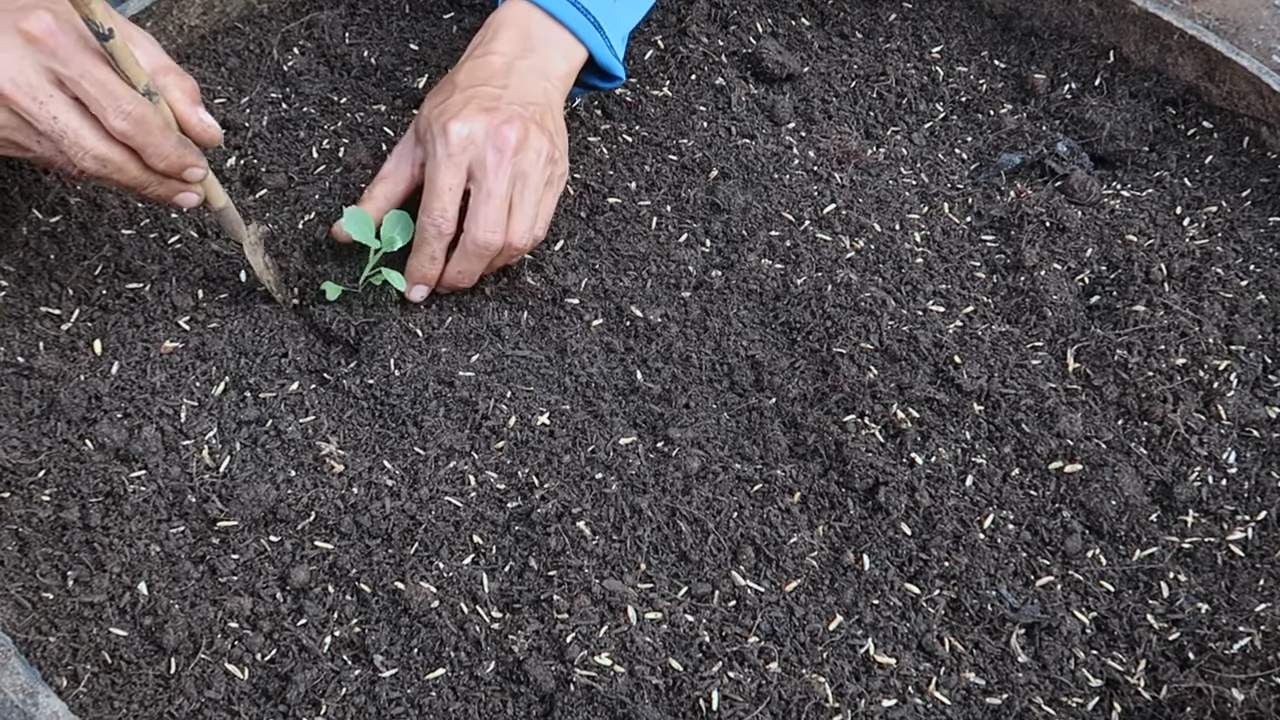
2. Plant the Stump: Make a small hole in the center of the potting mix, large enough to accommodate the cabbage stump. Place the stump in the hole, ensuring that the cut end is buried in the soil. Leave the top part of the stump, with the nodes, exposed.
3. Backfill with Soil: Gently backfill the hole with potting mix, firming the soil around the stump. Make sure the stump is stable and upright.
4. Water Thoroughly: Water the potting mix thoroughly until water drains out of the drainage holes. This will help settle the soil and provide the stump with the initial moisture it needs.
Phase 3: Caring for Your Cabbage Seedling
This is where patience comes in. It takes time for the cabbage stump to develop roots and new growth.
1. Find a Sunny Spot: Place the container in a sunny location. Cabbage needs at least 6 hours of sunlight per day to thrive. A south-facing window or a sunny spot in your garden is ideal.
2. Water Regularly: Keep the potting mix consistently moist, but not soggy. Water when the top inch of soil feels dry to the touch. Avoid overwatering, as this can lead to root rot.
3. Monitor for Growth: Keep an eye on your cabbage stump for signs of new growth. You should start to see small leaves emerging from the nodes within a few weeks.
4. Fertilize (Optional): Once you see new growth, you can start fertilizing your cabbage seedling with a diluted liquid fertilizer. Follow the instructions on the fertilizer package. A balanced fertilizer is a good choice.
5. Protect from Pests: Keep an eye out for pests like aphids, cabbage worms, and slugs. If you spot any pests, take action immediately. You can use organic pest control methods like insecticidal soap or handpicking the pests off the leaves.
Phase 4: Transplanting Your Cabbage Plant
Once your cabbage plant has developed a good root system and several leaves, it’s time to transplant it to a larger pot or your garden bed.
1. Choose a Location: Select a sunny spot in your garden with well-drained soil. Cabbage prefers slightly acidic soil with a pH of 6.0 to 7.0.
2. Prepare the Soil: Amend the soil with compost or other organic matter to improve drainage and fertility. Dig a hole that is slightly larger than the root ball of your cabbage plant.
3. Carefully Remove the Plant: Gently remove the cabbage plant from its container. Be careful not to damage the roots. If the plant is root-bound, gently loosen the roots before planting.
4. Plant the Cabbage: Place the cabbage plant in the hole, ensuring that the top of the root ball is level with the surrounding soil. Backfill the hole with soil, firming it gently around the plant.
5. Water Thoroughly: Water the transplanted cabbage plant thoroughly.
6. Mulch (Optional): Apply a layer of mulch around the base of the plant to help retain moisture and suppress weeds.
Phase 5: Ongoing Care
Congratulations! You’ve successfully grown a cabbage plant from a kitchen scrap. Now, let’s talk about ongoing care to ensure a bountiful harvest.
1. Water Regularly: Cabbage needs consistent moisture, especially during hot, dry weather. Water deeply and regularly, aiming for about 1 inch of water per week.
2. Fertilize Regularly: Cabbage is a heavy feeder, so it needs regular fertilization. Use a balanced fertilizer or a fertilizer specifically formulated for vegetables. Follow the instructions on the fertilizer package.
3. Weed Regularly: Keep the area around your cabbage plant free of weeds. Weeds compete with the cabbage for water and nutrients.
4. Protect from Pests: Continue to monitor your cabbage plant for pests and diseases. Take action immediately if you spot any problems.
5. Head Formation: As your cabbage plant matures, it will start to form a head. The time it takes for the head to form depends on the variety of cabbage and the growing conditions.
6. Harvesting: Harvest your cabbage when the head is firm and dense. Use a sharp knife to cut the head from the plant. Leave the outer leaves intact, as they can continue to produce smaller heads.
Troubleshooting
Even with the best care, you might encounter some challenges along the way. Here are a few common problems and how to address them:
* Stump Rotting: If your cabbage stump starts to rot, it’s likely due to overwatering or poor drainage. Make sure your container has adequate drainage holes and avoid overwatering. You can also try applying a fungicide to the stump.
* Slow Growth: If your cabbage plant is growing slowly, it could be due to a lack of sunlight, nutrients, or water. Make sure your plant is getting enough sunlight, water, and fertilizer.
* Pest Infestations: Pests like aphids, cabbage worms, and slugs can damage your cabbage plant. Use organic pest control methods to keep them at bay.
* Disease: Cabbage can be susceptible to diseases like black rot and clubroot. Choose disease-resistant varieties and practice good sanitation to prevent disease.
Final Thoughts
Growing cabbage from kitchen scraps is a rewarding and sustainable way to enjoy fresh produce. It’s a fun project for gardeners of all levels, and it’s a great way to reduce waste and save money. So, give it a try! You might be surprised at how easy it is to grow your own cabbage for free. Happy gardening!
Conclusion
So, there you have it! Growing your own cabbage, even in a small backyard, is not only achievable but incredibly rewarding. We’ve walked through the essential steps, from seed selection to pest control, and hopefully demystified the process. The beauty of this DIY approach lies in its simplicity and the sheer satisfaction of harvesting a crisp, healthy cabbage that you nurtured from a tiny seed.
Why is this DIY trick a must-try? Because it puts you in control. You know exactly what goes into your cabbage – no hidden pesticides, no questionable fertilizers. You get fresh, flavorful cabbage that tastes infinitely better than anything you can buy at the store. Plus, it’s a fantastic way to connect with nature, learn about the growing process, and reduce your carbon footprint. Think of the money you’ll save, too!
But the benefits extend beyond just the practical. Gardening is therapeutic. It’s a chance to de-stress, get some fresh air, and engage in a mindful activity. Watching your cabbage grow from a seedling to a mature head is a truly fulfilling experience. And let’s not forget the bragging rights! Imagine serving a delicious coleslaw or a hearty cabbage soup made with cabbage you grew yourself. Your friends and family will be impressed.
Now, let’s talk about variations. While we’ve focused on a general approach, there’s plenty of room for experimentation. Try different varieties of cabbage – red cabbage for a vibrant salad, Savoy cabbage for its delicate flavor, or Napa cabbage for Asian-inspired dishes. Consider companion planting to deter pests and improve soil health. Marigolds, dill, and rosemary are all excellent choices to plant alongside your cabbage. You can also adjust the planting schedule to extend your harvest season. Succession planting, where you plant new seeds every few weeks, ensures a continuous supply of fresh cabbage throughout the growing season.
Don’t be afraid to get your hands dirty and experiment. Gardening is a journey of learning and discovery. There will be successes and failures, but each experience will teach you something new. The most important thing is to have fun and enjoy the process.
We wholeheartedly encourage you to try this DIY backyard free cabbage growing method. It’s easier than you think, and the rewards are well worth the effort. Start small, be patient, and don’t be afraid to ask for help. There are plenty of online resources and local gardening communities that can provide support and guidance.
Once you’ve harvested your first cabbage, we’d love to hear about your experience! Share your photos, tips, and challenges in the comments section below. Let’s create a community of backyard cabbage growers and inspire others to take the plunge. What variety did you grow? What challenges did you face, and how did you overcome them? What delicious dishes did you create with your homegrown cabbage? We’re eager to learn from your experiences and celebrate your successes. So, go ahead, get planting, and let’s grow some amazing cabbage together! Remember, even a small backyard can yield a bountiful harvest with a little effort and dedication. Happy gardening!
Frequently Asked Questions (FAQ)
What is the best time of year to plant cabbage?
The best time to plant cabbage depends on your climate. In general, cabbage is a cool-season crop, meaning it thrives in temperatures between 60°F and 70°F. For spring crops, start seeds indoors 6-8 weeks before the last expected frost. Transplant seedlings outdoors 2-3 weeks before the last frost. For fall crops, start seeds indoors in mid-summer and transplant seedlings outdoors in late summer or early fall. Check your local frost dates to determine the optimal planting time for your region.
What kind of soil does cabbage need?
Cabbage prefers well-drained, fertile soil that is rich in organic matter. The ideal soil pH is between 6.0 and 7.0. Before planting, amend your soil with compost, aged manure, or other organic materials to improve drainage and fertility. If your soil is heavy clay, consider adding sand or perlite to improve drainage. A soil test can help you determine the nutrient levels in your soil and identify any deficiencies that need to be addressed.
How much sunlight does cabbage need?
Cabbage needs at least 6 hours of direct sunlight per day. Choose a planting location that receives full sun for optimal growth. If you live in a hot climate, some afternoon shade may be beneficial to prevent the cabbage from bolting (going to seed prematurely).
How often should I water cabbage?
Cabbage needs consistent moisture to thrive. Water deeply and regularly, especially during dry periods. Aim to keep the soil consistently moist but not waterlogged. A good rule of thumb is to water when the top inch of soil feels dry to the touch. Mulching around the plants can help retain moisture and suppress weeds.
What are some common pests and diseases that affect cabbage?
Cabbage is susceptible to several pests and diseases, including cabbage worms, cabbage loopers, aphids, flea beetles, and clubroot. To prevent pest problems, inspect your plants regularly and remove any pests by hand. You can also use insecticidal soap or Bacillus thuringiensis (Bt) to control cabbage worms and loopers. To prevent diseases, practice crop rotation, avoid overhead watering, and ensure good air circulation. If you suspect your plants have a disease, consult with your local extension office for diagnosis and treatment recommendations.
How do I know when my cabbage is ready to harvest?
Cabbage is ready to harvest when the head is firm and compact. The size of the head will vary depending on the variety. To harvest, use a sharp knife to cut the head from the stem, leaving a few outer leaves attached. You can store cabbage in the refrigerator for several weeks.
Can I grow cabbage in containers?
Yes, you can grow cabbage in containers, but you’ll need to choose a large container (at least 12 inches in diameter) to accommodate the plant’s root system. Use a well-draining potting mix and water regularly. Container-grown cabbage may require more frequent fertilization than cabbage grown in the ground.
What are some good companion plants for cabbage?
Good companion plants for cabbage include marigolds, dill, rosemary, thyme, onions, garlic, and nasturtiums. These plants can help deter pests, attract beneficial insects, and improve soil health. Avoid planting cabbage near tomatoes, strawberries, or grapes, as these plants can compete for nutrients or attract pests that also affect cabbage.
How can I prevent cabbage from bolting?
Bolting (going to seed prematurely) can be caused by stress, such as extreme temperatures, drought, or nutrient deficiencies. To prevent bolting, choose bolt-resistant varieties, plant at the appropriate time of year, provide consistent moisture, and fertilize regularly. If you notice your cabbage starting to bolt, harvest it immediately.
Is growing cabbage organically difficult?
Growing cabbage organically is definitely achievable with some planning and effort. Focus on building healthy soil, using organic fertilizers, practicing crop rotation, and employing natural pest control methods. Regularly inspect your plants for pests and diseases, and take action promptly to prevent problems from escalating. With a little dedication, you can enjoy a bountiful harvest of organic, homegrown cabbage.

Leave a Comment