

Soil Free Sprout Growing: Imagine harvesting fresh, crunchy sprouts right from your kitchen counter, without ever getting your hands dirty with soil! Sounds like a dream, right? Well, it’s not! For centuries, cultures around the globe, particularly in Asia, have harnessed the power of sprouts as a nutritional powerhouse, often relying on soil-free methods. From mung bean sprouts in stir-fries to alfalfa sprouts in salads, these tiny powerhouses have been a staple.
But why should *you* embrace soil free sprout growing? Let’s face it, traditional gardening can be messy, time-consuming, and space-dependent. Not everyone has a sprawling backyard or the time to dedicate to tending a garden. That’s where the magic of soil-free sprouting comes in! It’s the perfect solution for urban dwellers, busy individuals, or anyone who simply wants a quick, easy, and incredibly nutritious addition to their diet.
In this article, I’m going to share some simple, effective, and totally doable DIY tricks and hacks to get you started on your own soil-free sprouting journey. We’ll explore different methods, from using mason jars to specialized sprouting trays, and I’ll give you all the tips and tricks you need to avoid common pitfalls and ensure a bountiful harvest of delicious, healthy sprouts. Get ready to unlock the secrets to fresh, homegrown goodness, right in your own home!
Growing Sprouts Without Soil: A Beginner’s Guide
Hey there, fellow sprout enthusiasts! Are you tired of dealing with messy soil when growing your own sprouts? I get it! Soil can be a pain, attracting unwanted pests and sometimes leading to mold. That’s why I’m so excited to share my favorite method: growing sprouts without soil! It’s cleaner, easier, and just as nutritious. Let’s dive in!
What You’ll Need
Before we get started, let’s gather our supplies. This is a super simple setup, so you probably already have most of these items at home.
* **Sprouting Seeds:** Choose your favorite sprouting seeds! Some popular options include alfalfa, broccoli, radish, mung beans, lentils, and clover. Make sure you’re using seeds specifically intended for sprouting, as regular garden seeds might be treated with chemicals.
* **A Wide-Mouth Jar:** A mason jar works perfectly. I usually use a quart-sized jar, but you can adjust the size depending on how many sprouts you want to grow.
* **Sprouting Lid or Cheesecloth:** You’ll need something to cover the jar while allowing for drainage and airflow. A sprouting lid is ideal, but a piece of cheesecloth secured with a rubber band works just as well.
* **Water:** Clean, filtered water is best.
* **A Bowl or Stand:** You’ll need something to prop the jar at an angle for drainage.
Choosing Your Seeds
This is where the fun begins! The type of seed you choose will determine the flavor and texture of your sprouts. Here are a few of my favorites:
* **Alfalfa:** These are mild and slightly sweet, perfect for salads and sandwiches.
* **Broccoli:** Broccoli sprouts have a slightly peppery flavor and are packed with nutrients.
* **Radish:** These have a spicy kick that adds a zesty flavor to any dish.
* **Mung Beans:** Mung bean sprouts are crunchy and refreshing, often used in Asian cuisine.
* **Lentils:** Lentil sprouts are hearty and filling, great for adding protein to your meals.
* **Clover:** Clover sprouts are mild and delicate, a great addition to salads.
Important Note: Always buy your sprouting seeds from a reputable source to ensure they are safe and free from contaminants.
Step-by-Step Sprouting Guide
Okay, let’s get sprouting! This process is super easy, and once you get the hang of it, you’ll be enjoying fresh sprouts in no time.
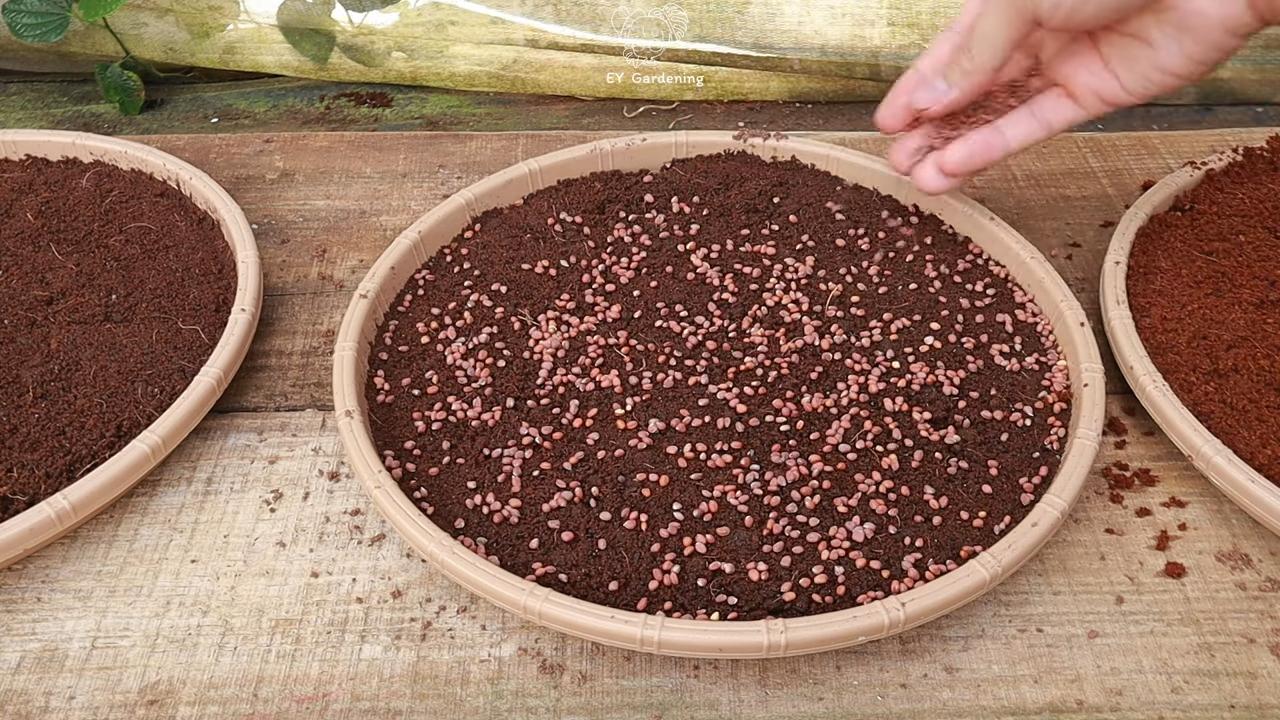
1. **Rinse the Seeds:** Place about 1-2 tablespoons of seeds in your jar. Add plenty of cool water and swirl the seeds around to remove any debris. Drain the water completely.
2. **Soak the Seeds:** Add fresh, cool water to the jar, ensuring the seeds are fully submerged. The amount of water will depend on the type of seed you’re using. Generally, you want about 2-3 times the volume of seeds in water.
3. **Soaking Time:** Let the seeds soak for the appropriate amount of time. This varies depending on the type of seed:
* Alfalfa: 8-12 hours
* Broccoli: 4-8 hours
* Radish: 4-8 hours
* Mung Beans: 8-12 hours
* Lentils: 8-12 hours
* Clover: 8-12 hours
I usually soak my seeds overnight for convenience.
4. **Drain and Rinse:** After the soaking period, drain the water completely using your sprouting lid or cheesecloth. Rinse the seeds thoroughly with fresh, cool water. This is crucial for preventing mold growth.
5. **Invert and Drain:** Place the jar upside down in a bowl or stand at a 45-degree angle. This allows excess water to drain out while still allowing air to circulate.
6. **Rinse Regularly:** Rinse the sprouts 2-3 times per day with fresh, cool water. This is the most important step! Consistent rinsing keeps the sprouts hydrated and prevents them from drying out or developing mold. Make sure to drain the water completely after each rinse.
7. **Observe and Enjoy:** Over the next few days, you’ll see your sprouts start to grow! The time it takes for them to be ready to eat will vary depending on the type of seed and the temperature of your environment. Generally, sprouts are ready to harvest in 3-7 days.
8. **Harvesting:** Once your sprouts have reached your desired length, it’s time to harvest! Give them one final rinse and drain them well.
9. **Storage:** Store your sprouts in an airtight container in the refrigerator. They should last for up to a week.
Troubleshooting Common Issues
Even with the best intentions, sometimes things can go wrong. Here are a few common issues you might encounter and how to fix them:
* **Mold:** Mold is the biggest enemy of sprouting. It usually appears as fuzzy white or gray patches. If you see mold, discard the entire batch of sprouts. To prevent mold, make sure you’re rinsing the sprouts thoroughly and frequently, and ensure good airflow.
* **Slow Growth:** If your sprouts are growing slowly, it could be due to a few factors. The temperature might be too cold, or the seeds might not be getting enough light. Try moving the jar to a warmer location or providing indirect sunlight.
* **Unpleasant Odor:** An unpleasant odor can indicate that the sprouts are starting to spoil. This is usually caused by insufficient rinsing or poor drainage. Make sure you’re rinsing the sprouts thoroughly and draining them completely after each rinse.
* **Seed Quality:** Sometimes, the problem isn’t your technique, but the seeds themselves. Using old or low-quality seeds can result in poor germination or mold growth. Always buy your sprouting seeds from a reputable source.
Tips for Success
Here are a few extra tips to help you become a sprouting pro:
* Use Filtered Water: Tap water can sometimes contain chlorine or other chemicals that can inhibit sprouting. Filtered water is always the best option.
* Ensure Good Airflow: Proper airflow is essential for preventing mold growth. Make sure the jar is well-ventilated and not overcrowded with sprouts.
* Avoid Direct Sunlight: While sprouts need light to grow, direct sunlight can overheat them and cause them to dry out. Indirect sunlight is ideal.
* Experiment with Different Seeds: Don’t be afraid to try different types of seeds to find your favorites. Each type of sprout has its own unique flavor and texture.
* Keep it Clean: Always use clean jars and sprouting lids to prevent contamination.
Incorporating Sprouts into Your Diet
Now that you’ve successfully grown your own sprouts, it’s time to enjoy them! Sprouts are incredibly versatile and can be added to a wide variety of dishes. Here are a few ideas:
* **Salads:** Sprouts add a crunchy and nutritious boost to any salad.
* **Sandwiches and Wraps:** Add sprouts to your favorite sandwiches and wraps for extra flavor and texture.
* **Soups and Stews:** Sprinkle sprouts on top of soups and stews for a fresh and vibrant garnish.
* **Smoothies:** Add a handful of sprouts to your smoothies for an extra dose of vitamins and minerals.
* **Stir-fries:** Sprouts are a great addition to stir-fries, adding a crunchy texture and a boost of nutrients.
* **Avocado Toast:** Top your avocado toast with sprouts for a healthy and delicious breakfast.
Benefits of Sprouting
Sprouting is not only easy and fun, but it also offers a wide range of health benefits. Here are just a few of the reasons why you should consider adding sprouts to your diet:
* Increased Nutrient Content: Sprouting increases the bioavailability of nutrients in seeds, making them easier for your body to absorb.
* Improved Digestion: Sprouting breaks down complex carbohydrates and proteins, making them easier to digest.
* Rich in Enzymes: Sprouts are packed with enzymes, which aid in digestion and nutrient absorption.
* High in Fiber: Sprouts are a good source of fiber, which promotes healthy digestion and helps regulate blood sugar levels.
* Antioxidant Powerhouse: Sprouts are rich in antioxidants, which protect your cells from damage caused by free radicals.
* Boosts Immunity: The vitamins and minerals in sprouts can help boost your immune system and protect you from illness.
Advanced Sprouting Techniques
Once you’ve mastered the basics of sprouting, you can start experimenting with more advanced techniques. Here are a few ideas:
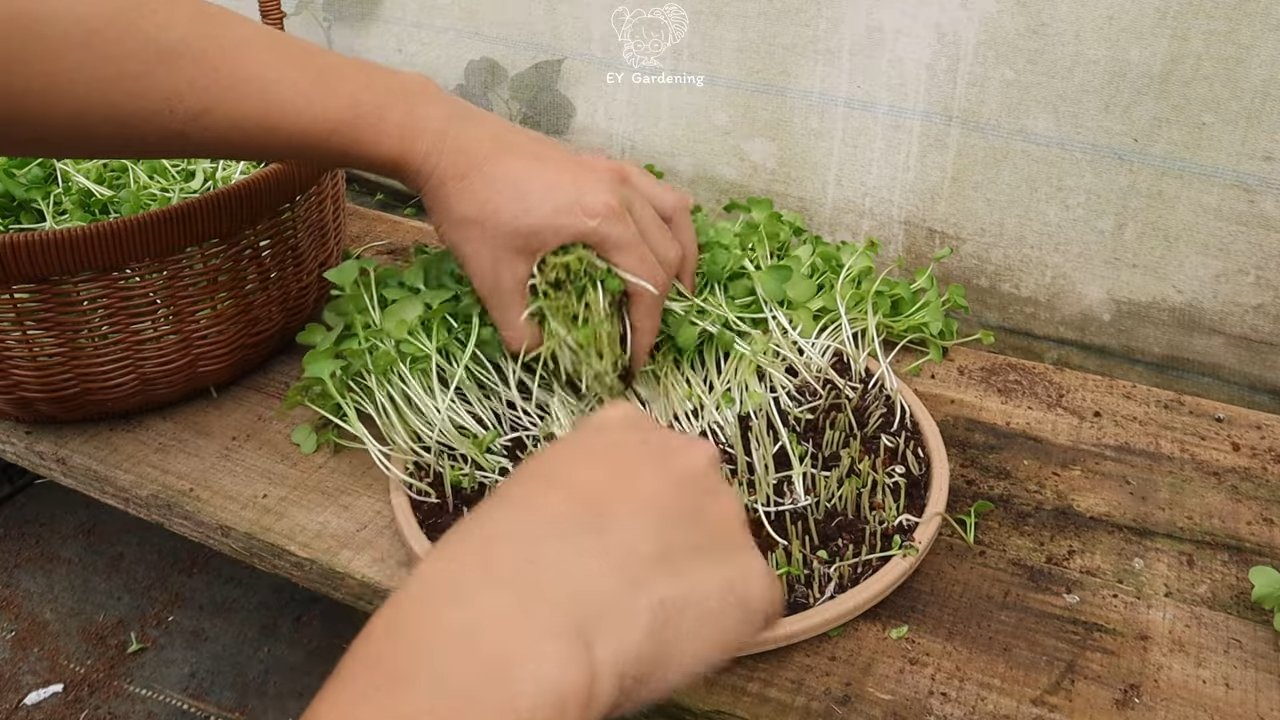
* Sprouting in a Tray: For larger quantities of sprouts, you can use a sprouting tray. This allows you to grow a larger surface area of sprouts at once.
* Microgreens: Microgreens are essentially sprouts that are allowed to grow for a longer period of time, developing small leaves. They are incredibly nutritious and flavorful.
* Sprouting Different Combinations: Try sprouting different combinations of seeds to create unique flavor profiles.
Conclusion
So, there you have it! Embracing the world of soil free sprout growing is not just a fun experiment; it’s a gateway to a healthier, more sustainable, and incredibly rewarding way to enjoy fresh, nutrient-packed greens right from your own kitchen. We’ve walked you through the simple steps, highlighting the ease and accessibility of this method, and hopefully dispelled any initial hesitations you might have had.
Why is this a must-try? Because it’s efficient, clean, and incredibly fast. Forget the mess of soil, the potential for pests, and the long wait times. With soil free sprouting, you’re looking at a harvest of delicious sprouts in just a matter of days. Imagine adding a vibrant crunch to your salads, sandwiches, and stir-fries, knowing that you nurtured those sprouts from seed to table with your own hands. The satisfaction is truly unparalleled.
But the beauty of soil free sprout growing lies in its adaptability. Feel free to experiment with different types of seeds. While we’ve focused on common varieties like alfalfa, broccoli, and radish, don’t be afraid to venture into the world of mung beans, lentils, or even sunflower seeds. Each seed offers a unique flavor profile and nutritional punch, allowing you to customize your sprout garden to your specific tastes and dietary needs.
Consider also experimenting with different sprouting containers. While mason jars are a classic and readily available option, you can also use specialized sprouting trays or even repurpose plastic containers with proper drainage. The key is to ensure adequate airflow and drainage to prevent mold growth and ensure healthy sprout development.
For an extra boost of flavor, try adding a few drops of lemon juice or apple cider vinegar to the rinsing water. This can help to inhibit bacterial growth and add a subtle tang to your sprouts. You can also experiment with different lighting conditions. While sprouts don’t require direct sunlight, a bit of indirect light can help them develop a richer green color and enhance their nutritional value.
We truly believe that soil free sprout growing is a game-changer for anyone looking to incorporate more fresh, healthy greens into their diet. It’s a simple, sustainable, and incredibly rewarding process that can be enjoyed by people of all ages and skill levels.
So, what are you waiting for? Gather your seeds, grab your sprouting container, and embark on this exciting journey. We’re confident that you’ll be amazed by the ease and speed with which you can grow your own delicious sprouts.
And most importantly, we want to hear about your experience! Share your successes, your challenges, and your creative variations with us. Let us know what seeds you’ve tried, what containers you’ve used, and what tips and tricks you’ve discovered along the way. Together, we can build a community of sprout enthusiasts and spread the word about this amazing method of growing fresh, healthy food. Share your photos and stories on social media using #SoilFreeSprouts and let’s inspire others to join the movement! Happy sprouting!
Frequently Asked Questions (FAQ)
What types of seeds are best for soil free sprout growing?
The best seeds for soil free sprouting are those specifically labeled for sprouting. These seeds have been tested for pathogens and are more likely to germinate successfully. Popular choices include alfalfa, broccoli, radish, mung beans, lentils, and sunflower seeds. Avoid using seeds that are treated with pesticides or fungicides, as these can be harmful to your health. Always purchase your seeds from a reputable source to ensure their quality and safety. Experimenting with different seed varieties is part of the fun, so don’t be afraid to try new things! Just remember to research the specific sprouting requirements for each type of seed to ensure optimal results.
How often should I rinse my sprouts?
Rinsing your sprouts is crucial for preventing mold growth and ensuring their freshness. You should rinse your sprouts at least twice a day, ideally in the morning and evening. In warmer climates or during periods of high humidity, you may need to rinse them more frequently. Use cool, clean water and make sure to drain the sprouts thoroughly after each rinse. The goal is to keep the sprouts moist but not waterlogged. Proper rinsing is essential for successful soil free sprout growing.
How long does it take for sprouts to be ready to eat?
The time it takes for sprouts to be ready to eat varies depending on the type of seed and the growing conditions. Generally, most sprouts are ready to harvest in 3 to 7 days. Alfalfa sprouts, for example, typically take about 5 to 7 days, while radish sprouts may be ready in as little as 3 days. Keep an eye on your sprouts and harvest them when they have reached your desired size and flavor. Remember to taste them regularly to monitor their progress.
How do I prevent mold growth in my sprouts?
Mold growth is a common concern when growing sprouts, but it can be easily prevented with proper care. The key is to ensure adequate airflow and drainage. Use a sprouting container with good ventilation and rinse your sprouts thoroughly at least twice a day. Avoid overcrowding the container and make sure to remove any damaged or discolored seeds. You can also add a few drops of lemon juice or apple cider vinegar to the rinsing water to help inhibit bacterial growth. If you do notice any mold, discard the affected sprouts immediately and thoroughly clean your sprouting container before starting a new batch.
How should I store my sprouts after harvesting?
Once your sprouts are ready to harvest, rinse them thoroughly and drain them well. Then, store them in a clean, airtight container in the refrigerator. Sprouts are best consumed within a few days of harvesting, so try to use them up as quickly as possible. To prolong their shelf life, you can line the container with a paper towel to absorb excess moisture. Avoid storing sprouts in a sealed plastic bag, as this can trap moisture and promote mold growth.
Can I grow sprouts in direct sunlight?
While sprouts don’t require direct sunlight, a bit of indirect light can be beneficial. Direct sunlight can scorch the sprouts and inhibit their growth. However, a little bit of indirect light can help them develop a richer green color and enhance their nutritional value. Place your sprouting container in a well-lit area, but away from direct sunlight.
What are the nutritional benefits of eating sprouts?
Sprouts are packed with nutrients and offer a wide range of health benefits. They are a good source of vitamins, minerals, enzymes, and antioxidants. Sprouts are also low in calories and high in fiber, making them a healthy addition to any diet. Eating sprouts can help boost your immune system, improve digestion, and protect against chronic diseases.
Is it safe to eat raw sprouts?
While sprouts are generally safe to eat, there is a small risk of foodborne illness associated with consuming raw sprouts. This is because sprouts are grown in warm, moist conditions, which can be conducive to bacterial growth. To minimize this risk, always purchase your seeds from a reputable source and rinse your sprouts thoroughly before eating them. You can also cook your sprouts to kill any harmful bacteria. If you are pregnant, elderly, or have a weakened immune system, it is best to avoid eating raw sprouts altogether.
Can I use tap water to rinse my sprouts?
Yes, you can use tap water to rinse your sprouts, as long as it is clean and safe to drink. If you are concerned about the quality of your tap water, you can use filtered water instead. Avoid using water that is heavily chlorinated or contains other chemicals, as this can inhibit sprout growth.
What if my sprouts don’t germinate?
If your sprouts don’t germinate, there could be several reasons why. First, make sure that your seeds are fresh and viable. Old seeds may have a lower germination rate. Second, ensure that you are providing adequate moisture and drainage. The sprouts should be moist but not waterlogged. Third, check the temperature. Sprouts germinate best in a warm environment. If you have tried all of these things and your sprouts still don’t germinate, try using a different type of seed or a different sprouting container.
Leave a Comment