

Grow Potatoes in Containers: Unlock the secrets to a bountiful harvest, even without a sprawling garden! Have you ever dreamed of plucking fresh, earthy potatoes straight from your own backyard (or balcony!)? Well, dream no more! This DIY guide is your passport to potato-growing success, all within the cozy confines of a container.
The humble potato, a staple in diets worldwide, boasts a rich history. Originating in the Andes Mountains thousands of years ago, it has journeyed across continents, nourishing civilizations and becoming a symbol of resilience and resourcefulness. For centuries, growing potatoes was confined to traditional fields, but now, we’re breaking those boundaries!
In today’s fast-paced world, space is often a luxury. Many of us yearn for the satisfaction of growing our own food but are limited by small apartments or urban landscapes. That’s where this DIY trick comes in! Learning how to grow potatoes in containers is a game-changer. It allows you to enjoy the taste of homegrown goodness, regardless of your living situation. Plus, it’s a fantastic way to connect with nature, reduce your carbon footprint, and impress your friends with your green thumb. I’m excited to share my tried-and-true methods for cultivating a thriving potato patch, one container at a time. Let’s get digging!
Grow Your Own Spuds: A Beginner’s Guide to Container Potato Gardening
Hey there, fellow gardening enthusiasts! Ever dreamt of harvesting your own homegrown potatoes, fresh from the earth (or, in this case, a container)? Well, dream no more! Growing potatoes in containers is surprisingly easy, even if you don’t have a sprawling backyard. It’s a fantastic way to enjoy fresh, delicious potatoes, and it’s incredibly rewarding to watch those little seed potatoes transform into a bountiful harvest. I’m going to walk you through everything you need to know to get started, from choosing the right container to harvesting your golden bounty. Let’s get digging!
Choosing Your Potato Variety
First things first, you need to decide what kind of potatoes you want to grow. There are tons of varieties out there, each with its own unique flavor and texture. Here’s a quick rundown of some popular choices:
* Russet Potatoes: These are your classic baking potatoes. They’re starchy and fluffy, perfect for mashed potatoes, fries, and, of course, baking.
* Yukon Gold Potatoes: These have a buttery flavor and a smooth, creamy texture. They’re great for roasting, boiling, and potato salads.
* Red Potatoes: These have a waxy texture and a slightly sweet flavor. They hold their shape well when cooked, making them ideal for potato salads and boiling.
* Fingerling Potatoes: These are long, slender potatoes with a unique flavor and texture. They’re delicious roasted or steamed.
* Specialty Potatoes: Don’t be afraid to experiment with more unusual varieties like purple potatoes or blue potatoes! They add a pop of color to your dishes and have a unique flavor.
Once you’ve chosen your variety, you’ll need to get your hands on some seed potatoes. These aren’t actual seeds, but rather small potatoes that have “eyes” (those little buds that sprout). You can buy seed potatoes from your local garden center or online.
Preparing Your Seed Potatoes
Before planting, you’ll want to “chit” your seed potatoes. This means encouraging them to sprout before planting, which gives them a head start. Here’s how to do it:
1. Inspect your seed potatoes: Make sure they’re firm and healthy, with plenty of eyes.
2. Cut large seed potatoes: If your seed potatoes are large (bigger than an egg), you can cut them into smaller pieces, making sure each piece has at least two eyes. Let the cut pieces air dry for a day or two to prevent rotting.
3. Place the seed potatoes in a cool, bright place: Arrange the seed potatoes in a single layer in an egg carton or a shallow tray.
4. Wait for sprouts to appear: Over the next few weeks, the eyes will start to sprout. Once the sprouts are about an inch long, you’re ready to plant.
Choosing the Right Container and Soil
Now, let’s talk about containers. The size of your container will depend on the variety of potato you’re growing, but in general, you’ll want a container that’s at least 15 gallons in size. A half-barrel planter, a large plastic tub, or even a sturdy garbage can will work. Just make sure it has drainage holes!
As for soil, potatoes need well-draining soil that’s rich in organic matter. I recommend using a mix of:
* Potting mix: This provides good drainage and aeration.
* Compost: This adds nutrients and improves soil structure.
* Peat moss or coco coir: This helps retain moisture.
Mix these ingredients together in equal parts to create a perfect potato-growing medium.
Planting Your Seed Potatoes
Alright, it’s time to get your hands dirty! Here’s how to plant your seed potatoes:
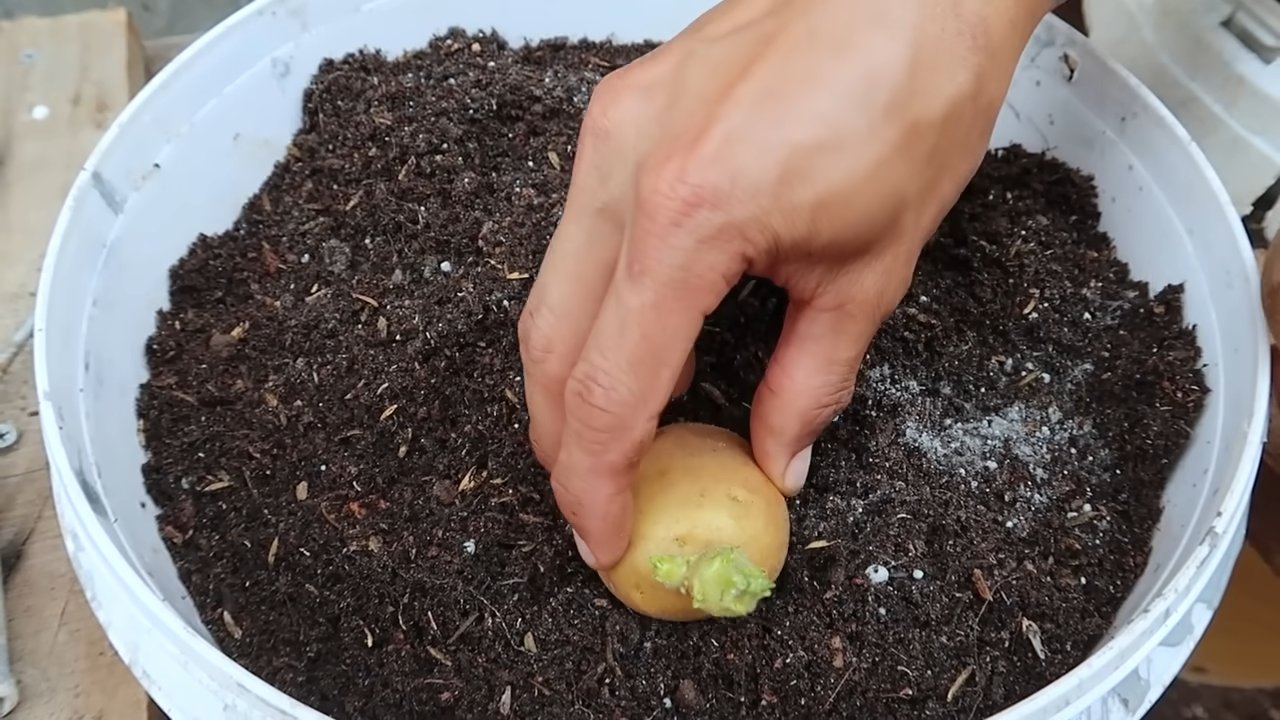
1. Fill the container with about 4-6 inches of soil: Don’t fill it all the way to the top, as you’ll be adding more soil later.
2. Place the seed potatoes on top of the soil: Space them evenly, about 8-12 inches apart. If you’re using cut seed potatoes, make sure the cut side is facing down.
3. Cover the seed potatoes with another 4-6 inches of soil: Gently pat the soil down.
4. Water thoroughly: Make sure the soil is evenly moist, but not soggy.
“Hilling” Your Potatoes
This is where the magic happens! As your potato plants grow, you’ll need to “hill” them. This means adding more soil to the container as the plants grow taller. Hilling encourages the plants to produce more potatoes along the stems.
1. Wait until the plants are about 6-8 inches tall: Once the plants have reached this height, it’s time to add more soil.
2. Add a few inches of soil around the base of the plants: Leave a few inches of the plant exposed.
3. Repeat the process every few weeks: As the plants continue to grow, keep adding soil until the container is almost full.
Caring for Your Potato Plants
Now that your potatoes are planted and hilled, it’s time to give them some TLC. Here are a few tips for keeping your potato plants happy and healthy:
* Water regularly: Potatoes need consistent moisture, especially during hot weather. Water deeply whenever the top inch of soil feels dry.
* Fertilize: Feed your potato plants with a balanced fertilizer every few weeks. Look for a fertilizer that’s specifically formulated for vegetables.
* Sunlight: Potatoes need at least 6-8 hours of sunlight per day. Place your container in a sunny spot.
* Pest control: Keep an eye out for pests like aphids, potato beetles, and flea beetles. If you spot any pests, treat them with an appropriate insecticide or organic pest control method.
* Weed control: Remove any weeds that pop up in the container. Weeds can compete with your potato plants for nutrients and water.
Harvesting Your Potatoes
The moment you’ve been waiting for! Harvesting your potatoes is the most rewarding part of the process. Here’s how to know when it’s time to harvest:
* Check the foliage: When the foliage starts to turn yellow and die back, it’s a sign that the potatoes are ready to harvest.
* Test dig: Gently dig around the base of a plant to check the size of the potatoes. If they’re the size you want, it’s time to harvest.
To harvest your potatoes:
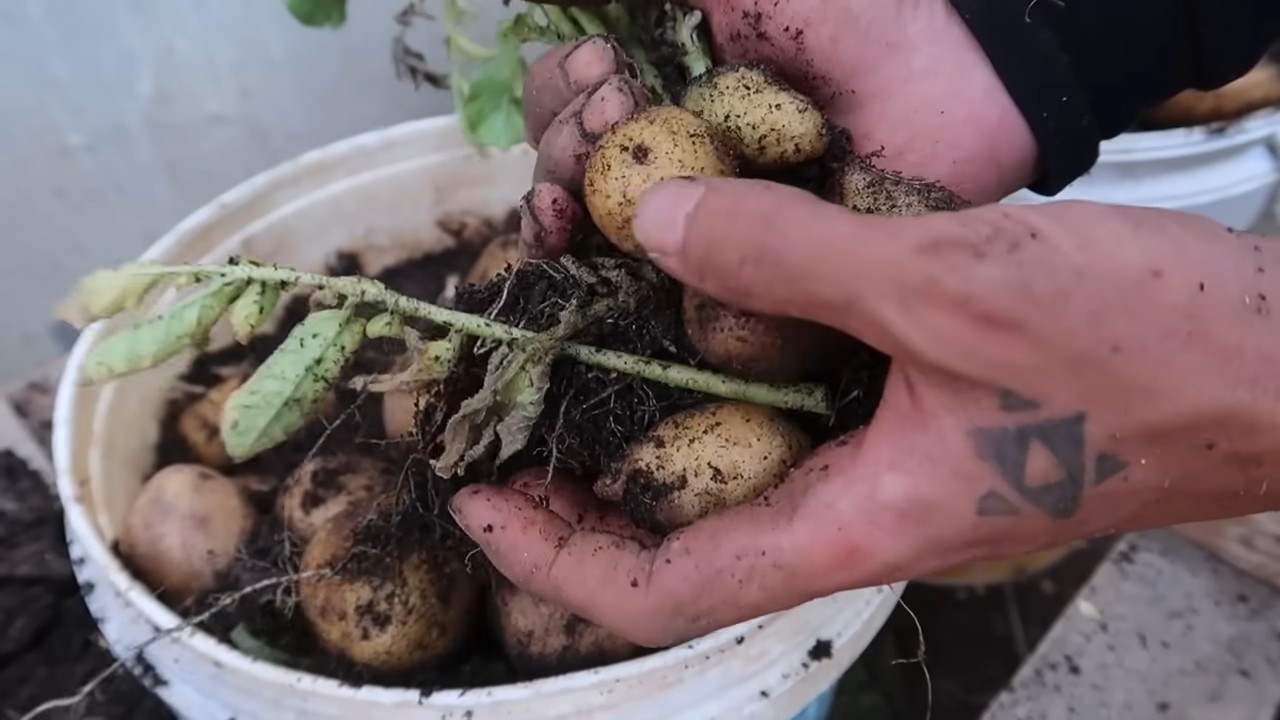
1. Gently tip the container over: Carefully pour the soil and potatoes onto a tarp or into a wheelbarrow.
2. Sort through the soil: Pick out the potatoes and brush off any excess soil.
3. Cure the potatoes: Let the potatoes dry in a cool, dark place for a few days to cure. This will help them store longer.
Storing Your Potatoes
Once your potatoes are cured, you can store them in a cool, dark, and dry place. A root cellar is ideal, but a basement or garage will also work. Store the potatoes in a breathable container, such as a burlap sack or a cardboard box with holes. Don’t store them near apples or onions, as these can cause the potatoes to sprout prematurely.
With proper storage, your homegrown potatoes can last for several months. Imagine enjoying the taste of your own homegrown potatoes all winter long!
Troubleshooting Common Problems
Even with the best care, you might encounter some problems while growing potatoes in containers. Here are a few common issues and how to address them:
* Potato blight: This fungal disease can cause the foliage to turn brown and die. To prevent potato blight, choose disease-resistant varieties and avoid overhead watering. If you spot blight, remove the affected foliage immediately.
* Scab: This bacterial disease causes rough, scabby patches on the potatoes. To prevent scab, maintain a slightly acidic soil pH and avoid overwatering.
* Green potatoes: Potatoes that are exposed to sunlight will turn green and produce a toxic substance called solanine. Avoid eating green potatoes. To prevent greening, make sure the potatoes are completely covered with soil.
* Pests: As mentioned earlier, pests can be a problem. Regularly inspect your plants for pests and treat them accordingly.
Enjoying Your Homegrown Harvest
Congratulations! You’ve successfully grown your own potatoes in containers. Now it’s time to enjoy the fruits (or rather, tubers) of your labor. There are endless ways to cook and enjoy your homegrown potatoes. Here are a few ideas:
* Roasted potatoes: Toss the potatoes with olive oil, herbs, and spices, and roast them in the oven until golden brown and crispy.
* Mashed potatoes: Boil the potatoes until tender, then mash them with butter, milk, and salt.
* Potato salad: Boil the potatoes until tender, then chop them and mix them with mayonnaise, celery, onion
Conclusion
So, there you have it! Growing potatoes in containers is not just a gardening trend; it’s a game-changer for anyone, regardless of space or experience. We’ve walked through the simple steps, highlighted the benefits, and hopefully, inspired you to ditch the grocery store spuds (at least some of the time!) and embrace the joy of harvesting your own homegrown goodness.
Why is this DIY trick a must-try? Because it puts you in control. You control the soil, the watering, the sunlight – everything that contributes to the flavor and quality of your potatoes. Forget those bland, mass-produced potatoes; container gardening allows you to cultivate varieties that burst with flavor and offer a texture you simply can’t find in supermarkets. Plus, it’s incredibly rewarding to watch those tiny seed potatoes transform into a bountiful harvest, all within the confines of a pot or bag.
But the best part? The possibilities are endless! Feel free to experiment with different potato varieties. Russets are fantastic for baking and frying, Yukon Golds offer a creamy texture perfect for mashed potatoes, and fingerling potatoes are a gourmet delight. Don’t be afraid to mix and match soil amendments to find the perfect blend for your specific climate and potato type. Consider adding compost tea during watering for an extra boost of nutrients.
And speaking of variations, think beyond the traditional container. While plastic pots and grow bags are excellent choices, you can also use repurposed items like old tires, laundry baskets (lined with fabric), or even large trash cans. Just ensure adequate drainage! Vertical gardening enthusiasts can even explore potato towers, maximizing space and creating a visually stunning display.
This isn’t just about growing potatoes; it’s about connecting with nature, learning new skills, and enjoying the fruits (or rather, tubers!) of your labor. It’s about sustainable living, reducing your carbon footprint, and knowing exactly where your food comes from. It’s about the satisfaction of serving a meal made with ingredients you nurtured from start to finish.
We wholeheartedly encourage you to give this DIY trick a try. Start small, perhaps with just one or two containers, and see how it goes. The learning curve is gentle, and the rewards are immense. And most importantly, don’t be afraid to experiment and have fun!
Once you’ve harvested your first batch of homegrown potatoes, we’d love to hear about your experience. Share your photos, tips, and triumphs in the comments section below. Let’s create a community of container potato growers, sharing our knowledge and inspiring others to join the fun. What variety did you grow? What challenges did you face? What delicious dishes did you create? Your insights could be invaluable to other aspiring gardeners. So, grab your seed potatoes, prepare your containers, and get ready to embark on a rewarding gardening adventure. Happy growing! Remember, mastering the art of growing potatoes in containers is easier than you think, and the taste of success is incredibly satisfying.
Frequently Asked Questions (FAQ)
1. What is the best type of container to use for growing potatoes?
The ideal container should be large enough to accommodate the growing potato plant and its developing tubers. A minimum size of 10 gallons is recommended, but larger is generally better. Options include plastic pots, grow bags (fabric pots), repurposed containers like old tires or laundry baskets (lined with fabric), and even potato towers. The key is to ensure adequate drainage to prevent waterlogging, which can lead to rot. Grow bags are particularly popular because they allow for air pruning of the roots, promoting healthier growth. Dark-colored containers can heat up quickly in direct sunlight, so consider lighter colors or providing shade in hot climates.
2. What kind of soil should I use for growing potatoes in containers?
Potatoes thrive in well-draining, slightly acidic soil. A good potting mix is essential. Avoid using garden soil, as it can be too heavy and compact, hindering tuber development. A mix of equal parts potting soil, compost, and perlite or vermiculite provides excellent drainage and aeration. Compost adds valuable nutrients and improves soil structure. You can also add a slow-release fertilizer to the soil mix to provide a steady supply of nutrients throughout the growing season. Consider testing your soil pH to ensure it’s within the optimal range of 5.5 to 6.5.
3. How often should I water my container potatoes?
Watering frequency depends on several factors, including the size of the container, the weather, and the type of soil. Generally, you should water when the top inch of soil feels dry to the touch. Avoid overwatering, as this can lead to root rot. During hot, dry weather, you may need to water daily. Ensure the container has adequate drainage to prevent water from pooling at the bottom. A good way to check if your potatoes need water is to lift the container; if it feels light, it’s likely time to water.
4. How much sunlight do potatoes need when grown in containers?
Potatoes need at least six hours of direct sunlight per day to thrive. Choose a location that receives ample sunlight throughout the growing season. If you live in a particularly hot climate, providing some afternoon shade can help prevent the soil from overheating. If you don’t have access to a sunny spot, you can supplement with grow lights. Rotate the containers regularly to ensure even sunlight exposure on all sides of the plant.
5. How do I “hill” potatoes in containers?
Hilling is the process of adding more soil to the container as the potato plant grows. This encourages the plant to produce more tubers along the buried stem. Start by planting the seed potato a few inches below the surface of the soil. As the plant grows, gradually add more soil to the container, covering the stem up to the lower leaves. Repeat this process every few weeks until the container is nearly full. This technique maximizes potato production within the limited space of a container.
6. When and how do I harvest my container potatoes?
Harvest time depends on the potato variety and the growing conditions. Generally, potatoes are ready to harvest when the foliage begins to yellow and die back. You can also harvest “new potatoes” earlier, when the plants are still green, for smaller, more tender potatoes. To harvest, gently tip the container over and carefully remove the potatoes from the soil. Be careful not to damage the tubers. Store harvested potatoes in a cool, dark, and dry place.
7. What are some common pests and diseases that affect container potatoes, and how can I prevent them?
Common pests include aphids, potato beetles, and flea beetles. Diseases include early blight, late blight, and potato scab. To prevent pests and diseases, use healthy seed potatoes, practice crop rotation (if possible), and maintain good air circulation around the plants. Inspect the plants regularly for signs of pests or diseases and take action promptly. Organic pest control methods include using insecticidal soap, neem oil, or hand-picking pests. For diseases, ensure good drainage and avoid overhead watering.
8. Can I grow potatoes in containers indoors?
While it’s possible to grow potatoes indoors, it requires a significant amount of light. You’ll need to provide at least 12-14 hours of artificial light per day using grow lights. The environment also needs to be well-ventilated to prevent fungal diseases. Growing potatoes outdoors in containers is generally easier and more successful.
9. What are the best potato varieties to grow in containers?
Several potato varieties are well-suited for container gardening. These include:
* **Yukon Gold:** A popular all-purpose potato with a creamy texture.
* **Red Pontiac:** A red-skinned potato with a waxy texture, great for boiling.
* **Fingerling Potatoes:** Small, elongated potatoes with a unique flavor.
* **Russet Potatoes:** Ideal for baking and frying.
* **Irish Cobbler:** An early-maturing variety that produces small to medium-sized potatoes.
Experiment with different varieties to find your favorites!
10. Can I reuse the soil from my potato containers?
It’s generally not recommended to reuse the soil from potato containers without amending it. Potatoes can deplete the soil of nutrients. Before reusing the soil, remove any remaining plant debris and amend it with fresh compost and fertilizer. Consider rotating crops to prevent the buildup of soilborne diseases. If you suspect the soil is contaminated with disease, it’s best to discard it and use fresh potting mix.
Leave a Comment