

DIY Vertical Garden projects are taking the home gardening world by storm, and for good reason! Imagine transforming a drab, unused wall into a vibrant, living masterpiece bursting with color and fresh herbs. Sounds amazing, right? Well, it’s more achievable than you think!
For centuries, cultures around the globe have explored vertical gardening techniques, from the Hanging Gardens of Babylon (one of the Seven Wonders of the Ancient World!) to the more modern, space-saving solutions embraced in urban environments today. The desire to connect with nature, even in limited spaces, is deeply ingrained in us.
Let’s face it, not everyone has a sprawling backyard to cultivate their green thumb. Apartment dwellers, condo owners, and even those with small patios often feel limited in their gardening aspirations. That’s where the magic of a DIY Vertical Garden comes in. It’s the perfect solution for maximizing space, adding a touch of nature to your surroundings, and even growing your own delicious herbs and vegetables. I’m so excited to share some easy and effective DIY tricks and hacks that will help you create your own stunning vertical garden, no matter your skill level or available space. Get ready to unleash your inner gardener and transform your living space into a green oasis!
DIY Vertical Garden: Your Green Paradise for Home
Hello dears! Do you also have little space but still want a small garden? Then I have just the thing for you: a DIY vertical garden! It’s not only super space-saving but also a real eye-catcher. I’ll show you how to create your own green paradise with simple means and a little creativity. Let’s get started!
What you need for your vertical garden
Before we start, here is a list of all the materials and tools you will need. Don’t worry, you probably have most of them at home already!
- A sturdy base: This can be an old pallet, a wooden frame, a grid wall, or even an old ladder. I chose an old wooden pallet because it looks rustic and already has ready-made compartments.
- Planters: There are no limits to your imagination here! You can use clay pots, plastic containers, old cans, or even fabric bags. Just make sure they have holes for water drainage.
- Potting soil: It is best to use a high-quality potting soil that retains water well.
- Plants: Choose plants that do not grow too large and thrive well in pots. Herbs, strawberries, lettuce, small flowers, or succulents are ideal.
- Tools:
- Drill (if you need to drill holes for hanging)
- Screws or nails (depending on how you want to attach the planters)
- Hammer
- Scissors or knife
- Gloves (to keep your hands clean)
- Measuring tool (folding rule or measuring tape)
- Sandpaper (if you want to treat the pallet or frame)
- Paint or stain (optional, to embellish the base)
- Additional material (optional):
- Weed barrier fabric (to line the pallet or frame)
- Cable ties or wire (to further secure the planters)
- Labels (to label the plants)
Step-by-Step Guide: How to build your vertical garden
Now let’s get down to it! I’ll show you step-by-step how to build your own vertical garden.
1. Preparation of the Base
- Cleaning: Start by thoroughly cleaning your base. Remove dust, dirt, and any loose parts. For a pallet, you can scrub it with a brush and water.
- Sanding (optional): If you are using a pallet or a wooden frame, you can smooth the surface with sandpaper to avoid splinters. This is especially important if children are around.
- Painting (optional): If you want to color the base, now is the right time. Choose a color or stain that matches the style of your garden. Let the paint dry well before you continue. I left my pallet natural because I like the rustic look.
- Lining (optional): If you want to prevent soil from falling through the pallet or frame, you can line the inside with weed barrier fabric. Attach the fabric with a stapler or with nails.
2. Preparation of the Planters
- Selection: Decide on the planters you want to use. Make sure they are large enough for the plants you want to put in them.
- Drilling holes (if necessary): If your planters do not have holes for water drainage, you need to drill them now. This is important so that water does not accumulate and the roots of the plants do not rot.
- Cleaning: Clean the planters thoroughly to remove any residues.
3. Attaching the Planters
There are various options here, depending on which base and which planters you are using.
- Pallet with clay pots:
- Attach holders: Attach holders for the clay pots to the pallet. You can buy special pot holders or simply use wire or cable ties.
- Insert pots: Place the clay pots in the holders. Make sure they are secure and cannot fall down.
- Wooden frame with plastic containers:
- Drill holes: Drill holes in the frame through which you can fasten the plastic containers with screws or nails.
- Attach containers: Attach the plastic containers to the frame. Make sure they are stable and do not wobble.
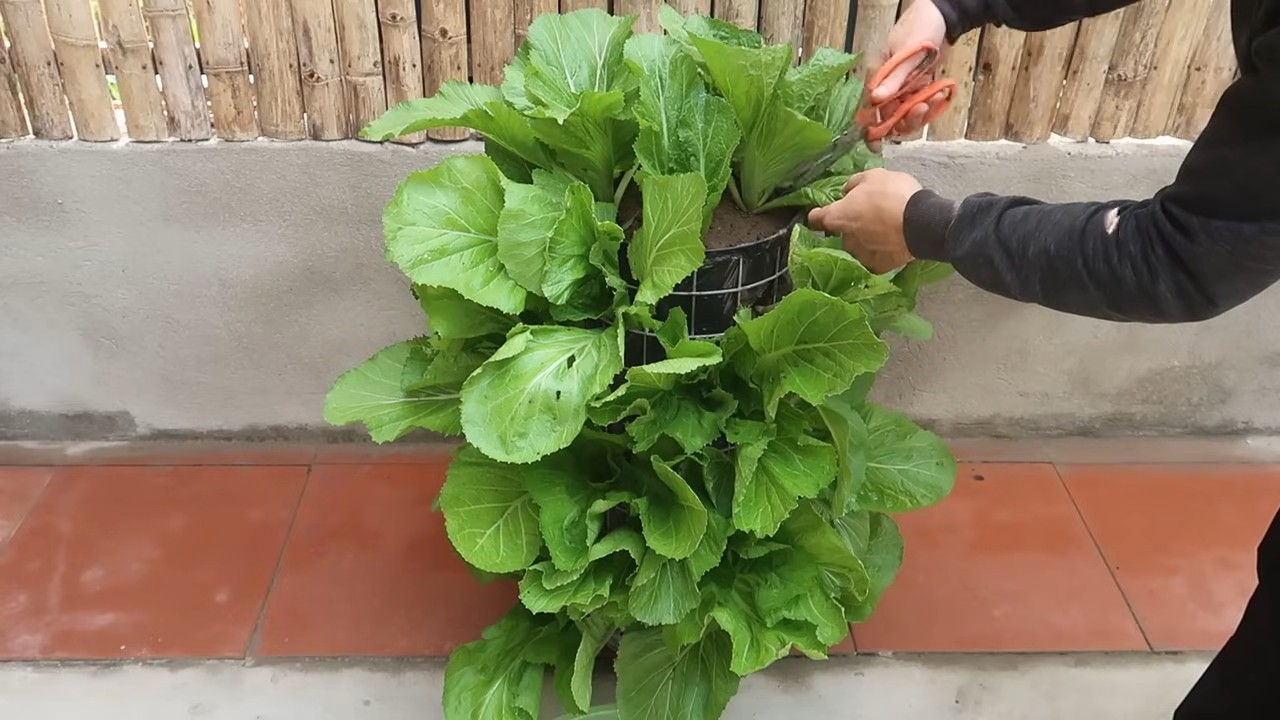
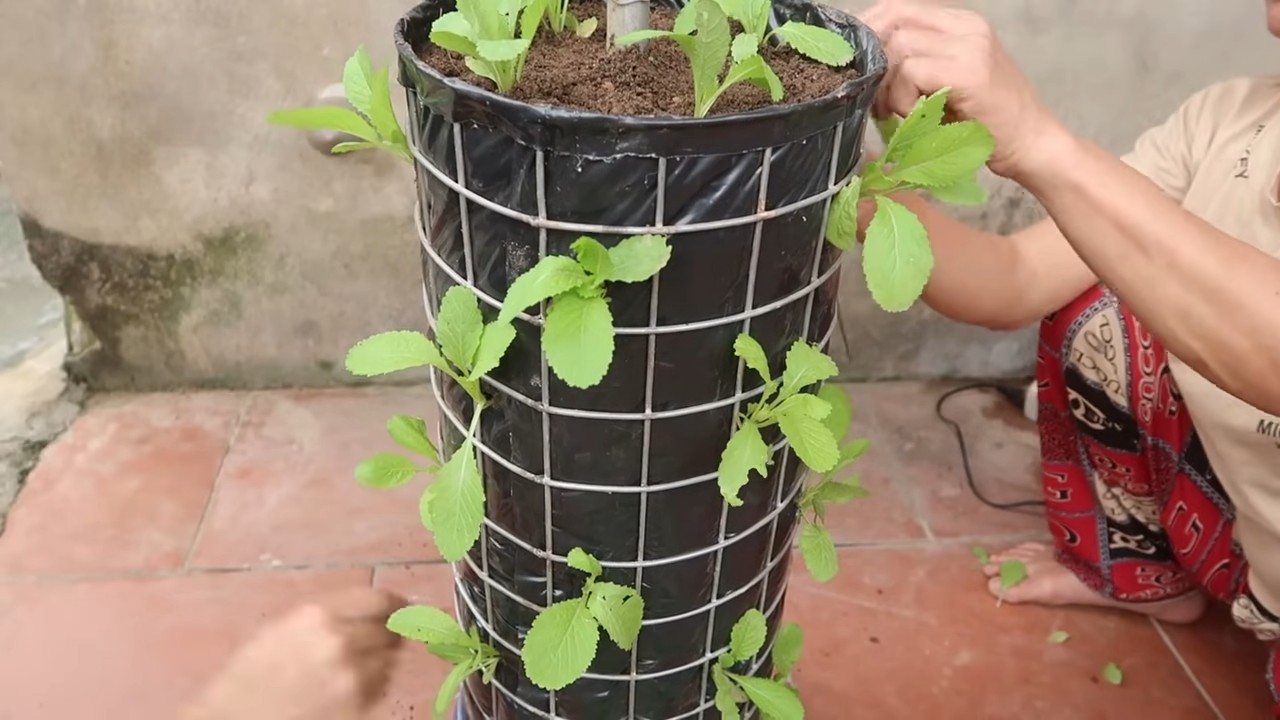
- Grid wall with fabric bags:
- Hang bags: Hang the fabric bags on the grid. You can attach them with hooks, cable ties, or wire.
- Secure: Make sure the bags are well fastened and cannot slip down.
4. Planting
- Fill with soil: Fill the planters with potting soil. Leave some space at the top so that the soil does not overflow when watering.
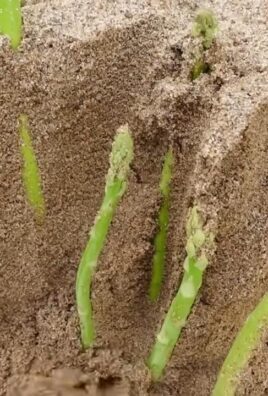
- Insert plants: Carefully place the plants in the soil. Make sure the roots have enough space.
- Watering: Water the plants thoroughly after planting.
5. Hanging and Decorating
- Hanging: Hang your vertical garden in a suitable place. Make sure it gets enough light and is protected from extreme weather conditions.
- Decorating (optional): Decorate your vertical garden according to your wishes. You can add small figures, stones, or other decorative elements.
- Labeling (optional): Label the plants with tags so you always know what you have planted.
Care Tips for Your Vertical Garden
To keep your vertical garden beautiful for a long time, here are a few care tips:
- Watering: Water the plants regularly, but avoid waterlogging. The soil should always be slightly moist.
- Fertilizing: Fertilize the plants regularly to provide them with sufficient nutrients. It is best to use a liquid fertilizer that you add to the watering can.
- Pruning: Regularly cut off withered leaves and flowers to keep the plants healthy.
- Pest protection: Check the plants regularly for pests. If necessary, you can use natural pesticides.
- Location: Make sure the plants get enough light. Depending on the plant species, a sunny or semi-shady location may be ideal.
- Wintering: Some plants are not winter-hardy and must be brought indoors in winter. Inform yourself about the needs of your plants.
Ideas for Your Vertical Garden
Here are a few more ideas on how you can design your vertical garden:
Flower garden: Plant various flowers such as petunias, geraniums, and begonias.
Herb garden: Plant various herbs such as basil, parsley, chives, and rosemary. This way, you always have fresh herbs on hand for cooking.
Strawberry garden: Plant strawberries in pots or hanging baskets. This way, you can harvest fresh strawberries all summer long.
Salad garden: Plant different types of lettuce such as head lettuce, lamb’s lettuce, and arugula. This way, you always have fresh salad for your meals.
Conclusion
Creating your own DIY Vertical Garden isn’t just a trendy project; it’s a transformative experience that brings nature closer to your everyday life. We’ve explored the simple yet effective methods to construct a thriving green wall, and now it’s time to reflect on why this endeavor is a must-try for any home or garden enthusiast.
The beauty of a DIY Vertical Garden lies in its adaptability. Whether you’re working with a sprawling balcony, a compact patio, or even just an indoor wall, this project can be tailored to fit your specific space and aesthetic preferences. Imagine transforming a dull, lifeless area into a vibrant tapestry of colors, textures, and fragrances. Beyond the visual appeal, a vertical garden offers a multitude of benefits. It improves air quality by filtering out pollutants, reduces ambient noise, and even helps to regulate temperature, creating a more comfortable and inviting environment.
But the advantages extend beyond the practical. Engaging in a DIY project like this is incredibly rewarding. It fosters creativity, encourages resourcefulness, and provides a sense of accomplishment as you watch your garden flourish. Plus, it’s a fantastic way to connect with nature, even in the heart of the city.
Don’t be afraid to experiment with different plant varieties to create a truly unique and personalized vertical garden. Consider incorporating herbs for a fragrant and functional addition to your kitchen, or choose colorful flowering plants to brighten up your outdoor space. Succulents are another excellent option, as they are low-maintenance and thrive in vertical environments. You can also explore different container options, from repurposed pallets and plastic bottles to stylish planters and hanging baskets. The possibilities are endless!
Variations to Consider:
* Pallet Garden: Repurpose an old wooden pallet into a rustic vertical garden. Simply attach landscaping fabric to the back and sides of each section to create pockets for planting.
* Hanging Shoe Organizer: A simple and affordable option for small spaces. Fill each pocket with potting soil and your favorite herbs or flowers.
* Stacked Planters: Create a tiered effect by stacking planters on top of each other. Choose plants that cascade downwards for a dramatic look.
* Indoor Living Wall: Bring the outdoors in by creating a living wall in your home. Use a waterproof backing and install a drip irrigation system for easy watering.
We strongly encourage you to embark on this exciting DIY journey. It’s a chance to unleash your creativity, enhance your living space, and connect with nature in a meaningful way. Once you’ve completed your DIY Vertical Garden, we’d love to hear about your experience! Share your photos, tips, and challenges in the comments section below. Let’s inspire each other to create beautiful and sustainable green spaces, one vertical garden at a time. Your success story could be the inspiration someone else needs to start their own project. So, grab your tools, gather your plants, and get ready to transform your space with the magic of a DIY Vertical Garden!
Frequently Asked Questions (FAQ)
What types of plants are best suited for a DIY Vertical Garden?
The best plants for your vertical garden depend on several factors, including the amount of sunlight your garden receives, the climate you live in, and your personal preferences. Generally, plants that are compact, have shallow root systems, and tolerate some degree of drought are ideal. Some popular choices include:
* Herbs: Mint, basil, thyme, oregano, and rosemary are all excellent choices for a fragrant and functional vertical garden.
* Succulents: Echeveria, sedum, and sempervivum are low-maintenance and come in a variety of colors and textures.
* Lettuce and Spinach: These leafy greens thrive in vertical gardens and provide a fresh source of salad ingredients.
* Strawberries: A delightful addition to any vertical garden, providing both beauty and delicious fruit.
* Flowering Plants: Petunias, impatiens, and begonias add a splash of color to your vertical garden.
* Trailing Plants: Pothos, ivy, and creeping Jenny cascade downwards, creating a lush and dramatic effect.
Consider the mature size of the plants you choose to ensure they don’t outgrow their containers. Also, be sure to select plants that have similar watering and sunlight requirements.
How do I water a DIY Vertical Garden?
Watering is crucial for the success of your vertical garden. The frequency of watering will depend on the type of plants you’re growing, the climate, and the type of containers you’re using. As a general rule, check the soil moisture regularly and water when the top inch feels dry to the touch.
There are several ways to water a vertical garden:
* Hand Watering: Use a watering can or hose to water each plant individually. Be sure to water slowly and evenly, allowing the water to soak into the soil.
* Drip Irrigation: Install a drip irrigation system for automated watering. This is a convenient option for larger vertical gardens.
* Self-Watering Containers: Use self-watering containers that have a reservoir of water at the bottom. The plants will draw water up as needed.
Avoid overwatering, as this can lead to root rot. Also, be sure to provide adequate drainage to prevent water from pooling in the containers.
What type of soil should I use for my DIY Vertical Garden?
Use a well-draining potting mix specifically formulated for containers. Avoid using garden soil, as it can become compacted and prevent proper drainage. A good potting mix will retain moisture while still allowing excess water to drain away. You can also amend your potting mix with perlite or vermiculite to improve drainage and aeration.
How much sunlight does my DIY Vertical Garden need?
The amount of sunlight your vertical garden needs will depend on the type of plants you’re growing. Most plants require at least six hours of sunlight per day, but some can tolerate partial shade. Observe your plants closely and adjust their location as needed. If your plants are not getting enough sunlight, they may become leggy and produce fewer flowers or fruits.
How do I fertilize my DIY Vertical Garden?
Vertical gardens require regular fertilization to provide the nutrients that plants need to thrive. Use a balanced liquid fertilizer diluted to half strength. Fertilize every two to four weeks during the growing season. Avoid over-fertilizing, as this can burn the roots of your plants.
How do I prevent pests and diseases in my DIY Vertical Garden?
Regularly inspect your plants for signs of pests or diseases. Remove any affected leaves or stems immediately. You can also use organic pest control methods, such as insecticidal soap or neem oil. To prevent diseases, ensure good air circulation and avoid overwatering.
Can I grow a DIY Vertical Garden indoors?
Yes, you can grow a vertical garden indoors! Choose plants that tolerate low light conditions, such as pothos, snake plants, and ZZ plants. Provide adequate humidity and water regularly. You may also need to supplement with artificial light, especially during the winter months.
How do I winterize my DIY Vertical Garden?
If you live in a cold climate, you’ll need to winterize your vertical garden to protect your plants from frost and freezing temperatures. Bring tender plants indoors or move them to a sheltered location. Prune back any dead or damaged growth. Water sparingly during the winter months.
What are some creative container ideas for a DIY Vertical Garden?
The possibilities are endless when it comes to container ideas for your vertical garden! Here are a few creative suggestions:
* Repurposed Pallets
* Plastic Bottles
* Hanging Shoe Organizers
* Tin Cans
* Wooden Crates
* Terra Cotta Pots
* Fabric Pockets
* Gutters
Get creative and use materials that you already have on hand. Just be sure to provide adequate drainage and choose containers that are appropriate for the size of your plants.


Leave a Comment