

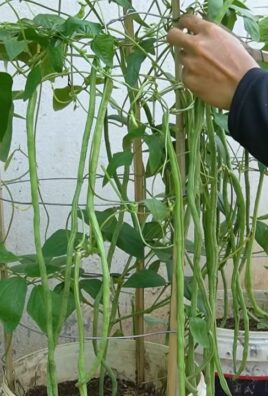
Growing bean sprouts peanuts at home might sound like a quirky science experiment, but trust me, it’s a surprisingly rewarding and delicious DIY project! Forget those bland, store-bought sprouts – imagine the satisfaction of harvesting your own crunchy, nutty bean sprouts, bursting with freshness and flavor.
Sprouting, in general, has a rich history, dating back thousands of years in Asian cultures. It was a clever way to access vital nutrients during long winters or periods of scarcity. Think of it as ancient food preservation meets modern-day healthy eating! And while we often think of mung beans when we hear “sprouts,” peanuts offer a unique and delightful twist.
Why should you try growing bean sprouts peanuts yourself? Well, for starters, it’s incredibly easy and inexpensive. You don’t need a fancy greenhouse or a green thumb of steel. Plus, commercially produced sprouts can sometimes be prone to contamination, so growing your own gives you complete control over the process, ensuring a safe and healthy snack. I’m excited to share some simple DIY tricks and hacks that will have you enjoying a bountiful harvest of peanut sprouts in no time. Get ready to unlock the secrets to fresh, flavorful, and nutritious sprouts right in your own kitchen!
DIY: Sprouting Peanuts – It’s This Easy!
Hey everyone! Have you ever tried peanut sprouts? They are super crunchy, nutty, and packed with nutrients. And the best part: you can easily sprout them yourself at home! I’ll show you how it’s done. It’s really child’s play and a lot of fun to watch this little miracle of nature.
What you need:
- Raw, unsalted peanuts (preferably organic quality)
- A clean mason jar or sprouting jar
- A piece of cheesecloth, muslin, or a special sprouting lid
- A rubber band or string
- Fresh, clean water
- A dark, cool place (e.g., a kitchen drawer or a cupboard)
Why Peanut Sprouts?
Peanut sprouts are not only delicious but also really healthy. They contain many vitamins, minerals, and enzymes. They are also a great source of plant-based protein and fiber. Compared to raw peanuts, they are easier to digest because the sprouting process breaks down certain components.
Step-by-Step Guide:
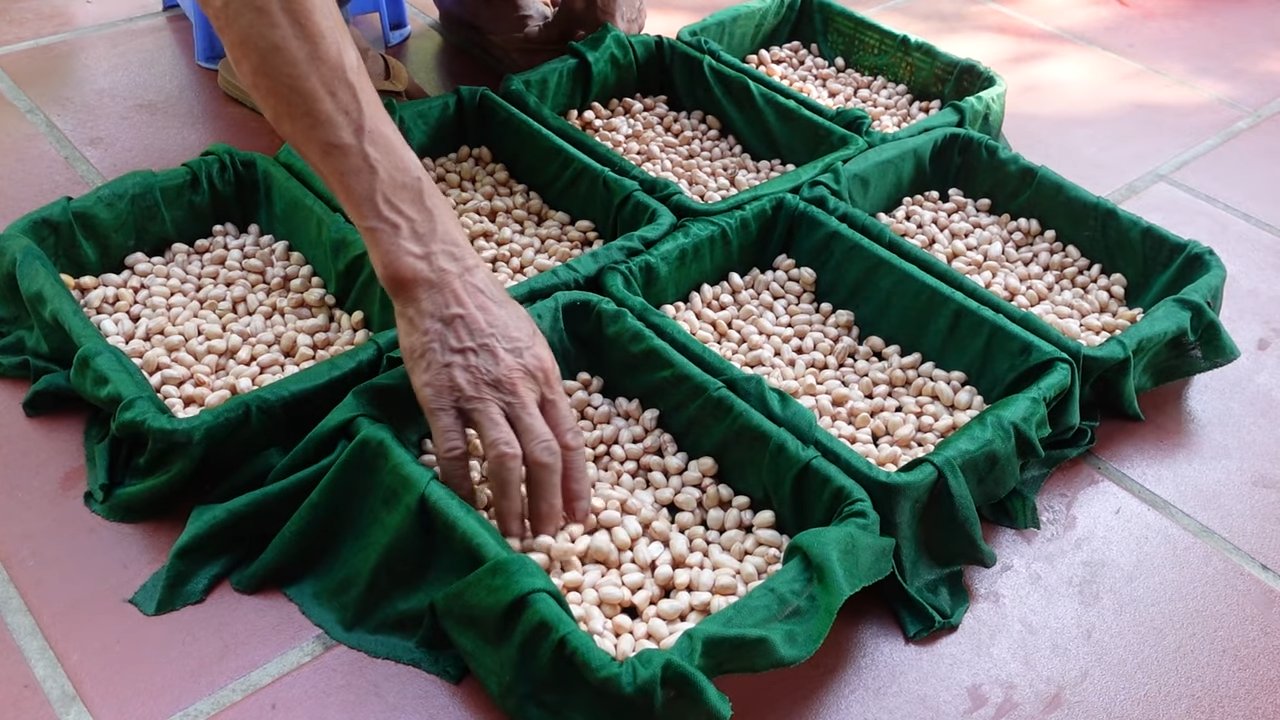
- Prepare the Peanuts: First, you need to wash the peanuts thoroughly. Put them in a sieve and rinse them under running water until the water runs clear. Sort out any damaged or discolored peanuts. Only the best peanuts will turn into crunchy sprouts.
- Soak: Put the washed peanuts into your mason jar or sprouting jar. Fill the jar with plenty of fresh water so that the peanuts are well covered. Let the peanuts soak for 8-12 hours. Soaking is important to get the germination process started. I usually let them soak overnight.
- Cover and Secure: After soaking, pour off the water. Rinse the peanuts thoroughly again with fresh water. Cover the jar with the cheesecloth, muslin, or sprouting lid. Secure the cover with a rubber band or string so that it doesn’t slip.
- The Right Location: Place the jar in a dark, cool place. You should avoid direct sunlight, as it can dry out the sprouts and hinder germination. A kitchen drawer or a cupboard is ideal.
- Rinse, rinse, rinse: This is the most important step! Rinse the peanut sprouts at least twice a day with fresh water. It’s best to do it in the morning and evening. Pour the water out through the cover and then refill the jar with fresh water. Swirl the jar slightly so that all sprouts are well moistened. Then let the water drain out again. This step is crucial to prevent mold and keep the sprouts fresh.
- Wait and Watch: After a few days, you will see the first small roots sprouting from the peanuts. That’s a great feeling! Make sure the sprouts always stay moist and continue to rinse them regularly.
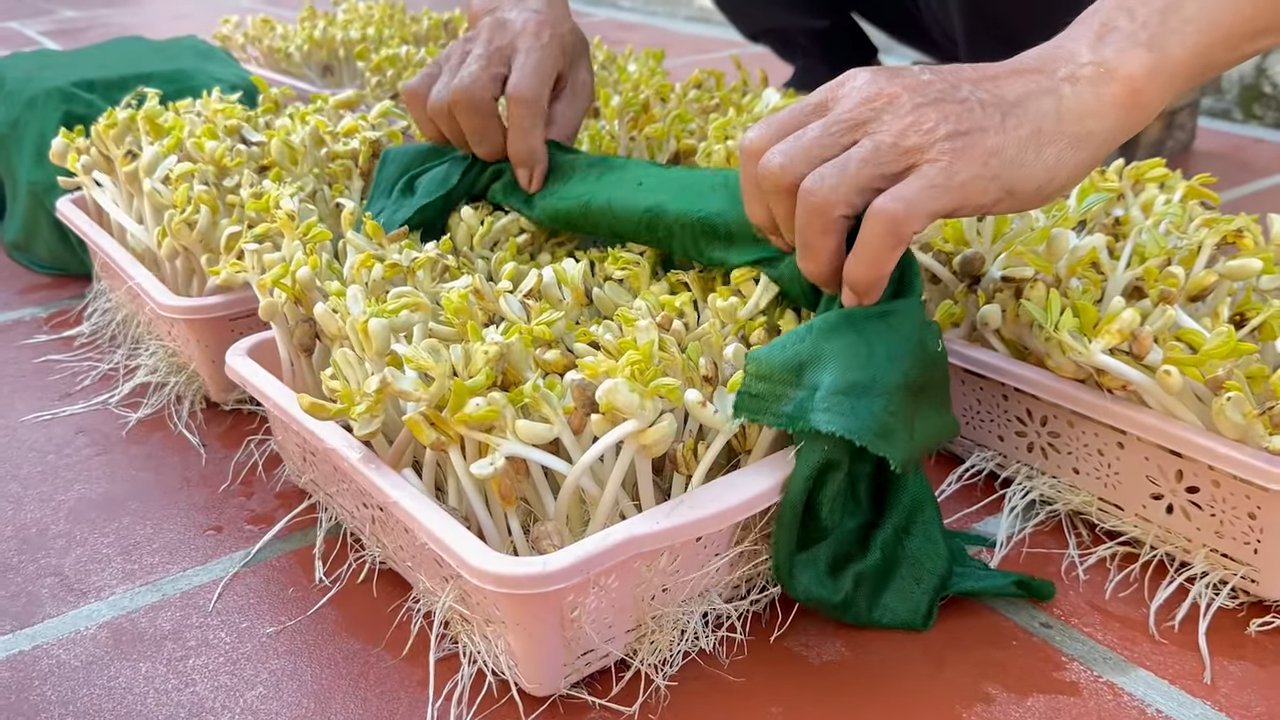
- Harvest and Enjoy: After about 3-5 days, your peanut sprouts are ready to harvest. They should now have small, white roots and green cotyledons. Rinse the sprouts thoroughly again before eating.
Tips and Tricks for Perfect Peanut Sprouts:
- Quality of Peanuts: Be sure to use raw, unsalted peanuts of organic quality. Roasted or salted peanuts will not germinate.
- Hygiene is Important: Make sure all utensils are clean to avoid mold.
- Regular Rinsing: Rinse the sprouts at least twice a day, or even more often, especially in warm weather.
- Ventilation: Ensure good ventilation by not overfilling the jar and not packing the sprouts too tightly.
- Avoid Mold: If you discover mold, you should remove the affected sprouts immediately and rinse the remaining sprouts thoroughly.
- Vary the Flavor: You can also mix the sprouts with other seeds or legumes to vary the taste.
- Storage: Store the harvested sprouts in the refrigerator. They will keep there for about 2-3 days.
Ways to Use Peanut Sprouts:
Peanut sprouts are incredibly versatile and can be used in many different dishes. Here are a few ideas:
- Salads: Add the sprouts to your salads for a crunchy bite and a nutty flavor.
- Sandwiches: Top your sandwiches with peanut sprouts for an extra portion of nutrients.
- Soups: Sprinkle the sprouts over your soups as a garnish.
- Wok Dishes: Add the sprouts to your stir-fries for a crunchy contrast.
- Smoothies: Mix the sprouts into your smoothies for an extra nutritional kick.
- Plain: Simply as a healthy snack in between meals.
Common Problems and Solutions:
- The peanuts don’t sprout: Check if the peanuts are fresh and unsalted. Make sure you soak them for long enough.
- The sprouts are moldy: Rinse the sprouts regularly and ensure good ventilation. Use clean utensils.
- The sprouts are slimy: This can be due to high humidity or insufficient ventilation. Rinse the sprouts more often and place the jar in a cooler location.
- The sprouts taste bitter: This can be due to too long a germination period. Harvest the sprouts as soon as they reach the desired size.
A Few More Personal Tips from Me:
I have found that it works best if I keep the peanuts in a dark cupboard and rinse them three times a day. This is especially important on hot days. I also make sure that the jar is not too full, so the sprouts have enough room to breathe. And most importantly: Be patient! It takes a few days for the sprouts to grow. But it’s worth it!
I hope this guide helps you to sprout your own peanuts. It’s truly a great feeling to grow something yourself and then enjoy it. Have fun sprouting! Let me know how it worked out for you.
Conclusion
So, there you have it! Growing your own bean sprouts from peanuts is not just a fun experiment; it’s a gateway to incredibly fresh, nutritious, and flavorful additions to your meals. Forget the bland, often chemically treated sprouts from the grocery store. This DIY method puts you in control, ensuring you get the highest quality sprouts bursting with vitality.
Why is this a must-try? Because it’s simple, cost-effective, and surprisingly rewarding. You’re transforming humble peanuts into a powerhouse of vitamins, minerals, and enzymes, all within the comfort of your own kitchen. Plus, the slightly nutty, sweet flavor of peanut sprouts is unlike anything you’ve tasted before. They add a delightful crunch and depth to salads, stir-fries, sandwiches, and even as a standalone snack.
But don’t stop there! Experiment with different sprouting times to achieve your preferred sprout length and texture. Try using different varieties of raw, unsalted peanuts to discover subtle flavor variations. You can even incorporate other sprouting seeds like mung beans or alfalfa for a mixed sprout medley. Consider adding a touch of lemon juice or vinegar to the rinsing water to further enhance the flavor and inhibit bacterial growth.
The possibilities are truly endless, and the best part is that you’re learning a valuable skill that connects you to your food in a more meaningful way. You’re reducing your reliance on commercially produced sprouts, minimizing your environmental impact, and enjoying a healthier, more sustainable lifestyle.
We wholeheartedly encourage you to embark on this sprouting adventure. It’s a fantastic project for families, a great way to introduce children to the wonders of gardening, and a satisfying accomplishment for anyone who appreciates fresh, wholesome food.
Don’t be intimidated by the process. It’s far easier than you might think. Just remember to use clean equipment, rinse your sprouts regularly, and provide them with adequate moisture and ventilation. With a little patience and attention, you’ll be enjoying a bountiful harvest of delicious peanut sprouts in no time.
And most importantly, we want to hear about your experience! Share your photos, tips, and variations in the comments below. Let’s build a community of peanut sprout enthusiasts and inspire others to discover the joys of growing their own food. Let us know what worked for you, what challenges you faced, and what creative ways you’ve found to incorporate these nutritious sprouts into your diet. Your feedback is invaluable and will help us refine this guide and empower others to succeed. So, go ahead, give it a try, and let the sprouting begin! Mastering the art of growing bean sprouts peanuts at home is easier than you think, and the rewards are well worth the effort.
Frequently Asked Questions (FAQ)
What kind of peanuts should I use for sprouting?
The best peanuts for sprouting are raw, unsalted, and unroasted peanuts in their shells. Avoid peanuts that have been processed in any way, as these may not germinate properly. Look for peanuts specifically labeled as “raw” or “for sprouting.” Organic peanuts are also a great choice, as they are free from pesticides and other harmful chemicals. Make sure to inspect the peanuts for any signs of mold or damage before using them. Discard any peanuts that appear discolored or have an off odor.
How long does it take for peanut sprouts to grow?
Generally, peanut sprouts will be ready to harvest in about 3-5 days. The exact time will depend on the temperature and humidity of your environment. Warmer temperatures will speed up the sprouting process, while cooler temperatures will slow it down. You’ll know your sprouts are ready when they have developed a small root and a short stem with tiny leaves. Don’t let them grow too long, as they can become bitter and less palatable.
How often should I rinse the peanut sprouts?
Rinsing is crucial for preventing mold and bacteria growth. Rinse your peanut sprouts at least twice a day, preferably in the morning and evening. Use cool, clean water and gently agitate the sprouts to ensure they are thoroughly rinsed. Drain the water completely after rinsing to prevent them from sitting in excess moisture. If you live in a particularly humid environment, you may need to rinse them more frequently.
What if my peanut sprouts start to smell bad?
A foul odor is a sign of bacterial contamination. If your peanut sprouts start to smell bad, discard them immediately. Do not attempt to salvage them, as they may be unsafe to eat. To prevent this from happening, ensure you are using clean equipment, rinsing the sprouts regularly, and providing them with adequate ventilation. You can also add a tablespoon of vinegar or lemon juice to the rinsing water to help inhibit bacterial growth.
How do I store peanut sprouts?
Once your peanut sprouts are ready to harvest, rinse them thoroughly and drain them well. Store them in an airtight container lined with a paper towel in the refrigerator. The paper towel will help absorb excess moisture and keep the sprouts fresh. Peanut sprouts will typically last for up to a week in the refrigerator. Check them regularly for any signs of spoilage and discard them if they start to smell bad or become slimy.
Can I eat the peanut shells after sprouting?
While technically edible, peanut shells are not typically consumed after sprouting. They are quite fibrous and can be difficult to digest. It’s best to discard the shells and focus on enjoying the nutritious sprouts themselves.
Are there any health benefits to eating peanut sprouts?
Yes, peanut sprouts are packed with nutrients and offer a variety of health benefits. They are a good source of protein, fiber, vitamins, and minerals. Sprouting increases the bioavailability of these nutrients, making them easier for your body to absorb. Peanut sprouts are also rich in enzymes, which aid in digestion. Some studies have suggested that peanut sprouts may have antioxidant and anti-inflammatory properties.
Can I sprout other types of nuts and seeds?
Yes, many other types of nuts and seeds can be sprouted, including mung beans, alfalfa, broccoli seeds, radish seeds, lentils, and sunflower seeds. Each type of sprout has its own unique flavor and nutritional profile. Experiment with different varieties to find your favorites. Just be sure to research the specific sprouting requirements for each type of nut or seed, as they may vary.
My sprouts are not growing, what am I doing wrong?
Several factors can contribute to sprouts not growing. First, ensure your peanuts are raw, unsalted, and viable for sprouting. Old or processed peanuts may not germinate. Second, check the temperature. Sprouts prefer a warm environment (around 70-75°F). Third, ensure adequate moisture. The peanuts should be consistently moist but not waterlogged. Fourth, provide proper ventilation. Stagnant air can lead to mold growth and inhibit sprouting. Finally, be patient. Sprouting can take a few days, so don’t give up too soon.
Can I grow peanut sprouts in soil?
While you can technically grow peanut sprouts in
So, there you have it! Growing your own bean sprouts from peanuts is not just a fun experiment; it’s a gateway to incredibly fresh, nutritious, and flavorful additions to your meals. Forget the bland, often chemically treated sprouts from the grocery store. This DIY method puts you in control, ensuring you get the highest quality sprouts bursting with vitality.
Why is this a must-try? Because it’s simple, cost-effective, and surprisingly rewarding. You’re transforming humble peanuts into a powerhouse of vitamins, minerals, and enzymes, all within the comfort of your own kitchen. Plus, the slightly nutty, sweet flavor of peanut sprouts is unlike anything you’ve tasted before. They add a delightful crunch and depth to salads, stir-fries, sandwiches, and even as a standalone snack.
But don’t stop there! Experiment with different sprouting times to achieve your preferred sprout length and texture. Try using different varieties of raw, unsalted peanuts to discover subtle flavor variations. You can even incorporate other sprouting seeds like mung beans or alfalfa for a mixed sprout medley. Consider adding a touch of lemon juice or vinegar to the rinsing water to further enhance the flavor and inhibit bacterial growth.
The possibilities are truly endless, and the best part is that you’re learning a valuable skill that connects you to your food in a more meaningful way. You’re reducing your reliance on commercially produced sprouts, minimizing your environmental impact, and enjoying a healthier, more sustainable lifestyle.
We wholeheartedly encourage you to embark on this sprouting adventure. It’s a fantastic project for families, a great way to introduce children to the wonders of gardening, and a satisfying accomplishment for anyone who appreciates fresh, wholesome food.
Don’t be intimidated by the process. It’s far easier than you might think. Just remember to use clean equipment, rinse your sprouts regularly, and provide them with adequate moisture and ventilation. With a little patience and attention, you’ll be enjoying a bountiful harvest of delicious peanut sprouts in no time.
And most importantly, we want to hear about your experience! Share your photos, tips, and variations in the comments below. Let’s build a community of peanut sprout enthusiasts and inspire others to discover the joys of growing their own food. Let us know what worked for you, what challenges you faced, and what creative ways you’ve found to incorporate these nutritious sprouts into your diet. Your feedback is invaluable and will help us refine this guide and empower others to succeed. So, go ahead, give it a try, and let the sprouting begin! Mastering the art of growing bean sprouts peanuts at home is easier than you think, and the rewards are well worth the effort.
Frequently Asked Questions (FAQ)
What kind of peanuts should I use for sprouting?
The best peanuts for sprouting are raw, unsalted, and unroasted peanuts in their shells. Avoid peanuts that have been processed in any way, as these may not germinate properly. Look for peanuts specifically labeled as “raw” or “for sprouting.” Organic peanuts are also a great choice, as they are free from pesticides and other harmful chemicals. Make sure to inspect the peanuts for any signs of mold or damage before using them. Discard any peanuts that appear discolored or have an off odor.
How long does it take for peanut sprouts to grow?
Generally, peanut sprouts will be ready to harvest in about 3-5 days. The exact time will depend on the temperature and humidity of your environment. Warmer temperatures will speed up the sprouting process, while cooler temperatures will slow it down. You’ll know your sprouts are ready when they have developed a small root and a short stem with tiny leaves. Don’t let them grow too long, as they can become bitter and less palatable.
How often should I rinse the peanut sprouts?
Rinsing is crucial for preventing mold and bacteria growth. Rinse your peanut sprouts at least twice a day, preferably in the morning and evening. Use cool, clean water and gently agitate the sprouts to ensure they are thoroughly rinsed. Drain the water completely after rinsing to prevent them from sitting in excess moisture. If you live in a particularly humid environment, you may need to rinse them more frequently.
What if my peanut sprouts start to smell bad?
A foul odor is a sign of bacterial contamination. If your peanut sprouts start to smell bad, discard them immediately. Do not attempt to salvage them, as they may be unsafe to eat. To prevent this from happening, ensure you are using clean equipment, rinsing the sprouts regularly, and providing them with adequate ventilation. You can also add a tablespoon of vinegar or lemon juice to the rinsing water to help inhibit bacterial growth.
How do I store peanut sprouts?
Once your peanut sprouts are ready to harvest, rinse them thoroughly and drain them well. Store them in an airtight container lined with a paper towel in the refrigerator. The paper towel will help absorb excess moisture and keep the sprouts fresh. Peanut sprouts will typically last for up to a week in the refrigerator. Check them regularly for any signs of spoilage and discard them if they start to smell bad or become slimy.
Can I eat the peanut shells after sprouting?
While technically edible, peanut shells are not typically consumed after sprouting. They are quite fibrous and can be difficult to digest. It’s best to discard the shells and focus on enjoying the nutritious sprouts themselves.
Are there any health benefits to eating peanut sprouts?
Yes, peanut sprouts are packed with nutrients and offer a variety of health benefits. They are a good source of protein, fiber, vitamins, and minerals. Sprouting increases the bioavailability of these nutrients, making them easier for your body to absorb. Peanut sprouts are also rich in enzymes, which aid in digestion. Some studies have suggested that peanut sprouts may have antioxidant and anti-inflammatory properties.
Can I sprout other types of nuts and seeds?
Yes, many other types of nuts and seeds can be sprouted, including mung beans, alfalfa, broccoli seeds, radish seeds, lentils, and sunflower seeds. Each type of sprout has its own unique flavor and nutritional profile. Experiment with different varieties to find your favorites. Just be sure to research the specific sprouting requirements for each type of nut or seed, as they may vary.
My sprouts are not growing, what am I doing wrong?
Several factors can contribute to sprouts not growing. First, ensure your peanuts are raw, unsalted, and viable for sprouting. Old or processed peanuts may not germinate. Second, check the temperature. Sprouts prefer a warm environment (around 70-75°F). Third, ensure adequate moisture. The peanuts should be consistently moist but not waterlogged. Fourth, provide proper ventilation. Stagnant air can lead to mold growth and inhibit sprouting. Finally, be patient. Sprouting can take a few days, so don’t give up too soon.
Can I grow peanut sprouts in soil?
While you can technically grow peanut sprouts in soil, it’s not the most efficient or common method. The sprouting process described above, using a jar or container with water, is much simpler and faster. Growing in soil requires more space, time, and effort. If you’re interested in growing peanuts to maturity, then soil is necessary, but for simply sprouting them for consumption, the jar method is recommended.
Leave a Comment