

Growing Winged Beans can seem daunting, but trust me, it’s a rewarding experience that brings a unique and delicious addition to your garden and your plate! Have you ever dreamt of harvesting vibrant, four-sided beans right from your backyard, adding an exotic touch to your meals? This DIY guide will unlock the secrets to successfully cultivating these fascinating legumes, even if you’re a beginner gardener.
Winged beans, also known as asparagus peas or Goa beans, boast a rich history, particularly in Southeast Asia and Papua New Guinea, where they’ve been cultivated for centuries. They’re not just a tasty vegetable; they’re a nutritional powerhouse, packed with protein, vitamins, and minerals. Traditionally, every part of the plant – from the beans and leaves to the roots and flowers – has been utilized for food and medicinal purposes.
In today’s world, where we’re increasingly conscious of sustainable living and healthy eating, growing winged beans at home offers a fantastic opportunity to connect with nature and enjoy fresh, organic produce. Plus, with rising grocery prices, wouldn’t it be amazing to harvest your own delicious and nutritious beans? This DIY article will provide you with simple, step-by-step instructions and clever hacks to ensure a bountiful harvest. I’ll share my personal tips and tricks, learned through trial and error, to help you avoid common pitfalls and maximize your yield. Let’s get started and transform your garden into a winged bean paradise!
Growing Winged Beans: Your DIY Guide for an Exotic Harvest
Hello garden friends! I am thrilled to introduce you to the fascinating world of growing winged beans today. This versatile and nutritious plant is not only an eye-catcher in any garden but also provides delicious pods, leaves, flowers, and roots. Sounds exciting, right? Let’s get started together!
What are Winged Beans Anyway?
Winged beans (Psophocarpus tetragonolobus), also known as Goa beans or asparagus beans, are tropical legumes originally from Southeast Asia. They are known for their four-winged pods, which not only look decorative but are also rich in protein, vitamins, and minerals. The best part? Almost all parts of the plant are edible!
Why Grow Winged Beans?
- Nutrient-rich: Winged beans are an excellent source of protein, fiber, vitamins (A, C), and minerals (iron, calcium).
- Versatile use: You can use the pods, leaves, flowers, and roots in various dishes.
- Decorative: The plant with its winged pods and bright flowers is a real eye-catcher in the garden.
- Soil improver: Like other legumes, winged beans enrich the soil with nitrogen.
- Relatively low-maintenance: With the right conditions, winged beans are relatively easy to grow.
Preparation: Everything You Need
Before we start growing, let’s make sure we have everything we need on hand.
- Seeds: Get high-quality winged bean seeds. You can find them in well-stocked garden centers or online.
- Seedling pots or trays: For starting indoors.
- Seed starting mix: A loose, low-nutrient soil is ideal for germination.
- Garden soil: For planting out in the bed or in containers.
- Compost or organic fertilizer: to enrich the soil with nutrients.
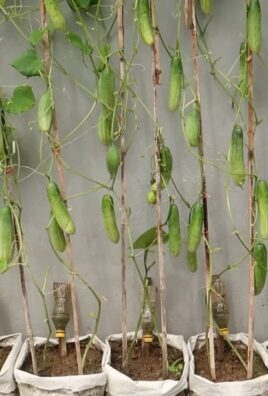
- Support/Trellis: Winged beans are climbing plants and require a support (e.g., trellis, fence, lattice).
- Watering can or hose: For watering.
- Garden tools: Spade, rake, possibly a small shovel.
- Patience: Growing winged beans requires some patience, but it’s worth it!
Step-by-Step Guide: How to Succeed
Phase 1: Starting Indoors (optional, but recommended)
Starting indoors gives the plants a head start and extends the growing season. I recommend starting about 4-6 weeks before the last expected frost.
- Prepare the seeds: To speed up germination, you can soak the seeds in lukewarm water for 12-24 hours before sowing. This softens the seed coat and makes it easier for them to sprout.
- Sowing: Fill the seedling pots or trays with seed starting mix. Place 2-3 seeds in each pot, about 2-3 cm (about 1 inch) deep. Cover the seeds with soil and press down lightly.
- Watering: Water the soil gently so that it is moist but not wet.
- Location: Place the pots in a warm, bright place. A temperature of 20-25°C (68-77°F) is ideal for germination.
- Moisture: Keep the soil evenly moist by spraying or watering it regularly. Avoid waterlogging.
- Germination: Germination usually takes 1-2 weeks. Once the seedlings appear, you can remove the weakest ones, leaving only the strongest shoot per pot.
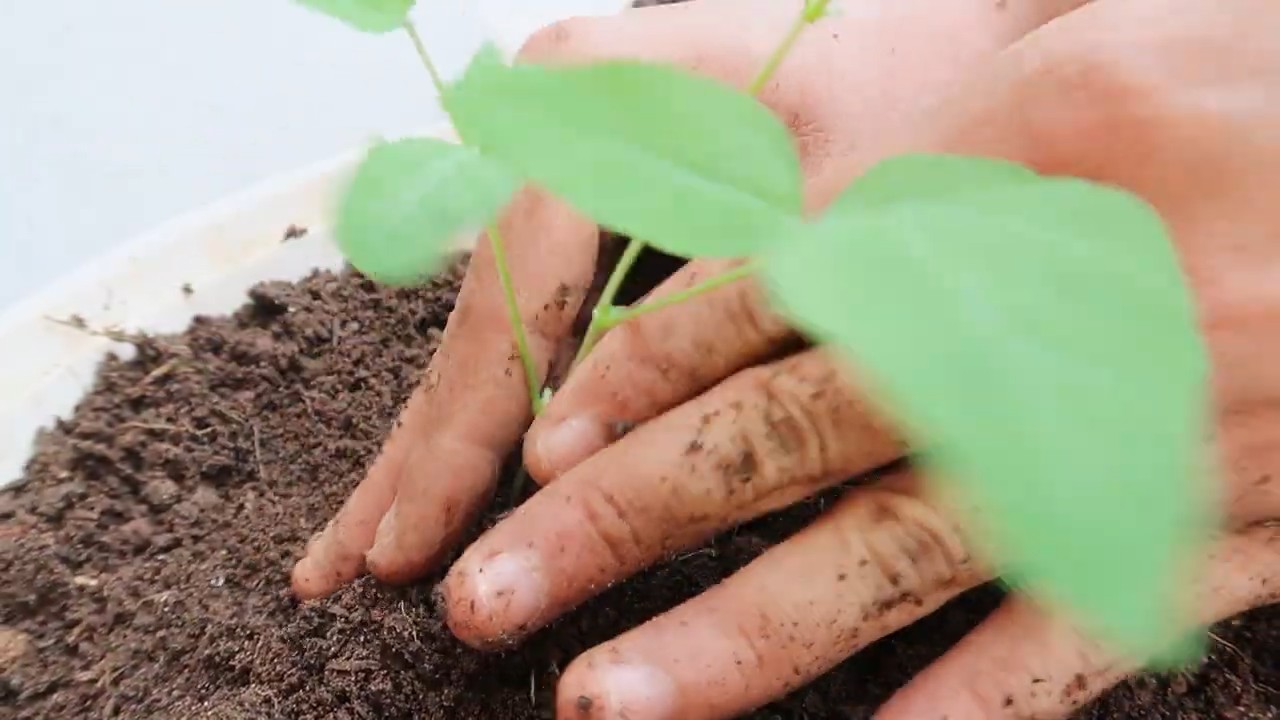
Phase 2: Planting Outdoors
Once the danger of frost has passed and the seedlings are strong enough (about 10-15 cm or 4-6 inches high), they can be planted outdoors.
- Location selection: Choose a sunny location with well-draining soil. Winged beans love warmth and light.
- Soil preparation: Loosen the soil thoroughly and enrich it with compost or organic fertilizer.
- Spacing: Plant the seedlings about 30-45 cm (12-18 inches) apart. If you want to create multiple rows, maintain a distance of about 60-90 cm (24-35 inches) between the rows.
- Planting out: Dig a hole that is slightly larger than the seedling’s root ball. Carefully place the seedling in the hole and fill it with soil. Press the soil down lightly.
- Watering: Water the plants thoroughly after planting.
- Install support: Make sure the plants have a sturdy support to climb on.
Phase 3: Care During the Growth Phase
Proper care is crucial for a bountiful harvest.
- Watering: Winged beans require regular watering, especially during dry periods. Make sure the soil is always slightly moist, but avoid waterlogging.
- Fertilizing: Fertilize the plants regularly with an organic fertilizer or compost. Avoid nitrogen-rich fertilizers, as they can promote leaf growth but inhibit flower formation.
- Weed control: Keep the area around the plants free of weeds to minimize competition for nutrients and water.
- Pests and diseases: Winged beans are relatively resistant to pests and diseases. Occasionally, aphids or spider mites may appear. These can be controlled with natural remedies, such as soapy water or neem oil.
- Pruning: Regularly remove side shoots to encourage flower formation.
- Mulching: A layer of mulch made of straw or grass clippings helps to retain moisture in the soil and suppress weeds.
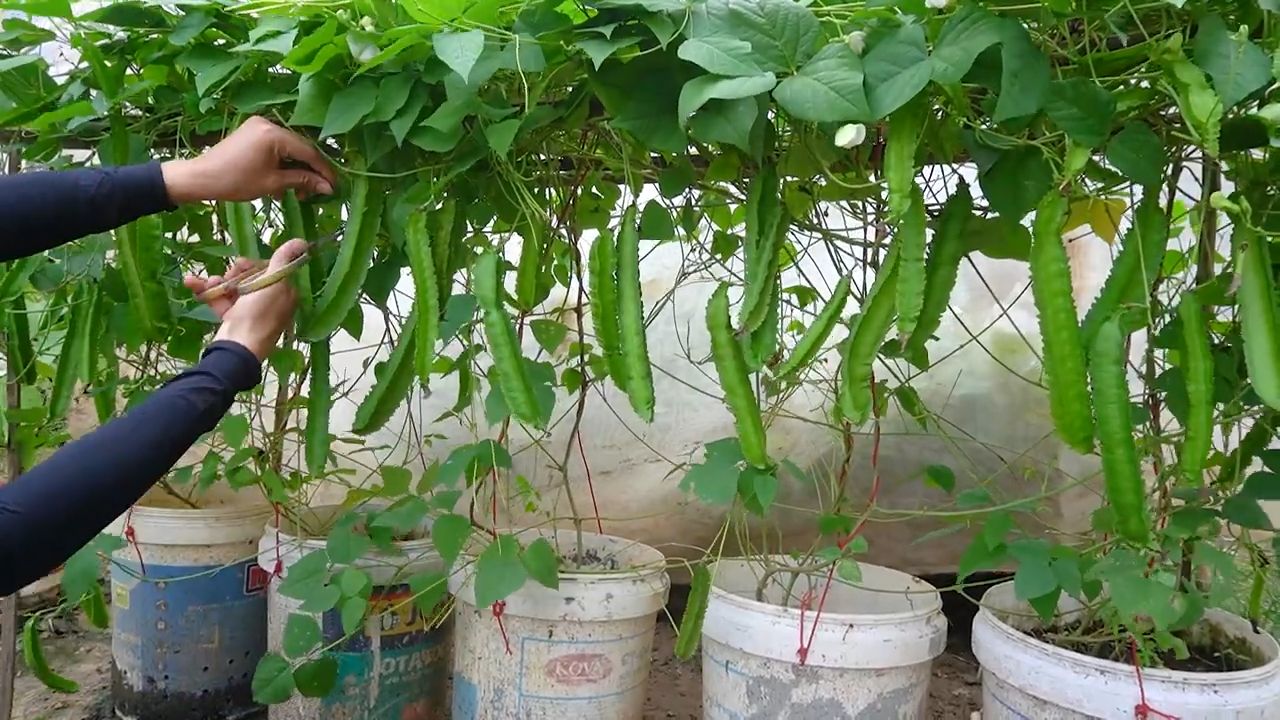
Phase 4: The Harvest
The harvest time depends on the variety and growing conditions. Typically, the first pods can be harvested about 2-3 months after planting.
- Pods: Harvest the pods when they are still young and tender (about 15-20 cm or 6-8 inches long). They should bend easily and not contain hard seeds.
- Leaves: The leaves can be harvested at any time. They taste best when they are young and tender.
- Flowers: The flowers can also be harvested and used in salads or as decoration.
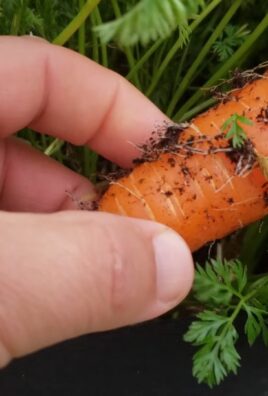
- Roots: The roots can be harvested when the plant is fully grown (about 6-9 months after planting). They should be cooked before consumption.
Use in the Kitchen: Pure Versatility!
Winged beans are incredibly versatile in the kitchen. Here are a few ideas on how you can use them:
Roots: Cooked and served as a vegetable side dish. They have a potato-like taste.
*
Pods: Steamed, fried, boiled, or raw in salads. They taste similar to green beans.
Leaves: Steamed, boiled, or raw in salads. They have a slightly nutty flavor.
Flowers: As a decoration for salads or other dishes.
Conclusion
So, there you have it! Growing winged beans at home is not only achievable but also incredibly rewarding. From the vibrant purple flowers to the uniquely shaped pods, this plant offers a visual spectacle in your garden. But the real magic lies in the versatility and nutritional powerhouse that winged beans represent. Forget bland, store-bought vegetables; imagine stepping into your backyard and harvesting fresh, crisp winged beans for your next stir-fry, salad, or even a hearty stew.
This DIY trick, focusing on proper support structures and consistent watering, unlocks the full potential of your winged bean plants. We’ve shown you how to create a thriving environment where these climbing legumes can flourish, producing an abundant harvest for you and your family. The satisfaction of nurturing a plant from seed to table is unparalleled, and with winged beans, you’re not just growing food; you’re cultivating a connection to nature and embracing a sustainable lifestyle.
Don’t be afraid to experiment! Try different trellising methods to find what works best for your space. Consider companion planting with herbs like basil or rosemary to deter pests and enhance the flavor of your beans. You can even explore different varieties of winged beans, each with its own unique characteristics and culinary applications. Some varieties are better suited for specific climates, so research which ones thrive in your region.
Ready to embark on your winged bean growing adventure? We encourage you to give this DIY trick a try. Start small, learn as you go, and don’t be discouraged by initial setbacks. Gardening is a journey, and every challenge is an opportunity to learn and grow.
We’re confident that with a little effort and the knowledge you’ve gained here, you’ll be enjoying a bountiful harvest of delicious and nutritious winged beans in no time. And most importantly, we want to hear about your experience! Share your photos, tips, and challenges in the comments below. Let’s create a community of winged bean enthusiasts and learn from each other’s successes and failures. Together, we can unlock the secrets to growing these amazing plants and enjoy the many benefits they offer. So, grab your seeds, prepare your garden, and get ready to experience the joy of growing your own winged beans!
Frequently Asked Questions (FAQ)
What are the ideal growing conditions for winged beans?
Winged beans thrive in warm, humid climates with plenty of sunshine. They require at least 6-8 hours of direct sunlight per day. The ideal temperature range is between 70°F and 85°F (21°C and 29°C). They are sensitive to frost, so it’s crucial to protect them from cold temperatures. Well-drained soil is essential, as waterlogged conditions can lead to root rot. Adding compost or other organic matter to the soil will improve drainage and provide essential nutrients.
How often should I water my winged bean plants?
Winged beans need consistent moisture, especially during hot weather. Water deeply and regularly, ensuring the soil remains consistently moist but not waterlogged. A good rule of thumb is to water when the top inch of soil feels dry to the touch. Mulching around the base of the plants can help retain moisture and suppress weeds. During periods of heavy rain, you may need to reduce watering frequency to prevent overwatering.
What type of support structure is best for winged beans?
Winged beans are vigorous climbers and require a sturdy support structure to grow properly. A trellis, fence, or even a strong stake can be used. The support should be at least 6-8 feet tall to accommodate the plant’s growth. Ensure the structure is strong enough to support the weight of the mature plant and its pods. You can also use a combination of structures, such as a trellis with additional stakes for extra support.
How long does it take for winged beans to mature and produce pods?
Winged beans typically take 90-120 days to mature and produce pods. The exact time will depend on the variety, climate, and growing conditions. You can start harvesting pods when they are young and tender, typically around 6-8 inches long. Regular harvesting will encourage the plant to produce more pods.
What are some common pests and diseases that affect winged beans?
Winged beans can be susceptible to pests such as aphids, bean beetles, and spider mites. Regularly inspect your plants for signs of infestation and take appropriate action. Organic pest control methods, such as insecticidal soap or neem oil, can be effective. Diseases such as fungal leaf spots and root rot can also affect winged beans. Ensure good air circulation and avoid overwatering to prevent these diseases.
Can I grow winged beans in containers?
Yes, you can grow winged beans in containers, but you’ll need a large container (at least 15-20 gallons) to accommodate the plant’s root system. Use a well-draining potting mix and provide a sturdy trellis or support structure. Container-grown winged beans may require more frequent watering and fertilization than those grown in the ground.
Are all parts of the winged bean plant edible?
Yes, all parts of the winged bean plant are edible, including the pods, leaves, flowers, roots, and seeds. The young pods are the most commonly consumed part and can be eaten raw or cooked. The leaves can be used in salads or stir-fries. The flowers can be added to salads or used as a garnish. The roots can be cooked and eaten like potatoes. The mature seeds can be roasted or boiled.
How do I save seeds from my winged bean plants?
To save seeds from your winged bean plants, allow the pods to mature and dry on the vine. Once the pods are completely dry and brittle, harvest them and remove the seeds. Store the seeds in a cool, dry place in an airtight container. Properly stored seeds can remain viable for several years.
What are the nutritional benefits of winged beans?
Winged beans are a nutritional powerhouse, packed with protein, fiber, vitamins, and minerals. They are a good source of protein, making them a valuable addition to vegetarian and vegan diets. They are also rich in fiber, which aids digestion and promotes gut health. Winged beans contain vitamins A, C, and B vitamins, as well as minerals such as iron, calcium, and potassium.
How can I incorporate winged beans into my diet?
Winged beans are incredibly versatile and can be used in a variety of dishes. The young pods can be eaten raw in salads or stir-fried with other vegetables. They can also be added to soups, stews, and curries. The leaves can be used in salads or stir-fries. The flowers can be added to salads or used as a garnish. The roots can be cooked and eaten like potatoes. The mature seeds can be roasted or boiled and used in various dishes. Experiment with different recipes and find your favorite ways to enjoy this nutritious and delicious vegetable.

Leave a Comment