

Growing Chili Peppers at Home can seem daunting, but trust me, with a few simple tricks and a little DIY spirit, you can transform your backyard (or even your balcony!) into a fiery paradise. Imagine plucking fresh, vibrant chili peppers, bursting with flavor, right from your own plants. No more bland supermarket peppers – just pure, homegrown heat!
Chili peppers have a rich history, dating back thousands of years in the Americas. They weren’t just a food source; they held cultural and medicinal significance for indigenous populations. From ancient rituals to traditional remedies, chili peppers have always been more than just a spice. Now, you can connect with that history by cultivating your own chili pepper plants.
Why should you embark on this DIY adventure? Well, for starters, growing chili peppers at home allows you to control exactly what goes into your food. No harmful pesticides or questionable fertilizers – just pure, organic goodness. Plus, it’s incredibly rewarding to nurture a plant from seed to harvest. And let’s be honest, who wouldn’t want to impress their friends and family with their homegrown hot sauce or spicy salsa? I’m here to guide you through some easy-to-follow DIY tricks and hacks that will have you harvesting a bumper crop of chili peppers in no time. Let’s get started!
Chili Growing for Everyone: How to Grow Hot Peppers at Home!
Hey chili lovers! Do you dream of harvesting your own fiery chilies and enhancing your dishes with homegrown heat? Then you’ve come to the right place! I’ll show you how to easily grow chili plants at home, whether you have a garden, a balcony, or just a sunny windowsill. Don’t worry, it’s easier than you think!
What you need for growing chilies:
- Chili seeds: The selection is huge! From mild jalapeños to hellishly hot habaneros – pick your favorite varieties. Look for high-quality seeds from trusted suppliers.
- Seed starting mix: Regular potting soil is too nutrient-rich for the delicate seedlings. Seed starting mix is looser and contains fewer nutrients, which promotes root growth.
- Seed starting containers: Small pots, seed trays, or even egg cartons are excellent for starting seeds.
- Mini-greenhouse or plastic wrap: To ensure high humidity for germination.
- Spray bottle: For moistening the soil.
- Pricking tool or spoon: For separating the seedlings.
- Pots or containers: For later planting of the chili plants.
- Potting soil: For the pots or containers.
- Fertilizer: Special chili fertilizer or tomato fertilizer.
- Watering can: For watering the plants.
- Sunlight: Chilies love the sun!
- Patience: Growing chilies takes time and care.
Preparation: The Foundation for a Bountiful Harvest
Before we start, it’s important to prepare everything. This saves time and nerves!
- Select seeds: Think about which heat levels you prefer and choose your chili varieties accordingly. Inform yourself about the specific needs of each variety (e.g., plant size, ripening time).
- Prepare seed containers: Fill the seed containers with seed starting mix. Lightly press the soil down.
- Soak seeds (optional): Soaking the seeds in lukewarm water for 12-24 hours can speed up germination.
- Choose a location: Find a bright and warm place for starting your seeds. A south-facing windowsill is ideal.
Sowing: The Start of Your Chili Adventure
Now let’s get down to it! Sowing is the first step to your own chili plants.
- Sow seeds: Place 1-2 seeds in each seed container. Cover the seeds with a thin layer of seed starting mix (about 0.5 cm).
- Moisten: Carefully moisten the soil with a spray bottle. The soil should be damp, but not wet.
- Mini-greenhouse or plastic wrap: Cover the seed containers with a mini-greenhouse or plastic wrap to ensure high humidity.
- Keep warm: Place the seed containers in a warm place (approx. 22-28°C / 72-82°F). A heating mat can be helpful to achieve the optimal temperature.
- Be patient: Germination can take 1-3 weeks, depending on the variety and temperature. Keep the soil moist and air out the mini-greenhouse or plastic wrap regularly to prevent mold.
Caring for the Seedlings: From a Tender Sprout to a Robust Chili Plant
As soon as the first seedlings sprout, the real care begins.
- Aerate: Remove the mini-greenhouse or plastic wrap as soon as the seedlings appear. Air out the seedlings regularly to prevent mold.
- Watering: Water the seedlings carefully with a spray bottle or a watering can with a fine stream. The soil should always be slightly moist, but not wet.
- Light: Place the seedlings in a bright spot. If there is not enough natural light, you can use a plant lamp.
- Rotate: Rotate the seed containers regularly so the seedlings don’t grow crooked towards the light.
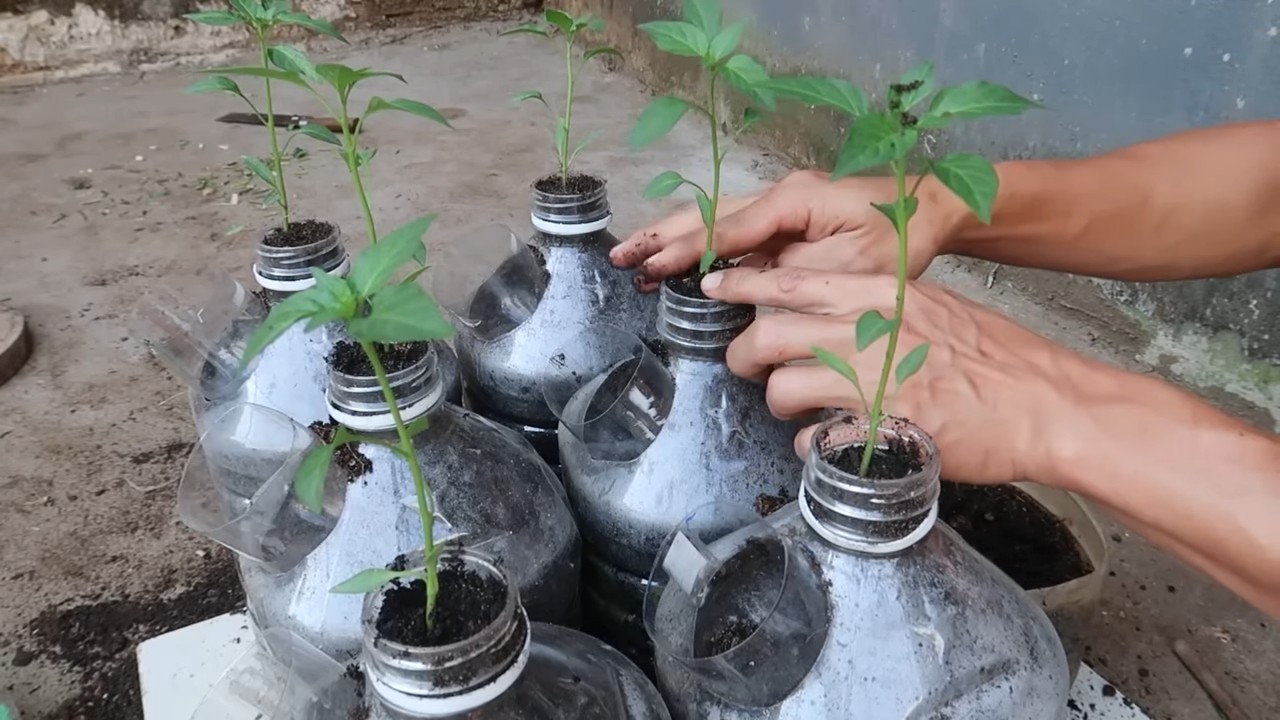
- Pricking out: Once the seedlings have developed their first true leaves (after the cotyledons), it’s time to prick them out. This means you transplant the seedlings into larger pots so they have more room to grow.
Pricking Out: Giving the Chili Plants More Space
Pricking out is an important step to give the chili plants a good start.
- Preparation: Fill small pots (approx. 8-10 cm / 3-4 inches in diameter) with potting soil.
- Carefully lift the seedling: Gently loosen the seedling from the seed starting mix with a pricking tool or a spoon. Be careful not to damage the roots.
- Planting: Place the seedling in the new pot. The cotyledons (seed leaves) should be just above the soil.
- Watering in: Water the seedling carefully.
- Care: Place the pricked-out seedlings in a bright spot and care for them as before.
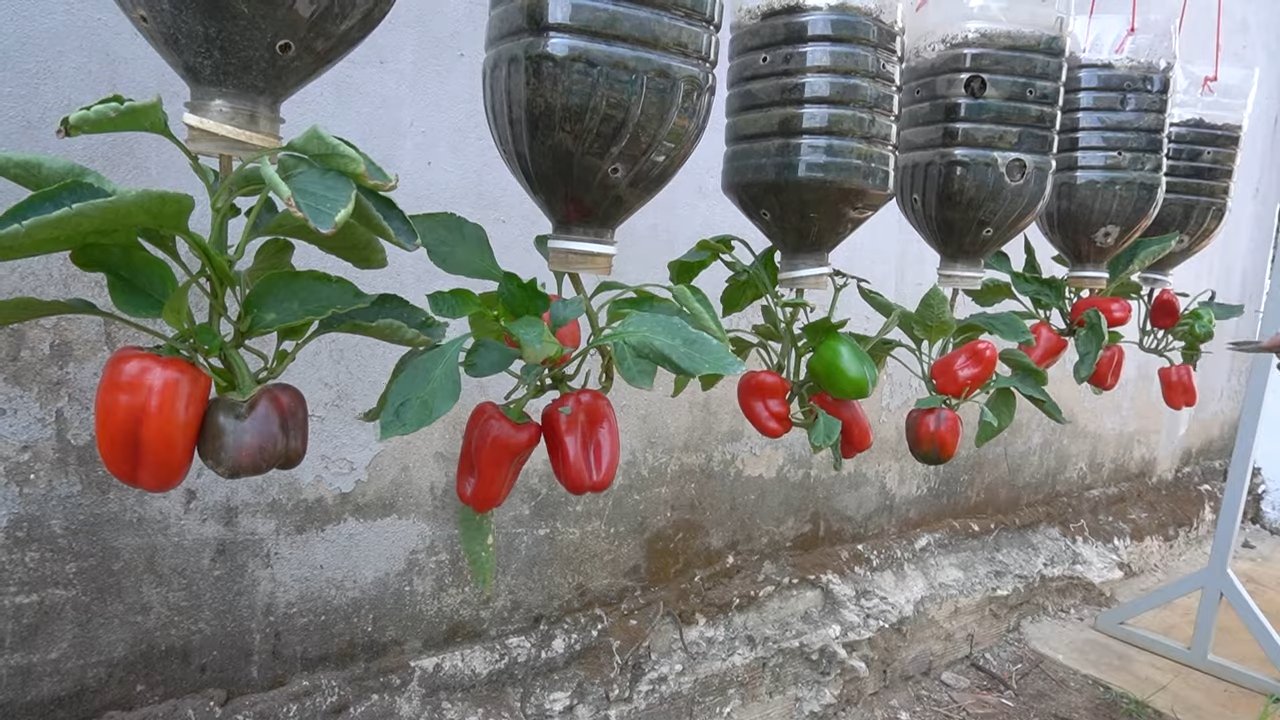
Planting Out: Off to the Outdoors or into a Container
Once the chili plants are strong enough (approx. 15-20 cm / 6-8 inches high) and there is no more danger of frost (mid-May), they can be transplanted outdoors or into larger containers.
- Hardening off: Before you plant the chili plants outdoors, you should slowly acclimate them to the sun and outdoor temperatures. Place the plants outside for a few hours during the day and bring them back in at night. Increase the time outdoors each day.
- Choose a location: Choose a sunny and sheltered spot for your chili plants.
- Prepare the planting hole: Dig a sufficiently large planting hole.
- Planting: Carefully place the chili plant in the planting hole. The top of the root ball should be level with the soil surface.
- Watering in: Water the chili plant thoroughly.
- Fertilizing: Fertilize the chili plant regularly with special chili fertilizer or tomato fertilizer. Follow the instructions on the fertilizer package.
Outdoor Care: Helping Your Chilies Thrive
Even outdoors, your chili plants need regular care.
Staking: For larger chili varieties, it may be necessary to support the plants with stakes to prevent them from breaking.
Watering: Water the chili plants regularly, especially on hot days. The soil should always be slightly moist, but not wet. Avoid waterlogging.
Fertilizing: Fertilize the chili plants regularly to ensure a rich harvest.
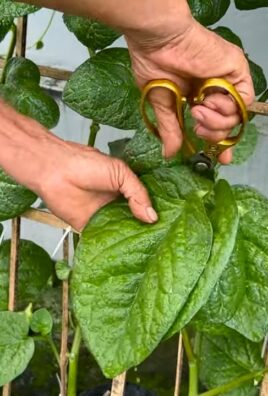
Pruning: Regularly remove the side shoots (suckers) in the leaf axils to promote fruit production.
Pests and diseases: Watch out for pests and diseases. If necessary, you can use organic pesticides.
Die Ernte: Der
Conclusion
So, there you have it! Growing chili peppers at home isn’t just a fun hobby; it’s a gateway to a world of fresh, flavorful, and fiery possibilities. From the satisfaction of nurturing a tiny seed into a thriving plant to the joy of harvesting your own homegrown chilies, the entire process is incredibly rewarding. We’ve covered everything from selecting the right varieties for your climate and taste to providing the optimal growing conditions and troubleshooting common problems.
But why is this DIY trick a must-try? Because it puts you in complete control. You know exactly what goes into your peppers – no mystery pesticides or questionable growing practices. Plus, the flavor of a freshly picked, homegrown chili pepper is simply unmatched by anything you can buy in a store. It’s brighter, more vibrant, and packed with a level of heat that you can tailor to your exact preferences.
Don’t be afraid to experiment! Once you’ve mastered the basics, try different variations. Consider growing your chili peppers in containers on a sunny balcony or patio if you’re short on space. Explore different soil mixes to see which one yields the best results. And definitely try your hand at creating your own unique chili blends using the peppers you’ve grown.
For a milder flavor, try growing Anaheim or Poblano peppers. If you’re looking for something with a bit more kick, consider Jalapeños or Serrano peppers. And for the truly adventurous, there’s always the option of growing super-hot varieties like Habaneros or Scotch Bonnets. Remember to always handle these peppers with care and wear gloves when handling them.
Beyond the fresh peppers, think about the endless possibilities for preserving your harvest. You can dry them, pickle them, make chili oil, or even create your own signature hot sauce. Imagine the bragging rights you’ll have when you serve your friends and family a dish made with chilies you grew yourself!
Growing chili peppers at home is also a fantastic way to reduce your carbon footprint. By growing your own food, you’re reducing your reliance on industrial agriculture and the long-distance transportation of produce. It’s a small step that can make a big difference.
We truly believe that anyone can successfully grow chili peppers at home with a little bit of knowledge and effort. So, what are you waiting for? Grab some seeds, get your hands dirty, and embark on this exciting culinary adventure.
We’re confident that you’ll be amazed by the results. And we want to hear all about your experiences! Share your photos, tips, and stories with us in the comments below. Let’s create a community of chili pepper enthusiasts and learn from each other. Happy growing!
Frequently Asked Questions (FAQ)
What is the best time of year to start growing chili peppers?
The best time to start growing chili peppers depends on your climate. In general, you should start your seeds indoors 6-8 weeks before the last expected frost. This gives the seedlings enough time to develop before being transplanted outdoors. If you live in a warmer climate with a longer growing season, you can start your seeds directly outdoors after the last frost. However, starting indoors is generally recommended for better control over the growing environment.
What kind of soil is best for growing chili peppers?
Chili peppers thrive in well-draining soil that is rich in organic matter. A good potting mix for chili peppers should contain a blend of peat moss, perlite, and vermiculite. You can also amend your soil with compost or aged manure to improve its fertility and drainage. Avoid using heavy clay soils, as they can become waterlogged and lead to root rot. The ideal pH for chili peppers is between 6.0 and 7.0.
How much sunlight do chili peppers need?
Chili peppers need at least 6-8 hours of direct sunlight per day to thrive. Choose a location in your garden that receives plenty of sunlight throughout the day. If you are growing your chili peppers indoors, place them near a sunny window or use grow lights to supplement the natural light. Insufficient sunlight can lead to leggy growth and reduced fruit production.
How often should I water my chili peppers?
Water your chili peppers regularly, especially during hot and dry weather. The soil should be kept consistently moist, but not waterlogged. Water deeply whenever the top inch of soil feels dry to the touch. Avoid overhead watering, as this can increase the risk of fungal diseases. Drip irrigation or soaker hoses are a good way to water your chili peppers efficiently and effectively.
What are some common pests and diseases that affect chili peppers?
Chili peppers can be susceptible to a variety of pests and diseases, including aphids, spider mites, whiteflies, and fungal diseases like powdery mildew and blossom end rot. Regularly inspect your plants for signs of pests or diseases. If you spot any problems, take action immediately. You can use insecticidal soap or neem oil to control pests. For fungal diseases, use a fungicide or improve air circulation around your plants. Blossom end rot is often caused by calcium deficiency, so you can amend your soil with calcium or use a calcium-based fertilizer.
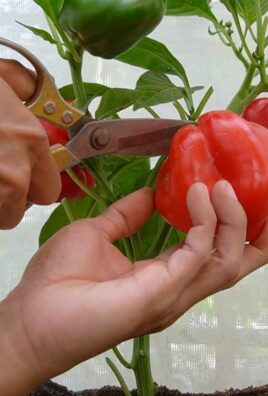
How do I know when my chili peppers are ripe?
The color of your chili peppers will change as they ripen. The exact color will depend on the variety of pepper you are growing. In general, chili peppers are ripe when they have reached their mature color and are firm to the touch. You can also gently squeeze the pepper to see if it gives slightly. If it does, it is likely ripe.
Can I grow chili peppers in containers?
Yes, chili peppers can be successfully grown in containers. Choose a container that is at least 12 inches in diameter and has drainage holes. Use a good quality potting mix and provide your plants with plenty of sunlight and water. Container-grown chili peppers may need to be fertilized more frequently than those grown in the ground.
How do I overwinter my chili pepper plants?
In colder climates, you can overwinter your chili pepper plants indoors. Before the first frost, prune your plants back to about 6 inches tall and transplant them into pots. Bring the pots indoors and place them in a sunny location. Water sparingly during the winter months. In the spring, you can transplant your plants back outdoors after the last frost.
What are some good companion plants for chili peppers?
Good companion plants for chili peppers include basil, tomatoes, carrots, and onions. Basil helps to repel pests, while tomatoes provide shade and support. Carrots and onions help to improve soil drainage and deter pests. Avoid planting chili peppers near fennel or brassicas, as these plants can inhibit their growth.
How can I make my chili peppers hotter?
The heat level of chili peppers is determined by genetics, but you can influence it to some extent by controlling the growing conditions. Stressing your plants by withholding water or fertilizer can sometimes increase the heat level. However, this can also reduce fruit production. The best way to grow hotter peppers is to choose varieties that are known for their heat.
Leave a Comment