

Growing gourds successfully can feel like a magical feat, transforming your backyard into a whimsical wonderland of unique shapes and sizes. Have you ever dreamed of crafting your own birdhouses, dippers, or even musical instruments from the fruits of your labor? This isn’t just a modern trend; gourds have a rich history, dating back thousands of years, serving as essential tools and decorative items in various cultures around the world. From ancient Egyptians using them as water containers to Native Americans crafting them into rattles and bowls, gourds have always been a versatile and valuable resource.
But let’s be honest, getting those gourds to actually grow successfully can be a bit tricky. That’s where this DIY guide comes in! I’m going to share some of my favorite home gardening tricks and hacks to help you cultivate a thriving gourd patch. Whether you’re a seasoned gardener or just starting out, these tips will empower you to overcome common challenges like pest control, pollination, and proper drying techniques. Imagine the satisfaction of harvesting your own homegrown gourds and transforming them into beautiful, functional art. So, let’s dive in and unlock the secrets to growing gourds successfully and creating your own gourd-geous creations!
Successfully Grow Pumpkins Yourself: Your Comprehensive DIY Guide
Hello dear garden friends! I am thrilled to introduce you to the fascinating world of pumpkin growing today. Pumpkins are not only incredibly versatile in the kitchen but also a real ornament for any garden. Whether giant Halloween pumpkins, delicate culinary pumpkins, or decorative gourds – with this guide, your cultivation is guaranteed to succeed!
Why Grow Pumpkins Yourself?
Before we start, let me briefly explain why it’s worth growing pumpkins yourself:
- Freshness and Flavor: Homegrown pumpkins simply taste incomparably better than store-bought ones. They are riper, more aromatic, and full of nutrients.
- Variety: In stores, you often find only a limited selection of pumpkin varieties. In your own garden, you can enjoy a huge variety and grow your favorite types.
- Sustainability: Homegrown means fewer transport miles and fewer pesticides. You know exactly what’s in your pumpkin!
- Gardening Fun: Growing pumpkins is an exciting and rewarding project that will bring you a lot of joy.
Proper Preparation is Key
Before we start planting, we need to make some important preparations.
- Location Selection: Pumpkins love the sun! Choose a sunny spot with at least 6 hours of direct sunlight per day. The soil should be loose, nutrient-rich, and well-draining.
- Soil Improvement: Pumpkins are heavy feeders and require a lot of nutrients. Improve the soil with plenty of compost, rotted manure, or organic fertilizer.
- Starting Indoors or Direct Sowing: You can either start pumpkins indoors or sow them directly in the open ground. Starting them indoors has the advantage that the plants get a head start.
Step-by-Step Guide: Growing Pumpkins
Here now is the detailed guide that will accompany you through the entire process:
1. Sowing (Starting Indoors or Direct Sowing)
- Starting Indoors (from April):
- Fill small pots (approx. 10 cm / 4 inches in diameter) with seed starting mix.
- Place 1-2 pumpkin seeds per pot about 2-3 cm (1 inch) deep in the soil.
- Water the soil gently and place the pots in a warm, bright place (e.g., a windowsill).
- Keep the soil moist, but not wet.
- After about 1-2 weeks, the first seedlings should appear.
- Once the plants have 2-3 true leaves, you can prick them out (thin them) and transplant them into larger pots.
- Direct Sowing (from mid-May, after the last frost):
- Prepare the soil by loosening it and enriching it with compost.
- Place 2-3 pumpkin seeds per planting spot about 3-4 cm (1.5 inches) deep in the soil.
- Maintain a distance of about 1-1.5 meters (3-5 feet) between planting spots (depending on the variety).
- Water the soil gently and keep it moist.
- Once the seedlings appear, remove the weakest shoot, leaving only the strongest one.
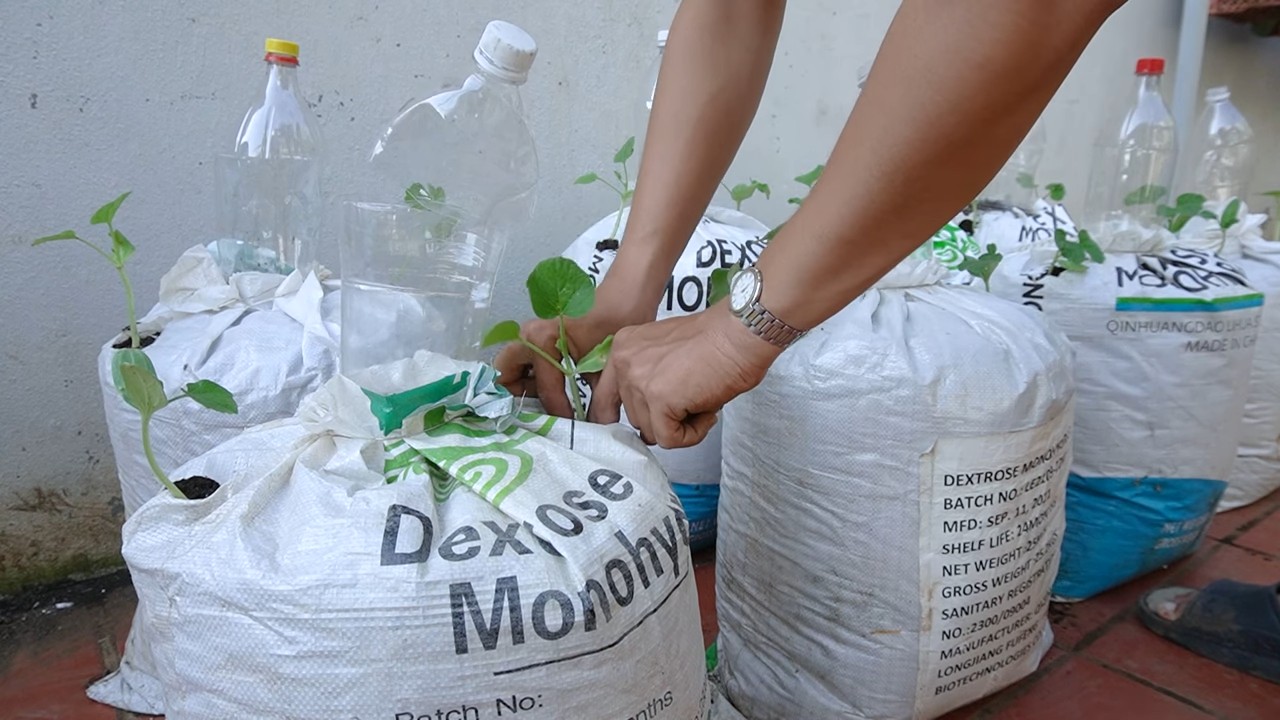
2. Planting Out (for Indoor-Started Plants)
- Preparation:
- Harden off the pre-grown pumpkin plants before planting them out by placing them outdoors for a few hours a day.
- Choose a sunny location with well-draining soil.
- Prepare the soil by loosening it and enriching it with compost.
- Planting Out:
- Dig a hole that is slightly larger than the plant’s root ball.
- Carefully place the plant in the hole and fill it with soil.
- Gently press the soil down and water the plant thoroughly.
- Maintain a distance of about 1-1.5 meters (3-5 feet) between plants (depending on the variety).
3. Care: Watering, Fertilizing, Mulching
- Watering: Pumpkins need a lot of water, especially during fruit formation. Water regularly and thoroughly, preferably in the morning or evening. Avoid wetting the leaves to prevent fungal diseases.
- Fertilizing: Fertilize the pumpkin plants regularly with an organic fertilizer or compost. They need a lot of nutrients, especially during fruit formation.
- Mulching: Mulch the soil around the pumpkin plants with straw, hay, or grass clippings. This keeps the soil moist, suppresses weeds, and protects the fruits from direct contact with the ground.
4. Pollination: Help for the Busy Bees
Pumpkins have male and female flowers. The female flowers can be recognized by the small fruit base directly below the blossom. Pollination is usually done by insects, especially bees. If pollination is insufficient, you can lend a hand:
- Hand Pollination:
- Find a male flower (without a fruit base).
- Cut off the male flower.
- Remove the petals, leaving only the stamen with the pollen.
- Gently dab the pollen onto the stigma of a female flower.
- Repeat the process with several female flowers.
- The best time for hand pollination is early in the morning.
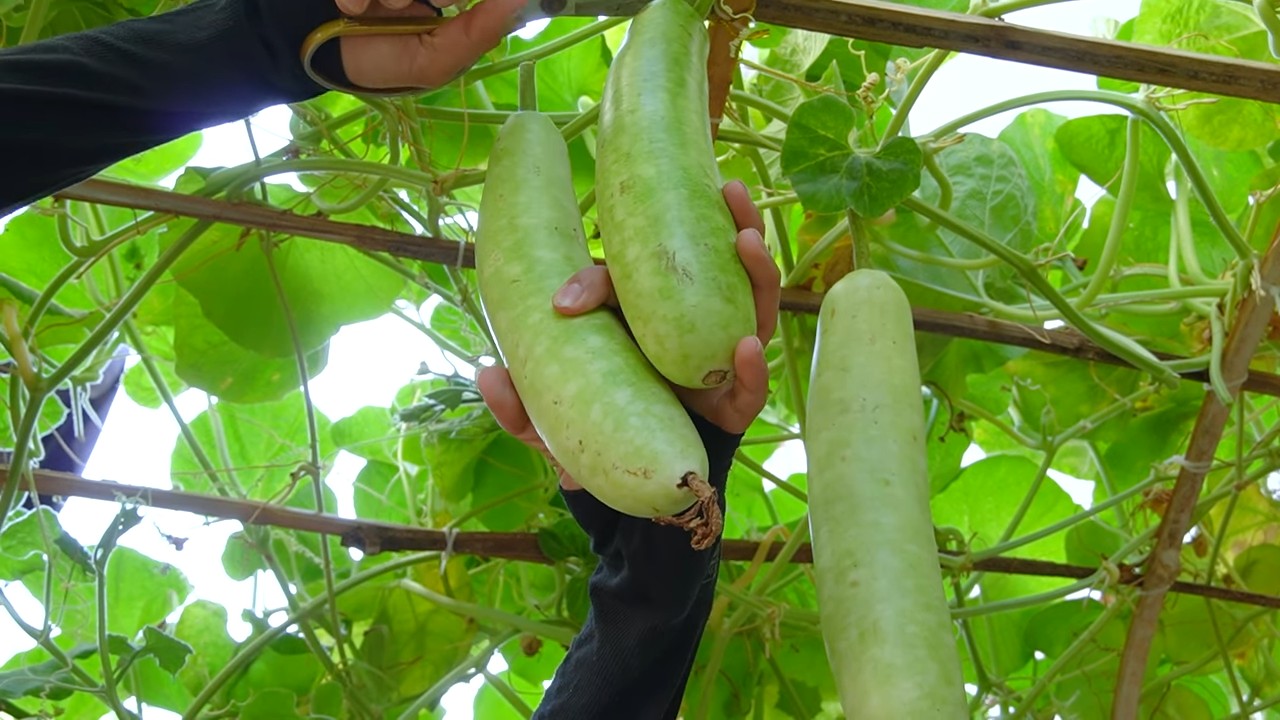
5. The Harvest: The Reward for Your Effort
- Harvest Time: The harvest time depends on the pumpkin variety. In general, pumpkins are ripe when the rind is hard and sounds hollow when tapped. The stem should be dry and woody.
- Harvesting Process:
- Cut the pumpkin from the stem with a sharp knife or garden shears.
- Leave a stem of about 5-10 cm (2-4 inches) on the pumpkin.
- Avoid damaging the pumpkin during harvest.
- Storage: Store the harvested pumpkins in a cool, dry, and well-ventilated place. A cellar or garage is ideal. Damaged pumpkins should be used quickly as they do not keep for long.
Challenges and Solutions
Challenges can also arise when growing pumpkins. Here are some common problems and their solutions:
- Slug Infestation: Slugs love young pumpkin plants. Protect your plants with slug fences, slug pellets, or natural deterrents like coffee grounds.
- Powdery Mildew: Powdery mildew is a fungal disease that appears as a white coating on the leaves. Remove affected leaves and treat the plants with a fungicide or a home remedy like a milk-water mixture (1:9 ratio).
- Fruit Flies: Fruit flies can infest ripe pumpkins. Check the pumpkins regularly and remove damaged fruits.
- Deficiency Symptoms: Yellow leaves or stunted growth can indicate a nutrient deficiency. Fertilize the plants with a suitable fertilizer.
Variety Recommendations: Something for Every Taste
The selection of pumpkin varieties is huge! Here are some of my personal favorites:
Butternut: Sweet, nutty flavor, ideal for soups.
Hokkaido: A classic with a nutty taste and bright orange skin.
Conclusion
So, there you have it! Mastering the art of growing gourds successfully isn’t just about planting a seed and hoping for the best. It’s about understanding their needs, providing the right environment, and employing a few clever DIY tricks to give them a competitive edge. From crafting your own nutrient-rich soil amendments to building sturdy trellises from repurposed materials, these hands-on approaches not only save you money but also deepen your connection with the growing process.
This isn’t just about having a few gourds to decorate with in the fall; it’s about experiencing the satisfaction of nurturing life from seed to harvest. It’s about learning new skills, becoming more self-sufficient, and adding a touch of natural beauty to your surroundings. And let’s be honest, there’s something incredibly rewarding about showing off your homegrown gourds to friends and family, knowing you played an active role in their creation.
But the journey doesn’t end here. Consider experimenting with different gourd varieties to discover your favorites. Try different training techniques to shape your gourds into unique forms. Explore the possibilities of using your homegrown gourds for crafting, decorating, or even making musical instruments. The possibilities are truly endless!
Don’t be afraid to get your hands dirty and embrace the challenges that come with growing gourds successfully. Every mistake is a learning opportunity, and every success is a reason to celebrate.
We encourage you to try these DIY tricks and share your experiences with us. What worked best for you? What challenges did you encounter? What creative uses did you find for your homegrown gourds? Share your tips, photos, and stories in the comments below. Let’s build a community of gourd-growing enthusiasts and inspire each other to cultivate even more beautiful and bountiful harvests. After all, the best way to learn is by sharing and collaborating. So, get out there, get growing, and let’s see what amazing gourds you can create!
Frequently Asked Questions (FAQs)
Q: What are the most common problems when growing gourds, and how can I prevent them?
A: Several issues can plague gourd growers, but most are preventable with proactive measures. Powdery mildew is a frequent fungal disease, appearing as a white, powdery coating on the leaves. To prevent it, ensure good air circulation around your plants by spacing them adequately and pruning excess foliage. Applying a fungicide preventatively can also be helpful, especially in humid climates. Squash vine borers are another common pest, laying their eggs near the base of the plant. Regularly inspect your plants for signs of their presence (small holes in the stem, sawdust-like frass) and take action immediately. You can wrap the base of the stems with aluminum foil or netting to deter the moths from laying eggs. Squash bugs can also be a nuisance, sucking sap from the leaves and weakening the plant. Handpicking them off the plants or using insecticidal soap can help control their population. Finally, blossom-end rot, characterized by a dark, sunken spot on the bottom of the gourd, is often caused by calcium deficiency or inconsistent watering. Ensure your soil is rich in calcium and water your plants regularly and deeply, especially during dry spells.
Q: How do I know when my gourds are ready to harvest?
A: Determining the right time to harvest your gourds is crucial for ensuring their longevity and quality. The best indicator is the stem. When the stem connecting the gourd to the vine turns brown and dry, it’s a sign that the gourd is mature and ready to be harvested. The gourd’s skin should also be hard and firm to the touch. You can gently tap the gourd; a hollow sound indicates maturity. Avoid harvesting gourds after a frost, as this can damage them and shorten their lifespan. When harvesting, use a sharp knife or pruning shears to cut the gourd from the vine, leaving a few inches of stem attached. This helps prevent rot from entering the gourd.
Q: Can I grow gourds in containers? If so, what size container is recommended?
A: Yes, you can absolutely grow gourds in containers, although it’s important to choose the right variety and container size. Bush varieties of gourds are generally better suited for container growing than vining varieties, as they require less space. Select a large container, at least 20 gallons in size, to provide ample room for the roots to grow. Ensure the container has good drainage to prevent waterlogging. Use a high-quality potting mix that is rich in organic matter. Provide a trellis or support system for the gourds to climb on, even if they are bush varieties. Water regularly and fertilize every few weeks with a balanced fertilizer. Keep in mind that container-grown gourds may require more frequent watering and fertilization than those grown in the ground.
Q: What are some creative ways to use my homegrown gourds?
A: The possibilities for using homegrown gourds are truly endless! Once dried, they can be transformed into a wide variety of crafts and decorations. Birdhouses are a popular choice, providing shelter for feathered friends. Bowls and containers can be carved from larger gourds, adding a rustic touch to your home decor. Musical instruments, such as maracas and drums, can be made from smaller gourds. Gourds can also be painted, decorated, and used as ornaments for holidays or special occasions. Get creative and experiment with different techniques to create unique and personalized gourd art. You can also use gourd seeds for planting next year or roasting them for a healthy snack.
Q: How do I properly dry and cure my gourds for long-term storage?
A: Proper drying and curing are essential for preserving your gourds and preventing them from rotting. After harvesting, wash the gourds with soapy water to remove any dirt or debris. Place them in a well-ventilated area, such as a garage or shed, away from direct sunlight and moisture. Elevate the gourds on racks or pallets to allow air to circulate around them. Turn the gourds regularly to ensure even drying. The drying process can take several weeks or even months, depending on the size and thickness of the gourds. You’ll know the gourds are dry when they are lightweight and the seeds rattle inside. Once dry, you can clean the outer skin with steel wool or sandpaper to remove any mold or blemishes. Store the dried gourds in a cool, dry place until you’re ready to use them.
Q: Are there any specific soil requirements for growing gourds successfully?
A: Yes, gourds thrive in well-drained soil that is rich in organic matter. Before planting, amend your soil with compost, aged manure, or other organic materials to improve its fertility and drainage. Gourds prefer a slightly acidic to neutral soil pH, between 6.0 and 7.0. You can test your soil pH with a soil testing kit and amend it accordingly. Ensure your soil is loose and well-aerated to allow for proper root growth. Avoid planting gourds in heavy clay soil, as this can lead to root rot. If you have clay soil, amend it with plenty of organic matter to improve its drainage and structure.
Q: What type of fertilizer is best for growing gourds?
A: Gourds benefit from regular fertilization throughout the growing season. Start with a balanced fertilizer, such as 10-10-10, at planting time. Once the plants begin to flower, switch to a fertilizer that is higher in phosphorus, such as 5-10-5, to promote fruit production. Avoid over-fertilizing, as this can lead to excessive foliage growth and reduced fruit yield. Follow the instructions on the fertilizer label carefully. You can also supplement with organic fertilizers, such as compost tea or fish emulsion, to provide additional nutrients and beneficial microbes to the soil.
Q: How much sunlight do gourds need to grow successfully?
A: Gourds require at least six to eight hours of direct sunlight per day to grow successfully. Choose a planting location that receives plenty of sunlight throughout the day. If you live in a hot climate, provide some afternoon shade to prevent the gourds from scorching. Insufficient sunlight can lead to weak plants, reduced fruit yield, and increased susceptibility to diseases.
Q: What are some good companion plants for gourds?
A: Companion planting can be a beneficial practice for growing gourds. Some good companion plants for gourds include:
* **Marigolds:** These flowers repel many common pests, such as nematodes and squash bugs.
* **Nasturtiums:** These edible flowers attract beneficial insects, such as pollinators and predatory wasps.
* **Radishes:** These root vegetables deter squash vine borers and other soil pests.
* **Beans:** These legumes fix nitrogen in the soil, which can benefit gourd growth.
* **Corn:** Corn provides a natural trellis for vining gourd varieties.
Avoid planting gourds near members of the cabbage family, such as broccoli and cauliflower, as they can compete for nutrients and attract pests.
Leave a Comment