

Growing peanuts backyard might seem like a whimsical dream, reserved for sprawling farms and cartoon characters. But I’m here to tell you that this dream can absolutely become a reality, even in your own little patch of green! Forget the store-bought stuff; imagine the satisfaction of harvesting your very own homegrown peanuts, bursting with fresh, nutty flavor.
The humble peanut has a rich history, dating back thousands of years to South America, where it was a staple food source. Over time, it spread across the globe, becoming an integral part of various cuisines and cultures. From peanut butter sandwiches to savory sauces, this versatile legume has truly conquered the culinary world. But beyond its deliciousness, growing peanuts offers a unique connection to the earth and a rewarding gardening experience.
Why should you consider growing peanuts backyard? Well, for starters, it’s incredibly fun and educational, especially if you have kids. It’s a fantastic way to teach them about the life cycle of plants and the importance of sustainable food practices. Plus, peanuts are surprisingly easy to grow, requiring minimal effort and resources. In this article, I’ll share my top DIY tricks and hacks to help you cultivate a thriving peanut patch, regardless of your gardening experience. Get ready to dig in and discover the joy of homegrown peanuts!
Growing Peanuts in Your Own Garden: A Comprehensive DIY Guide
Hey garden friends! Have you ever wondered how peanuts actually grow? And even better, have you thought about just growing them yourself? It’s easier than you might think, and the sense of accomplishment from harvesting your own peanuts is simply priceless. I’ll show you how it’s done!
What you need for growing peanuts
Before we get started, here is a list of everything you’ll need. Don’t worry, you probably have many of these things at home already!
- Peanut kernels: Make sure to buy raw, unroasted peanuts. Organic peanuts are best to ensure they haven’t been treated. You can often find them in the supermarket or a health food store.
- Garden tools: A shovel, a rake, and possibly a dibber will be helpful.
- Good soil: Peanuts prefer loose, well-draining soil. Sandy loam is ideal.
- Compost or organic fertilizer: To enrich the soil and provide nutrients for the peanuts.
- Patience: Peanuts take time to grow. Expect about 4-5 months from sowing to harvest.
- A sunny location: Peanuts love the sun!
- Watering can or garden hose: For regular watering.
- Mulch (optional): To retain moisture in the soil and suppress weeds. Straw or grass clippings work well.
Preparation: The Key to Success
Proper preparation is the key to a bountiful peanut harvest. So take your time with this step!
1. Preparing the Soil
- Location Selection: Find a sunny spot in your garden. Peanuts need at least 6-8 hours of sun per day.
- Soil Cultivation: Loosen the soil with a shovel or digging fork. Remove stones, roots, and weeds.
- Soil Improvement: Mix compost or organic fertilizer into the soil. This improves the soil structure and provides the peanuts with essential nutrients. Make sure the soil is well-draining. Peanuts do not tolerate waterlogging at all.
- Check the pH Value: Peanuts prefer a slightly acidic to neutral pH (between 6.0 and 7.0). You can check the pH with a soil test kit from a garden center and adjust it if necessary.
2. Preparing the Peanuts
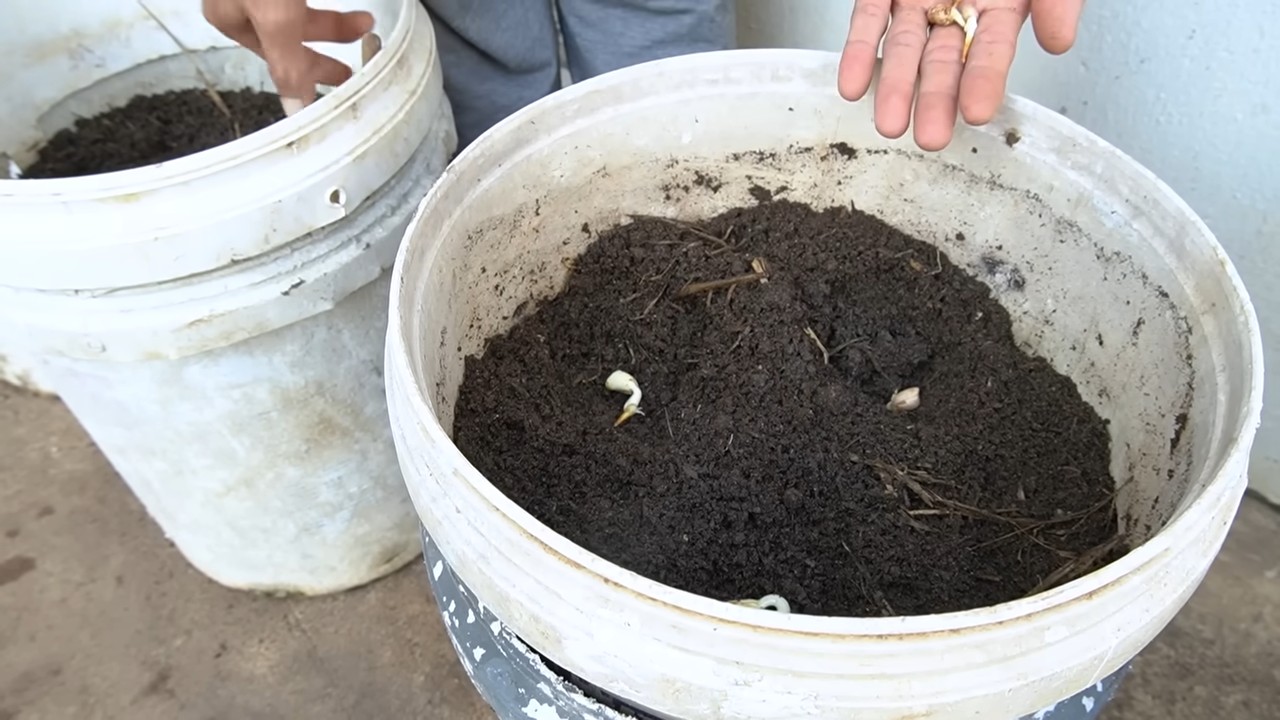
- Pre-sprouting Peanuts (optional): To speed up the germination process, you can pre-sprout the peanuts. Place them in lukewarm water for 24 hours.
- Shelling Peanuts (optional): You can also shell the peanuts before sowing them. This is also said to speed up germination. However, I have personally had good experiences just leaving them in the shell.
Sowing: Let’s Get Started!
Now comes the exciting part: Sowing the peanuts!
- The Right Time: Wait until the soil temperature has reached at least 18°C (65°F). This is usually the case after the last frosts in spring.
- Sowing Depth: Place the peanuts about 5 cm (2 inches) deep in the soil.
- Spacing: Maintain a distance of about 15-20 cm (6-8 inches) between plants and 60-75 cm (24-30 inches) between rows.
- Watering: Water the soil thoroughly after sowing.
- Mulching (optional): Distribute a layer of mulch around the plants to retain moisture in the soil and suppress weeds.
Care: Patience is Required
Peanuts are relatively low-maintenance, but you should keep a few things in mind to achieve a good harvest.
- Watering: Water the peanuts regularly, especially during dry periods. Make sure the soil does not dry out, but avoid waterlogging.
- Weed Control: Regularly remove weeds that grow around the peanut plants. Weeds compete with the peanuts for nutrients and water.
- Hilling: When the peanut plants flower, they form what are called “pegs,” which burrow into the ground. These pegs develop into peanuts. To support this process, you can mound the soil up around the plants. This gives the pegs more support and makes it easier for them to penetrate the soil.
- Fertilizing (optional): If the plants look pale or are growing poorly, you can fertilize them with an organic fertilizer. Be sure to use a fertilizer that is low in nitrogen, as too much nitrogen promotes leaf growth but can impair peanut production.
- Pests and Diseases: Peanuts are relatively resistant to pests and diseases. Occasionally, aphids or spider mites may appear. You can combat these with a natural insecticide.
The Harvest: The Reward for Your Effort
After about 4-5 months, the time has finally come: Harvest time is here!
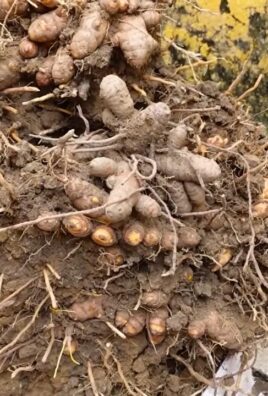
- The Right Time: The best time to harvest is when the leaves of the peanut plants turn yellow and die back. You can also dig up a few plants and check the peanuts. If the shells of the peanuts are hard and the kernels are well-developed, it’s time to harvest.
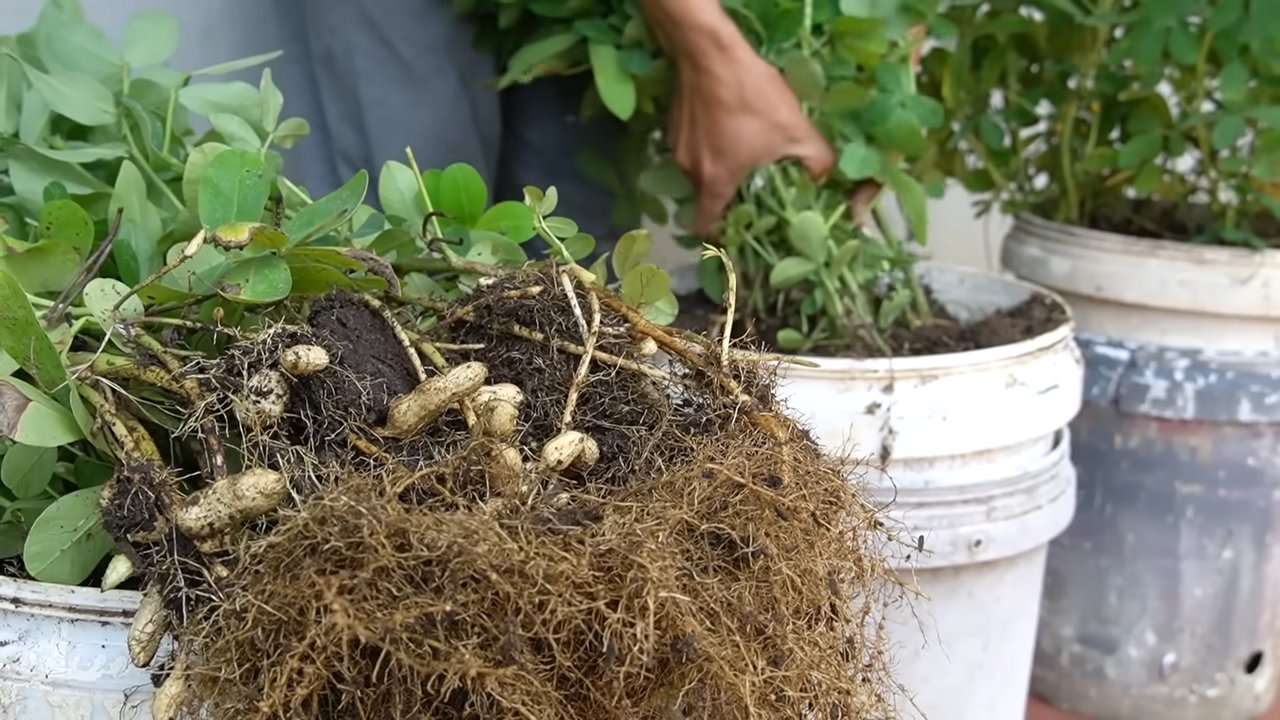
- The Harvest: Carefully dig up the peanut plants with a shovel. Shake off the soil and let the plants with the peanuts still attached dry in a dry, airy place for a few days.
- Separating the Peanuts: After the plants have dried, you can separate the peanuts from the plants.
- Drying the Peanuts: Place the peanuts on a wire rack or a cloth and let them dry for another 1-2 weeks in a dry, airy place. This is important to prevent mold.
- Storage: Store the dried peanuts in an airtight container in a cool, dry place. They will keep for several months this way.
Tips and Tricks for a Bountiful Peanut Harvest
Here are a few additional tips that can help you maximize your peanut harvest:
- Choose the right variety: There are different peanut varieties that differ in size, taste, and ripening time. Find out which variety is best suited for your climate and soil conditions.
- Practice crop rotation: Do not grow peanuts in the same spot every year. Rotate the cultivation area to prevent diseases and pests.
- Soil analysis: A soil analysis can help you determine the nutrient content of your soil and fertilize it accordingly.
- Observe your plants: Look for signs of pests, diseases, or nutrient deficiencies and act accordingly.
- Be patient: Peanuts take time to grow. Don’t be discouraged if it doesn’t work out right away. With a little practice, you will soon be able to harvest your own peanuts!
What to do if something goes wrong?
Even with peanut cultivation, problems can sometimes occur. Here are a few common problems and how you can solve them:
- Poor germination: If the peanuts do not germinate, there can be various reasons. The soil may have been too cold, too dry.
Conclusion
So, there you have it! Growing peanuts in your backyard isn’t just a quirky gardening experiment; it’s a rewarding journey that connects you to the source of a beloved snack. From the initial planting to the satisfying harvest, every step is a testament to the magic of nature and the simple pleasure of homegrown goodness.
Why is this DIY trick a must-try? Because it offers a unique experience that store-bought peanuts simply can’t replicate. Imagine the pride of serving freshly roasted peanuts to your friends and family, knowing that you nurtured them from seed to table. Think of the educational opportunity for children, witnessing the fascinating underground development of this legume. And consider the sheer satisfaction of bypassing the grocery store and enjoying a truly sustainable snack.
Beyond the basic method, there’s ample room for experimentation. Try different peanut varieties to discover your favorite flavor profile. Valencia peanuts, known for their sweetness, might be your go-to for snacking, while Virginia peanuts, with their large size, are perfect for roasting. Explore companion planting to enhance your peanut crop. Marigolds can deter nematodes, while herbs like basil can repel unwanted insects.
For those in cooler climates, consider starting your peanut plants indoors a few weeks before the last expected frost. This will give them a head start and increase your chances of a successful harvest. You can also use raised beds or containers to provide better drainage and warmer soil temperatures.
Don’t be afraid to get your hands dirty and embrace the learning process. Growing peanuts is a journey of discovery, and every season brings new insights and opportunities for improvement. The key is to be patient, observant, and willing to adapt to the unique conditions of your backyard.
We wholeheartedly encourage you to embark on this peanut-growing adventure. It’s a chance to connect with nature, learn new skills, and enjoy the unparalleled taste of homegrown peanuts. And most importantly, we want to hear about your experience! Share your successes, your challenges, and your tips with us in the comments below. Let’s create a community of backyard peanut growers and learn from each other’s experiences. Your insights could inspire others to take the plunge and discover the joy of growing their own peanuts. So, grab some seeds, prepare your soil, and get ready to experience the magic of growing peanuts in your own backyard. You won’t regret it! This is a truly rewarding and delicious DIY project.
Frequently Asked Questions (FAQ)
Q: What kind of soil is best for growing peanuts?
A: Peanuts thrive in well-drained, sandy loam soil. This type of soil allows the developing peanut pods to easily penetrate the ground. Avoid heavy clay soils, as they can restrict pod development and lead to misshapen peanuts. The ideal soil pH for peanuts is between 6.0 and 6.5. Before planting, consider amending your soil with compost or other organic matter to improve drainage and fertility. A soil test can help you determine the specific nutrient needs of your soil.
Q: How much sunlight do peanuts need?
A: Peanuts require at least 6-8 hours of direct sunlight per day to thrive. Choose a planting location that receives ample sunlight throughout the growing season. Insufficient sunlight can lead to stunted growth, reduced yields, and smaller peanuts. If you’re growing peanuts in containers, make sure to place them in a sunny spot or supplement with grow lights if necessary.
Q: How often should I water my peanut plants?
A: Peanuts need consistent moisture, especially during flowering and pod development. Water deeply and regularly, aiming to keep the soil consistently moist but not waterlogged. Avoid overhead watering, as it can promote fungal diseases. Drip irrigation or soaker hoses are ideal for delivering water directly to the roots. As the peanuts mature and the foliage begins to yellow, you can gradually reduce watering.
Q: When is the best time to plant peanuts?
A: The best time to plant peanuts is after the last frost, when the soil temperature has warmed to at least 65°F (18°C). Peanuts are warm-season crops and are sensitive to frost. In cooler climates, you can start peanut seeds indoors 4-6 weeks before the last frost and transplant them outdoors once the weather warms up. Check your local weather forecast and planting guides for specific recommendations for your region.
Q: How long does it take for peanuts to mature?
A: Peanuts typically take 120-150 days to mature, depending on the variety and growing conditions. The exact time will vary depending on your climate and the specific peanut variety you are growing. You’ll know your peanuts are ready to harvest when the foliage begins to yellow and the inside of the peanut shells are darkened with prominent veins. You can also dig up a few plants to check the maturity of the pods.
Q: What are some common pests and diseases that affect peanuts?
A: Common pests that can affect peanuts include aphids, spider mites, and nematodes. Diseases include leaf spot, white mold, and peanut rust. Regularly inspect your plants for signs of pests or diseases. Use organic pest control methods, such as insecticidal soap or neem oil, to manage infestations. Ensure good air circulation and avoid overhead watering to prevent fungal diseases. Crop rotation can also help reduce the risk of soilborne diseases.
Q: How do I harvest peanuts?
A: To harvest peanuts, carefully dig up the entire plant, being careful not to damage the pods. Gently shake off any excess soil and hang the plants upside down in a well-ventilated area to dry for 2-3 weeks. Once the plants are dry, you can remove the peanuts from the vines.
Q: How do I store peanuts?
A: After harvesting and drying, store your peanuts in a cool, dry place in airtight containers. Shelled peanuts can be stored in the refrigerator for several months or in the freezer for up to a year. Unshelled peanuts can be stored in a cool, dry place for several months.
Q: Can I roast my homegrown peanuts?
A: Absolutely! Roasting your homegrown peanuts is a delicious way to enjoy your harvest. Preheat your oven to 350°F (175°C). Spread the peanuts in a single layer on a baking sheet and roast for 15-20 minutes, or until they are golden brown and fragrant. Stir the peanuts occasionally to ensure even roasting. Let the peanuts cool completely before shelling and enjoying. You can also add salt or other seasonings to the peanuts before roasting for added flavor.
Q: What are some creative ways to use my homegrown peanuts?
A: Beyond simply snacking on roasted peanuts, there are many creative ways to use your homegrown harvest. You can make homemade peanut butter, add peanuts to salads or stir-fries, use them in baking recipes, or even create your own peanut brittle. The possibilities are endless! Experiment with different recipes and flavors to discover your favorite ways to enjoy your homegrown peanuts.
Leave a Comment