

Growing Winged Beans can transform your garden into a vibrant, edible landscape, and I’m here to show you how! Forget those bland, store-bought vegetables – imagine stepping outside and harvesting your own unique and delicious crop. This isn’t just about gardening; it’s about connecting with nature and enjoying the fruits (or rather, beans!) of your labor.
Winged beans, also known as asparagus peas or goa beans, have a rich history, particularly in Southeast Asia and Papua New Guinea, where they’ve been cultivated for centuries. They’re a nutritional powerhouse, offering a complete protein source, vitamins, and minerals. But beyond their health benefits, they’re simply fascinating plants to grow. Their climbing habit and beautiful blue flowers add a touch of exotic charm to any garden.
Why should you learn this DIY trick? Because growing winged beans is surprisingly easy, even for beginner gardeners! Many people are intimidated by the idea of growing anything beyond basic herbs, but I’m going to break down the process into simple, manageable steps. Plus, with rising food costs and a growing interest in sustainable living, learning to grow your own food is more relevant than ever. This DIY guide will empower you to cultivate your own supply of these versatile and nutritious beans, saving you money and reducing your environmental impact. Let’s get started!
Growing Winged Beans: Your DIY Guide for an Exotic Delight
I love trying new and unusual plants in my garden, and the winged bean (Psophocarpus tetragonolobus) is definitely one of my favorites! It is not only beautiful with its bright blue flowers and winged pods, but also incredibly nutritious and versatile in the kitchen. In this article, I will show you how you can grow this fascinating plant yourself. Don’t worry, it’s easier than you think!
What are Winged Beans Anyway?
Before we get started, let’s briefly clarify what winged beans actually are. They are a tropical legume native to Southeast Asia. The name comes from the four “wings” that run along the pods. The great thing about winged beans is that almost all parts of the plant are edible: the young pods, the leaves, the flowers, the roots, and even the dried seeds. They are rich in protein, vitamins, and minerals.
Why Grow Winged Beans?
- Nutritional Value: Winged beans are an excellent source of protein, fiber, vitamins (A, C), and minerals (iron, calcium).
- Versatility: You can cook the young pods like green beans, use the leaves in salads, fry the flowers, and prepare the roots like potatoes.
- Beauty: The plant is an ornament for any garden with its blue flowers and unusual pods.
- Nitrogen Fixation: Like other legumes, winged beans can fix nitrogen from the air in the soil, which improves your soil.
- Sustainability: They are relatively low-maintenance and require little fertilizer.
Preparation is Everything: What You Need
Before you start growing, you should make sure you have everything you need. Here is a list:
- Winged bean seeds: You can buy them online or in well-stocked garden centers. Look for fresh seeds for a better germination rate.
- Seed starting pots or trays: For starting indoors.
- Seed starting mix: A light, well-draining soil is ideal.
- Garden soil: For planting out in the open.
- Compost or organic fertilizer: For soil improvement.
- Trellis/Support: Winged beans are climbing plants and need a sturdy support (e.g., a trellis, a fence, or a teepee).
- Watering can or hose: For watering.
- Garden tools: Spade, rake, etc.
Step-by-Step Guide to Growing Winged Beans
Here is a detailed guide on how you can grow your own winged beans:
1. Preparing the Seeds (optional)
Although it is not strictly necessary, soaking the seeds before sowing can speed up germination.
- Step 1: Place the seeds in lukewarm water for 24 hours.
- Step 2: Remove the seeds from the water and dry them lightly.
2. Starting Indoors (recommended)
Starting the plants indoors gives them a head start, especially in cooler climates.
- Step 1: Fill the seed starting pots with seed starting mix.
- Step 2: Sow the seeds about 2-3 cm (1 inch) deep in the soil. Place 2-3 seeds per pot.
- Step 3: Water the soil gently so that it is moist but not wet.
- Step 4: Place the pots in a warm, bright place (e.g., on a windowsill). The ideal germination temperature is between 20 and 25 degrees Celsius (68-77°F).
- Step 5: Keep the soil moist, but avoid waterlogging.
- Step 6: Germination usually takes 7-14 days.
- Step 7: Once the seedlings have developed a few leaves, you can remove the weakest seedling per pot, so that only the strongest remains.
3. Direct Sowing Outdoors (Alternative)
If you live in a region with mild winters, you can also sow the seeds directly outdoors.
- Step 1: Wait until the soil temperature has reached at least 18 degrees Celsius (64°F) and there is no more danger of frost.
- Step 2: Prepare the soil by loosening it and enriching it with compost or organic fertilizer.
- Step 3: Sow the seeds about 2-3 cm (1 inch) deep in the soil, with a distance of about 30-45 cm (12-18 inches) between the plants.
- Step 4: Water the soil gently.
- Step 5: Keep the soil moist until the seedlings have emerged.
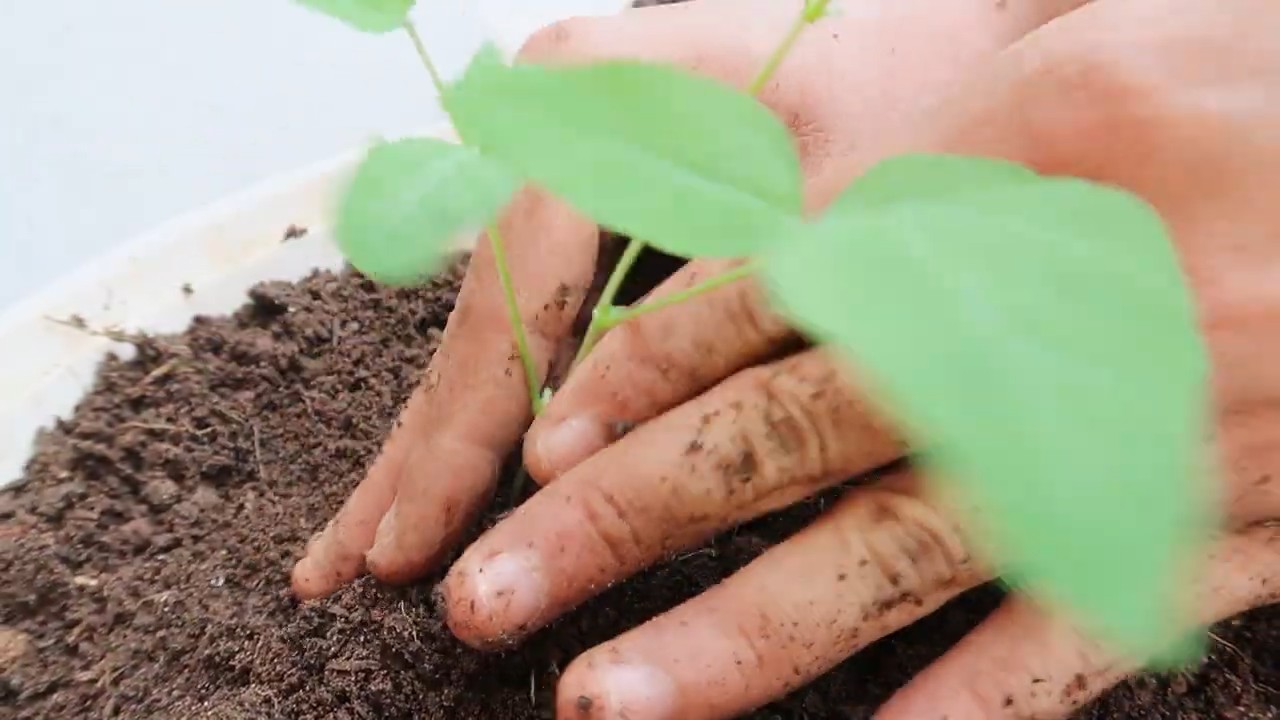
4. Planting Out
Once the seedlings are large enough (about 15-20 cm or 6-8 inches high) and there is no more danger of frost, you can plant them outdoors.
- Step 1: Choose a sunny location with well-draining soil. Winged beans love the sun!
- Step 2: Prepare the soil by loosening it and enriching it with compost or organic fertilizer.
- Step 3: Dig holes that are slightly larger than the root balls of the seedlings.
- Step 4: Carefully place the seedlings in the holes and fill them with soil.
- Step 5: Water the plants thoroughly.
- Step 6: Install the support near the plants.
5. Caring for Winged Beans
Caring for winged beans is relatively simple. Here are some tips:
- Watering: Water the plants regularly, especially during dry periods. Make sure the soil is moist but not wet.
- Fertilizing: Fertilize the plants every few weeks with an organic fertilizer.
- Weed control: Keep the area around the plants weed-free.
- Support: Guide the shoots of the plants along the support.
- Pests and diseases: Winged beans are relatively resistant to pests and diseases. Aphids may occasionally appear. You can combat these with a jet of water or with organic pesticides.
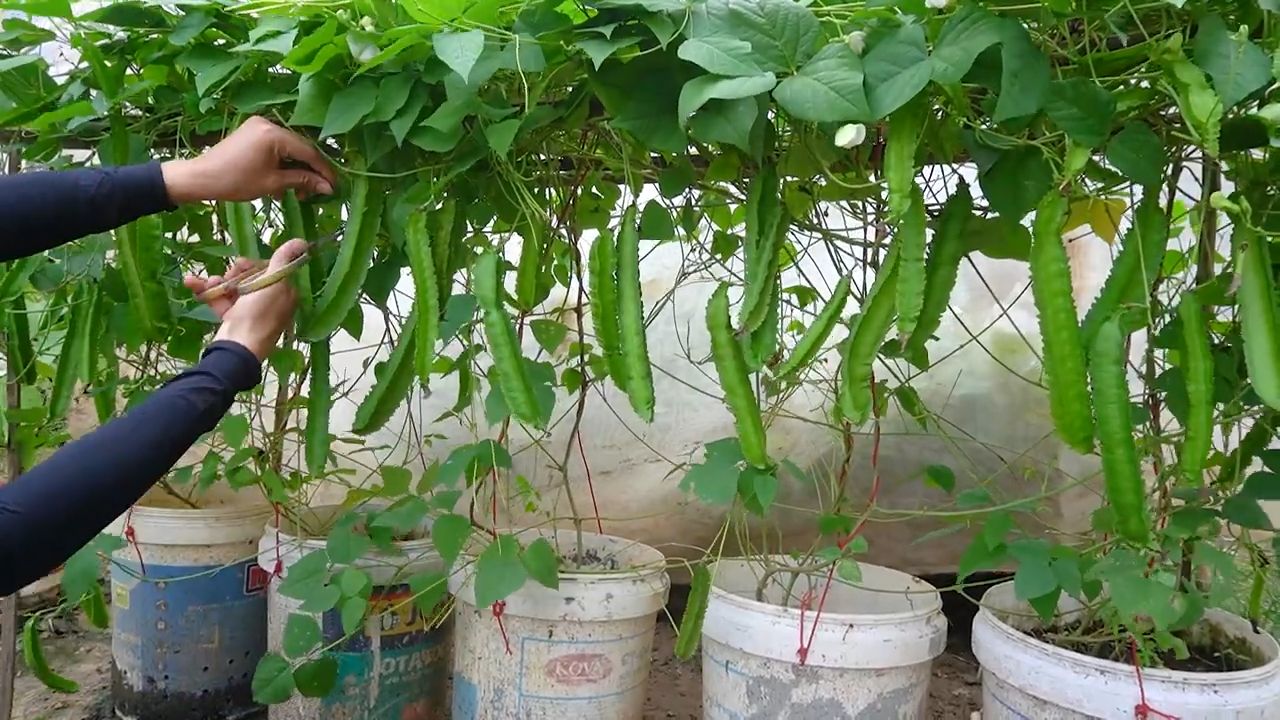
6. Harvesting Winged Beans
The harvest time depends on the variety and growing conditions. As a rule, you can start harvesting about 2-3 months after sowing.
- Pods: Harvest the young pods when they are about 10-15 cm (4-6 inches) long and still tender. You can cook, steam, or fry them like green beans.
- Leaves: Harvest the leaves when they are young and tender. You can use them in salads or prepare them like spinach.
- Flowers: Harvest the flowers when they are freshly opened. You can fry them or use them in salads.
- Roots: Harvest the roots when the plant is fully grown. You can cook, fry, or bake them like potatoes.
- Seeds: Let some pods ripen on the plant until they are dry and brown. Harvest the seeds and dry them thoroughly before storing them.
Common Problems and Solutions
Poor germination: Use fresh seeds and ensure sufficient warmth and moisture during germination.
Conclusion
So, there you have it! Growing winged beans at home is not just a gardening project; it’s an adventure in flavor, a step towards sustainable living, and a chance to impress your friends and family with a truly unique culinary experience. From the vibrant purple flowers to the crisp, delicious pods, every stage of the winged bean’s growth is a reward in itself.
We’ve walked you through the process, from selecting the right seeds and preparing the soil to providing the necessary support and harvesting your bounty. Remember, patience is key. Winged beans can take a little longer to mature than some other garden vegetables, but the wait is absolutely worth it.
Why is this DIY trick a must-try? Because it empowers you to cultivate a nutrient-rich, versatile crop that’s often overlooked in mainstream agriculture. You’ll have access to fresh, organic winged beans right in your backyard, ready to be transformed into delectable dishes. Plus, you’ll be contributing to biodiversity and promoting a more sustainable food system.
Ready to take your winged bean growing to the next level? Consider these variations and suggestions:
* Vertical Gardening: If you’re short on space, winged beans are perfect for vertical gardening. Train them up trellises, fences, or even balconies to maximize your yield.
* Companion Planting: Winged beans thrive alongside certain companion plants. Try planting them with corn, sunflowers, or beans to create a mutually beneficial ecosystem.
* Seed Saving: Once your winged beans have matured, save some of the seeds for future planting. This is a great way to ensure a continuous supply of this amazing vegetable.
* Different Varieties: Explore different varieties of winged beans to discover your favorite flavors and textures. Some varieties are more suited to specific climates or growing conditions.
* Culinary Experimentation: Don’t be afraid to experiment with different ways to prepare winged beans. Try them stir-fried, steamed, roasted, or even added to soups and stews. The possibilities are endless!
Growing your own food is incredibly rewarding, and winged beans are no exception. They offer a unique combination of flavor, nutrition, and sustainability that’s hard to beat. So, grab your seeds, prepare your garden, and get ready to embark on a winged bean growing adventure.
We’re confident that you’ll be amazed by the results. And we can’t wait to hear about your experiences! Share your photos, tips, and recipes with us in the comments below. Let’s create a community of winged bean enthusiasts and spread the word about this incredible vegetable. Happy gardening!
Frequently Asked Questions (FAQ)
Q: What exactly are winged beans, and why should I grow them?
A: Winged beans (Psophocarpus tetragonolobus) are a legume native to Southeast Asia. They are incredibly versatile, with almost every part of the plant being edible – the pods, leaves, flowers, seeds, and even the roots. They are also exceptionally nutritious, packed with protein, vitamins, and minerals. Growing them yourself ensures you have access to fresh, organic produce, and it’s a fun and rewarding gardening experience. Plus, they are relatively easy to grow with the right support and conditions.
Q: What is the best time of year to plant winged beans?
A: Winged beans are tropical plants and thrive in warm weather. The best time to plant them is after the last frost, when the soil temperature has reached at least 65°F (18°C). In most regions, this is typically in late spring or early summer. If you live in a colder climate, you can start the seeds indoors 4-6 weeks before the last frost and transplant them outdoors once the weather warms up.
Q: How much sunlight do winged beans need?
A: Winged beans need at least 6-8 hours of direct sunlight per day to thrive. Choose a sunny location in your garden where they will receive plenty of light throughout the day. If you’re growing them indoors, use grow lights to supplement natural sunlight. Insufficient sunlight can lead to poor growth and reduced yields.
Q: What kind of soil is best for growing winged beans?
A: Winged beans prefer well-drained, fertile soil with a slightly acidic to neutral pH (6.0-7.0). Amend your soil with compost or other organic matter to improve drainage and fertility. Avoid heavy clay soils, as they can become waterlogged and inhibit root growth. A raised bed or container filled with a good quality potting mix is also a great option.
Q: How much space do winged beans need?
A: Winged beans are climbing plants and require a trellis or other support structure to grow on. Provide at least 6-8 feet of vertical space for them to climb. Plant the seeds or seedlings about 12-18 inches apart along the base of the trellis. This will give them enough room to spread out and produce a good yield.
Q: How often should I water winged beans?
A: Winged beans need consistent moisture, especially during hot weather. Water them deeply whenever the top inch of soil feels dry to the touch. Avoid overwatering, as this can lead to root rot. Mulching around the base of the plants can help retain moisture and suppress weeds.
Q: Do winged beans need fertilizer?
A: Winged beans are legumes and can fix nitrogen from the air, so they don’t require heavy fertilization. However, a light application of a balanced fertilizer (e.g., 10-10-10) at planting time can help promote healthy growth. Avoid over-fertilizing, as this can lead to excessive foliage growth at the expense of pod production.
Q: When can I harvest winged beans?
A: Winged beans are typically ready to harvest about 2-3 months after planting. The pods are best harvested when they are young and tender, about 6-8 inches long. They should be firm and snap easily when bent. Regular harvesting will encourage the plant to produce more pods. You can also harvest the leaves, flowers, and roots for culinary use.
Q: Are there any pests or diseases that affect winged beans?
A: Winged beans are generally resistant to pests and diseases, but they can be susceptible to aphids, spider mites, and fungal diseases like powdery mildew. Inspect your plants regularly for signs of infestation or disease and take appropriate action. Organic pest control methods, such as insecticidal soap or neem oil, can be effective for controlling aphids and spider mites. Ensure good air circulation to prevent fungal diseases.
Q: Can I grow winged beans in containers?
A: Yes, winged beans can be successfully grown in containers, provided you choose a large enough container (at least 10-12 gallons) and provide adequate support for the vines. Use a good quality potting mix and ensure the container has good drainage. Water regularly and fertilize as needed. Container-grown winged beans may require more frequent watering and fertilization than those grown in the ground.
Q: How do I save seeds from winged beans?
A: To save seeds from winged beans, allow some of the pods to mature fully on the plant. The pods will turn brown and dry out. Once the pods are completely dry, harvest them and remove the seeds. Spread the seeds out on a tray to dry completely before storing them in an airtight container in a cool, dry place. Properly stored seeds can remain viable for several years.
Q: What are some ways to cook with winged beans?
A: Winged beans are incredibly versatile in the kitchen. The young pods can be eaten raw in salads or stir-fried, steamed, or roasted. The leaves can be used like spinach, and the flowers can be added to salads or used as a garnish. The mature seeds can be cooked and eaten like beans, or ground into flour. The roots can be boiled or roasted like potatoes. Experiment with different recipes and find your favorite ways to enjoy this amazing vegetable.


Leave a Comment