

Grow chili peppers at home, and unlock a world of flavor and fiery fun right in your backyard! Imagine plucking fresh, vibrant chili peppers straight from your garden, ready to spice up your favorite dishes. Forget those bland, store-bought peppers – with a little know-how, you can cultivate a thriving chili pepper patch bursting with unique varieties and intense heat.
Chili peppers have a rich history, dating back thousands of years to South America, where they were revered for their culinary and medicinal properties. From ancient Aztec rituals to modern-day culinary masterpieces, these fiery fruits have captivated cultures worldwide. Today, the desire to grow chili peppers at home is fueled by a longing for fresh, organic ingredients and the satisfaction of nurturing something from seed to harvest.
But why should you embark on this spicy adventure? Well, for starters, growing your own chili peppers allows you to control the quality and freshness of your produce. Plus, it’s a fantastic way to add a personal touch to your cooking and impress your friends and family with your green thumb. In this article, I’ll share my favorite DIY tricks and hacks to help you cultivate a bountiful chili pepper harvest, even if you’re a complete beginner. Get ready to turn up the heat and transform your garden into a chili pepper paradise!
Chili Growing for Everyone: Your DIY Guide for Spicy Success!
Hey chili lovers! Do you dream of your own chili harvest to enhance your dishes with fiery heat? Then you’ve come to the right place! I’ll show you how you can easily grow your own chili plants at home – whether on the balcony, in the garden, or even on a windowsill. Don’t worry, it’s easier than you think!
What you need for growing chilies:
- Chili seeds: The selection is huge! Think about what level of heat you prefer and choose your varieties accordingly. Everything from mild jalapeños to hellishly hot habaneros is available.
- Seed starting mix: Regular potting soil is too nutrient-rich for the delicate seedlings. Seed starting mix is loose, permeable, and contains fewer nutrients.
- Seed starting containers: Small pots, seed trays, or even egg cartons are excellent. It’s important that they have drainage holes so excess water can run off.
- Mini-greenhouse or plastic wrap: To ensure high humidity for germination.
- Spray bottle: For moistening the soil.
- Pricking tool or pencil: For separating the seedlings.
- Pots for the mature plants: These should be sufficiently large (at least 10 liters / 2.5 gallons in volume) so the chili plants have enough space to grow.
- Potting soil: For the larger pots.
- Fertilizer: Special chili fertilizer or tomato fertilizer is ideal.
- Watering can: For watering the plants.
- A sunny location: Chili plants love the sun!
Starting the Seeds: The Foundation for Your Chili Harvest
Starting the seeds is the first and most important step. Here you lay the foundation for a bountiful harvest. I usually start as early as February or March, so the plants have enough time to grow big and strong by summer.
Step 1: Preparation
- Fill your seed starting containers with seed starting mix. Lightly press the soil down.
- Moisten the soil with the spray bottle. It should be damp, but not wet.
Step 2: Sowing the Seeds
- Place 1-2 chili seeds per container on the soil.
- Cover the seeds with a thin layer of seed starting mix (approx. 0.5 cm / 0.2 inches).
- Moisten the soil again with the spray bottle.
- Cover the seed containers with a mini-greenhouse or plastic wrap. This ensures high humidity, which is important for germination.
Step 3: Germination
- Place the seed containers in a warm place (approx. 22-28°C / 72-82°F). A heating mat can be very helpful here.
- Briefly air out the mini-greenhouse or plastic wrap daily to prevent mold.
- Keep the soil moist, but not wet.
- After approx. 1-3 weeks, the first seedlings should be visible.
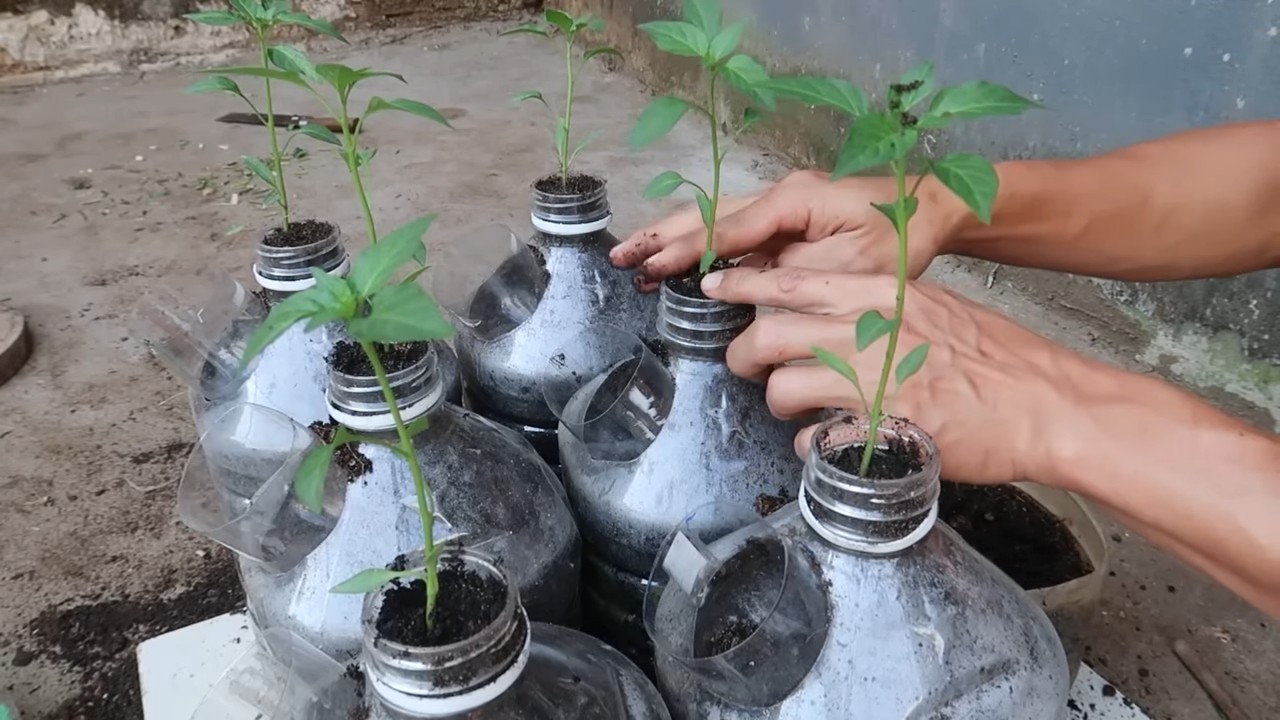
Pricking Out: Giving the Little Chili Plants More Space
Once the seedlings have developed their first true leaves (besides the seed leaves), it’s time for pricking out. This means you transplant the small plants into larger pots so they have more room to grow.
Step 1: Preparation
- Fill small pots (approx. 8-10 cm / 3-4 inches in diameter) with potting soil.
- Lightly moisten the soil.
Step 2: Pricking Out
- Gently loosen the soil around the seedlings with a pricking tool or a pencil.
- Carefully lift the seedlings out of the soil. Try to damage the roots as little as possible.
- Place each seedling in its own pot.
- Fill the pot with soil and press it down lightly.
- Water the plants gently.
Step 3: Care After Pricking Out
- Place the pricked-out plants in a bright, but not too sunny, spot.
- Water the plants regularly, but avoid waterlogging.
- Fertilize the plants after about 2 weeks with a special chili or tomato fertilizer.
Planting Out: Off to the Outdoors!
Once the temperatures rise and there is no more danger of frost (usually from mid-May), you can plant your chili plants outdoors.
Step 1: Preparation
- Choose a sunny location for your chili plants.
- Prepare the soil. It should be loose, permeable, and nutrient-rich.
- Dig holes that are slightly larger than the pots the chili plants are in.
Step 2: Planting Out
- Carefully remove the chili plants from their pots.
- Place the plants in the prepared holes.
- Fill the holes with soil and press it down lightly.
- Water the plants thoroughly.
Step 3: Care After Planting Out
- Water the plants regularly, especially during dry weather.
- Fertilize the plants regularly with a special chili or tomato fertilizer.
- Remove weeds regularly.
- If necessary, support the plants with stakes to prevent them from breaking.
Care: So Your Chili Plants Thrive Magnificently
Proper care is crucial for a bountiful chili harvest. Here are a few tips you should follow:
- Watering: Chili plants need regular water, especially in warm weather. Make sure the soil is always slightly moist, but avoid waterlogging. It’s best to water in the morning or evening when the sun isn’t shining.
- Fertilizing: Chili plants are heavy feeders and need regular fertilizer. It’s best to use a special chili or tomato fertilizer. Fertilize the plants every 2-3 weeks during the growing and flowering season.
- Pruning: Removing the side shoots (suckers) is not strictly necessary for chili plants, but it can lead to a better harvest. If you remove the side shoots, the plant will concentrate on developing the main stems and produce more fruit.
- Pests and Diseases: Chili plants can be affected by various pests and diseases. Watch for signs like aphids, spider mites, or fungal infections. If necessary, you can use organic pesticides.
- Overwintering: If you want to overwinter your chili plants, you should bring them indoors before the first frost. Cut the plants back and place them in a bright, cool place (approx. 10-15°C / 50-59°F). Water the plants only sparingly. In the spring, you can then plant them outdoors again.
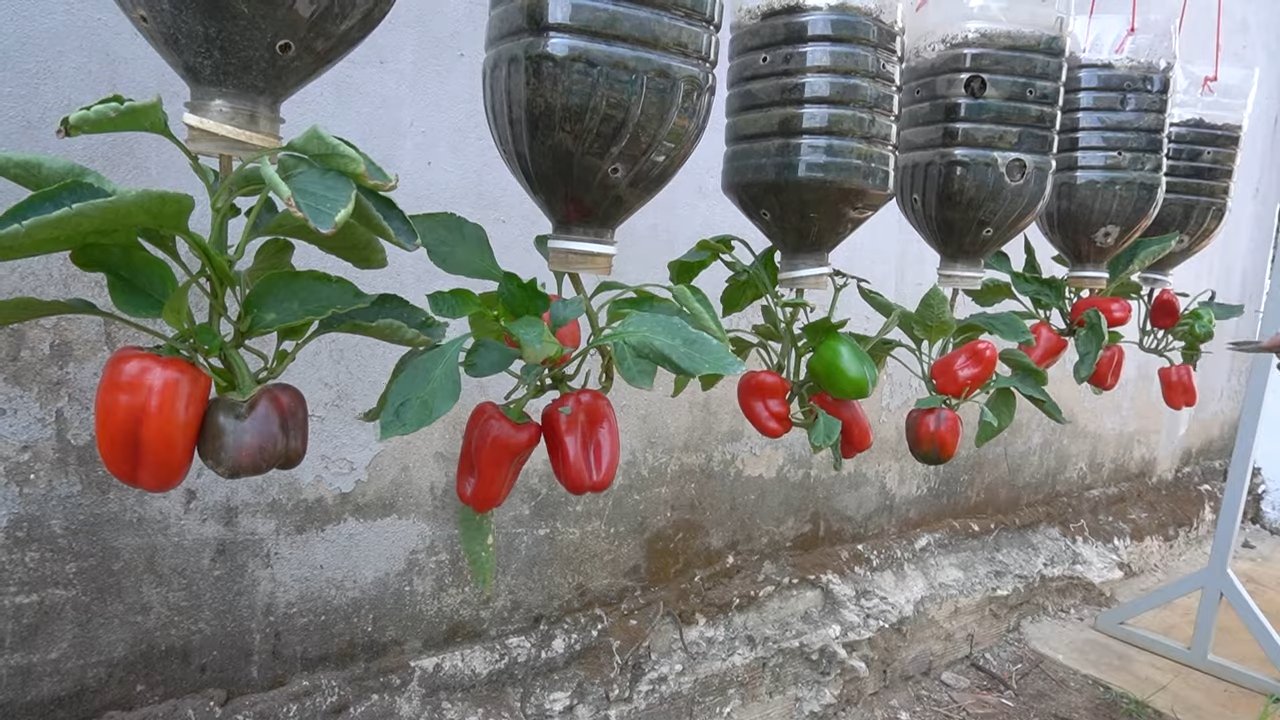
The Harvest: The Reward for Your Effort
The time has finally come: You can harvest your own chili peppers! The ripening time depends on the variety. Ripe chilies have an intense color and are easily detached from the plant.
The right time: Most chili varieties are ripe when they have reached their final color (red, yellow, orange, brown, or purple).
Conclusion
So, there you have it! Growing chili peppers at home isn’t just a fun gardening project; it’s a gateway to unlocking a world of flavor, freshness, and fiery satisfaction right in your own backyard (or balcony!). We’ve walked you through the essential steps, from selecting the perfect seeds to nurturing your plants and harvesting those vibrant, spicy gems.
But why is this DIY trick a must-try? Beyond the obvious benefit of having a readily available supply of fresh chili peppers, consider the control you gain over the entire process. You know exactly what goes into your plants – no mystery chemicals or pesticides, just good old-fashioned care and attention. This translates to healthier, tastier peppers that you can feel good about using in your cooking.
Furthermore, growing your own chili peppers is incredibly rewarding. There’s something deeply satisfying about watching a tiny seed sprout and transform into a thriving plant laden with colorful fruit. It’s a connection to nature, a lesson in patience, and a source of immense pride when you finally harvest your first batch.
And the possibilities are endless! Don’t limit yourself to just one variety. Experiment with different types of chili peppers, from the mild and fruity poblano to the scorching hot habanero. Try growing them in different containers, using different soil mixes, or even experimenting with hydroponics.
Here are a few suggestions and variations to get you started:
* **Infused Oils:** Once you have a good harvest, try infusing olive oil with your chili peppers for a flavorful and spicy condiment. Simply add dried chili peppers to a bottle of olive oil and let it sit for a few weeks.
* **Homemade Hot Sauce:** Create your own signature hot sauce by blending your chili peppers with vinegar, garlic, and other spices. The possibilities are truly endless!
* **Dried Chili Powder:** Dry your chili peppers and grind them into a homemade chili powder for a burst of flavor in your favorite dishes.
* **Pickled Peppers:** Preserve your harvest by pickling your chili peppers in a vinegar brine. They’ll add a tangy and spicy kick to sandwiches, salads, and more.
* **Ornamental Peppers:** Some chili pepper varieties are incredibly beautiful, with colorful foliage and uniquely shaped fruits. Grow them for their ornamental value as well as their culinary uses.
Growing chili peppers at home is more than just a hobby; it’s an investment in your culinary creativity and a step towards a more sustainable lifestyle. It allows you to tailor the heat and flavor profiles to your exact preferences, something you simply can’t achieve with store-bought peppers.
So, what are you waiting for? Grab some seeds, get your hands dirty, and embark on this exciting gardening adventure. We encourage you to try this DIY trick and share your experiences with us. Let us know what varieties you’re growing, what challenges you’ve faced, and what delicious creations you’ve made with your homegrown chili peppers. Share your photos and stories in the comments below – we can’t wait to hear from you! Happy growing!
FAQ
Q: What is the best time of year to start growing chili peppers?
A: The best time to start growing chili peppers depends on your climate. In general, chili peppers need warm temperatures to thrive, so you should start them indoors 6-8 weeks before the last expected frost. If you live in a warm climate with a long growing season, you can start them directly outdoors after the last frost. However, starting indoors gives them a head start and allows them to mature faster. Consider your local climate and growing season when determining the optimal time to start your seeds.
Q: What kind of soil is best for growing chili peppers?
A: Chili peppers prefer well-draining soil that is rich in organic matter. A good potting mix for chili peppers should contain a blend of peat moss, perlite, and vermiculite. You can also amend your garden soil with compost or other organic matter to improve its drainage and fertility. Avoid heavy clay soils, as they can retain too much moisture and lead to root rot. The ideal pH for chili peppers is between 6.0 and 7.0.
Q: How much sunlight do chili peppers need?
A: Chili peppers need at least 6-8 hours of direct sunlight per day to thrive. Choose a sunny location in your garden or on your balcony where your plants will receive plenty of sunlight. If you are growing your chili peppers indoors, you may need to supplement with artificial lighting, such as grow lights. Insufficient sunlight can lead to leggy plants and reduced fruit production.
Q: How often should I water my chili pepper plants?
A: Water your chili pepper plants regularly, especially during hot and dry weather. The soil should be kept consistently moist, but not waterlogged. Water deeply whenever the top inch of soil feels dry to the touch. Avoid overhead watering, as this can promote fungal diseases. Drip irrigation or soaker hoses are a good way to water chili pepper plants efficiently.
Q: What are some common pests and diseases that affect chili peppers?
A: Chili peppers can be susceptible to a variety of pests and diseases, including aphids, spider mites, whiteflies, blossom end rot, and fungal diseases. Regularly inspect your plants for signs of pests or diseases and take action promptly. You can use insecticidal soap or neem oil to control pests, and fungicides to prevent or treat fungal diseases. Good air circulation and proper watering can also help prevent diseases. Blossom end rot is caused by a calcium deficiency and can be prevented by adding calcium to the soil or using a calcium-rich fertilizer.
Q: How do I know when my chili peppers are ripe?
A: The color of the chili pepper is the best indicator of ripeness. Most chili peppers will turn from green to red, yellow, orange, or brown when they are ripe, depending on the variety. The pepper should also feel firm and slightly waxy to the touch. You can also taste a small piece of the pepper to check for ripeness. The flavor should be fully developed and the heat level should be at its peak.
Q: Can I grow chili peppers in containers?
A: Yes, chili peppers can be grown successfully in containers. Choose a container that is at least 12 inches in diameter and has drainage holes. Use a good quality potting mix and water regularly. Container-grown chili peppers may need to be fertilized more frequently than those grown in the ground. Make sure the container is placed in a sunny location.
Q: How do I overwinter my chili pepper plants?
A: If you live in a climate with cold winters, you can overwinter your chili pepper plants indoors. Before the first frost, prune the plants back to about 6 inches tall and dig them up carefully. Pot them in containers and bring them indoors. Place them in a sunny location and water them sparingly. They may lose some of their leaves during the winter, but they should start to grow again in the spring.
Q: How can I increase the heat of my chili peppers?
A: Several factors can influence the heat of chili peppers, including genetics, growing conditions, and stress. To increase the heat of your chili peppers, make sure they receive plenty of sunlight and water. You can also stress the plants slightly by withholding water for a few days before harvesting. Some gardeners believe that adding Epsom salts to the soil can also increase the heat of chili peppers. Remember that the heat level of chili peppers can vary even within the same variety.
Leave a Comment