

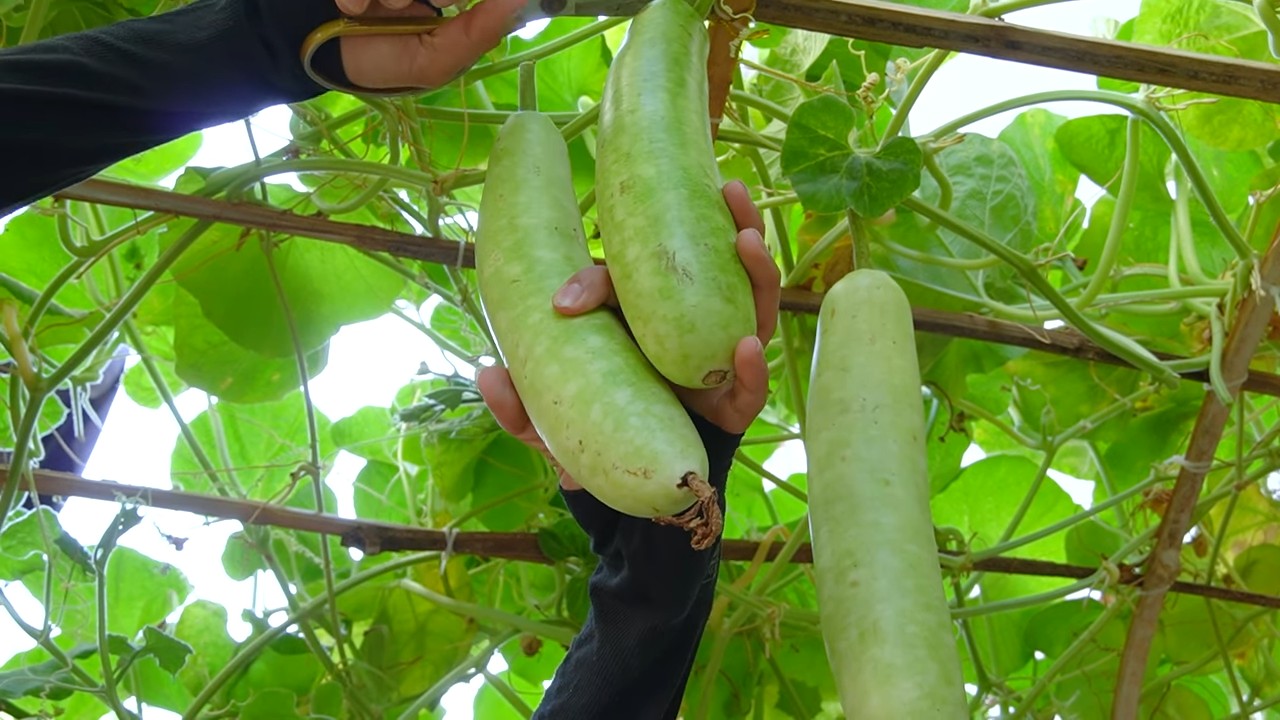
Growing giant gourds might seem like something out of a fairytale, but trust me, it’s an achievable dream for any home gardener! Imagine the look on your neighbor’s faces when they see a gourd the size of a small car sitting proudly in your yard. For centuries, gourds have held a special place in various cultures, used for everything from practical containers to decorative art. Think of the intricate gourd art of South America or the traditional uses of gourds in African societies – these plants have a rich and fascinating history.
But beyond the novelty, growing giant gourds offers a unique challenge and a rewarding experience. It’s not just about throwing a seed in the ground and hoping for the best. It requires a bit of planning, some clever DIY tricks, and a whole lot of patience. That’s where this article comes in! I’m going to share my favorite hacks and DIY tips that will help you cultivate your own colossal cucurbits. Whether you’re a seasoned gardener or just starting out, these secrets will give you the edge you need to grow a gourd that’s truly something to behold. So, grab your gardening gloves, and let’s get started on this exciting journey to giant gourd glory!
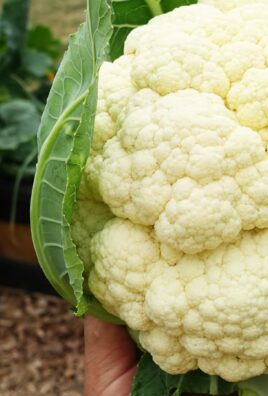
Growing Giant Pumpkins Yourself: My Ultimate DIY Guide for the Garden
Hello dear garden friends! Have you ever imagined growing a pumpkin so large it’s almost a small house? I have! And I’ve succeeded. Growing giant pumpkins is a challenge, but with the right preparation, care, and a little luck, any of you can become a pumpkin champion. In this article, I’ll share my proven tips and tricks so that your garden, too, will soon be adorned by a gigantic pumpkin.
Preparation: The Key to Success
Before we even start putting seeds in the ground, we need to ensure we create the optimal conditions. A giant pumpkin is not a modest guest; it needs space, nutrients, and lots of sun.
- Choose the right variety: Not every pumpkin grows to be giant. Choose a variety specifically bred for growing giant pumpkins. The ‘Atlantic Giant’ variety is the absolute classic and has produced many world records. When buying seeds, look for good quality, preferably from pumpkins that were themselves very large.
- The perfect location: Giant pumpkins love the sun! Find a spot in your garden that gets at least 6-8 hours of direct sunlight per day. They also need a lot of space, so plan for at least 50 square meters (about 540 square feet) per plant. Yes, you read that right!
- The soil: The soil must be rich in nutrients and well-draining. It’s best to prepare the soil in the fall by incorporating plenty of compost, rotted manure, or other organic materials. In the spring, you can then add a slow-release fertilizer.
- Starting indoors: To give the pumpkins a head start, you should start them indoors. This gives them a growth advantage of several weeks.
Step-by-Step Guide: From Seed to Giant
Now let’s get down to it! Here is my detailed guide on how to care for your giant pumpkins right from the start:
1. Starting Indoors (around mid-April)
- Prepare the seeds: To speed up germination, you can soak the seeds in lukewarm water for 24 hours before planting.
- Sowing: Fill small pots (approx. 10 cm / 4 inches in diameter) with seed starting mix. Place one seed per pot about 2-3 cm (1 inch) deep in the soil.
- Water and keep warm: Gently water the soil and place the pots in a warm, bright place. A temperature of 20-25°C (68-77°F) is ideal.
- Be patient: After about 5-10 days, the first seedlings should be visible.
2. Caring for the Young Plants
- Bright light: As soon as the seedlings emerge from the soil, they need a lot of light. Place them by a bright window or use a plant lamp.
- Water regularly: The soil should always be slightly moist, but not wet. Avoid waterlogging, as this can lead to root rot.
- Fertilize: Once the young plants have their first true leaves, you can fertilize them with a mild liquid fertilizer.
- Hardening off: Before you plant the young plants outdoors, you should slowly acclimate them to the outdoor conditions. Place them outside for a few hours during the day and bring them back in at night.
3. Planting Outdoors (around mid-May, after the last frost)
- Prepare the soil: Loosen the soil thoroughly and work in compost or rotted manure again.
- Dig the planting hole: Dig a planting hole that is large enough, about twice the size of the young plant’s root ball.
- Planting: Carefully place the young plant in the planting hole and fill it with soil. Lightly press the soil down.
- Watering in: Water the plant thoroughly.
- Protection: Protect the young plant from snails and other pests. A snail fence or slug pellets can help.
4. Care During the Growing Season
- Watering: Giant pumpkins need a lot of water, especially during the growing phase. It’s best to water them in the morning so the leaves can dry during the day. Avoid watering the leaves directly, as this can promote fungal diseases.
- Fertilizing: Fertilize the pumpkins regularly with a special pumpkin fertilizer or a balanced liquid fertilizer. Pay attention to the dosage instructions.
- Guiding the vines: Giant pumpkins produce long vines that take up a lot of space. Guide the vines in the desired direction so they don’t grow over other plants.
- Pollination: Pumpkins are monoecious, meaning they have male and female flowers on the same plant. The female flowers can be recognized by the small, immature fruit at the base of the blossom. To ensure the female flowers are pollinated, you can do it yourself. Take a brush and transfer the pollen from a male flower to the stigma of a female flower. It’s best to do this in the morning when the flowers are open.
- Selecting the fruit: If several fruits are growing on the plant, you should choose the most promising one and remove the others. This allows the plant to put all its energy into the growth of that single fruit.
- Underlay: Place something underneath the pumpkin, such as a board or straw, to protect it from moisture and rot.
- Sun protection: On very hot days, it may be wise to protect the pumpkin from direct sunlight with a sunshade or a cloth.
- Protection from damage: Make sure the pumpkin is not damaged. Small scratches or cracks can lead to rot.
5. The Harvest
- Signs of ripeness: A ripe giant pumpkin has a hard rind and sounds hollow when you tap it. The vine connected to the pumpkin should also be dry and brown.
- Harvest carefully: Carefully cut the pumpkin from the vine with a sharp knife or a saw. Leave a stem of about 10-15 cm (4-6 inches) in length.
- Transport: Transporting a giant pumpkin is a challenge. It’s best to use a pallet and a forklift or crane. Be careful not to damage the pumpkin.
Common Problems and Solutions
Challenges also arise when growing giant pumpkins. Here are some common problems and how you can solve them:
- Snails: Snails are every gardener’s nightmare. Protect your young plants with a snail fence or slug pellets.
- Powdery Mildew: Powdery mildew is a fungal disease that appears as a white coating on the leaves. Remove affected leaves and treat the plant with a fungicide.
- Fruit Flies: Fruit flies can damage the fruit. Hang fruit fly traps or use insecticides.
- Root Rot: Root rot is caused by waterlogging. Ensure good drainage and avoid overwatering the plants.
Additional Tips for Giant Pumpkin Success
Regular checks: Check your pumpkins regularly for pests and diseases.
Conclusion
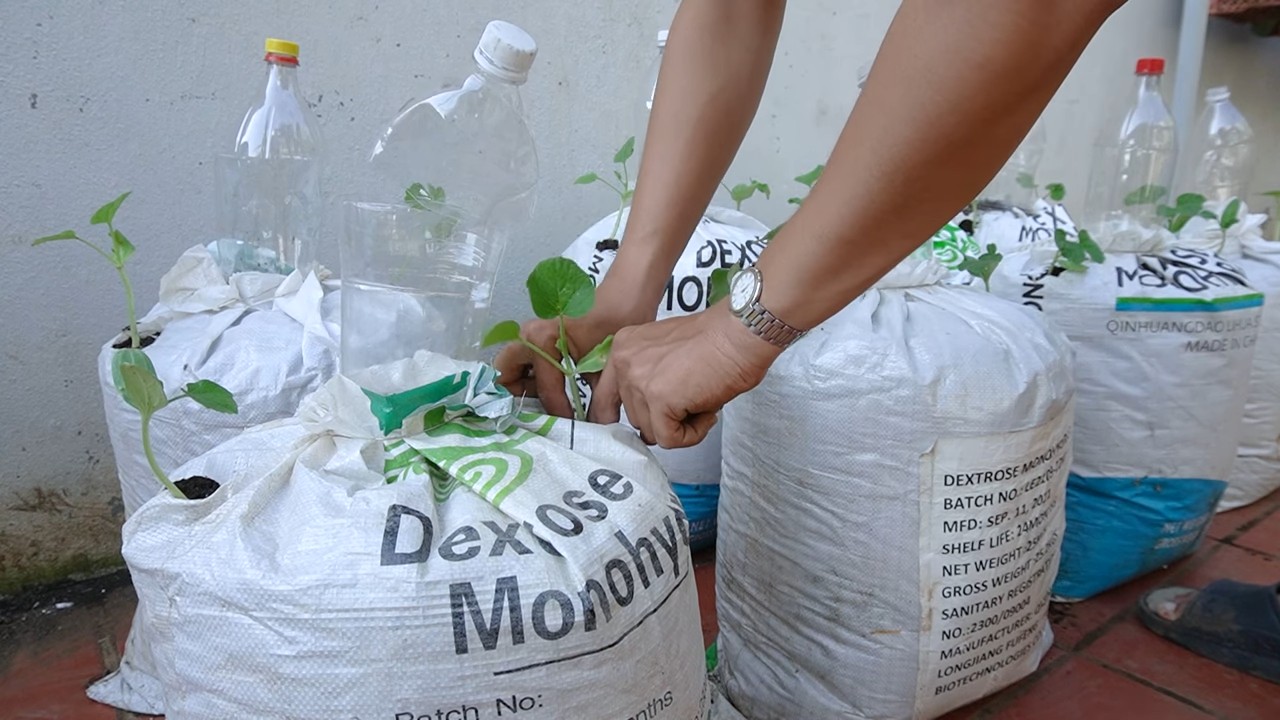
So, there you have it! Growing giant gourds isn’t just a whimsical dream; it’s an achievable reality with a little dedication and the right techniques. We’ve explored the secrets to nurturing these behemoths, from selecting the perfect seeds to providing the optimal growing environment. The DIY trick of creating a nutrient-rich soil blend, as detailed earlier, is absolutely essential for maximizing your gourd’s potential. It’s the foundation upon which your giant gourd empire will be built.
Why is this DIY approach a must-try? Because it gives you complete control over the nutrients your gourd receives. Commercial fertilizers can be expensive and may not be perfectly tailored to the specific needs of a rapidly growing gourd. By crafting your own soil blend, you can ensure your plant gets exactly what it needs, when it needs it, leading to explosive growth and a truly impressive final product. Think of it as a personalized gourmet meal plan, but for your gourd!
But don’t stop there! Experimentation is key to unlocking even greater potential. Consider variations on the DIY soil blend. For instance, adding a small amount of bone meal can provide an extra boost of phosphorus, crucial for root development. Or, if you live in an area with acidic soil, incorporating some lime can help balance the pH and make nutrients more accessible to your plant. Another variation could involve using different types of compost, such as worm castings or mushroom compost, to further enrich the soil with beneficial microbes. You could also try different training methods, such as vertical training on a sturdy trellis, to maximize space and sunlight exposure. Remember to document your experiments and track your results to see what works best for you and your specific growing conditions.
The journey of growing giant gourds is a rewarding one, filled with challenges and triumphs. It’s a testament to the power of nature and the satisfaction of nurturing something extraordinary. Don’t be intimidated by the size of the task; break it down into manageable steps, follow the guidelines we’ve discussed, and most importantly, have fun!
We wholeheartedly encourage you to try this DIY trick and embark on your own giant gourd adventure. The results will speak for themselves. Imagine the awe and wonder of your friends and neighbors when they see the colossal gourd you’ve cultivated. It’s a conversation starter, a source of pride, and a testament to your gardening prowess.
Once you’ve harvested your giant gourd, we’d love to hear about your experience! Share your photos, tips, and stories with us in the comments section below. Let’s build a community of giant gourd enthusiasts and learn from each other’s successes and challenges. Together, we can push the boundaries of what’s possible and grow even bigger and better gourds! So, get your hands dirty, embrace the challenge, and prepare to be amazed by the incredible potential of growing giant gourds.
FAQ
What kind of seeds should I use for growing giant gourds?
The most important factor is to choose seeds specifically bred for giant gourd growing. Look for varieties like ‘Atlantic Giant,’ which are known for their potential to produce massive gourds. Purchase seeds from reputable suppliers who specialize in giant gourd seeds. These suppliers often have seeds from prize-winning gourds, increasing your chances of success. Also, consider the lineage of the seeds. Seeds from gourds with a proven track record of size and weight are more likely to produce similar results. Don’t just grab any gourd seed from the grocery store; invest in quality seeds from a trusted source.
How often should I water my giant gourd plant?
Watering frequency depends on several factors, including weather conditions, soil type, and the size of your plant. Generally, young plants need less water than mature plants. As your gourd grows larger, it will require significantly more water, sometimes several gallons per day. The best way to determine if your plant needs water is to check the soil moisture. Stick your finger about two inches into the soil; if it feels dry, it’s time to water. Water deeply and thoroughly, ensuring the water reaches the roots. Avoid overhead watering, as this can promote fungal diseases. Consider using a soaker hose or drip irrigation system to deliver water directly to the roots. During hot, dry periods, you may need to water daily or even twice a day.
What are the most common pests and diseases that affect giant gourds?
Giant gourds are susceptible to several pests and diseases, including squash vine borers, squash bugs, powdery mildew, and downy mildew. Squash vine borers can be particularly devastating, as they tunnel into the stems and kill the plant. Monitor your plants regularly for signs of infestation, such as wilting leaves or holes in the stems. Squash bugs can also cause significant damage by sucking the sap from the leaves. Powdery mildew and downy mildew are fungal diseases that can cause white or gray patches on the leaves. To prevent these problems, practice good sanitation by removing dead leaves and debris from around the plants. Use insecticidal soap or neem oil to control pests, and apply fungicides to prevent or treat fungal diseases. Crop rotation can also help reduce the risk of soilborne diseases.
How do I pollinate my giant gourd flowers?
Giant gourds have separate male and female flowers. The female flowers have a small immature gourd at the base, while the male flowers do not. To ensure pollination, you may need to hand-pollinate the flowers, especially if you don’t have many bees or other pollinators in your area. The best time to hand-pollinate is early in the morning, when the flowers are fully open. Use a small paintbrush or cotton swab to collect pollen from the male flower and transfer it to the stigma of the female flower. You can also remove the entire male flower and gently rub the pollen-covered stamen onto the stigma of the female flower. After pollination, the female flower should begin to develop into a gourd.
How much space does a giant gourd plant need?
Giant gourd plants are vigorous growers and require a significant amount of space. Each plant can easily spread 20 feet or more, so it’s essential to provide ample room for it to grow. Choose a location with plenty of sunlight and well-drained soil. Prepare the soil by amending it with compost and other organic matter. Consider using raised beds or mounds to improve drainage. Space the plants at least 10-15 feet apart to allow for adequate growth. You may also need to prune the vines to control their spread and direct the plant’s energy towards developing a single, large gourd.
What is the best fertilizer for giant gourds?
Giant gourds are heavy feeders and require a steady supply of nutrients to support their rapid growth. A balanced fertilizer with a ratio of 10-10-10 or 14-14-14 is a good starting point. However, as the plant grows, it will need more phosphorus and potassium to promote fruit development. Consider using a fertilizer with a higher ratio of phosphorus and potassium, such as 5-15-30. You can also supplement with organic fertilizers, such as bone meal, kelp meal, and compost tea. Apply fertilizer regularly throughout the growing season, following the instructions on the product label. Avoid over-fertilizing, as this can burn the roots and damage the plant.
How do I prevent my giant gourd from rotting?
Rotting can be a common problem with giant gourds, especially in humid climates. To prevent rotting, ensure the gourd is not sitting directly on the soil. Place a piece of plywood or cardboard underneath the gourd to elevate it and improve air circulation. Avoid damaging the skin of the gourd, as this can create entry points for pathogens. Monitor the gourd regularly for signs of rot, such as soft spots or discoloration. If you notice any signs of rot, remove the affected area immediately. You can also apply a fungicide to prevent the spread of rot. Proper watering and fertilization can also help prevent rotting by promoting healthy growth and strengthening the plant’s defenses.
How long does it take to grow a giant gourd?
The time it takes to grow a giant gourd depends on several factors, including the variety of gourd, the growing conditions, and the level of care you provide. Generally, it takes about 120-150 days from seed to harvest. The gourd will grow most rapidly during the summer months, when temperatures are warm and sunlight is abundant. Monitor the gourd’s growth regularly and adjust your watering and fertilization accordingly. Be patient and persistent, and you’ll be rewarded with a truly impressive giant gourd.
Leave a Comment