

Soil bag corn growing – it might sound unconventional, but trust me, it’s a game-changer for anyone dreaming of fresh, homegrown corn, regardless of space! Have you ever envisioned biting into a juicy, sweet ear of corn you nurtured from a tiny seed, but thought your tiny balcony or lack of a traditional garden plot made it impossible? Well, think again!
Growing corn has deep roots in human history, dating back thousands of years in Mesoamerica. It’s been a staple crop, a symbol of abundance, and a vital part of countless cultures. While traditionally grown in vast fields, the beauty of modern gardening is its adaptability. We’re taking this ancient grain and bringing it to your doorstep, no sprawling acreage required!
Why should you embrace this DIY trick? Because soil bag corn growing is incredibly accessible, cost-effective, and surprisingly productive. It eliminates the need for tilling, weeding, and extensive garden preparation. Plus, it’s a fantastic way to recycle those large soil bags! I’m going to show you how to transform a simple bag of soil into a thriving corn patch, offering you a taste of summer’s bounty, no matter where you live. Get ready to unleash your inner gardener and enjoy the satisfaction of harvesting your own delicious corn!
DIY: Growing Corn in a Sack – Here’s How!
Hey guys! Do you want fresh, homegrown corn but don’t have space for a huge field? No problem! Today, I’m going to show you how to easily grow corn in a sack. This is not only space-saving but also super effective and a lot of fun! Let’s get started!
What you need:
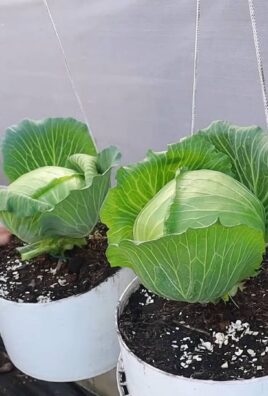
- A large, sturdy sack: A jute sack, a robust plastic sack (e.g., a feed sack), or a special grow bag is best. It should have a capacity of at least 60 liters.
- High-quality potting soil: It’s important that the soil is nutrient-rich and well-draining.
- Corn kernels: Choose a corn variety that is suitable for growing in a pot. Dwarf corn or early varieties are ideal.
- Compost or organic fertilizer: For an extra dose of nutrients.
- Gravel or expanded clay pebbles: For good drainage at the bottom of the sack.
- Water: For watering, of course!
- Knife or scissors: To cut holes in the sack.
- Watering can or hose: For watering the plants.
- Support material (optional): Bamboo stakes or similar, in case the plants get too tall and topple over.
Preparing the Sack
- Cleaning the sack: If you are using a used sack, clean it thoroughly with water to remove any residues.
- Adding drainage holes: Cut or poke several holes (about 1 cm in diameter) in the bottom of the sack. This is super important so that excess water can drain away and the roots don’t rot. I usually make about 5-6 holes.
- Filling in a drainage layer: Fill a layer of gravel or expanded clay pebbles (about 5-10 cm high) into the sack. This ensures good drainage and prevents waterlogging.
Filling the Sack with Soil
- Fill in the first layer of soil: Fill the sack with a first layer of potting soil (about 20 cm high).
- Add compost or fertilizer: Mix some compost or organic fertilizer into this layer. This gives the corn plants a good start. I always use about a handful per sack.
- Add more soil: Continue filling the sack with soil until it is almost full. Leave a rim of about 5-10 cm at the top.
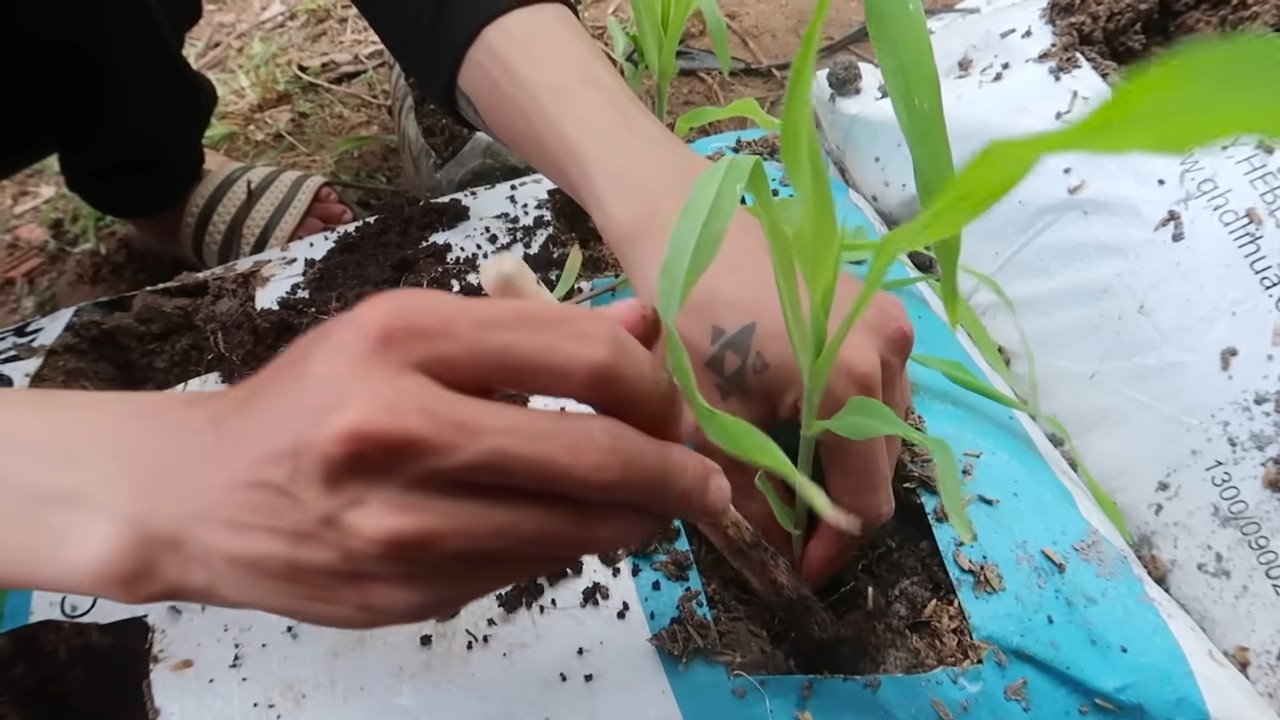
Sowing the Corn Kernels
- Note the sowing time: Corn is sensitive to frost. Wait to sow until there is no more risk of frost. This is usually the case from mid-May onwards.
- Prepare sowing holes: Press small holes (about 3-5 cm deep) into the soil with your finger or a small stick. The distance between the holes should be about 15-20 cm.
- Place corn kernels: Put 2-3 corn kernels in each hole. This increases the probability that at least one kernel will germinate.
- Close the holes: Cover the corn kernels with soil and press it down lightly.
- Watering: Water the soil carefully so that it is well moistened. Make sure the kernels are not washed away.
Caring for the Corn Plants
- Choose a location: Place the sack in a sunny and warm spot. Corn needs a lot of sun to grow well.
- Water regularly: Keep the soil moist, but not wet. Water regularly, especially on hot days. It’s best to test with your finger to see if the soil is still moist enough.
- Fertilize: Fertilize the corn plants regularly with an organic fertilizer or liquid fertilizer. This ensures healthy growth and a good harvest. I usually fertilize every 2-3 weeks.
- Remove weeds: Regularly remove weeds that grow in the sack.
- Support (optional): If the corn plants get too tall and topple over, support them with bamboo stakes or similar.
- Protect from pests: Watch out for pests like snails or aphids. If necessary, you can use organic pesticides.
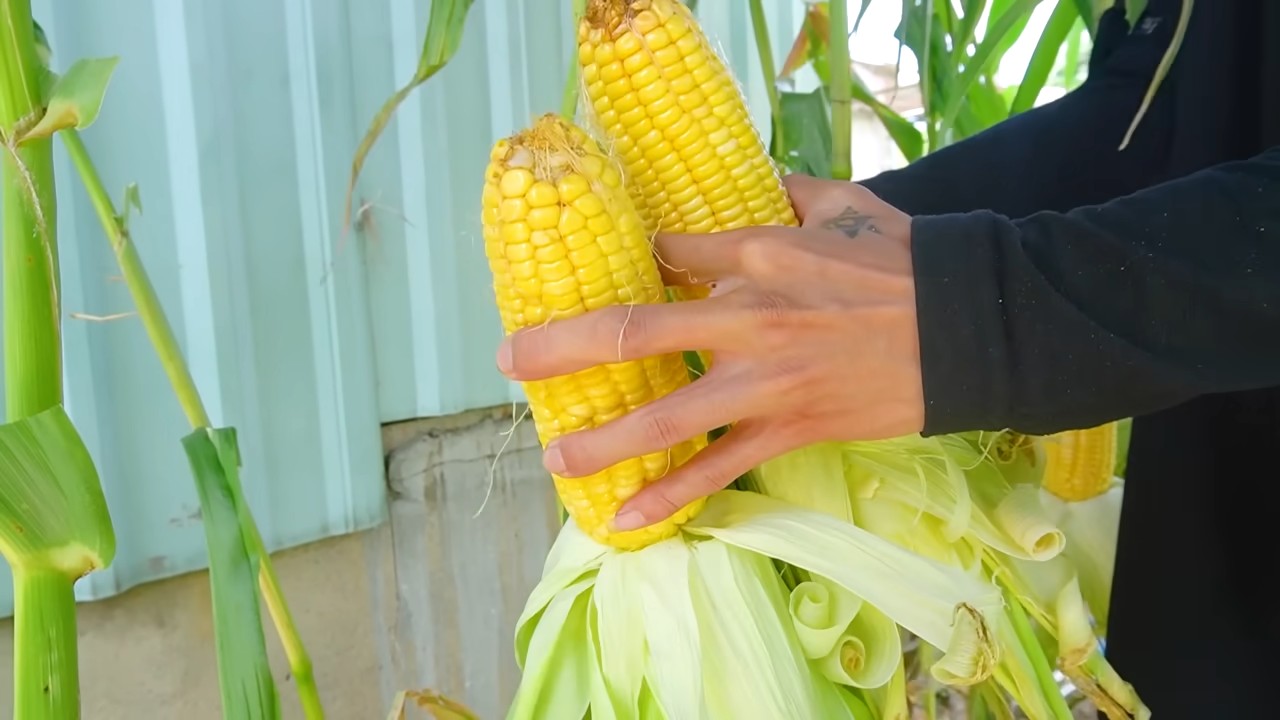
Harvest Time
- Recognizing ripeness: The corn cobs are ripe when the husks turn brown and dry, and the corn kernels are plump and juicy.
- Harvesting: Carefully break the corn cobs off the plant.
- Enjoy: Boil, grill, or bake the corn cobs and enjoy your homegrown corn!
Additional Tips and Tricks
- Variety selection: Before sowing, inform yourself about the different corn varieties and choose one that is suitable for growing in a pot. Dwarf corn or early varieties are ideal.
- Pollination: Corn is wind-pollinated. If you have several sacks of corn next to each other, pollination is usually not a problem. If you only have one sack, you can assist pollination by gently shaking the male flower heads (the “tassels” at the top of the plant) when the female flowers (the “silks” on the cobs) become visible.
- Soil improvement: Mix some sand or perlite into the potting soil to improve drainage.
- Protection from birds: Birds love corn kernels. Protect the young plants with a net or a scarecrow.
- Multiple sowings: To have a longer harvest period, you can sow the corn kernels in several stages.
- Creative design: Paint the sack with bright colors or patterns to make it an eye-catcher in your garden or on your balcony.
Common Problems and Solutions
- Plants are not growing: Check if the soil is moist enough and if the plants are getting enough sun. You may also need to fertilize.
- Leaves are turning yellow: This can be a sign of nutrient deficiency. Fertilize the plants with a suitable fertilizer.
- Pests: Combat pests like snails or aphids with organic pesticides.
- Plants are toppling over: Support the plants with bamboo stakes or similar.
- No corn cobs: This can be due to a lack of pollination. Assist pollination by shaking the male flower heads.
Conclusion
Growing corn in a sack is a great way to grow fresh corn even in a small space. With a little care and attention, you can soon look forward to a bountiful harvest. Try it out, it’s worth it! Happy gardening!
Conclusion
So, there you have it! Growing corn in a soil bag isn’t just a quirky gardening experiment; it’s a game-changer for anyone looking to maximize their yield, minimize their space, and enjoy the freshest, sweetest corn imaginable. We’ve walked you through the simple steps, highlighted the benefits, and armed you with the knowledge to confidently embark on this rewarding journey.
Why is this DIY trick a must-try? Because it democratizes corn cultivation. You don’t need acres of farmland or specialized equipment. All you need is a bag of soil, some corn seeds, sunshine, and a little bit of patience. It’s perfect for urban gardeners with limited space, apartment dwellers with balconies, or anyone who wants to supplement their garden with a bountiful harvest of homegrown corn.
Beyond the convenience and space-saving advantages, growing corn in a soil bag offers superior control over the growing environment. You can easily monitor moisture levels, adjust nutrient inputs, and protect your plants from pests and diseases. This translates to healthier plants, higher yields, and ultimately, more delicious corn on your table.
But the beauty of this method lies in its adaptability. Feel free to experiment with different varieties of corn to find your personal favorite. Try adding companion plants like beans or squash to the bag to create a mini-ecosystem that benefits all three crops. You can even incorporate organic fertilizers like compost or worm castings to boost the soil’s fertility and enhance the flavor of your corn.
Consider these variations to tailor the process to your specific needs and preferences:
* Vertical Support: For taller corn varieties, consider adding a simple trellis or staking system to provide extra support and prevent the plants from toppling over in strong winds.
* Watering System: If you live in a hot, dry climate, consider installing a drip irrigation system to ensure consistent moisture levels and minimize water waste.
* Soil Amendments: Experiment with different soil amendments like perlite or vermiculite to improve drainage and aeration, especially if you’re using a heavier soil mix.
* Succession Planting: Plant multiple bags of corn at staggered intervals to extend your harvest season and enjoy fresh corn for a longer period.
The possibilities are endless! The key is to embrace the spirit of experimentation and find what works best for you and your growing conditions.
We are confident that once you experience the joy of harvesting your own homegrown corn from a simple soil bag, you’ll be hooked. It’s a truly rewarding experience that connects you to the food you eat and allows you to appreciate the magic of nature.
So, what are you waiting for? Grab a bag of soil, some corn seeds, and get ready to embark on this exciting gardening adventure. We encourage you to try this DIY trick and share your experiences with us. Post photos of your corn plants, share your tips and tricks, and let us know how it goes. Together, we can create a community of passionate gardeners who are dedicated to growing their own food and enjoying the simple pleasures of life. Let’s get growing!
Frequently Asked Questions (FAQ)
What type of soil is best for growing corn in a soil bag?
The ideal soil for growing corn in a soil bag is a well-draining, nutrient-rich potting mix. Avoid using garden soil, as it can be too heavy and compact, hindering root growth and drainage. Look for a potting mix that contains a blend of peat moss, perlite, and vermiculite. These ingredients help to retain moisture while providing adequate aeration for the roots. You can also amend your potting mix with compost or other organic matter to boost its fertility and improve its water-holding capacity. A slightly acidic to neutral pH (around 6.0 to 7.0) is optimal for corn growth.
How many corn seeds should I plant in a single soil bag?
The number of corn seeds you plant in a soil bag depends on the size of the bag and the variety of corn you’re growing. As a general rule, you can plant 3-4 corn seeds per square foot of soil surface. For a standard-sized soil bag (around 2-3 cubic feet), you can plant approximately 6-8 corn seeds. Be sure to space the seeds evenly to allow for adequate growth and prevent overcrowding. Once the seedlings emerge, thin them out to the strongest 2-3 plants per bag to ensure they have enough room to develop.
How often should I water corn grown in a soil bag?
Corn grown in a soil bag requires consistent moisture, especially during hot and dry weather. Water deeply and regularly, ensuring that the soil is evenly moist but not waterlogged. The frequency of watering will depend on factors such as the weather, the size of the bag, and the type of soil you’re using. As a general guideline, water every 2-3 days, or more frequently during hot spells. Check the soil moisture level regularly by sticking your finger into the soil. If the top inch feels dry, it’s time to water. Avoid overwatering, as this can lead to root rot and other problems.
What kind of fertilizer should I use for corn grown in a soil bag?
Corn is a heavy feeder and requires a steady supply of nutrients to thrive. Use a balanced fertilizer with a higher nitrogen content, as nitrogen is essential for leaf growth and overall plant vigor. Look for a fertilizer with an NPK ratio of around 10-5-5 or 12-6-6. You can use either a slow-release granular fertilizer or a liquid fertilizer. If using a granular fertilizer, incorporate it into the soil at planting time and then side-dress the plants with additional fertilizer every 4-6 weeks. If using a liquid fertilizer, dilute it according to the package instructions and apply it to the soil around the base of the plants every 2-3 weeks. Supplementing with compost tea or other organic fertilizers can also benefit corn growth.
How much sunlight does corn grown in a soil bag need?
Corn requires at least 6-8 hours of direct sunlight per day to grow and produce well. Choose a location for your soil bag that receives plenty of sunlight throughout the day. If you live in a particularly hot climate, you may want to provide some afternoon shade to prevent the plants from overheating. Insufficient sunlight can lead to stunted growth, reduced yields, and poor kernel development.
How do I prevent pests and diseases from affecting my corn plants?
Growing corn in a soil bag can help to minimize pest and disease problems, as it provides a more controlled environment than growing in the ground. However, it’s still important to take precautions to protect your plants. Regularly inspect your plants for signs of pests or diseases, such as aphids, corn earworms, or fungal infections. If you detect any problems, take action immediately. You can use organic pest control methods, such as insecticidal soap or neem oil, to control pests. For fungal diseases, ensure good air circulation around the plants and avoid overwatering. You can also use a fungicide if necessary. Crop rotation and companion planting can also help to prevent pest and disease problems.
When is the best time to harvest corn grown in a soil bag?
The best time to harvest corn is when the silks have turned brown and dry, and the kernels are plump and milky. To test for ripeness, peel back a portion of the husk and puncture a kernel with your fingernail. If the liquid that comes out is milky, the corn is ready to harvest. If the liquid is clear, the corn is not yet ripe. If the liquid is thick and doughy, the corn is overripe. Harvest the corn by twisting the ear downward and pulling it away from the stalk. Enjoy your freshly harvested corn immediately for the best flavor.
Leave a Comment