

Growing water spinach easily is simpler than you might think, even if you don’t have a sprawling garden! Have you ever dreamt of harvesting fresh, vibrant greens right from your own backyard (or even your balcony)? I know I have! Water spinach, also known as Ong Choy or Kang Kong, is a delicious and nutritious leafy green popular in Asian cuisine, and it’s surprisingly easy to cultivate at home.
This versatile vegetable has a rich history, deeply rooted in Southeast Asian cultures where it’s been a staple for centuries. Beyond its culinary appeal, water spinach is packed with vitamins and minerals, making it a healthy addition to any diet. But let’s be honest, sometimes getting fresh, high-quality produce can be a challenge, and that’s where the magic of DIY gardening comes in!
In this article, I’m going to share some of my favorite home gardening tricks and DIY hacks that will empower you to start growing water spinach easily, regardless of your gardening experience. We’ll cover everything from seed selection and planting techniques to harvesting and pest control. Say goodbye to expensive grocery store trips and hello to fresh, homegrown goodness! Get ready to unleash your inner gardener and enjoy the satisfaction of nurturing your own delicious water spinach crop.
Growing Water Spinach (Ong Choy) Yourself Made Easy: My DIY Guide
I love water spinach! This crunchy, slightly sweet spinach is simply unbeatable in Asian cuisine. And the best part? You can easily grow it yourself, even indoors! I’ll show you how.
What you need:
- Seeds: Water spinach seeds (Ong Choy). You can find them online or in an Asian grocery store.
- Container: A bucket, a tub, a large pot, or even a plastic box. The main thing is that it’s waterproof and large enough.
- Soil: Regular potting soil or seed starting mix.
- Water: Stale tap water or rainwater is best.
- Sunlight: Water spinach loves the sun! A sunny spot by the window or on the balcony is ideal.
- Optional: Liquid fertilizer for vegetables.
The Preparation:
Before we start, we need to prepare the seeds. This helps them to germinate faster.
- Soak the seeds: Put the water spinach seeds in a bowl with lukewarm water. Let them soak for 12-24 hours. You will see that they swell up a bit. That’s a good thing!
- Prepare the container: Fill your container with soil. Leave a few centimeters of space at the top. The soil should be moist, but not wet.
Sowing and Cultivation:
Now comes the exciting part: sowing!
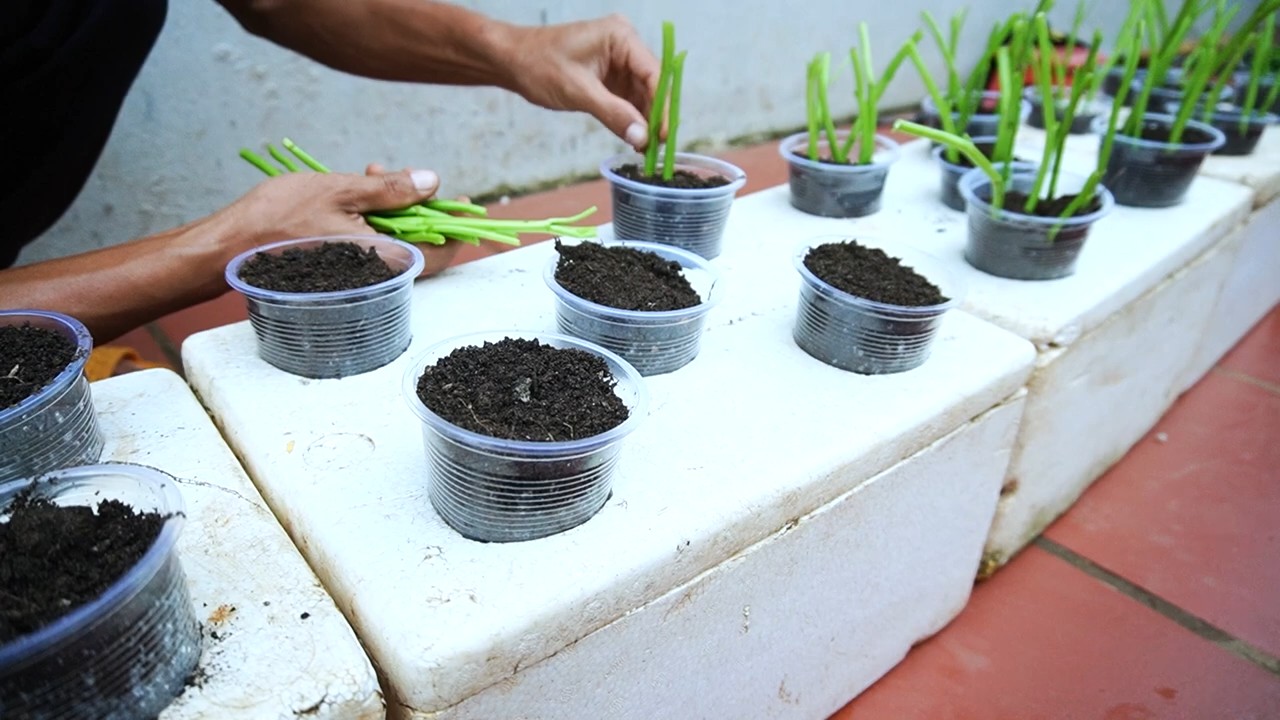
- Sow the seeds: Distribute the soaked seeds evenly on the soil. You can sow them a bit densely, as not all seeds will germinate.
- Cover with soil: Cover the seeds with a thin layer of soil (approx. 0.5 cm).
- Water: Water the soil carefully so that it is well moistened.
- Place in a warm and bright spot: Place the container in a warm and bright location. A temperature of 20-25°C is ideal.
- Keep moist: Make sure the soil always stays moist. You can spray it regularly with a spray bottle.
Growing in Water (Hydroponics Version):
Water spinach also grows great in water! This is a great alternative if you don’t have space for soil or just want to try something new.
- Prepare the container: Choose a waterproof container.
- Germinate the seeds: You can either put the seeds directly into the container (covered with a little water) or germinate them beforehand in a damp cloth.
- Water level: Fill the container with water so that the roots of the seedlings are covered.
- Nutrients: Regularly add some liquid fertilizer for vegetables to the water.
- Light: Place the container in a bright spot.
- Change the water: Change the water regularly (every few days) to prevent algae growth.
Care:
Water spinach is relatively low-maintenance, but you should keep a few things in mind:
- Watering: Water spinach needs a lot of water. Make sure the soil is always moist. In the hydroponics version, you need to change the water regularly and top it up if necessary.
- Fertilizing: If you want, you can regularly fertilize the water spinach with liquid fertilizer for vegetables. This promotes growth.
- Sunlight: Water spinach loves the sun! Place it in as sunny a spot as possible.
- Pests: Water spinach is relatively resistant to pests. If you do find any, you can treat them with a natural pesticide.
Harvest:
This is the best part!
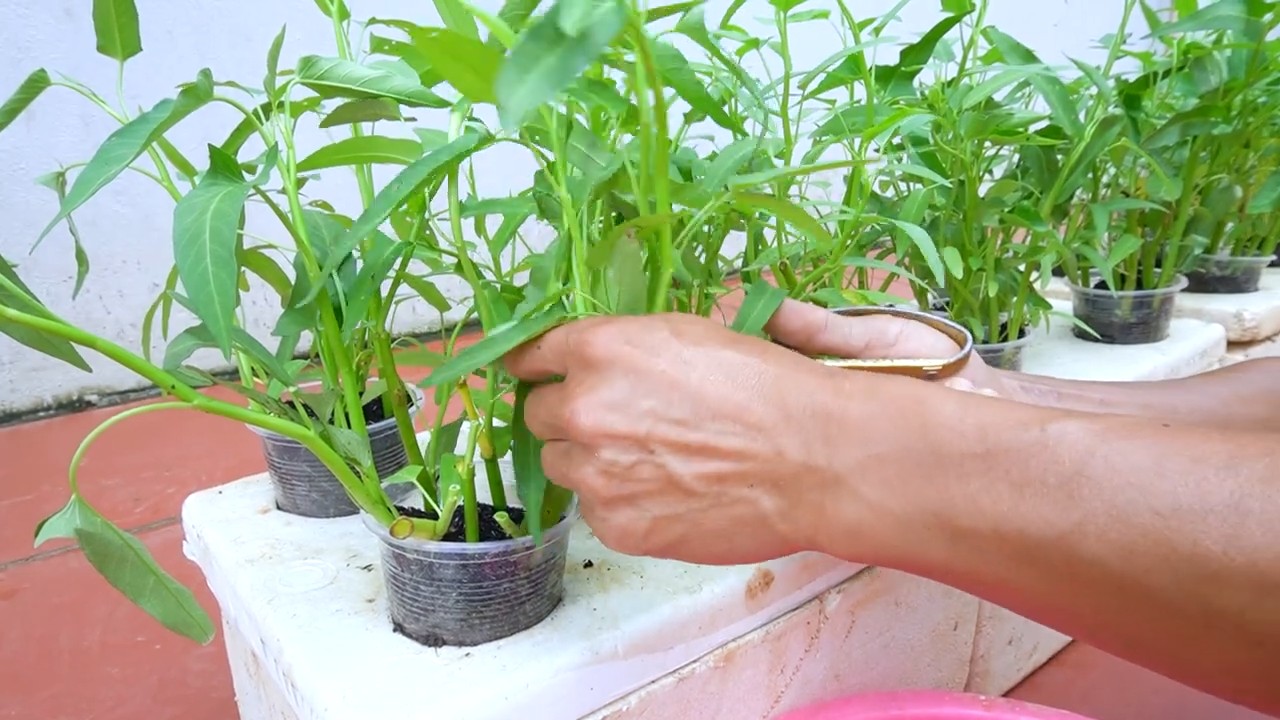
- When to harvest? You can harvest the water spinach as soon as it has reached a height of about 20-30 cm. This usually takes 4-6 weeks.
- How to harvest? Simply cut the stems with scissors or a knife. Leave a few centimeters standing so the water spinach can continue to grow.
- Harvest regularly: The more often you harvest, the more water spinach will grow back!
Tips and Tricks:
- Seeds from your own harvest: If you want, you can collect the seeds for the next season yourself. Just let a few plants flower and the seeds ripen.
- Different varieties: There are different varieties of water spinach. Just try out which one you like best.
- Water spinach in winter: You can also grow water spinach in winter, but you may need a plant lamp to ensure sufficient light.
- Hydroponics systems: If you are interested in hydroponics, you can also build a more complex system. There are many tutorials online.
Common Problems and Solutions:
- Yellow leaves: Yellow leaves can be a sign of a nutrient deficiency. Fertilize the water spinach with liquid fertilizer.
- Mold: Mold can develop if the soil is too moist or the air circulation is poor. Provide better ventilation and water less.
- Slow growth: Slow growth can be due to too little light or nutrients. Place the water spinach in a sunnier spot and fertilize it regularly.
Water Spinach in the Kitchen:
Water spinach is incredibly versatile! You can eat it raw in salads, serve it steamed as a side dish, or use it in stir-fries. It is particularly delicious when fried with garlic and chili.
Summary:
Growing your own water spinach is really child’s play and fun! With a little patience and care, you can soon enjoy your own harvest. Just give it a try! I’m sure you’ll be thrilled. Good luck!
Conclusion
So, there you have it! Growing water spinach easily at home is not just a possibility; it’s a rewarding and surprisingly simple endeavor. We’ve walked through the steps, demystified the process, and hopefully, ignited a spark of excitement for you to cultivate your own fresh, vibrant greens.
Why is this DIY trick a must-try? Because it puts you in control of your food source. You know exactly what’s going into your water spinach – no pesticides, no hidden chemicals, just pure, homegrown goodness. Imagine the satisfaction of harvesting your own leafy vegetables, knowing you nurtured them from seed to table. Beyond the health benefits, growing water spinach is also incredibly cost-effective. A single packet of seeds can yield a continuous supply of greens, saving you money on grocery bills and reducing your reliance on store-bought produce.
But the benefits don’t stop there. Growing water spinach is also an environmentally friendly choice. By reducing your carbon footprint associated with transportation and packaging, you’re contributing to a more sustainable lifestyle. Plus, the process itself is incredibly therapeutic. Tending to your plants, watching them grow, and connecting with nature can be a wonderful stress reliever.
Now, let’s talk about variations. While we’ve focused on growing water spinach in water, you can also cultivate it in soil. If you choose the soil method, ensure you use a well-draining, nutrient-rich mix and keep the soil consistently moist. Another variation involves experimenting with different growing containers. From repurposed buckets to large plastic tubs, the possibilities are endless. Just make sure your container is clean and has adequate drainage holes if you’re growing in soil. You can also try different varieties of water spinach. Some varieties are more heat-tolerant, while others are more resistant to pests. Experiment to find the variety that thrives best in your local climate.
Consider adding companion plants to your water spinach setup. Herbs like basil and mint can help deter pests and attract beneficial insects. Flowers like marigolds can also add a splash of color and further protect your water spinach from unwanted visitors.
We encourage you to embrace this DIY project and experience the joy of growing your own water spinach. It’s a simple, rewarding, and sustainable way to add fresh, healthy greens to your diet. Don’t be afraid to experiment, adapt the techniques to your specific environment, and most importantly, have fun!
Once you’ve harvested your first batch of homegrown water spinach, we’d love to hear about your experience. Share your tips, tricks, and photos with us in the comments below. Let’s create a community of water spinach enthusiasts and inspire others to embark on this green journey. Remember, every successful garden starts with a single seed. So, grab your seeds, get your hands dirty, and start growing your own delicious water spinach today! We are confident that you will find that **growing water spinach easily** is a skill that will bring you joy and fresh produce for years to come.
Frequently Asked Questions (FAQ)
What are the ideal conditions for growing water spinach?
Water spinach thrives in warm, humid environments with plenty of sunlight. Aim for at least 6 hours of direct sunlight per day. The ideal temperature range is between 75°F and 90°F (24°C and 32°C). While it prefers warm conditions, it can tolerate slightly cooler temperatures, but growth will be slower. If you live in a cooler climate, consider starting your water spinach indoors or using a greenhouse to provide a warmer environment. Consistent moisture is also crucial, whether you’re growing it in water or soil.
How long does it take for water spinach to grow?
Water spinach is a fast-growing vegetable. You can typically expect to harvest your first crop within 4 to 6 weeks of planting the seeds or cuttings. The exact time will depend on the growing conditions, such as temperature, sunlight, and nutrient availability. Regular harvesting encourages further growth, so you can enjoy a continuous supply of water spinach throughout the growing season.
What kind of water should I use for growing water spinach?
Tap water is generally suitable for growing water spinach, but it’s best to let it sit for 24 hours to allow chlorine to dissipate. Alternatively, you can use filtered water or rainwater. Avoid using water that is heavily chlorinated or contains high levels of minerals, as this can inhibit growth. Regularly change the water in your container to prevent the buildup of algae and maintain optimal growing conditions.
How often should I fertilize my water spinach?
Water spinach is a heavy feeder, so regular fertilization is essential for optimal growth. If you’re growing it in water, add a liquid fertilizer specifically formulated for leafy greens every 1 to 2 weeks. Follow the instructions on the fertilizer packaging for the correct dosage. If you’re growing it in soil, amend the soil with compost or other organic matter before planting. You can also side-dress with a granular fertilizer every few weeks.
What are some common pests and diseases that affect water spinach?
Water spinach is relatively pest-resistant, but it can be susceptible to aphids, spider mites, and snails. Regularly inspect your plants for signs of infestation and take action promptly. You can control aphids and spider mites with insecticidal soap or neem oil. Handpick snails or use snail bait. Diseases are less common, but fungal infections can occur in humid conditions. Ensure good air circulation around your plants and avoid overwatering to prevent fungal problems.
Can I grow water spinach indoors?
Yes, you can grow water spinach indoors, but you’ll need to provide adequate light. Place your plants near a sunny window or use grow lights to supplement natural light. Ensure the temperature is warm and the humidity is high. You may also need to provide additional ventilation to prevent fungal problems.
How do I harvest water spinach?
Harvest water spinach by cutting the stems about 6 inches from the base of the plant. This will encourage new growth and allow you to harvest multiple times. You can harvest individual leaves as needed or cut the entire plant at once. Harvest in the morning for the best flavor and texture.
Is water spinach safe to eat?
Yes, water spinach is safe to eat when grown properly. However, it’s important to wash it thoroughly before consumption to remove any dirt or debris. Avoid eating water spinach that has been grown in contaminated water or soil. Also, be aware that water spinach can accumulate nitrates, so it’s best to consume it in moderation.
Can I save seeds from my water spinach plants?
Yes, you can save seeds from your water spinach plants, but it’s important to allow the plants to flower and produce seeds. The seeds will be ready to harvest when they are dry and brown. Store the seeds in a cool, dry place until you’re ready to plant them. However, keep in mind that seeds from hybrid varieties may not produce plants that are true to type.
What are some ways to cook water spinach?
Water spinach is a versatile vegetable that can be cooked in a variety of ways. It can be stir-fried, steamed, boiled, or added to soups and stews. It has a mild, slightly sweet flavor that pairs well with garlic, ginger, and soy sauce. It’s also a popular ingredient in Asian cuisine. Try stir-frying it with garlic and chili peppers for a quick and easy side dish.

Leave a Comment