

Grow Snake Gourd at Home and unlock a world of culinary possibilities right in your backyard! Have you ever dreamt of harvesting your own exotic vegetables, impressing your friends with unique dishes, and knowing exactly where your food comes from? Well, dream no more! This DIY guide is your passport to cultivating these fascinating, serpentine gourds with ease.
Snake gourds, also known as Chichinda in some regions, have a rich history deeply intertwined with Asian cuisine and traditional medicine. For centuries, they’ve been a staple in Indian, Chinese, and Southeast Asian cultures, prized for their nutritional value and distinctive flavor. Imagine adding this unique ingredient to your stir-fries, curries, or even using it in refreshing summer drinks!
But why should you learn to grow snake gourd at home? In today’s world, where we’re increasingly conscious of food miles and the impact of our choices on the environment, growing your own produce is a powerful act. Plus, let’s be honest, store-bought snake gourds can be hard to find and often lack the freshness and vibrancy of homegrown ones. I’m here to show you that with a little know-how and some simple techniques, you can successfully cultivate these amazing vegetables, even if you’re a beginner gardener. Get ready to embark on a rewarding journey of growing your own food and adding a touch of the exotic to your table!
Growing Snake Hair Cucumber at Home: A Comprehensive DIY Guide
Hello garden friends! Have you ever heard of the snake hair cucumber? It’s not only a fascinating and unusual vegetable variety, but also relatively easy to grow at home. I’ll show you how you can easily do it yourself. Let’s dive into this exciting gardening adventure together!
What you need for growing snake hair cucumbers
Before we get started, here is a list of the things you will need:
- Snake hair cucumber seeds: Get high-quality seeds from a reliable supplier.
- Seedling pots or trays: For starting the seeds indoors.
- Seed starting mix: A light, well-draining soil.
- Garden soil: For the final bed or pot.
- Compost or organic fertilizer: To improve soil quality.
- Container (optional): If you want to grow the cucumbers in pots.
- Trellis/Support: A trellis, fence, or similar, as snake hair cucumbers are climbing plants.
- Watering can or hose: For watering the plants.
- Pruning shears: For pruning the plants.
- Garden gloves: To protect your hands.
Step-by-Step Guide to Growing Snake Hair Cucumbers
Here is a detailed guide to help you successfully grow snake hair cucumbers:
1. Preparing and Sowing Seeds
- Soak seeds: Place the snake hair cucumber seeds in lukewarm water for 24 hours. This helps to speed up germination.
- Sow in seedling pots: Fill the seedling pots with seed starting mix. Lightly press the soil down and sow 2-3 seeds per pot at a depth of about 1-2 cm.
- Water: Water the soil carefully so that it is moist but not waterlogged.
- Location: Place the seedling pots in a warm and bright location. A temperature of 20-25°C is ideal for germination.
- Germination: The seeds usually germinate within 7-14 days. Keep the soil moist during this time.
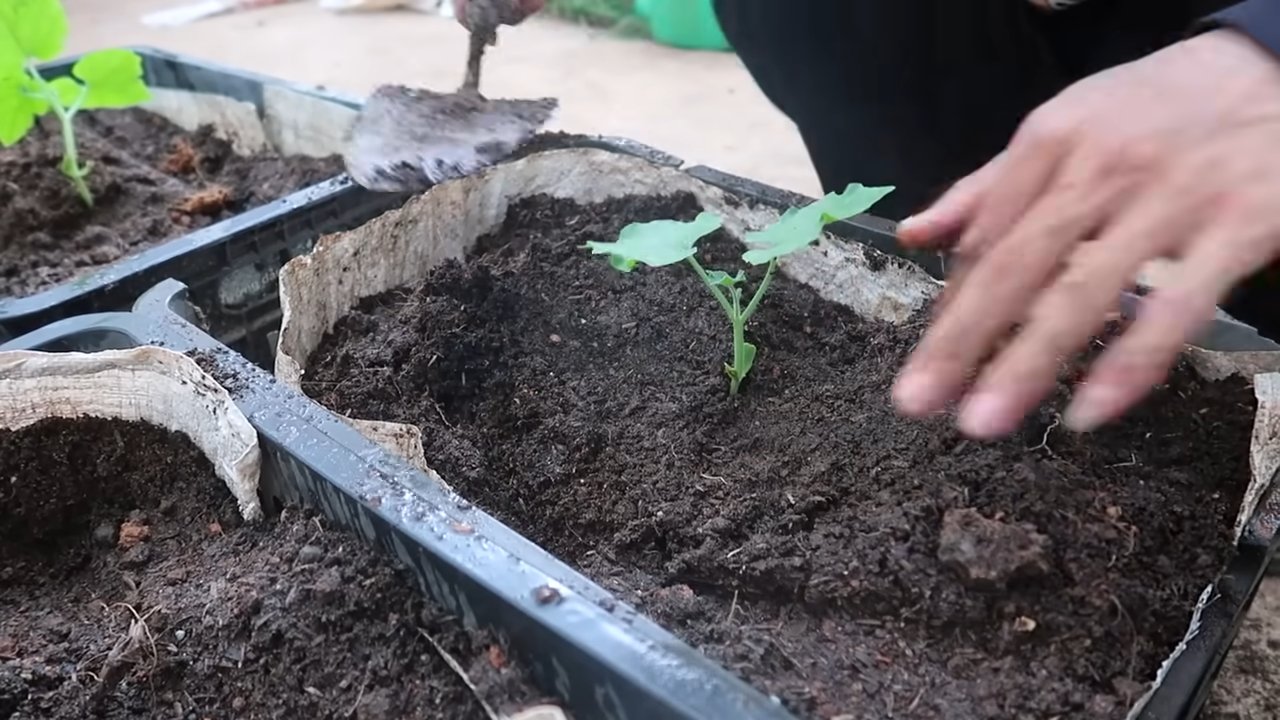
2. Caring for Seedlings
- Thinning: Once the seedlings have a few leaves, thin them out, leaving only the strongest seedling per pot.
- Watering: Water the young plants regularly, but avoid waterlogging.
- Light: Ensure the young plants get enough light. If necessary, use a plant lamp.
- Fertilizing: Start fertilizing the young plants every two weeks with a diluted liquid fertilizer.
3. Planting Outdoors
- Timing: Wait until there is no more risk of frost and the soil temperature is at least 15°C before planting the seedlings outdoors. In Germany, this is usually from mid-May.
- Location selection: Choose a sunny location with well-draining soil. Snake hair cucumbers need at least 6 hours of sunlight per day.
- Soil preparation: Loosen the soil thoroughly and mix in compost or organic fertilizer. This improves the soil structure and provides the plants with nutrients.
- Planting distance: Plant the seedlings about 60-90 cm apart from each other.
- Planting: Dig a hole large enough to accommodate the root ball of the seedling. Carefully place the plant in and fill the hole with soil. Lightly press the soil down and water the plant thoroughly.
4. Installing a Trellis/Support
- Necessity: Snake hair cucumbers are climbing plants and need a support structure to grow.
- Types of supports: You can use a trellis, a fence, a climbing grid, or even a sturdy post.
- Installation: Install the support near the plants so they can attach to it.
- Guidance: Help the plants attach to the support by gently tying them to it.
5. Caring for the Snake Hair Cucumbers
- Watering: Water the plants regularly, especially during dry periods. Make sure the soil is moist but not waterlogged.
- Fertilizing: Fertilize the plants every 2-3 weeks with an organic fertilizer or a special vegetable fertilizer.
- Pruning: Prune the plants regularly to encourage growth and stimulate fruit production. Remove dead or diseased leaves and shoots.
- Protection from pests and diseases: Check the plants regularly for pests and diseases. If necessary, use organic pesticides or fungicides.
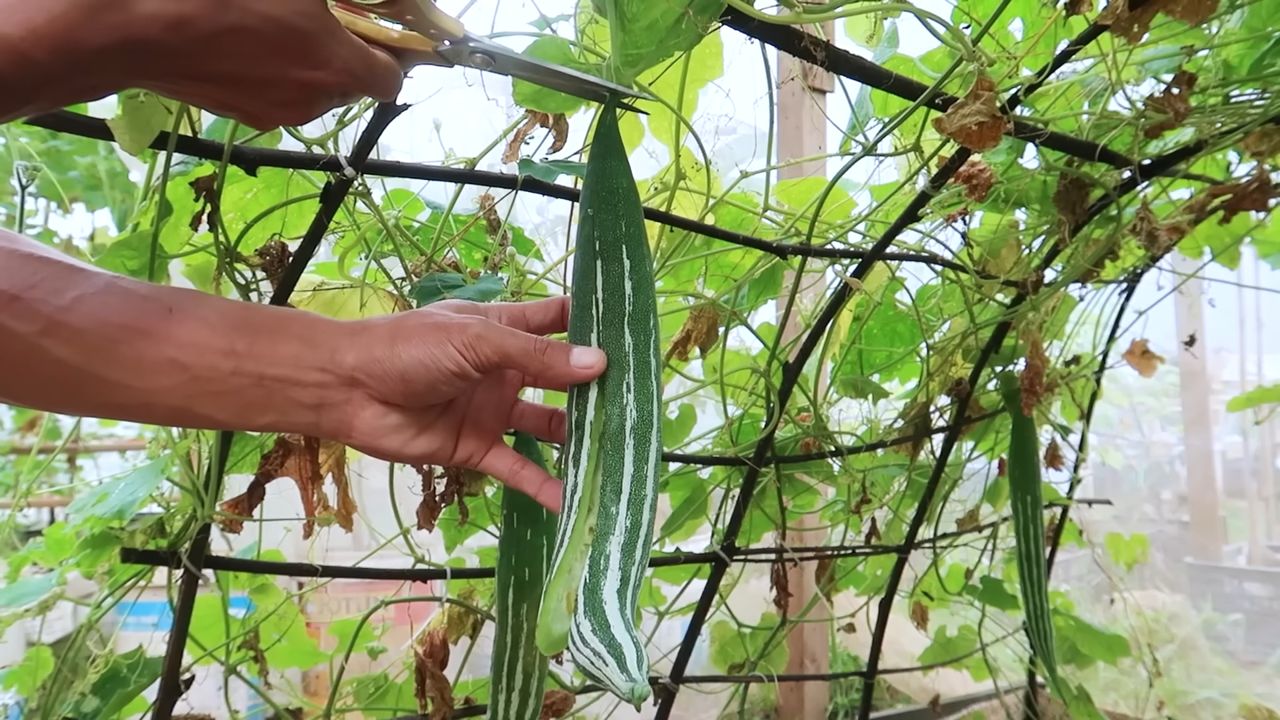
6. Harvesting the Snake Hair Cucumbers
- Timing: Snake hair cucumbers can be harvested when they have reached the desired size. They are usually about 30-60 cm long.
- Harvesting: Cut the cucumbers with pruning shears.
- Frequency: Harvest the cucumbers regularly to encourage further fruit production.
Additional Tips and Tricks
- Pollination: Snake hair cucumbers are cross-pollinators. If you don’t have bees or other pollinators in your garden, you can hand-pollinate the flowers.
- Mulching: Mulch the soil around the plants with straw or other organic material. This helps to retain moisture in the soil and suppress weeds.
- Encouraging fruit set: To encourage fruit set, you can fertilize the plants with a special fruit-setting fertilizer.
- Variety selection: There are different varieties of snake hair cucumbers. Inform yourself about the different varieties and choose the one that best suits your needs and climate.
Common Problems and Solutions
- Yellow leaves: Yellow leaves can be a sign of overwatering, nutrient deficiency, or disease. Check the watering and fertilize the plants if necessary.
- Pests: Snake hair cucumbers can be infested by various pests, such as aphids, spider mites, or snails. Use organic pesticides or pick the pests off by hand.
- Diseases: Snake hair cucumbers can be affected by various diseases, such as powdery mildew or downy mildew. Use fungicides or ensure good air circulation for the plants.
Growing Snake Hair Cucumbers in Pots
If you don’t have a garden, you can also grow snake hair cucumbers in pots.
Care: Water and fertilize the plants regularly. Make sure the pot drains well to avoid waterlogging.
Pot size: Choose a pot with a diameter of at least 45 cm and a volume of at least 30 liters.
Soil: Use a high-quality potting mix or a mixture of garden soil, compost, and sand.
Trellis/Support: Place a support in the pot for the plants to climb on.
Conclusion
So, there you have it! Growing snake gourd at home is not only achievable but also incredibly rewarding. From the satisfaction of nurturing a plant from seed to the joy of harvesting your own fresh produce, this DIY project offers a unique connection to nature and a delicious addition to your culinary repertoire. We’ve walked you through the essential steps, from seed preparation and soil selection to trellising and pest control, providing you with the knowledge and confidence to embark on this exciting gardening adventure.
But why is this DIY trick a must-try? Beyond the obvious benefits of fresh, organic produce, growing your own snake gourd allows you to control the entire process, ensuring that your vegetables are free from harmful pesticides and chemicals. You’ll also be reducing your carbon footprint by minimizing transportation costs associated with store-bought produce. Plus, let’s be honest, there’s something truly special about serving a dish made with ingredients you’ve grown yourself – it’s a conversation starter and a testament to your green thumb!
Don’t be afraid to experiment with variations! Try different trellising methods to see what works best for your space and the growth habits of your snake gourd. Consider companion planting with herbs like basil or marigolds to deter pests naturally. And if you’re feeling adventurous, explore different varieties of snake gourd, each with its own unique flavor and texture. Some varieties are shorter and thicker, while others are long and slender – the possibilities are endless!
Ready to take the plunge and grow your own snake gourd? We encourage you to give it a try! It’s a fun, educational, and ultimately delicious experience. Remember to document your progress, take photos, and share your successes (and challenges!) with us. We’d love to hear about your journey and learn from your experiences. Share your tips, tricks, and photos in the comments section below. Let’s build a community of snake gourd enthusiasts and inspire others to embrace the joys of home gardening.
Ultimately, mastering the art of growing snake gourd at home is about more than just producing vegetables; it’s about connecting with nature, fostering self-sufficiency, and enjoying the fruits (or rather, vegetables) of your labor. So, grab your seeds, prepare your soil, and get ready to embark on a rewarding gardening adventure. Happy growing!
Frequently Asked Questions (FAQ)
What is the best time of year to plant snake gourd seeds?
The ideal time to plant snake gourd seeds is during the late spring or early summer, after the last frost has passed and the soil has warmed up. Snake gourd thrives in warm weather and requires a long growing season to reach its full potential. In regions with mild winters, you may be able to start seeds indoors earlier and transplant them outdoors once the weather permits. Aim for soil temperatures consistently above 70°F (21°C) for optimal germination.
How much sunlight does snake gourd need?
Snake gourd requires at least 6-8 hours of direct sunlight per day to thrive. Choose a planting location that receives ample sunlight throughout the day. If you’re growing snake gourd indoors, supplement with grow lights if necessary to ensure adequate light exposure. Insufficient sunlight can lead to stunted growth, reduced flowering, and lower yields.
What type of soil is best for growing snake gourd?
Snake gourd prefers well-draining, fertile soil that is rich in organic matter. Amend your soil with compost, aged manure, or other organic amendments to improve its fertility and drainage. A slightly acidic to neutral soil pH (6.0-7.0) is ideal. Avoid heavy clay soils, as they can become waterlogged and inhibit root growth. If you have clay soil, consider growing snake gourd in raised beds or containers with a well-draining potting mix.
How often should I water snake gourd plants?
Water snake gourd plants regularly, especially during hot, dry weather. Keep the soil consistently moist, but avoid overwatering, which can lead to root rot. Water deeply at the base of the plant, rather than overhead, to prevent fungal diseases. Mulching around the base of the plant can help retain moisture and suppress weeds. Check the soil moisture regularly and adjust your watering schedule accordingly.
What kind of trellis is best for snake gourd?
Snake gourd vines can grow quite long, so they require a sturdy trellis to support their weight. A strong fence, arbor, or custom-built trellis made of wood or metal are all good options. Ensure that the trellis is tall enough to accommodate the full length of the vines, which can reach 10-15 feet or more. The trellis should also be strong enough to withstand strong winds and heavy fruit loads. Train the vines to climb the trellis by gently guiding them and tying them to the structure as needed.
How do I prevent pests and diseases from affecting my snake gourd plants?
Regularly inspect your snake gourd plants for signs of pests and diseases. Common pests include aphids, squash bugs, and vine borers. Control pests by handpicking them off the plants, using insecticidal soap, or introducing beneficial insects like ladybugs. Prevent fungal diseases by providing good air circulation, avoiding overhead watering, and applying a fungicide if necessary. Practice crop rotation to prevent soilborne diseases from building up.
When is the best time to harvest snake gourd?
Harvest snake gourd when the fruits are young and tender, typically when they are about 12-18 inches long. The skin should be smooth and green, and the flesh should be firm. Overripe snake gourd can become tough and bitter. Use a sharp knife or pruning shears to cut the fruit from the vine, leaving a short stem attached. Harvest regularly to encourage continued fruit production.
Can I eat the seeds of snake gourd?
The seeds of snake gourd are edible but are generally not consumed due to their bitter taste and hard texture. They can be roasted and ground into a powder for use as a spice, but this is not a common practice. It’s best to focus on enjoying the flesh of the snake gourd, which has a mild, slightly sweet flavor.
How can I store snake gourd after harvesting?
Store snake gourd in the refrigerator for up to a week. Wrap the fruits in plastic wrap or place them in a plastic bag to prevent them from drying out. You can also freeze snake gourd for longer storage. Blanch the sliced or diced snake gourd in boiling water for a few minutes, then cool it in ice water before freezing. Frozen snake gourd can be stored for up to several months.
What are some ways to cook with snake gourd?
Snake gourd can be used in a variety of culinary dishes. It can be stir-fried, sautéed, steamed, or added to soups and stews. It has a mild flavor that pairs well with spices, herbs, and other vegetables. In Indian cuisine, snake gourd is often used in curries, dals, and vegetable dishes. It can also be used to make pickles, chutneys, and raitas. Experiment with different recipes and find your favorite way to enjoy this versatile vegetable.


Leave a Comment