

Growing Queen Cabbage at Home might sound like a challenge reserved for seasoned gardeners, but trust me, it’s more achievable (and rewarding!) than you think. Have you ever dreamt of strolling through your backyard, plucking a vibrant, leafy Queen Cabbage straight from the earth, and transforming it into a delicious, healthy meal? Well, stop dreaming and start doing! This DIY guide is your passport to homegrown cabbage bliss.
Cabbage, in general, boasts a rich history, dating back thousands of years. From ancient Rome, where it was prized for its medicinal properties, to medieval Europe, where it sustained entire populations, cabbage has always been a culinary staple. While the “Queen Cabbage” might not have the same ancient lineage as its common cousins, its unique flavor and impressive size make it a worthy addition to any modern garden.
Why should you embark on this growing Queen Cabbage at home adventure? Simple! Freshness, flavor, and control. Store-bought cabbage simply can’t compare to the crisp, vibrant taste of a homegrown head. Plus, you’ll know exactly what went into nurturing your cabbage, avoiding harmful pesticides and ensuring a truly organic experience. In this article, I’ll share my favorite DIY tricks and hacks to help you cultivate a thriving Queen Cabbage patch, even if you’re a complete beginner. Get ready to roll up your sleeves and discover the joy of homegrown goodness!
Growing King Cabbage at Home: Your Comprehensive DIY Guide
Hello, garden friends! Have you ever heard of King Cabbage? This impressive type of cabbage, also known as Tuscan kale or Cavolo Nero, is not only super healthy but also a real eye-catcher in the garden. I’ll show you how you can easily grow this robust and delicious cabbage yourself. Let’s get started!
What you need to grow King Cabbage
Before we begin, here is a list of everything you’ll need:
- Seeds: King Cabbage seeds (Cavolo Nero) are available online or in well-stocked garden centers.
- Seed starting mix: For starting seeds indoors.
- Seedling pots or trays: Small containers for the seedlings.
- Garden soil: Nutrient-rich soil for the garden bed or pot.
- Compost or organic fertilizer: To improve soil quality.
- Watering can or hose: For watering the plants.
- Gardening tools: Spade, shovel, trowel.
- Mulch material: Straw, wood chips, or grass clippings to cover the soil.
- Protective netting (optional): Against cabbage whites and other pests.
- Plant stakes (optional): For additional support if needed.
The Preparation: How to Start Right
The key to a successful King Cabbage harvest lies in proper preparation. Here are the steps you should follow:
1. Starting Seeds Indoors (or in a Greenhouse)
- Sowing time: Start sowing about 6-8 weeks before the last expected frost. In Germany, this is usually in March or April.
- Sowing: Fill the seedling pots with seed starting mix. Lightly press the soil down and sow 2-3 seeds per pot about 1 cm deep.
- Watering: Gently moisten the soil with a spray bottle or watering can. The soil should be moist, but not wet.
- Location: Place the seedling pots in a bright, warm place. A temperature of 18-20°C is ideal for germination.
- Germination: Germination usually takes 5-10 days. Keep the soil moist during this time.
- Pricking out: Once the seedlings have developed their first true leaves (after the cotyledons), you can prick them out. This means removing the weakest plants and transplanting the strongest ones into larger pots. Be careful not to damage the roots.
2. Preparing the Bed or Pot
- Location selection: King Cabbage needs a sunny location with at least 6 hours of sun per day.
- Soil condition: The soil should be loose, rich in humus, and well-draining. King Cabbage prefers a slightly alkaline soil with a pH between 6.5 and 7.5.
- Soil improvement: Before planting, work plenty of compost or organic fertilizer into the soil. This improves the soil structure and provides the plants with important nutrients.
- Preparing the bed: Dig over the bed and remove weeds and stones. Smooth the surface and loosen the soil.
- Preparing the pot: Choose a sufficiently large pot (at least 30 liters) with drainage holes. Fill the pot with a mixture of garden soil and compost.
Planting: Into the Bed or Pot!
After the preparations are complete, it’s time to plant the King Cabbage plants in the bed or pot.
- Hardening off: Before you plant them outdoors, you should harden off the plants. This means placing them outside for a few hours a day for several days to get them used to the sun and temperatures.
- Planting time: Plant the King Cabbage plants in the bed or pot after the last frost.
- Planting distance: Maintain a planting distance of about 60-75 cm between the plants. This gives them enough space to grow.
- Planting: Dig a hole that is slightly larger than the plant’s root ball. Place the plant in it and fill the hole with soil. Press the soil down lightly.
- Watering: Water the plants thoroughly after planting.
- Mulching: Cover the soil around the plants with mulch material. This helps to retain moisture in the soil, suppress weeds, and protect the soil from temperature fluctuations.
The Care: How to Keep Your King Cabbage Healthy and Strong
Proper care is crucial for a bountiful harvest. Here are some tips you should follow:
1. Watering
- Water regularly: King Cabbage needs regular water, especially during dry periods. Make sure the soil is always moist, but not wet.
- Water in the morning: It’s best to water in the morning so that the leaves can dry during the day. This helps to prevent fungal diseases.
- Don’t water over the leaves: Avoid watering over the leaves, as this can promote the spread of diseases. Instead, water directly at the roots.
2. Fertilizing
- Fertilize regularly: King Cabbage is a heavy feeder and needs regular nutrients. Fertilize the plants every 2-3 weeks with an organic fertilizer or compost tea.
- Nitrogen-rich fertilizer: During the growth phase, a nitrogen-rich fertilizer is ideal to promote leaf growth.
- Potassium-rich fertilizer: Before harvesting, you can use a more potassium-rich fertilizer to strengthen the plants’ resistance.
3. Pest Control
- Cabbage whites: Cabbage whites are common pests that eat the leaves of King Cabbage. You can keep them away with a protective net or by picking off the caterpillars.
- Flea beetles: Flea beetles can eat small holes in the leaves. You can combat them with crop protection nets or by regular watering and mulching.
- Aphids: Aphids can settle on the leaves and suck them out. You can rinse them off with a jet of water or combat them with a biological insecticide.
- Cabbage fly: The larvae of the cabbage fly feed on the roots. You can combat them with crop protection nets or by applying nematodes.
4. Weed Control
- Weed regularly: Remove weeds regularly to prevent them from taking nutrients and water from the King Cabbage.
- Mulching: Mulching helps to suppress weed growth.
5. Additional Tips
- Harvest regularly: Harvest the leaves regularly to encourage the growth of new leaves. Start with the lower leaves and work your way up.
- Plant stakes: If necessary, you can support the plants with stakes, especially if they grow tall or are exposed to strong winds.
- Prevent diseases: Ensure good ventilation and avoid waterlogging to prevent diseases.
The Harvest: Finally Enjoying King Cabbage!
The harvest season for King Cabbage usually begins in the fall and lasts into the winter.

Conclusion
So, there you have it! Growing Queen Cabbage at home isn’t just a gardening project; it’s an investment in fresh, flavorful, and nutritious food right at your doorstep. We’ve walked you through the essential steps, from selecting the right seeds and preparing your soil to nurturing your seedlings and protecting your precious plants from pests. The satisfaction of harvesting your own Queen Cabbage, knowing exactly where it came from and what went into its growth, is truly unparalleled.
But why is this DIY trick a must-try? Beyond the obvious benefits of fresh produce, growing your own Queen Cabbage allows you to control the entire process. You can choose organic methods, avoid harmful pesticides, and select varieties that are perfectly suited to your local climate. Plus, it’s a fantastic way to connect with nature, de-stress, and learn new skills. Imagine the pride you’ll feel when you serve a salad featuring your own homegrown Queen Cabbage to family and friends!
Don’t be afraid to experiment with variations! Try different companion plants to deter pests naturally. Consider succession planting to ensure a continuous harvest throughout the growing season. You could even explore growing Queen Cabbage in containers if you have limited garden space. The possibilities are endless!
We understand that gardening can sometimes feel daunting, but we’re confident that with a little patience and dedication, you can successfully grow your own Queen Cabbage. Remember to start small, be observant, and don’t be afraid to ask for help. There’s a wealth of information available online and in your local community.
Now, it’s your turn! We encourage you to take the plunge and try growing Queen Cabbage at home. We’re eager to hear about your experiences, both the successes and the challenges. Share your photos, tips, and questions in the comments below. Let’s create a community of Queen Cabbage enthusiasts and learn from each other. Happy gardening!
Frequently Asked Questions (FAQs)
1. What is Queen Cabbage, and why should I grow it?
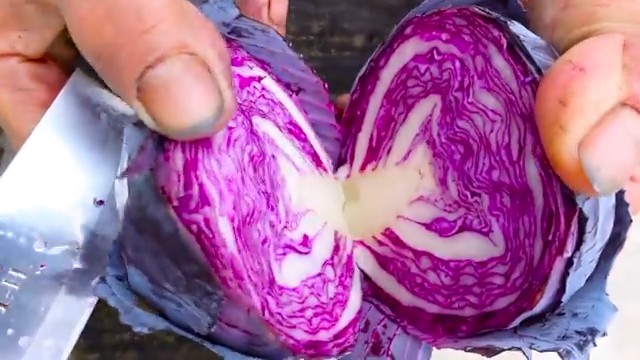
Queen Cabbage is a variety of cabbage known for its large size, dense head, and sweet, mild flavor. It’s an excellent source of vitamins, minerals, and fiber, making it a healthy addition to your diet. Growing it yourself ensures you have access to fresh, organic produce, free from harmful pesticides and herbicides. Plus, it’s a rewarding and enjoyable gardening experience!
2. What is the best time to plant Queen Cabbage?
The best time to plant Queen Cabbage depends on your climate. In general, it’s a cool-season crop, so you’ll want to plant it in early spring or late summer for a fall harvest. If you live in a warmer climate, you may be able to grow it throughout the winter. Check your local gardening resources for specific planting dates in your area. Starting seeds indoors 6-8 weeks before the last expected frost is a great way to get a head start.
3. What kind of soil does Queen Cabbage need?
Queen Cabbage thrives in well-drained, fertile soil that is rich in organic matter. Amend your soil with compost or well-rotted manure before planting to improve its structure and nutrient content. A slightly acidic soil pH of 6.0 to 7.0 is ideal. Consider getting a soil test to determine the pH and nutrient levels of your soil and adjust accordingly.
4. How much sunlight does Queen Cabbage require?
Queen Cabbage needs at least 6 hours of direct sunlight per day to grow properly. Choose a sunny location in your garden where your plants will receive ample sunlight. If you live in a particularly hot climate, some afternoon shade may be beneficial to prevent the leaves from scorching.
5. How often should I water my Queen Cabbage plants?
Water your Queen Cabbage plants regularly, especially during dry periods. Aim to keep the soil consistently moist but not waterlogged. Water deeply at the base of the plants, avoiding wetting the leaves, which can increase the risk of fungal diseases. Mulching around the plants can help retain moisture in the soil.
6. What are some common pests and diseases that affect Queen Cabbage?
Common pests that can affect Queen Cabbage include cabbage worms, aphids, and flea beetles. Diseases include clubroot, black rot, and downy mildew. Regularly inspect your plants for signs of pests or diseases and take action promptly. Organic pest control methods, such as handpicking pests, using insecticidal soap, or introducing beneficial insects, can be effective. Ensure good air circulation around your plants to prevent fungal diseases.
7. How do I prevent cabbage worms from eating my Queen Cabbage?
Cabbage worms are a common pest that can decimate your Queen Cabbage crop. To prevent them, consider using row covers to protect your plants from moths laying eggs. Bacillus thuringiensis (Bt) is a safe and effective organic insecticide that can be used to control cabbage worms. Regularly inspect your plants and handpick any worms you find. Companion planting with herbs like dill or thyme can also help deter cabbage moths.
8. When is Queen Cabbage ready to harvest?
Queen Cabbage is typically ready to harvest when the head is firm and dense. The exact time will depend on the variety and growing conditions, but it usually takes about 80-100 days from planting. Gently squeeze the head to check for firmness. If it feels solid, it’s likely ready to harvest.
9. How do I harvest Queen Cabbage?
To harvest Queen Cabbage, use a sharp knife to cut the head from the stem, leaving a few outer leaves attached. You can also leave the roots in the ground, as they may produce smaller side shoots that you can harvest later.
10. Can I grow Queen Cabbage in containers?
Yes, you can grow Queen Cabbage in containers, but you’ll need a large container with good drainage. Choose a container that is at least 12 inches in diameter and 12 inches deep. Use a high-quality potting mix and water regularly. Container-grown Queen Cabbage may require more frequent fertilization than plants grown in the ground.
11. What are some good companion plants for Queen Cabbage?
Good companion plants for Queen Cabbage include dill, thyme, rosemary, marigolds, and nasturtiums. These plants can help deter pests, attract beneficial insects, and improve the overall health of your Queen Cabbage plants. Avoid planting Queen Cabbage near other members of the brassica family, such as broccoli, cauliflower, and kale, as they can attract the same pests and diseases.
12. How do I store Queen Cabbage after harvesting?
Store Queen Cabbage in a cool, dry place, such as a refrigerator or root cellar. Wrap the head in plastic wrap or a plastic bag to prevent it from drying out. Properly stored Queen Cabbage can last for several weeks.
13. Can I save seeds from my Queen Cabbage for next year?
Saving seeds from Queen Cabbage can be challenging, as it is a biennial plant, meaning it typically takes two years to produce seeds. You’ll need to overwinter the plant and allow it to flower and produce seeds in the second year. However, if you’re growing hybrid varieties, the seeds may not produce plants that are true to type.
14. Where can I find Queen Cabbage seeds or seedlings?
You can find Queen Cabbage seeds or seedlings at most garden centers or online seed retailers. Look for reputable suppliers that offer high-quality seeds and seedlings. Be sure to choose varieties that are well-suited to your local climate.
15. What if my Queen Cabbage doesn’t form a head?
If your Queen Cabbage doesn’t form a head, it could be due to several factors, such as insufficient sunlight, poor soil, or inadequate watering. Ensure your plants are receiving at least 6 hours of direct sunlight per day, are planted in fertile, well-drained soil, and are watered regularly. Fertilizing with a balanced fertilizer can also help promote head formation.
Leave a Comment