

Cucumber growing mistakes can turn your dreams of crisp, refreshing salads into a vine of frustration. Have you ever envisioned yourself strolling through your garden, effortlessly plucking juicy cucumbers, only to be met with yellowing leaves, misshapen fruits, or a complete lack of produce? You’re not alone! For centuries, cucumbers have been cultivated, dating back to ancient India, where they were prized for their cooling properties and versatility. From Cleopatra’s beauty regime to Roman emperors’ feasts, cucumbers have a rich history, but even with all that accumulated knowledge, common pitfalls can still sabotage your harvest.
That’s why I’m here to guide you through the most common cucumber growing mistakes and, more importantly, how to avoid them. We’ll delve into everything from soil preparation and watering techniques to pest control and pollination strategies. Imagine the satisfaction of finally enjoying a bountiful cucumber harvest, knowing you’ve conquered the challenges and unlocked the secrets to successful home gardening. This isn’t just about growing cucumbers; it’s about empowering you to create a thriving garden and enjoy the fruits (or vegetables!) of your labor. Let’s get started and turn those gardening dreams into a delicious reality!
Cucumber Growing Made Easy: Avoid These Common Mistakes for a Bountiful Harvest!
Hello dear garden friends! I’m so excited to guide you through the world of cucumber growing today. Cucumbers are simply fantastic – crisp, refreshing, and versatile. But let’s be honest, sometimes they can be quite fussy. Don’t worry, I’ve made the most common mistakes in cucumber cultivation myself and learned how to avoid them. With my tips and tricks, you’ll soon be bringing in a plentiful cucumber harvest!
The right preparation is everything!
Before we even start putting seeds in the ground, we need to make sure the basics are right. Here are the most important points:
- The right location: Cucumbers love the sun! Choose a location that gets at least 6-8 hours of direct sunlight per day.
- The perfect soil: Cucumbers need well-drained, nutrient-rich soil. You should definitely improve heavy clay soils with compost or other organic material.
- The right variety: There are countless cucumber varieties! Think about what kind of cucumbers you like to eat most (slicing cucumbers, pickling cucumbers, etc.) and choose a variety that is suitable for your climate.
Step-by-Step Guide to Sowing and Planting
Now let’s get down to it! Here is a detailed guide on how to sow and plant your cucumbers correctly:
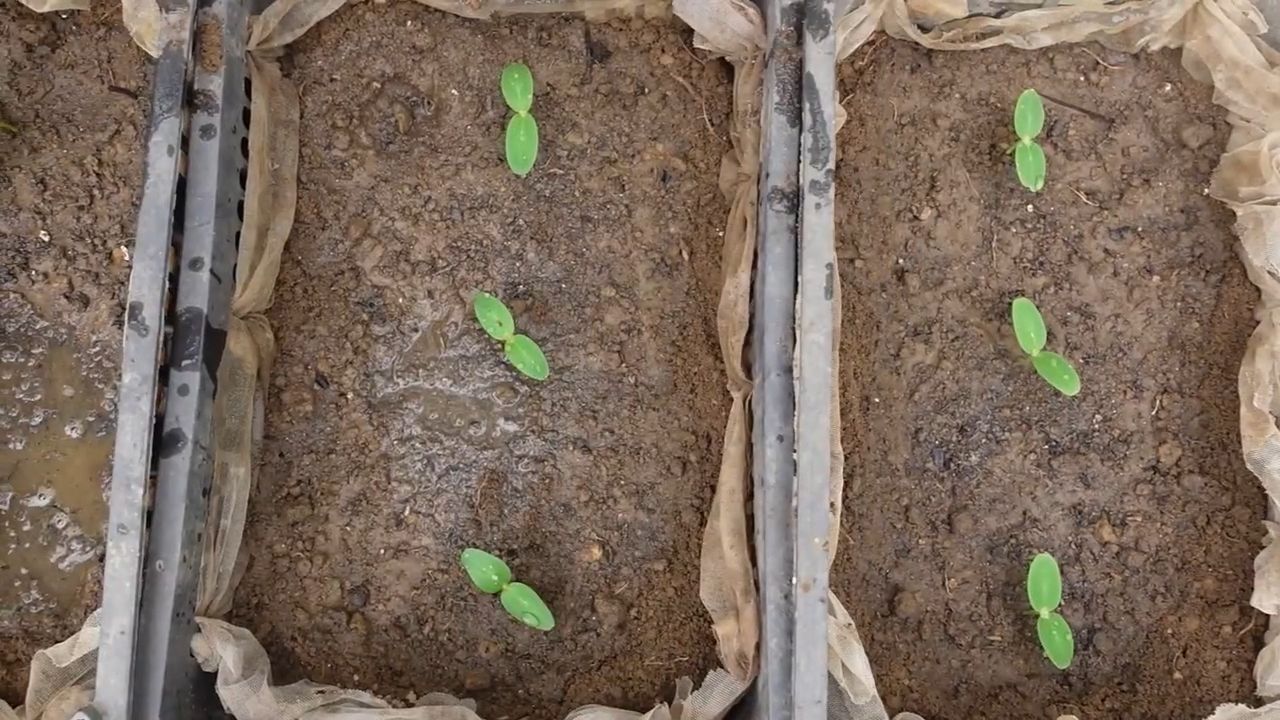
- Sowing: You can either sow cucumbers directly outdoors or start them indoors. I personally prefer starting them indoors, as the plants then have a little head start.
- Starting indoors: Start about 3-4 weeks before the last expected frost. Fill small pots with seed starting mix and sow 2-3 seeds per pot. Keep the soil moist and place the pots in a warm, bright place.
- Direct sowing: When there is no more danger of frost, you can sow the cucumbers directly outdoors. Prepare the soil by loosening it and enriching it with compost. Sow the seeds at a distance of about 30 cm.
- Planting: When the pre-grown cucumber plants are large enough (about 10-15 cm high), they can be transplanted outdoors.
- Preparing the planting hole: Dig a hole that is slightly larger than the root ball of the plant. Add some compost or organic fertilizer to the hole.
- Placing the plant: Carefully remove the plant from the pot and place it in the planting hole. Be careful not to damage the root ball.
- Filling and watering: Fill the hole with soil and press it down lightly. Water the plant thoroughly.
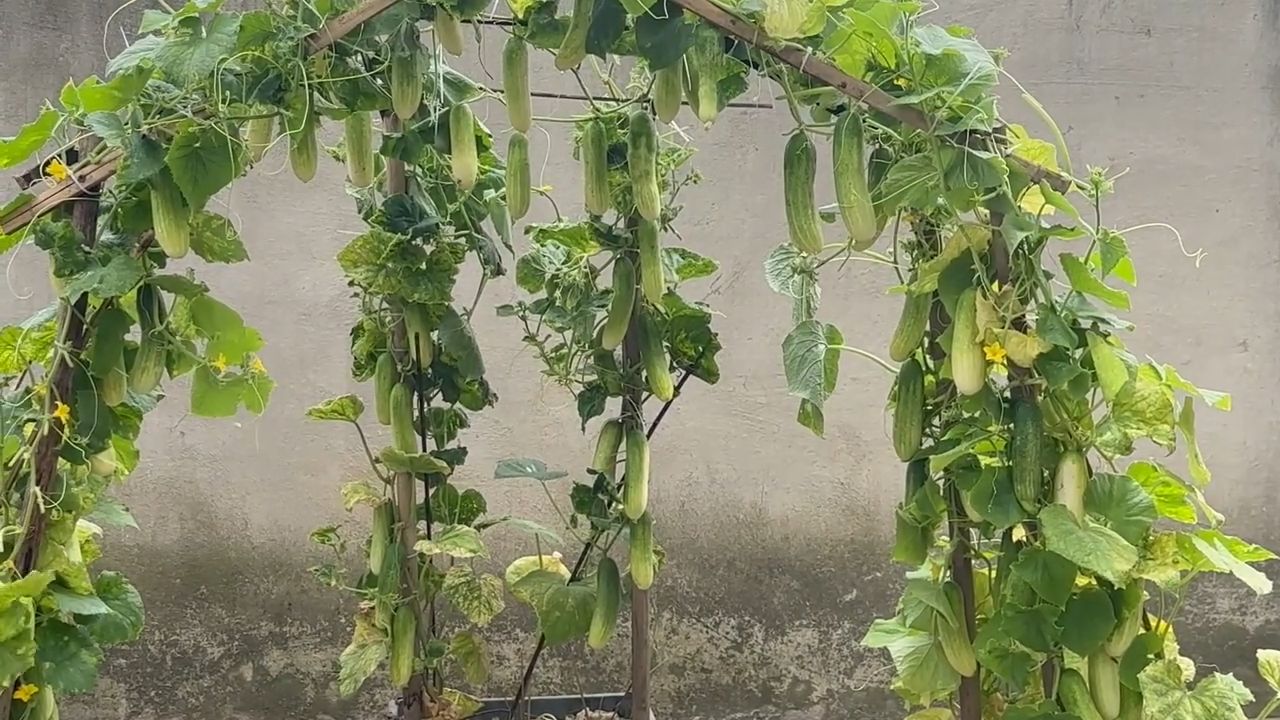
- Trellis: Cucumbers are climbing plants and need a trellis. You can use a wire rack, a fence, or just stakes. The trellis helps the plants to stand upright and provides better ventilation, which can prevent diseases.
The most common mistakes in watering and fertilizing
Watering and fertilizing are crucial for a healthy cucumber harvest. Here are the most common mistakes you should avoid:
- Too little water: Cucumbers need a lot of water, especially during fruit formation. Make sure to always keep the soil moist, but avoid waterlogging.
- Improper watering: It’s best to water the cucumbers in the morning so the leaves can dry during the day. Avoid watering the leaves directly, as this can promote fungal diseases. Instead, water directly at the roots.
- Too much fertilizer: Too much fertilizer can damage the plants. Use a balanced fertilizer and stick to the dosage instructions.
- Wrong fertilizer: Cucumbers need a fertilizer that is rich in potassium to promote fruit formation. Avoid fertilizers that contain too much nitrogen, as this can lead to lush leaf growth but few fruits.
Protection from pests and diseases
Unfortunately, cucumbers are susceptible to various pests and diseases. Here are some tips on how to protect your plants:
- Pests:
- Aphids: Aphids can be rinsed off with a jet of water or treated with an insecticide.
- Spider mites: Spider mites love dry conditions. Increase the humidity by spraying the plants regularly.
- Cucumber beetles: Cucumber beetles can damage the leaves and fruits. Collect them by hand or use an insecticide.
- Diseases:
- Powdery mildew: Powdery mildew is a fungal disease that is characterized by a white coating on the leaves. Ensure good ventilation and remove affected leaves.
- Downy mildew: Downy mildew is another fungal disease that is characterized by yellow spots on the leaves. Use a fungicide to prevent it from spreading.
- Cucumber mosaic virus: Cucumber mosaic virus is a viral disease that is characterized by mosaic-like patterns on the leaves. There is no cure for the virus. Remove affected plants to prevent it from spreading.
Harvest time!
Finally, the time has come! The cucumbers are ripe and can be harvested.
- The right time: Harvest the cucumbers when they have reached the desired size and color. Cucumbers that are too large can become bitter.
- The right technique: Cut the cucumbers from the stem with a sharp knife or scissors. Do not pull on the cucumbers, as this can damage the plant.
- Regular harvesting: Harvest the cucumbers regularly to encourage the production of new fruits.
Additional tips for a successful cucumber harvest
Here are a few more tips that will help you get an even better cucumber harvest:
- Mulching: Mulch the soil around the cucumber plants to retain moisture and suppress weeds.
- Crop rotation: Do not plant cucumbers in the same location every year to prevent diseases and pests.
- Pollination: Cucumbers need pollination to produce fruit. If you don’t have bees or other pollinators in your garden, you can pollinate the flowers by hand.
- Regular inspection: Check your cucumber plants regularly for pests and diseases. The earlier you identify problems, the easier it is to fix them.
Common mistakes and how to avoid them (in detail)
Let’s dive deeper into the most common mistakes and discuss exactly how you can avoid them:
How to avoid it: Feel the soil! It should be moist, but not wet. Water deeply and less often, rather than shallowly and often. Mulching
Mistake: Sowing/planting too early:
Why it happens: Impatience! We all want to get started as soon as possible, but cucumbers are sensitive to frost.
How to avoid it: Wait until the danger of frost has really passed. Watch the weather forecast and be patient. If you are starting them indoors, don’t start too early – 3-4 weeks before the last frost is plenty of time.
Mistake: Improper watering (too much or too little):
Why it happens: Lack of knowledge about the plant’s needs or irregular observation.
Conclusion
So, there you have it! Avoiding these common cucumber growing mistakes is the key to unlocking a bountiful harvest of crisp, delicious cucumbers right from your own garden. We’ve covered everything from soil preparation and watering techniques to pest control and pollination strategies. Ignoring these crucial aspects can lead to stunted growth, bitter fruits, and a whole lot of frustration.
But don’t let that scare you! Growing cucumbers can be incredibly rewarding, and with a little knowledge and attention, you can easily overcome these potential pitfalls. Think of it this way: each mistake avoided is a step closer to enjoying homemade pickles, refreshing salads, and flavorful additions to your favorite dishes.
This isn’t just about growing cucumbers; it’s about cultivating a connection with nature, learning new skills, and experiencing the satisfaction of nurturing something from seed to table. And the best part? You don’t need a sprawling farm to enjoy the fruits (or vegetables!) of your labor. Cucumbers thrive in containers, raised beds, and even small garden plots, making them accessible to gardeners of all levels and spaces.
Consider experimenting with different cucumber varieties to find your favorites. Bush cucumbers are ideal for smaller spaces, while vining cucumbers offer a larger yield if you have room to trellis them. You can also explore different pickling methods, fermentation techniques, and culinary applications to truly personalize your cucumber experience.
Don’t be afraid to get your hands dirty, embrace the learning process, and most importantly, have fun! Gardening is a journey, not a destination, and every season brings new opportunities to learn and grow.
We’re confident that by implementing these tips and avoiding these common cucumber growing mistakes, you’ll be well on your way to a successful and satisfying harvest. Now, it’s your turn! Get out there, plant those seeds, and watch your cucumber dreams come to life.
We’d love to hear about your experiences! Share your successes, challenges, and any unique tips you’ve discovered in the comments below. Let’s create a community of cucumber enthusiasts and learn from each other. Happy gardening!
Frequently Asked Questions (FAQ)
Why is my cucumber plant producing flowers but no cucumbers?
This is a common issue, and there are several potential causes. One of the most frequent reasons is inadequate pollination. Cucumbers are typically pollinated by bees, so if you’re not seeing much bee activity in your garden, you may need to hand-pollinate the flowers. To do this, use a small paintbrush to transfer pollen from the male flowers (those with a thin stem behind the flower) to the female flowers (those with a small cucumber-like structure behind the flower). Another possibility is that the plant is stressed due to lack of water, nutrients, or extreme temperatures. Ensure your cucumber plants are receiving consistent moisture, are fertilized regularly with a balanced fertilizer, and are protected from harsh weather conditions. Some cucumber varieties are also parthenocarpic, meaning they don’t require pollination to produce fruit. If you’re still having trouble, consider switching to one of these varieties.
My cucumber leaves are turning yellow. What’s wrong?
Yellowing leaves can indicate a variety of problems. Overwatering is a common culprit, as it can lead to root rot. Make sure your soil is well-draining and avoid watering too frequently. Nutrient deficiencies, particularly nitrogen, can also cause yellowing leaves. Amend your soil with compost or use a fertilizer rich in nitrogen. Pests, such as spider mites or aphids, can also suck the sap from the leaves, causing them to turn yellow. Inspect your plants regularly for signs of pests and treat them accordingly with insecticidal soap or neem oil. Finally, fungal diseases like powdery mildew can also cause yellowing. Ensure good air circulation around your plants and treat with a fungicide if necessary.
How often should I water my cucumber plants?
Cucumbers need consistent moisture to thrive, especially during hot weather. Aim to water deeply and regularly, providing about 1-2 inches of water per week. The best way to determine if your plants need water is to check the soil moisture. Stick your finger about an inch into the soil; if it feels dry, it’s time to water. Avoid overhead watering, as this can promote fungal diseases. Instead, water at the base of the plant, using a soaker hose or drip irrigation system. Mulching around your cucumber plants can also help retain moisture and suppress weeds.
What’s the best fertilizer for cucumber plants?
Cucumbers are heavy feeders and benefit from regular fertilization. A balanced fertilizer with an NPK ratio of 10-10-10 or 14-14-14 is a good starting point. You can also use a fertilizer specifically formulated for vegetables. Apply fertilizer according to the package directions, typically every 2-3 weeks. In addition to chemical fertilizers, you can also amend your soil with organic matter, such as compost or well-rotted manure. These amendments provide a slow-release source of nutrients and improve soil drainage and structure. During the fruiting stage, you may want to switch to a fertilizer with a higher potassium content to promote fruit development.
How do I prevent pests and diseases from attacking my cucumber plants?
Prevention is key when it comes to pests and diseases. Start by choosing disease-resistant cucumber varieties. Ensure good air circulation around your plants by spacing them properly and pruning any overcrowded foliage. Inspect your plants regularly for signs of pests or diseases and take action promptly. Insecticidal soap and neem oil are effective treatments for many common cucumber pests, such as aphids, spider mites, and cucumber beetles. For fungal diseases like powdery mildew, use a fungicide or try a homemade remedy like baking soda spray. Crop rotation can also help prevent soilborne diseases from building up. Finally, keep your garden clean and free of debris, as this can provide a breeding ground for pests and diseases.
Why are my cucumbers bitter?
Bitterness in cucumbers is often caused by stress, such as inconsistent watering, extreme temperatures, or poor soil conditions. Cucurbitacins, the compounds responsible for bitterness, are produced in higher concentrations when the plant is stressed. To prevent bitterness, ensure your cucumber plants receive consistent moisture, are protected from extreme temperatures, and are grown in fertile, well-draining soil. Some cucumber varieties are also less prone to bitterness than others. You can also try peeling the cucumber before eating it, as the highest concentration of cucurbitacins is found in the skin.
When is the best time to harvest cucumbers?
The best time to harvest cucumbers depends on the variety and your personal preference. Generally, cucumbers are ready to harvest when they are firm, green, and have reached the desired size for their variety. Overripe cucumbers can become yellow, seedy, and bitter. Harvest cucumbers regularly to encourage continued production. Use a sharp knife or pruners to cut the cucumber from the vine, leaving a small stem attached. Handle cucumbers gently to avoid bruising.
Can I grow cucumbers in containers?
Yes, cucumbers can be successfully grown in containers. Choose a large container, at least 12 inches in diameter, with good drainage. Use a high-quality potting mix and provide a trellis or support for vining varieties. Container-grown cucumbers may require more frequent watering and fertilization than those grown in the ground. Choose bush cucumber varieties for smaller containers.
What are some good companion plants for cucumbers?
Companion planting can help improve the health and productivity of your cucumber plants. Some good companion plants for cucumbers include marigolds, nasturtiums, and radishes, which can help deter pests. Dill and basil can also attract beneficial insects. Avoid planting cucumbers near aromatic herbs like sage, as they can inhibit growth.
How do I save cucumber seeds for next year?
Saving cucumber seeds is a great way to preserve your favorite varieties. Allow a few cucumbers to ripen fully on the vine until they turn yellow or orange. Scoop out the seeds and pulp and place them in a jar with water. Allow the mixture to ferment for a few days, stirring occasionally. This process will help remove the gelatinous coating from the seeds. After fermentation, rinse the seeds thoroughly and spread them out on a paper towel to dry completely. Store the dried seeds in an airtight container in a cool, dark, and dry place.
Leave a Comment