

Grow Leeks at Home: Your Guide to a Bountiful Harvest
Growing leeks at home might seem daunting, but I’m here to tell you it’s easier than you think! This article is your passport to a world of delicious, homegrown leeks, bursting with flavor and far surpassing anything you’ll find in the supermarket. Forget bland, supermarket leeks; prepare for a culinary adventure!
For centuries, leeks have held a significant place in various cultures. From ancient Egypt, where they were considered a sacred plant, to their prominent role in Welsh culture (they’re even the national emblem!), leeks have a rich history interwoven with human civilization. But you don’t need to be a historian or a seasoned gardener to enjoy the benefits of growing leeks at home.
Why Grow Your Own Leeks?
There are so many reasons to embark on this rewarding journey! Firstly, homegrown leeks possess an unparalleled flavor – intensely sweet and subtly savory, a far cry from the often-lackluster store-bought varieties. Secondly, you control the growing process, ensuring your leeks are free from pesticides and other potentially harmful chemicals. And finally, the sheer satisfaction of harvesting your own delicious leeks is incredibly rewarding. It’s a connection to the earth and a taste of true self-sufficiency.
In this article, I’ll share my tried-and-true grow leeks at home techniques, from seed starting to harvesting, including helpful tips and tricks to ensure a bountiful harvest. Get ready to transform your garden (or even a sunny windowsill!) into a leek-growing paradise. Let’s get started!
Growing Leeks from Seed: A Comprehensive DIY Guide
Leeks, those subtly sweet and savory members of the onion family, are surprisingly easy to grow at home. Follow this guide, and you’ll be enjoying your own homegrown leeks in no time!
Phase 1: Planning and Preparation
- Choose your leek variety: Research different leek varieties to find one that suits your climate and growing season. Consider factors like maturity time and size. Some popular choices include ‘King Richard’, ‘Musselburgh’, and ‘American Flag’.
- Select your location: Leeks need at least six hours of sunlight per day. Choose a sunny spot in your garden with well-drained soil. Leeks prefer slightly acidic soil (pH 6.0-6.8).
- Prepare the soil: Leeks need loose, fertile soil. Amend heavy clay soil with compost or other organic matter to improve drainage and aeration. For sandy soil, add peat moss or other organic matter to improve water retention. I like to dig down about 12 inches and incorporate a generous amount of compost.
- Gather your supplies: You’ll need leek seeds, seed starting trays or pots, seed starting mix, gardening gloves, a watering can, and a trowel or hand cultivator. Optional: row covers for frost protection, and a garden hoe.
Phase 2: Starting Seeds Indoors (Optional but Recommended)
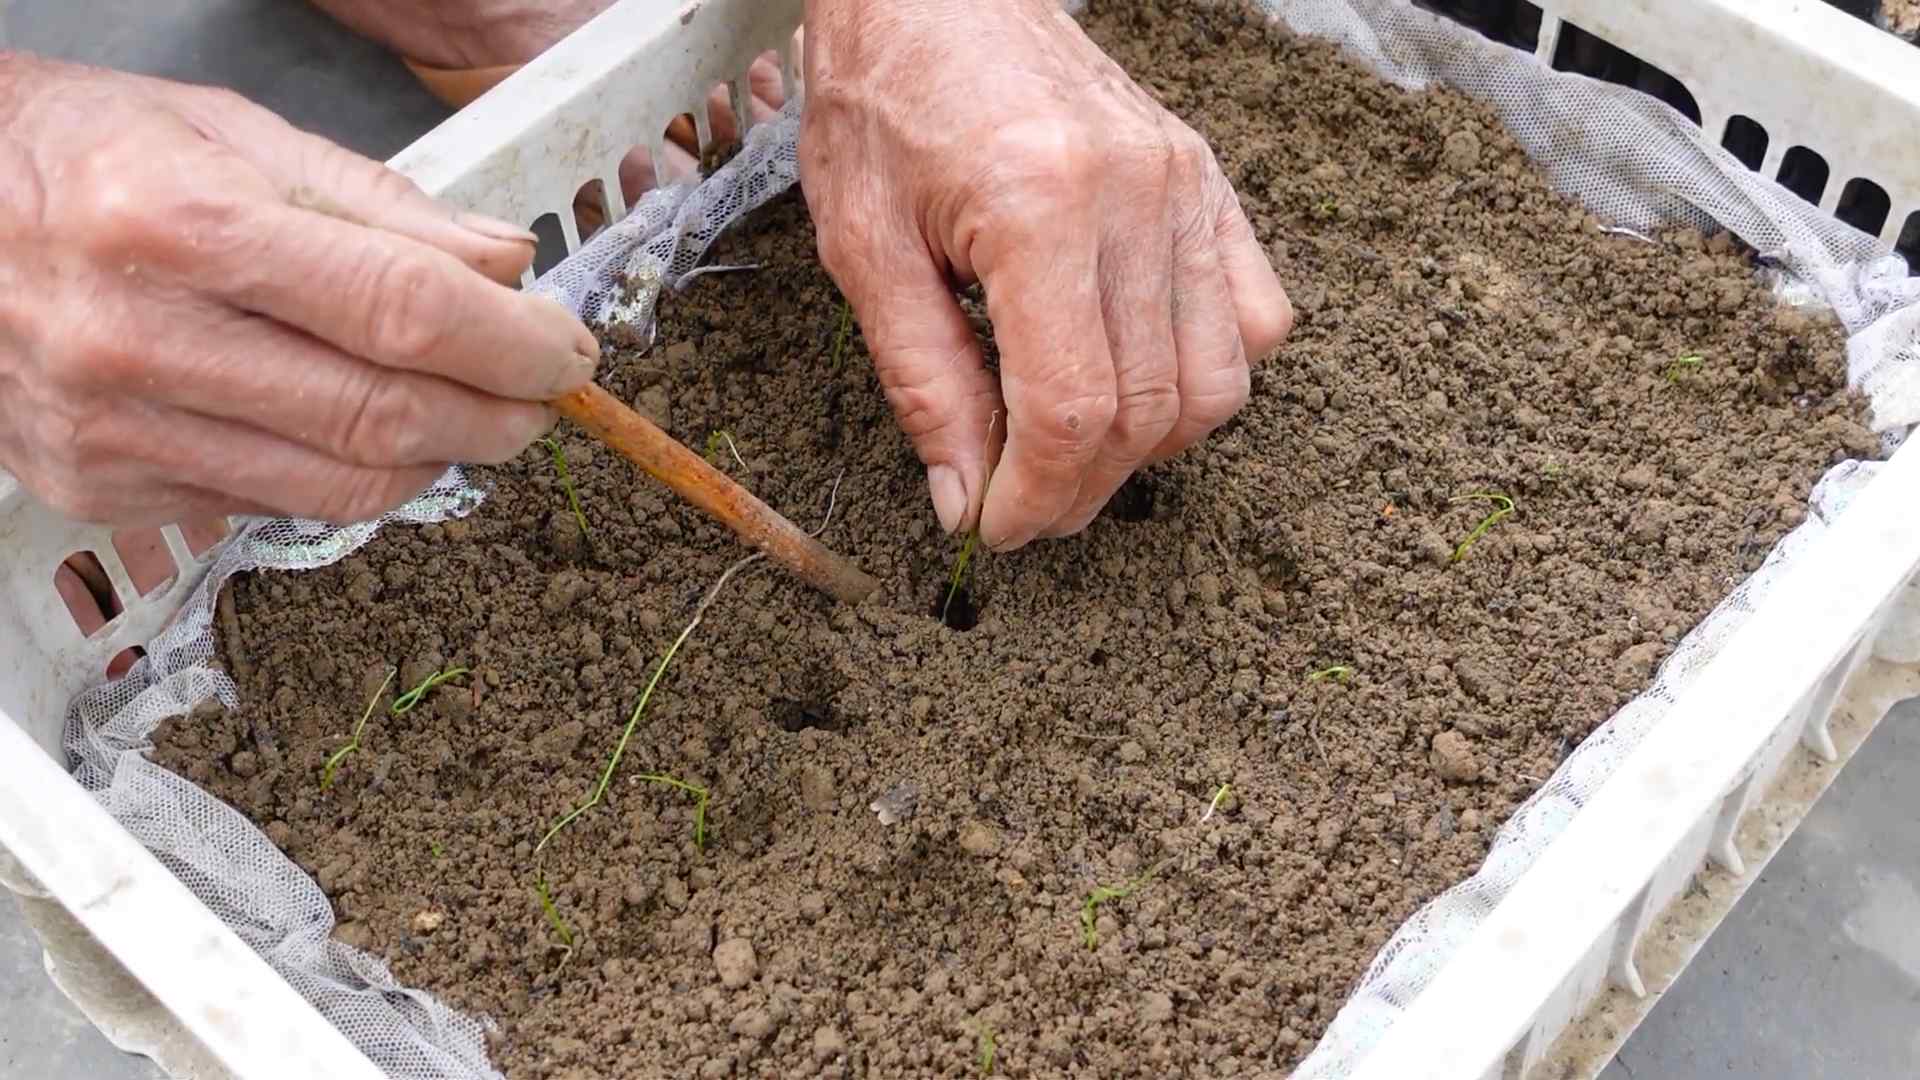
- Sow the seeds: Start seeds indoors 6-8 weeks before the last expected frost in your area. Sow seeds about ¼ inch deep and 1 inch apart in seed starting trays filled with seed starting mix. Gently firm the soil around the seeds.
- Water gently: Water the seeds thoroughly but gently, avoiding washing them out of the soil. Use a watering can with a fine rose to avoid disturbing the seeds.
- Provide warmth and light: Place the trays in a warm location (around 70-75°F) with plenty of sunlight. You may need to supplement with grow lights, especially during shorter winter days. I usually place mine on a sunny windowsill and supplement with a grow light for a few hours each day.
- Maintain moisture: Keep the soil consistently moist but not soggy. Allow the top inch of soil to dry slightly between waterings. Overwatering can lead to damping off, a fungal disease that can kill seedlings.
- Thin seedlings: Once the seedlings have developed their first true leaves (the leaves that appear after the cotyledons), thin them to one seedling per cell or pot. This gives each seedling enough space to grow strong and healthy.
- Harden off seedlings: A few weeks before transplanting outdoors, begin hardening off the seedlings. Gradually expose them to outdoor conditions for increasing periods of time each day to acclimate them to the elements. Start with a few hours and gradually increase the time until they can tolerate full sun and temperature fluctuations.
Phase 3: Transplanting and Growing
- Prepare the planting site: Once the danger of frost has passed, prepare the planting site. Loosen the soil and remove any weeds or rocks. I like to create furrows about 6 inches deep and 12 inches apart.
- Transplant the seedlings: Carefully remove the seedlings from their containers, being careful not to damage the roots. Plant them in the furrows, spacing them about 4-6 inches apart. Plant them deeply, burying most of the stem to encourage long, white stalks. This is crucial for getting nice, long leeks.
- Water thoroughly: Water the newly transplanted seedlings thoroughly to help them settle in. Continue to water regularly, especially during dry periods.
- Weed regularly: Keep the area around the leeks free of weeds to prevent competition for nutrients and water. Regular weeding also helps to improve air circulation, reducing the risk of fungal diseases.
- Mulch (optional): Applying a layer of mulch around the plants can help to retain moisture, suppress weeds, and regulate soil temperature.
- Fertilize (optional): If your soil is poor in nutrients, you can apply a balanced fertilizer a few weeks after transplanting. Follow the instructions on the fertilizer package carefully.
- Blanch (optional): For a milder flavor and whiter stalks, you can blanch the leeks by mounding soil around the base of the plants as they grow. This prevents sunlight from reaching the lower part of the stalk.
Phase 4: Harvesting and Storage
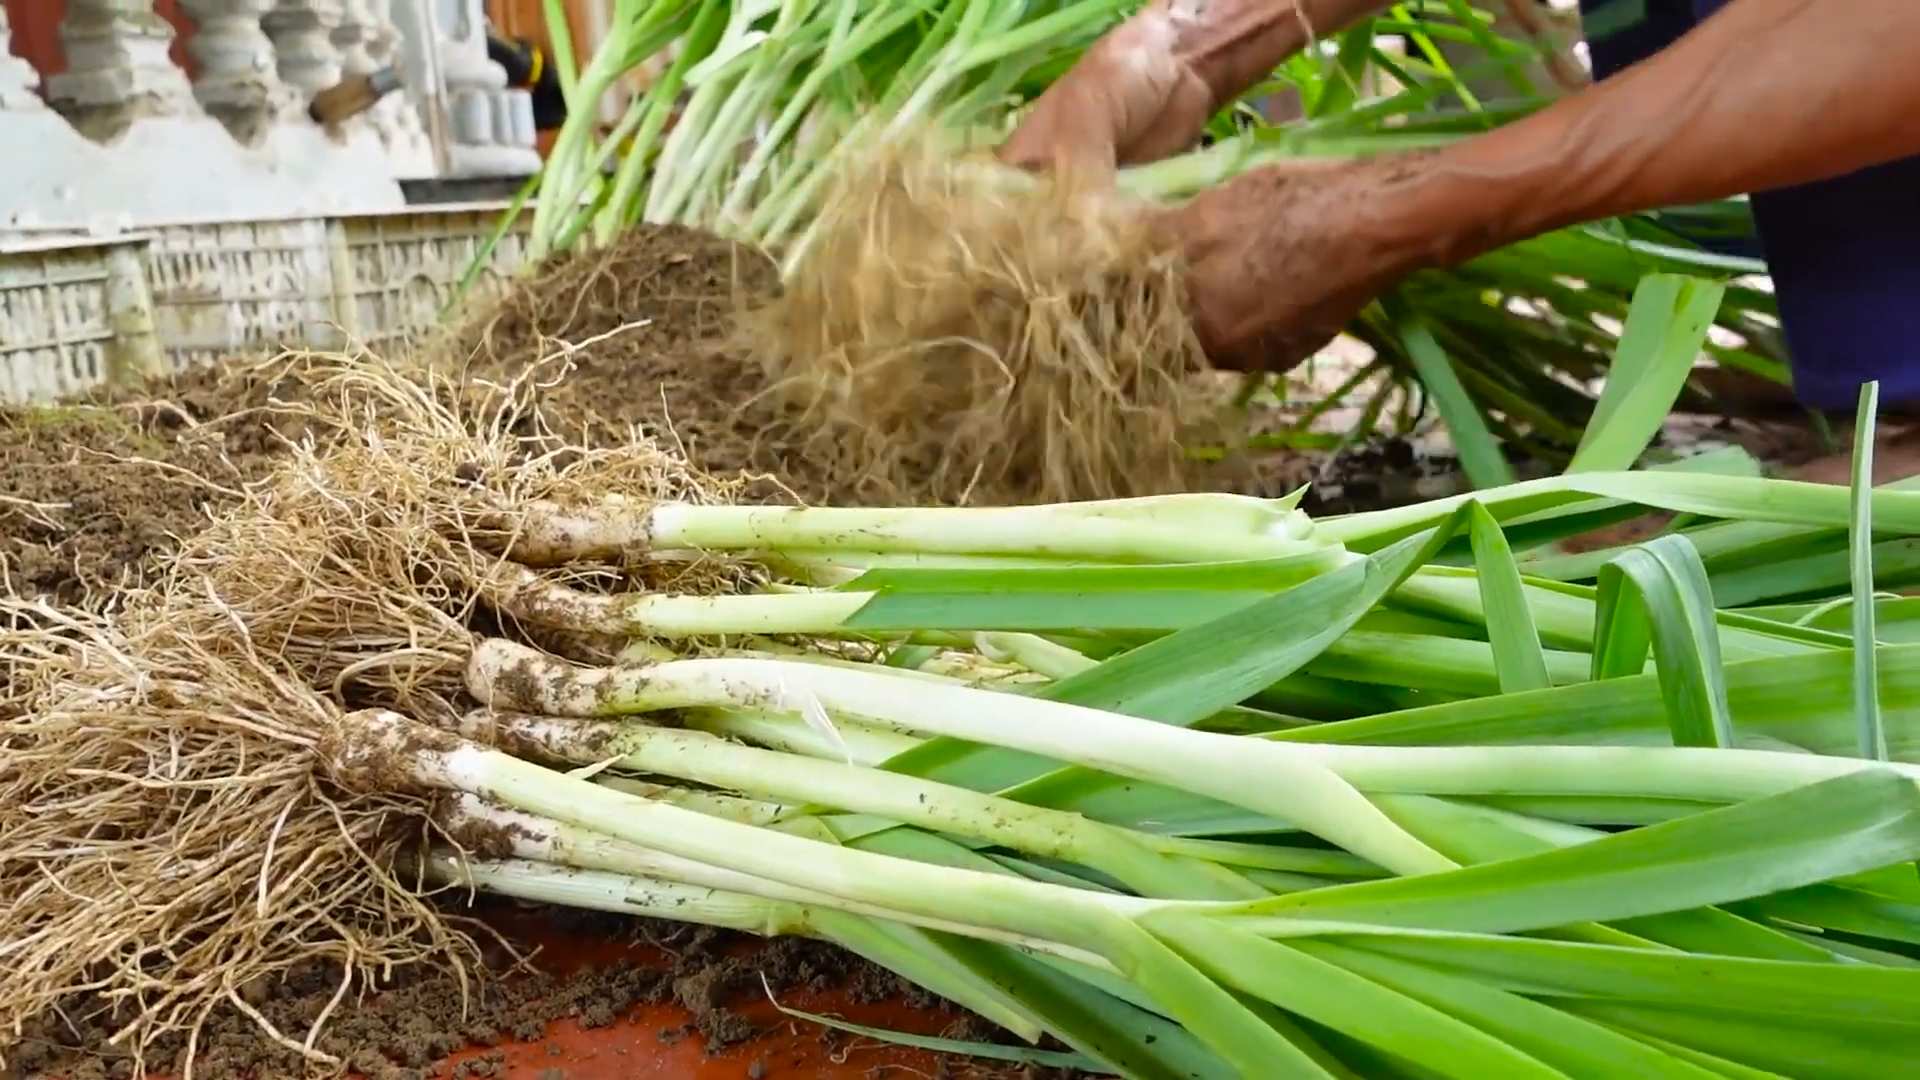
- Harvesting: Leeks are ready for harvest when the stalks are about 1 inch in diameter and the desired length. This usually takes about 4-6 months from transplanting. Gently loosen the soil around the base of the leek and pull it up. If you blanched them, you may need to carefully dig them up.
- Cleaning: Cut off the dark green tops and trim the roots. Wash the leeks thoroughly to remove any soil.
- Storage: Leeks can be stored in the refrigerator for up to a week. For longer storage, you can freeze them. Blanch them briefly before freezing to maintain quality.
Remember: Patience is key! Growing leeks takes time, but the reward of fresh, homegrown leeks is well worth the effort. Happy gardening!
Conclusion
Growing your own leeks at home is a surprisingly rewarding experience, offering a fresh, flavorful alternative to store-bought options. This DIY approach not only provides you with superior quality leeks, bursting with a more intense and nuanced flavor, but it also connects you directly to the growing process. You’ll appreciate the subtle differences in taste and texture, a testament to the care and attention you’ve invested. The satisfaction of harvesting your own homegrown leeks is unparalleled, a true testament to the power of gardening. This simple DIY trick transforms your garden (or even a sunny windowsill!) into a source of delicious, healthy leeks, making it a must-try for any home cook or gardening enthusiast.
Beyond the basic method outlined, there are numerous ways to personalize your leek-growing journey. Experiment with different leek varieties to discover your favorites. Some varieties are known for their milder flavor, while others boast a more robust, pungent taste. Consider the size and shape of your garden space when selecting your leek variety; some are better suited for smaller containers or raised beds. You can also explore companion planting, pairing your leeks with herbs like chamomile or carrots to enhance their growth and flavor profile. For those with limited space, growing leeks in containers is a fantastic option, allowing you to cultivate these versatile vegetables even on a balcony or patio. Remember to maintain consistent soil moisture and provide adequate sunlight for optimal growth. The possibilities are endless, allowing you to tailor your leek-growing experience to your specific needs and preferences.
We strongly encourage you to embark on this rewarding gardening adventure. The process is simpler than you might think, and the results are undeniably delicious. Share your leek-growing journey with us! Post pictures of your thriving leeks on social media using #GrowLeeksAtHome and tag us. We’d love to see your success and hear about your experiences, from planting to harvest. Let’s build a community of home leek growers, sharing tips, tricks, and recipes to celebrate the joy of growing your own food. Don’t hesitate to reach out if you have any questions – we’re here to support you every step of the way. Start growing your own leeks today and experience the difference!
Frequently Asked Questions
What type of soil is best for growing leeks?
Leeks thrive in loose, well-draining soil rich in organic matter. Amend heavy clay soils with compost or other organic materials to improve drainage and aeration. A slightly acidic to neutral pH (6.0-7.0) is ideal. Before planting, ensure the soil is free of rocks and debris to prevent root damage.
How much sunlight do leeks need?
Leeks require at least six hours of direct sunlight per day for optimal growth. However, they can tolerate some partial shade, especially during the hottest part of the day in warmer climates. Choose a location in your garden that receives ample sunlight but is also protected from strong winds.
When is the best time to plant leeks?
The best time to plant leeks depends on your climate. In cooler climates, you can sow seeds directly outdoors in early spring or fall. In warmer climates, it’s best to start seeds indoors six to eight weeks before the last expected frost and transplant seedlings outdoors after the danger of frost has passed. You can also plant leeks in the summer for a fall harvest.
How often should I water my leeks?
Consistent moisture is crucial for healthy leek growth. Water regularly, keeping the soil consistently moist but not waterlogged. The frequency of watering will depend on your climate, soil type, and weather conditions. During dry spells, you may need to water more frequently. Mulching around the plants can help retain soil moisture and suppress weeds.
How long does it take for leeks to mature?
The time it takes for leeks to mature depends on the variety and growing conditions. Generally, leeks are ready for harvest in about 15-20 weeks from sowing seeds or transplanting seedlings. You can start harvesting individual leeks as they reach the desired size, leaving the others to continue growing.
What are some common problems when growing leeks?
Some common problems when growing leeks include leek moth infestation, fungal diseases (like leaf blight), and nutrient deficiencies. Regularly inspect your plants for signs of pests or diseases and take appropriate action if necessary. Providing adequate nutrients through fertilization and maintaining good soil health can help prevent many problems.
Can I grow leeks in containers?
Yes, absolutely! Leeks can be successfully grown in containers, making them a great option for gardeners with limited space. Choose large containers (at least 12 inches in diameter) with adequate drainage holes. Use a well-draining potting mix and ensure the containers receive ample sunlight.
What are some ways to use homegrown leeks?
Homegrown leeks are incredibly versatile! Use them in soups, stews, quiches, gratins, and stir-fries. They’re also delicious roasted, grilled, or added to salads. The possibilities are endless – experiment and discover your favorite ways to enjoy your fresh, homegrown leeks!
How do I store harvested leeks?
To store harvested leeks, trim the roots and green tops, then wrap the leeks loosely in plastic wrap or place them in a plastic bag with a few holes for ventilation. Store them in the refrigerator’s crisper drawer for up to a week. For longer storage, you can blanch and freeze the leeks.
Leave a Comment