

Grow Mustard Greens at Home
Have you ever dreamt of enjoying the peppery bite of fresh, homegrown mustard greens without leaving your backyard? Well, dream no more! This article is your passport to the surprisingly simple world of growing mustard greens at home. I’ll share my tried-and-true tips and tricks, transforming your gardening experience from daunting to delightful. From seed to plate, we’ll cover everything you need to know to cultivate a thriving crop of these nutritious and flavorful greens.
The history of mustard greens is rich and fascinating, stretching back centuries. Cultivated for both culinary and medicinal purposes, these hardy plants have played a significant role in various cultures worldwide. Today, they’re experiencing a well-deserved resurgence as people seek healthier, more sustainable food options. And what better way to achieve that than by growing mustard greens at home?
Why Grow Your Own?
In a world of often-expensive and sometimes-questionable grocery store produce, growing your own mustard greens offers unparalleled benefits. You’ll know exactly what went into your food – no pesticides, no artificial fertilizers, just pure, wholesome goodness. Plus, the satisfaction of harvesting your own greens is incredibly rewarding! Imagine the fresh, vibrant flavor bursting in your mouth, knowing you nurtured them from tiny seeds to full-grown plants. It’s a truly fulfilling experience.
So, whether you’re a seasoned gardener or a complete beginner, get ready to embark on this exciting journey with me. Let’s discover the secrets to successfully growing mustard greens at home and unlock the joy of fresh, homegrown flavor!
Growing Mustard Greens at Home: A Step-by-Step Guide
I love the peppery bite of fresh mustard greens, and nothing beats the satisfaction of growing your own. This guide will walk you through the entire process, from seed to harvest, so you can enjoy a bountiful crop right in your kitchen or garden.
Choosing Your Growing Method
- Direct Sowing: This is the simplest method. You sow the seeds directly into the ground or containers. It’s ideal for warm weather.
- Starting Indoors (Seed Starting): This method gives you a head start, especially in cooler climates. You’ll start the seeds indoors and transplant them later.
Section 1: Preparing for Planting
- Select Your Seeds: Choose high-quality mustard green seeds from a reputable supplier. Look for varieties suited to your climate. I usually opt for a fast-maturing variety for quicker results.
- Choose Your Growing Location: Mustard greens thrive in full sun to partial shade. If growing indoors, select a sunny windowsill or use grow lights. For outdoor growing, choose a location with at least six hours of sunlight daily. Good soil drainage is crucial; mustard greens don’t like soggy feet.
- Prepare Your Soil: Whether you’re planting directly or starting indoors, good soil is key. For containers, use a well-draining potting mix. For outdoor planting, amend your soil with compost or other organic matter to improve its structure and fertility. I like to add a layer of mulch to retain moisture and suppress weeds.
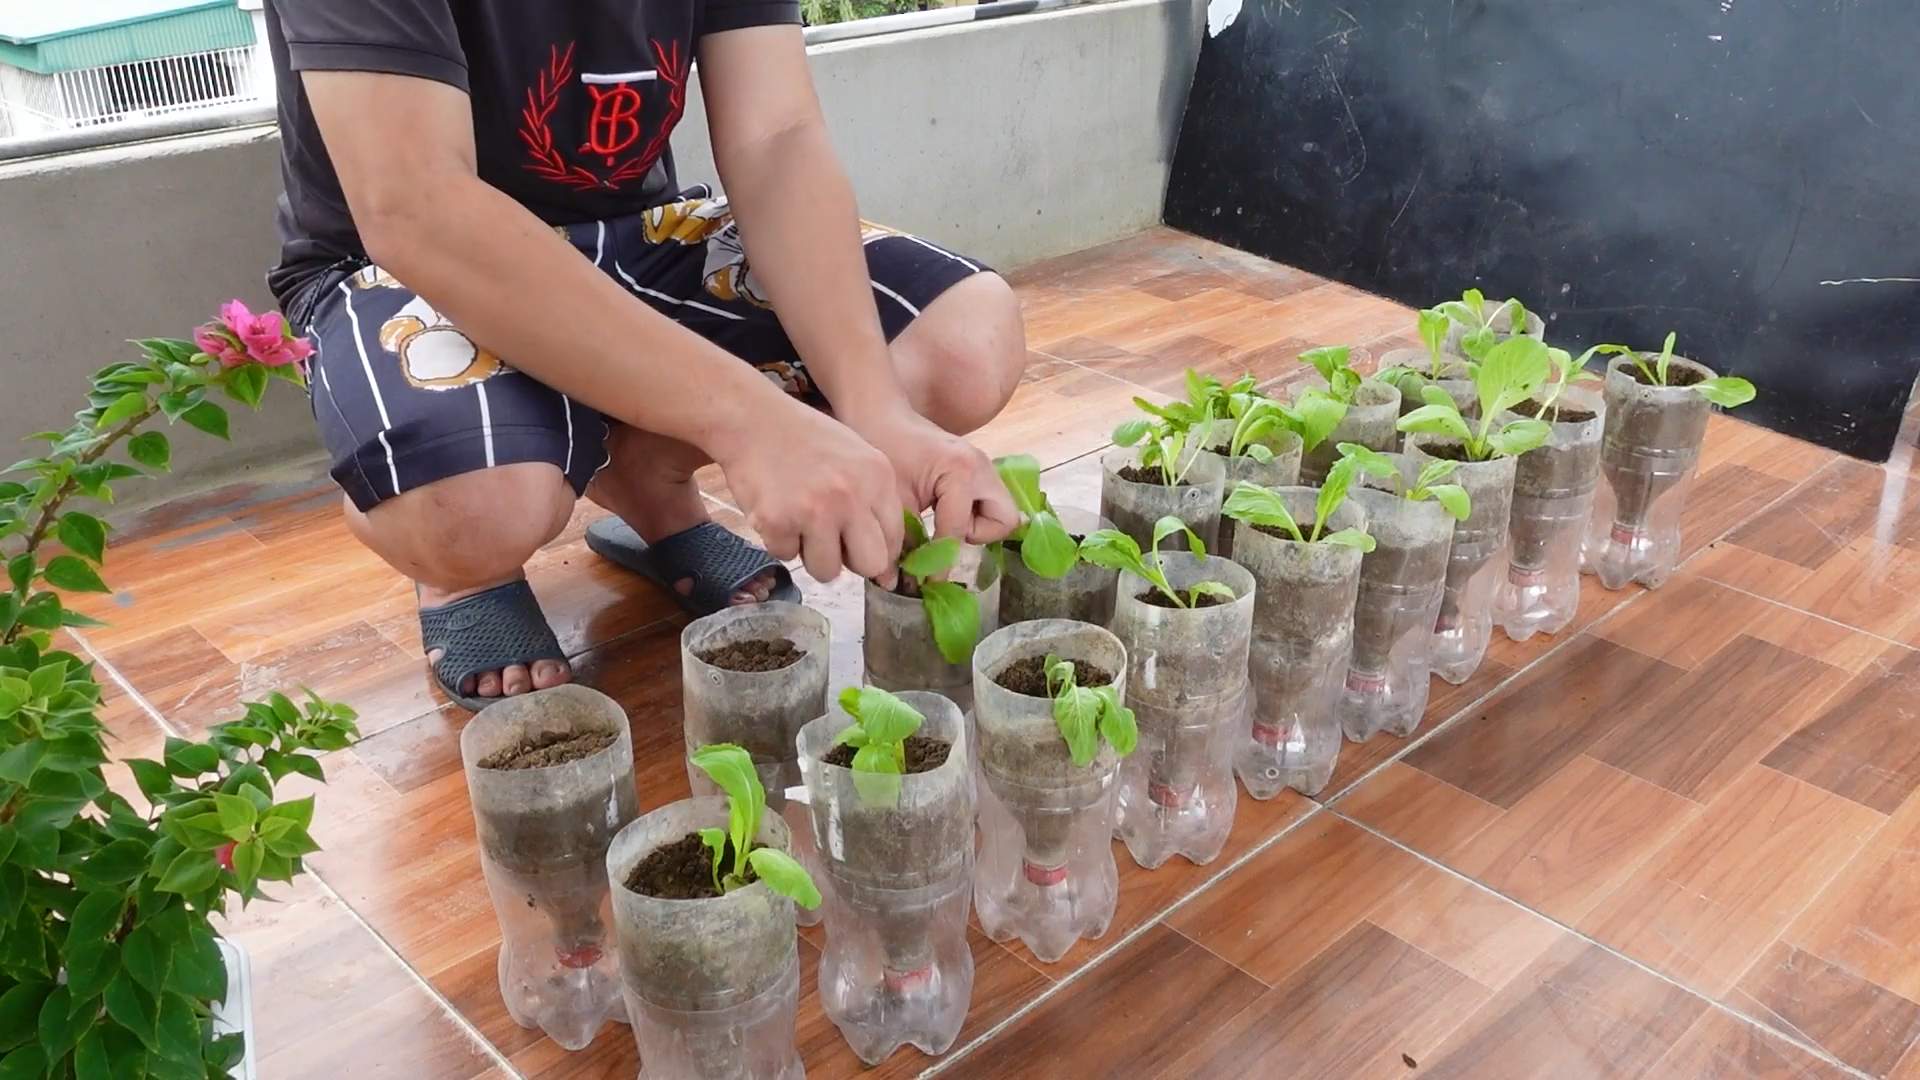
- Prepare Your Containers (If Applicable): If using containers, ensure they have drainage holes to prevent waterlogging. Choose containers at least 6 inches deep. I prefer using recycled containers like plastic tubs or repurposed food containers.
Section 2: Sowing the Seeds
- Sowing Directly Outdoors: Sow seeds about ¼ inch deep and 1-2 inches apart. Gently firm the soil around the seeds. Water gently after sowing.
- Starting Seeds Indoors: Fill your seed trays or containers with moist seed-starting mix. Sow seeds about ¼ inch deep and 1 inch apart. Cover the tray with plastic wrap to retain moisture and place it in a warm location (around 70-75°F). Keep the soil consistently moist but not soggy. Germination usually takes 3-7 days.
- Thinning (For both methods): Once seedlings have a few true leaves (the leaves that appear after the cotyledons), thin them out to give each plant enough space to grow. For direct sowing, leave about 4-6 inches between plants. For indoor-started plants, transplant them into larger containers or directly into the garden, spacing them accordingly.
Section 3: Caring for Your Mustard Greens
- Watering: Keep the soil consistently moist, but avoid overwatering. Water deeply and less frequently rather than shallowly and often. Check the soil moisture regularly, especially during hot and dry weather. I usually water when the top inch of soil feels dry.
- Fertilizing: Mustard greens are relatively low-maintenance and don’t require heavy fertilization. A light application of balanced fertilizer every few weeks can boost growth, especially if your soil is poor. I prefer using organic fertilizers.
- Weeding: Regularly remove weeds to prevent competition for nutrients and water. Mulching helps significantly reduce weed growth.
- Pest and Disease Control: Mustard greens are generally pest-resistant. However, keep an eye out for aphids or flea beetles. If you notice any pests, you can try using insecticidal soap or neem oil. Good air circulation helps prevent fungal diseases.
Section 4: Harvesting Your Mustard Greens
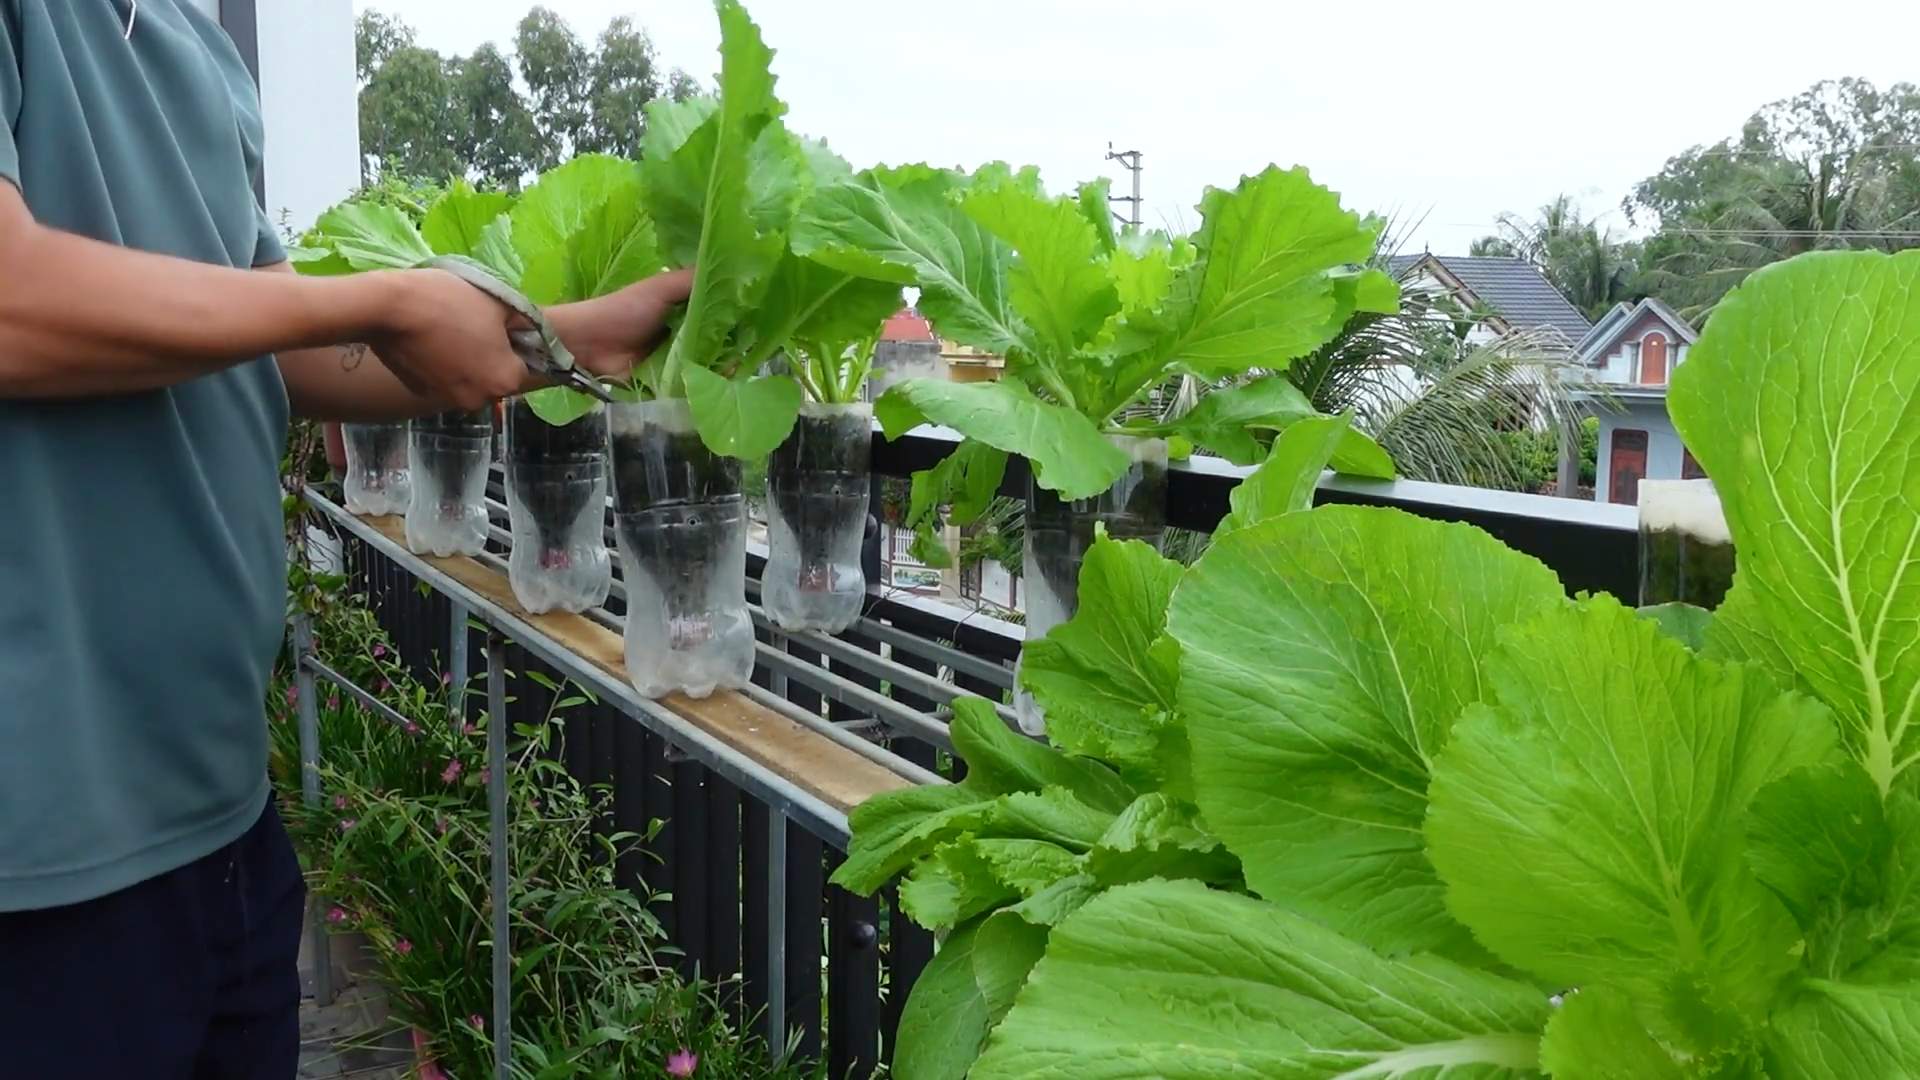
- Harvest Time: Mustard greens are ready for harvest when they reach about 4-6 inches tall. You can harvest the entire plant or just the outer leaves, allowing the inner leaves to continue growing.
- Harvesting Techniques: Use a sharp knife or scissors to cut the leaves cleanly. For a continuous harvest, harvest the outer leaves only, leaving the inner leaves to grow. This will extend your harvest period.
- Post-Harvest Care: Wash your harvested greens thoroughly. Store them in a plastic bag in the refrigerator for up to a week. You can also blanch and freeze them for longer storage.
Troubleshooting
- Yellowing Leaves: This could indicate overwatering, underwatering, or nutrient deficiency. Adjust your watering schedule and consider fertilizing.
- Bolting: Bolting (going to seed) occurs when the plant is stressed by heat or long days. Choose a variety suited to your climate and provide adequate shade during hot weather.
- Pests: Regularly inspect your plants for pests and take appropriate action if necessary.
Tips for Success
- Succession Planting: Sow new seeds every few weeks for a continuous harvest.
- Choose the Right Variety: Select a variety that is well-suited to your climate and growing conditions.
- Pay Attention to Details: Consistent watering, proper spacing, and timely harvesting are crucial for a successful crop.
Conclusion
So there you have it! Growing your own mustard greens at home is a surprisingly simple and rewarding endeavor. This DIY trick isn’t just about saving money on groceries; it’s about connecting with your food, understanding where it comes from, and enjoying the freshest, most flavorful greens imaginable. The vibrant, peppery bite of homegrown mustard greens surpasses anything you can find in the supermarket. The ease of cultivation, coupled with the exceptional taste and nutritional benefits, makes this a must-try for any home gardener, regardless of experience level. You’ll be amazed at how quickly these resilient plants sprout and thrive, providing you with a continuous harvest of delicious, healthy greens. From salads and sandwiches to stir-fries and soups, the culinary possibilities are endless.
Beyond the basic method outlined, there are numerous ways to personalize your mustard green growing experience. Experiment with different varieties – some boast a milder flavor, while others pack a serious punch. Consider starting your seeds indoors under grow lights for an earlier harvest, especially in colder climates. If space is limited, try vertical gardening techniques or grow your mustard greens in containers on a balcony or windowsill. For a truly unique flavor profile, try incorporating companion planting – planting herbs like basil or dill nearby can enhance the overall taste and deter pests. Don’t be afraid to get creative! The beauty of growing your own mustard greens is the flexibility it offers.
We strongly encourage you to try this simple yet effective DIY method of growing mustard greens at home. It’s a fantastic way to introduce yourself to the joys of gardening, even if you’re a complete beginner. Share your experiences with us! We’d love to hear about your successes (and any challenges you encounter – learning from mistakes is all part of the fun!). Post pictures of your thriving mustard greens on social media using #GrowMustardGreensAtHome and tag us – we can’t wait to see your bountiful harvests. Remember, the journey from seed to plate is incredibly rewarding, and the taste of homegrown mustard greens is an experience you won’t soon forget. Embrace the simplicity, savor the flavor, and enjoy the satisfaction of growing your own food!
Frequently Asked Questions
What type of soil is best for growing mustard greens?
Mustard greens thrive in loose, well-draining soil that’s rich in organic matter. A slightly acidic to neutral pH (around 6.0-7.0) is ideal. You can amend your existing soil with compost or other organic materials to improve its texture and nutrient content. Avoid heavy clay soils, as they can retain too much water and lead to root rot.
How much sunlight do mustard greens need?
Mustard greens prefer at least six hours of direct sunlight per day. However, they can tolerate some shade, especially during the hottest part of the day. In hotter climates, providing some afternoon shade might be beneficial to prevent wilting.
How often should I water my mustard greens?
Keep the soil consistently moist but not waterlogged. Water deeply and regularly, especially during dry periods. The frequency of watering will depend on factors such as weather conditions, soil type, and the size of your plants. Check the soil moisture regularly by sticking your finger a couple of inches into the soil – if it feels dry, it’s time to water.
How long does it take for mustard greens to mature?
The time it takes for mustard greens to mature depends on the variety and growing conditions. Generally, you can expect to harvest your first crop within 4-6 weeks of sowing seeds. Some varieties may be ready even sooner, while others might take a little longer.
What are some common pests or diseases that affect mustard greens?
Mustard greens are relatively pest-resistant, but they can be susceptible to aphids, flea beetles, and whiteflies. Regularly inspect your plants for signs of infestation and take appropriate action if necessary. Natural pest control methods, such as introducing beneficial insects or using insecticidal soap, are often effective. Fungal diseases, such as downy mildew, can also occur in humid conditions. Ensuring good air circulation and avoiding overhead watering can help prevent fungal problems.
Can I grow mustard greens in containers?
Absolutely! Mustard greens are well-suited for container gardening. Choose containers that are at least 6 inches deep and have drainage holes to prevent waterlogging. Use a high-quality potting mix that provides good drainage and aeration.
What should I do with my harvested mustard greens?
Harvest mustard greens when the leaves are young and tender for the best flavor. You can harvest individual leaves as needed or cut the entire plant at ground level, allowing it to regrow. Store harvested greens in a plastic bag in the refrigerator for up to a week. Alternatively, you can blanch and freeze them for longer storage.
What if my mustard greens bolt?
Bolting, or going to seed, is a natural process that occurs when mustard greens are exposed to stress, such as heat or drought. Bolting results in bitter-tasting leaves. To prevent bolting, ensure consistent watering and avoid planting during the hottest part of the summer. Choose a fast-maturing variety if you live in a hot climate.
Leave a Comment