

DIY Celery Garden: Grow Your Own Crunchy Stalks!
I’ve always loved the crisp, refreshing taste of celery, but the price at the grocery store can be a bit steep. That’s why I decided to try my hand at a DIY celery garden – and let me tell you, it’s been a surprisingly rewarding experience! This article is all about sharing my simple yet effective techniques for growing your own delicious celery, right in your backyard or even on a sunny windowsill. Forget those expensive supermarket bunches; you’ll be amazed at how easy it is to cultivate your own supply of this versatile vegetable.
Celery’s history is surprisingly rich! Cultivated for thousands of years, it’s been a staple in various cuisines across the globe. From ancient Greece, where it was valued for its medicinal properties, to its modern-day popularity in everything from salads to soups, celery has held a consistent place in our culinary heritage. But beyond its historical significance, there’s a very practical reason to consider a DIY celery garden: homegrown celery is simply fresher and tastier than anything you’ll find in the store.
Why Grow Your Own Celery?
There’s nothing quite like biting into a stalk of celery you’ve nurtured from a tiny seed or cutting. The flavor is intensely vibrant, and knowing exactly where your food comes from and how it was grown offers a unique satisfaction. Plus, growing your own celery is a fantastic way to reduce your grocery bill and minimize your environmental impact. This DIY project is perfect for beginners, requiring minimal space and effort for maximum delicious results. So, let’s get started on your very own DIY celery garden!
My Amazing DIY Celery Garden: From Stalk to Sprout!
I love fresh celery, but grocery store celery can be pricey. So, I decided to try growing my own! It’s surprisingly easy, and now I have a constant supply of crunchy, delicious celery right in my kitchen. Here’s how I did it, and how you can too!
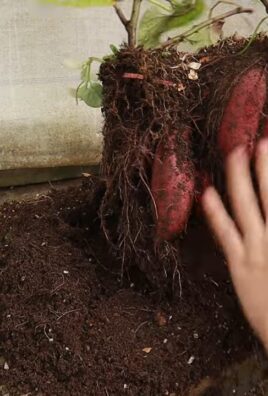
Phase 1: Preparing Your Celery Base
- Choose the right celery: Select a bunch of organic celery with firm, healthy stalks. Avoid any that show signs of wilting or disease. Organic is best to avoid pesticide residues.
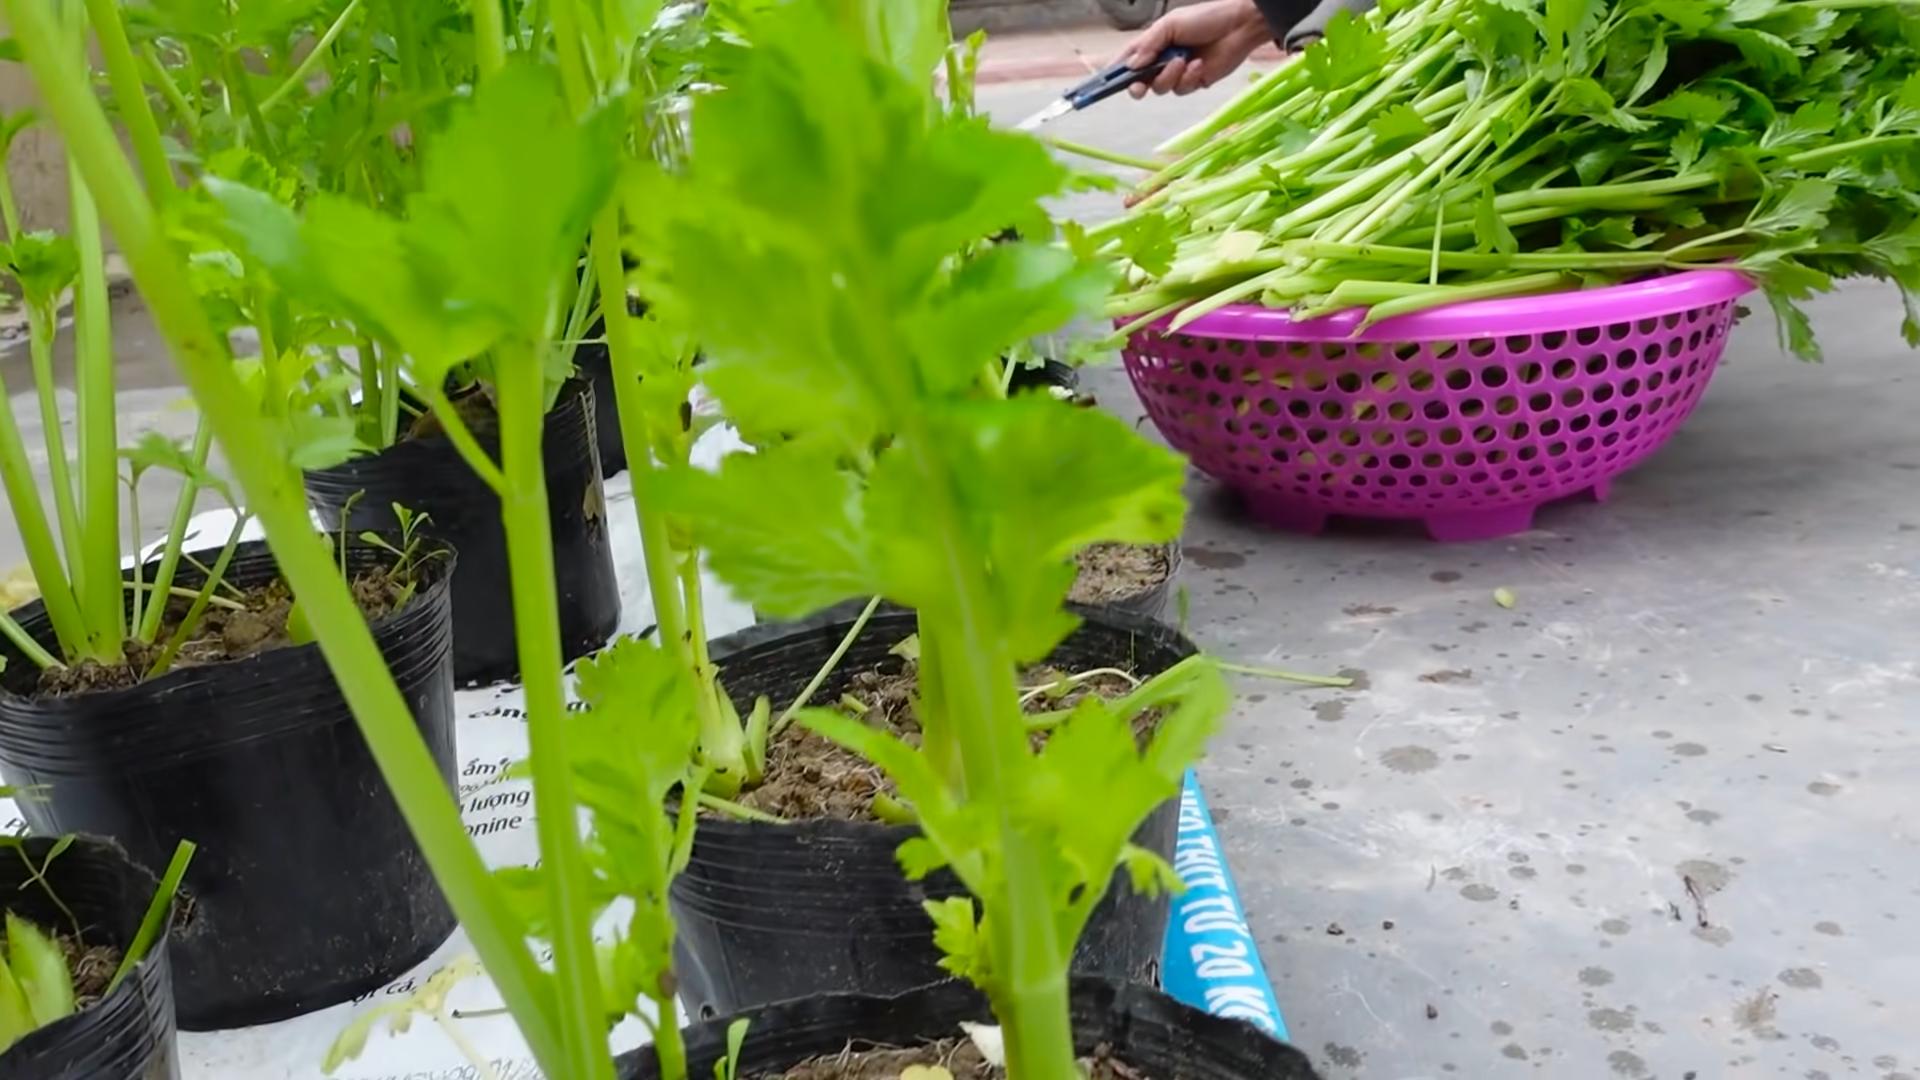
- Cut the base: Carefully cut off the bottom inch or two of the celery stalk, ensuring you get a nice, flat base with the root end intact. This is where the magic happens!
- Clean the base: Rinse the cut base thoroughly under cold running water to remove any dirt or debris. You want a clean, healthy start for your celery.
- Remove outer leaves (optional): You can remove some of the outer, older leaves to help the plant focus its energy on root and new leaf growth. However, this isn’t strictly necessary.
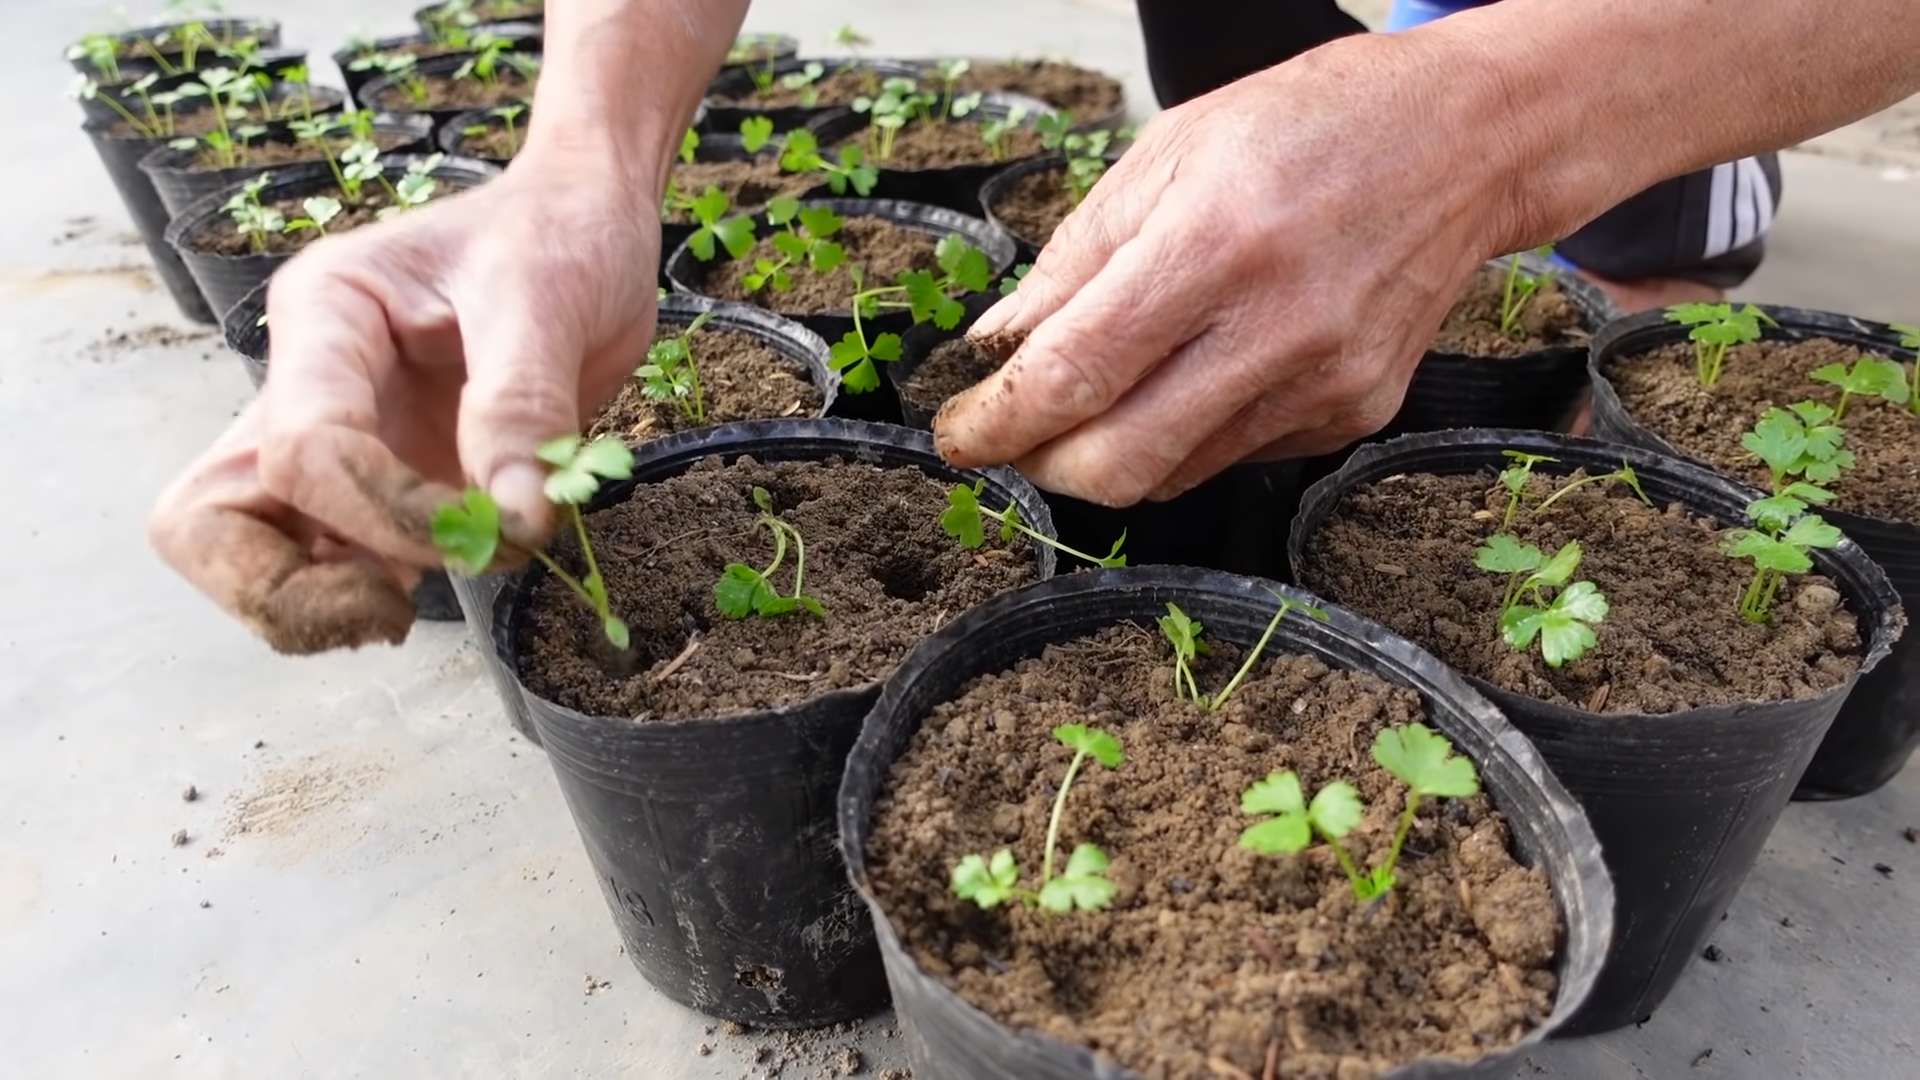
Phase 2: Planting Your Celery
- Choose your container: A shallow dish or a small pot works perfectly. Make sure it has drainage holes to prevent waterlogging, which can rot the celery base. I used a repurposed terracotta saucer.
- Add your growing medium: Fill your container with a well-draining potting mix. You can buy a pre-mixed potting mix from a garden center, or you can make your own using a blend of peat moss, perlite, and vermiculite. The key is good drainage.
- Plant the celery base: Gently press the cut end of the celery base into the potting mix, ensuring it’s firmly seated but not buried too deeply. The base should be mostly visible above the soil.
- Water thoroughly: Give the celery a good watering, ensuring the soil is evenly moist but not soggy. Use lukewarm water to avoid shocking the plant.
- Place in a sunny spot: Find a location that receives bright, indirect sunlight. Direct sunlight can be too harsh, especially initially. A windowsill that gets morning or afternoon sun is ideal.
Phase 3: Caring for Your Celery Garden
- Maintain moisture: Keep the soil consistently moist but not waterlogged. Check the soil daily and water when the top inch feels dry. Overwatering is a common mistake, so err on the side of caution.
- Monitor for growth: You should start to see new growth within a week or two. This will appear as small, light green shoots emerging from the center of the celery base. This is very exciting!
- Fertilize (optional): You can use a diluted liquid fertilizer every few weeks to encourage faster growth. However, it’s not essential, especially if you’re using a nutrient-rich potting mix.
- Protect from pests: Keep an eye out for pests like aphids or slugs. If you see any, you can remove them manually or use an organic pest control solution. I’ve had good luck with a simple spray of diluted dish soap and water.
- Harvest your celery: Once your celery has grown to a desirable size (usually about 6-8 weeks), you can start harvesting the outer stalks. Cut them close to the base, leaving the inner stalks to continue growing. This allows for a continuous harvest.
Phase 4: Troubleshooting Common Problems
Problem: Celery base rotting
This is usually caused by overwatering. Ensure your container has good drainage and allow the soil to dry slightly between waterings. If the base is already rotting, you may need to start over with a fresh celery base.
Problem: Slow or no growth
This could be due to insufficient sunlight or lack of nutrients. Make sure your celery is getting enough bright, indirect sunlight. You can also try fertilizing with a diluted liquid fertilizer.
Problem: Pests
Aphids and slugs are common pests that can damage celery. Regularly inspect your plants and remove any pests you find. You can also use an organic pest control solution.
Problem: Yellowing leaves
Yellowing leaves can indicate overwatering, underwatering, or nutrient deficiencies. Check your watering habits and consider fertilizing if necessary. If the yellowing is severe, the plant may be beyond saving.
Phase 5: Tips for Success
- Use organic celery: This reduces the risk of pesticide residues affecting your growth.
- Choose a well-draining potting mix: This prevents root rot, a common problem with celery.
- Don’t overwater: Allow the soil to dry slightly between waterings.
- Provide bright, indirect sunlight: Direct sunlight can be too harsh.
- Be patient: It takes time for celery to grow, so don’t get discouraged if you don’t see results immediately.
Remember: Growing your own celery is a rewarding experience. Even if your first attempt isn’t perfect, you’ll learn from it and improve your technique next time. Happy gardening!
Conclusion
So there you have it – your very own thriving DIY celery garden! This simple, yet incredibly rewarding, project proves that growing your own fresh produce is easier than you might think. Forget limp, tasteless celery from the supermarket; this method guarantees crisp, flavorful stalks bursting with natural goodness, directly from your garden to your plate. The satisfaction of harvesting your own homegrown celery is unparalleled, and the cost savings add up quickly, especially if you’re a regular celery consumer. This DIY celery garden is a must-try for anyone, from seasoned gardeners to complete beginners. It’s a fantastic way to connect with nature, learn a new skill, and enjoy the freshest, most delicious celery you’ve ever tasted. The minimal effort required yields maximum rewards, making it a perfect project for busy individuals or families looking for a fun and productive activity.
Beyond the basic method outlined, there are countless ways to personalize your DIY celery garden. Experiment with different types of celery – some varieties are known for their particularly thick stalks or intense flavor. Consider incorporating your celery garden into a larger herb or vegetable patch, creating a beautiful and productive ecosystem. If space is limited, you can even try growing celery in containers on a balcony or patio. For those with a truly ambitious green thumb, explore the possibility of starting your celery from seed – a slightly more challenging but ultimately rewarding experience. Remember to always monitor your celery for pests and diseases, and adjust your watering schedule based on the weather conditions. With a little care and attention, your DIY celery garden will flourish, providing you with a bountiful harvest for weeks to come.
We strongly encourage you to try this DIY celery garden project and share your experience with us! Post pictures of your thriving celery plants on social media using the hashtag #DIYCeleryGarden. We’d love to see your results and hear about your successes (and any challenges you might encounter along the way – learning from mistakes is all part of the fun!). Join our growing community of home gardeners and let’s inspire each other to cultivate our own delicious, healthy food. Don’t hesitate to reach out with any questions or to share your tips and tricks. Happy gardening!
Frequently Asked Questions
Q: How long does it take to grow celery from a stalk?
The time it takes to harvest celery from a stalk depends on several factors, including the variety of celery, the growing conditions, and the size of the stalk you start with. Generally, you can expect to harvest your first celery stalks within 8-12 weeks. However, some varieties might take longer, and optimal growing conditions will significantly speed up the process. Regular watering and sufficient sunlight are key to a quick and successful harvest.
Q: What type of soil is best for growing celery?
Celery thrives in rich, moist, well-drained soil. A slightly acidic soil pH (around 6.0-6.8) is ideal. Before planting, amend your soil with compost or other organic matter to improve its fertility and drainage. This will ensure your celery plants have access to the nutrients they need for healthy growth. Poorly drained soil can lead to root rot, so proper soil preparation is crucial.
Q: How often should I water my celery?
Consistent moisture is essential for healthy celery growth. Aim to keep the soil consistently moist but not waterlogged. The frequency of watering will depend on factors such as weather conditions, soil type, and the size of your plants. During hot, dry periods, you may need to water daily, while in cooler, wetter conditions, watering every other day or even less frequently might suffice. Always check the soil moisture before watering – stick your finger a couple of inches into the soil; if it feels dry, it’s time to water.
Q: What are some common problems when growing celery?
Some common problems encountered when growing celery include pests like aphids and slugs, and diseases like leaf spot and blight. Regularly inspect your plants for signs of pests or diseases. If you notice any problems, take appropriate action promptly, such as using organic pest control methods or removing affected leaves. Maintaining good air circulation around your plants can help prevent fungal diseases. Proper watering and soil drainage are also crucial in preventing many common celery issues.
Q: Can I grow celery indoors?
Yes, you can grow celery indoors, but it requires careful attention to light and humidity. Celery needs at least six hours of sunlight per day, so a sunny windowsill or a grow light is essential. Maintaining high humidity is also important, especially during the hotter months. You can increase humidity by placing the pot on a tray of pebbles filled with water or using a humidifier. Indoor celery might not grow as large as outdoor celery, but it’s still a rewarding project.
Q: What can I do with my harvested celery?
The possibilities are endless! Use your fresh, homegrown celery in soups, stews, salads, and stir-fries. Chop it up for celery sticks with your favorite dip, or add it to sandwiches and wraps. You can even juice it for a refreshing and healthy drink. The crisp, clean flavor of homegrown celery elevates any dish.
Leave a Comment