

Grow Chili Peppers: Your Guide to a Spicy Harvest
Grow chili peppers! It sounds daunting, maybe even a little spicy, but I promise you, it’s far more rewarding – and easier than you think – than you might imagine. This isn’t just about adding a fiery kick to your tacos; it’s about connecting with nature, experiencing the satisfaction of nurturing a plant from seed to harvest, and enjoying the freshest, most flavorful chili peppers you’ll ever taste. I’ve been growing chili peppers for years, and I’ve learned a thing or two along the way – tricks and DIY solutions that have transformed my harvests from meager to magnificent.
The cultivation of chili peppers boasts a rich history, stretching back millennia to the Americas. These vibrant fruits have played a crucial role in various cultures, not only as a culinary staple but also in traditional medicine and even religious ceremonies. Today, the global love affair with chili peppers continues to grow, with countless varieties offering a spectrum of heat and flavor profiles.
Why Grow Your Own Chili Peppers?
There are so many reasons to embark on this spicy adventure! Firstly, homegrown chili peppers are unbelievably flavorful. Nothing compares to the taste of a freshly picked pepper, bursting with sunshine and intense flavor. Secondly, growing your own gives you complete control over the quality and variety of peppers you enjoy. Want a super-hot habanero? Or a milder jalapeño? The choice is yours! Finally, it’s incredibly satisfying to watch your tiny seedlings grow into thriving plants, producing a bountiful harvest you can proudly share with friends and family. This article is packed with simple Grow Chili Peppers techniques and DIY solutions to help you achieve a successful and abundant harvest, no matter your experience level. So let’s get started on your journey to growing your own delicious chili peppers!
Growing Chili Peppers: A DIY Guide to a Spicy Harvest
I love the vibrant colors and intense flavors of chili peppers, and nothing beats the satisfaction of growing your own. This guide will walk you through the entire process, from seed to harvest, ensuring you have a bumper crop of delicious chilies.
Phase 1: Starting Seeds Indoors
- Choosing your seeds: Select chili pepper varieties suited to your climate and desired heat level. Consider factors like plant size and growing time. Seed packets usually provide this information.
- Starting time: Begin sowing seeds indoors 6-8 weeks before the last expected frost in your area. This allows the seedlings to develop strong roots before transplanting outdoors.
- Seed starting mix: Use a seed-starting mix, not garden soil. Garden soil is often too dense and can suffocate delicate seedlings. A good seed-starting mix provides excellent drainage and aeration.
- Planting the seeds: Sow seeds about ¼ inch deep and 1-2 inches apart in small pots or seed trays. Gently water the soil, ensuring it’s moist but not soggy.
- Providing warmth and light: Place the seed trays in a warm location (70-80°F) with plenty of sunlight. A sunny windowsill works well, or you can use grow lights to supplement natural light. Consistent warmth is key for germination.
- Maintaining moisture: Keep the soil consistently moist but not waterlogged. Allow the top inch of soil to dry slightly between waterings. Overwatering can lead to damping off, a fungal disease that kills seedlings.
- Thinning seedlings: Once seedlings develop their first true leaves (the leaves after the cotyledons), thin them out, leaving the strongest seedling in each pot. You can transplant the extra seedlings into separate pots.
- Hardening off: Before transplanting outdoors, gradually acclimate your seedlings to outdoor conditions. This process, called hardening off, reduces transplant shock. Start by placing them outdoors for a few hours each day, gradually increasing the time over a week.
Phase 2: Transplanting and Outdoor Care
- Choosing the right location: Select a sunny spot in your garden that receives at least 6-8 hours of direct sunlight per day. Chili peppers need plenty of sun to thrive.
- Soil preparation: Amend your soil with compost or other organic matter to improve drainage and fertility. Chilies prefer well-drained soil that’s slightly acidic (pH 6.0-7.0).
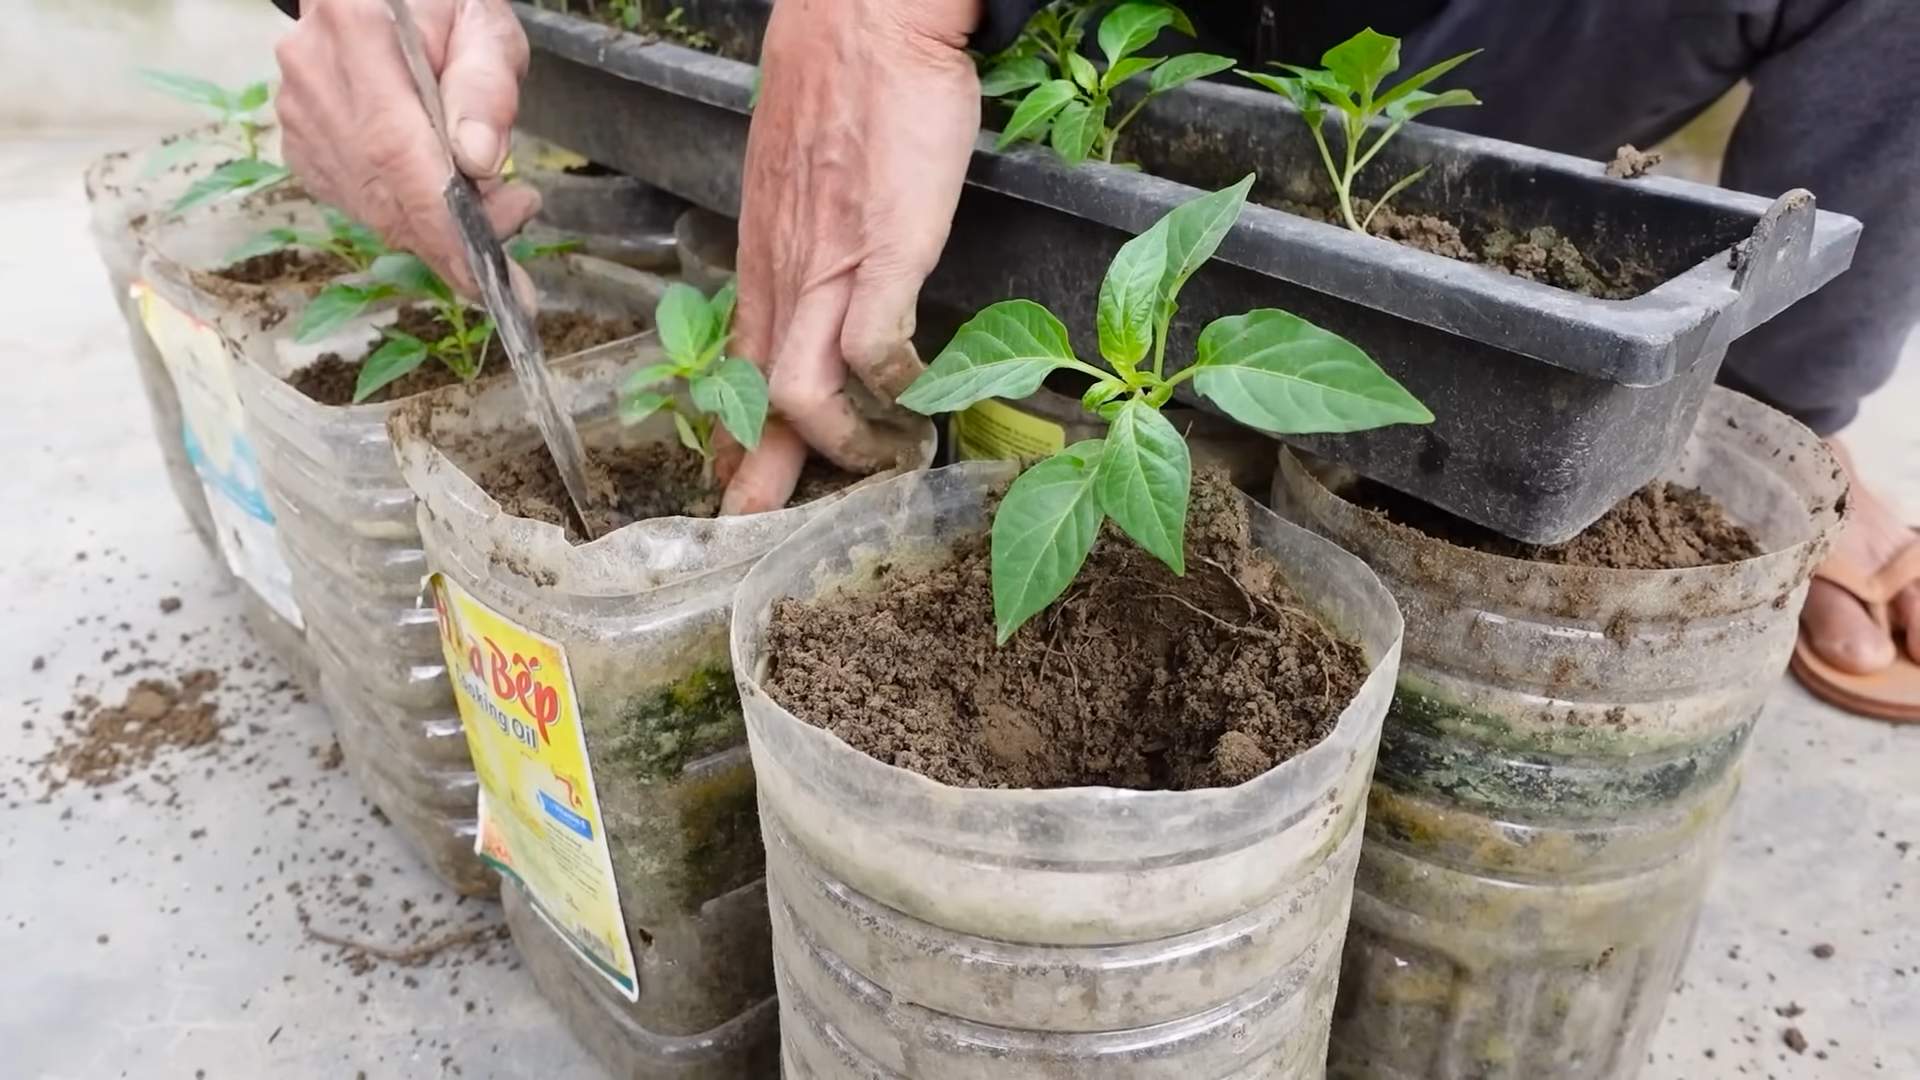
- Transplanting: Once the danger of frost has passed, carefully transplant your seedlings into the garden. Dig holes slightly larger than the root balls and gently place the seedlings in the holes. Fill the holes with soil, firming it gently around the base of each plant.
- Watering: Water deeply and regularly, especially during dry periods. Consistent moisture is crucial for healthy growth and fruit production. Avoid overhead watering, which can encourage fungal diseases.
- Mulching: Apply a layer of mulch around the plants to help retain moisture, suppress weeds, and regulate soil temperature.
- Fertilizing: Feed your chili plants regularly with a balanced fertilizer, following the instructions on the package. Over-fertilizing can lead to excessive leaf growth at the expense of fruit production.
- Staking or caging: Some chili pepper varieties can grow quite tall and may need staking or caging to support the plants and prevent them from falling over, especially in windy conditions.
- Pest and disease control: Regularly inspect your plants for pests and diseases. Address any problems promptly using appropriate organic or chemical controls. Early detection is key to preventing widespread damage.
Phase 3: Harvesting and Enjoying Your Chili Peppers
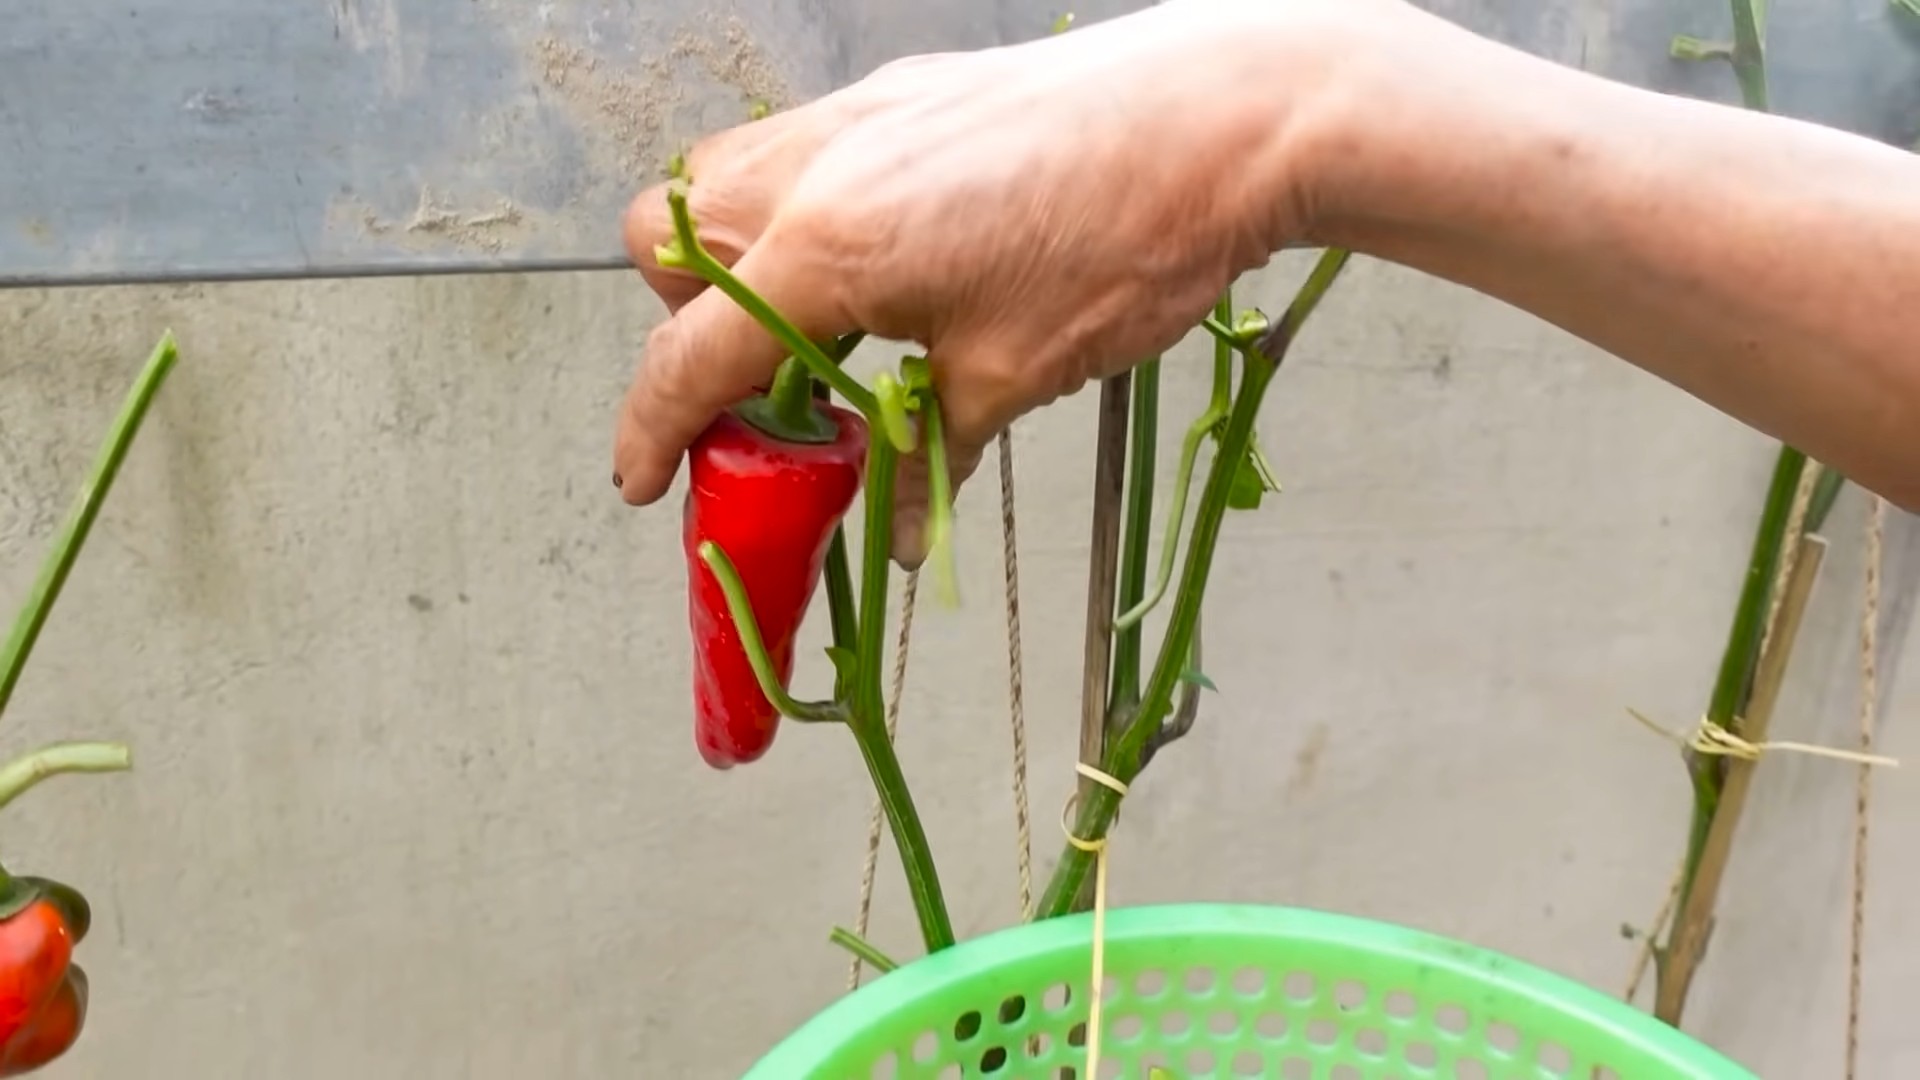
- Harvesting time: Chili peppers are ready for harvest when they reach their mature color and feel firm to the touch. The time it takes varies depending on the variety, but it’s usually several weeks after flowering.
- Harvesting techniques: Use sharp scissors or pruning shears to cut the peppers from the plant, leaving a short stem attached. This helps prevent damage to the plant and encourages further fruiting.
- Storing your harvest: Fresh chili peppers can be stored in the refrigerator for several weeks. You can also freeze them or dry them for longer storage. Freezing preserves the flavor and heat well.
- Using your chilies: Enjoy your homegrown chili peppers in a variety of dishes – salsas, sauces, stews, or simply as a spicy garnish. Remember to handle them carefully, as the oils can irritate your skin.
Troubleshooting Common Problems
- Yellowing leaves: This could indicate nutrient deficiencies, overwatering, or underwatering. Check your watering schedule and consider adding fertilizer.
- Blossom drop: This can be caused by stress, such as temperature fluctuations, inconsistent watering, or nutrient deficiencies. Ensure consistent care and a stable environment.
- Pest infestations: Common pests include aphids, spider mites, and whiteflies. Use appropriate organic or chemical controls to manage infestations.
- Fungal diseases: Good air circulation and avoiding overhead watering can help prevent fungal diseases. If a disease develops, remove affected plant parts and consider using a fungicide.
Remember, patience and consistent care are key to a successful chili pepper harvest. Enjoy the process and the delicious rewards of your labor!
Conclusion
So there you have it! A comprehensive guide to successfully growing your own chili peppers, a rewarding experience that yields delicious, flavorful results far surpassing anything you can buy in the store. This DIY approach to chili pepper cultivation isn’t just about saving money; it’s about connecting with nature, understanding the growth cycle of a plant, and ultimately, enjoying the fruits (or rather, the fiery peppers!) of your labor. Growing chili peppers from seed is a surprisingly simple process, even for beginner gardeners, and the satisfaction of harvesting your own homegrown peppers is unparalleled. The vibrant colors, the intense aromas, and the satisfying heat – these are all rewards that make the effort entirely worthwhile. This method ensures you have complete control over the type of chili pepper you grow, allowing you to experiment with different varieties and spice levels to perfectly suit your palate. From mild poblanos to scorching habaneros, the possibilities are endless!
Beyond the basic method outlined, there are numerous ways to personalize your chili pepper growing experience. Consider experimenting with different growing mediums, such as coco coir or a well-draining soil mix enriched with compost. You can also explore vertical gardening techniques, especially beneficial if you have limited space. Using trellises or hanging baskets can maximize your yield and keep your plants organized. Don’t be afraid to try different fertilization methods, ensuring your plants receive the necessary nutrients throughout their growth cycle. Remember, consistent watering and protection from pests are crucial for healthy plants. Finally, consider experimenting with companion planting. Certain plants, like basil or marigolds, can deter pests and improve the overall health of your chili pepper plants.
We strongly encourage you to embark on this rewarding journey of growing your own chili peppers. The process is educational, fun, and ultimately, incredibly delicious. Share your experiences with us! Post pictures of your thriving plants and your bountiful harvest on social media using #GrowChiliPeppers. We’d love to see your success stories and learn from your experiences. Let’s build a community of chili pepper enthusiasts, sharing tips, tricks, and of course, recipes! Remember, even if you encounter a few setbacks along the way, the learning process is part of the fun. Don’t be discouraged – keep experimenting, keep learning, and keep growing those delicious chili peppers! The taste of homegrown chili peppers is a reward that’s simply unmatched.
Frequently Asked Questions
What type of soil is best for growing chili peppers?
Chili peppers thrive in well-draining soil that is rich in organic matter. A slightly acidic pH level (around 6.0-7.0) is ideal. You can amend your soil with compost or other organic materials to improve drainage and fertility. Avoid heavy clay soils, as they can retain too much water and lead to root rot.
How much sunlight do chili peppers need?
Chili peppers are sun-worshippers! They need at least 6-8 hours of direct sunlight per day to thrive. Choose a location in your garden or on your patio that receives ample sunlight. Insufficient sunlight can lead to poor growth and reduced fruit production.
How often should I water my chili peppers?
Consistent watering is crucial, but avoid overwatering. Water deeply when the top inch or two of soil feels dry to the touch. The frequency will depend on your climate and the type of soil you’re using. Well-draining soil is key to preventing root rot, a common problem with overwatering.
When can I expect to harvest my chili peppers?
The time it takes for chili peppers to mature varies depending on the variety. Some varieties may be ready to harvest in as little as 60 days, while others may take up to 100 days or more. Check the seed packet or plant tag for specific information on the expected harvest time for your chosen variety. Harvest peppers when they reach their full color and size, as indicated on the seed packet or plant tag.
What are some common pests and diseases that affect chili peppers?
Chili peppers can be susceptible to various pests and diseases, including aphids, spider mites, whiteflies, and fungal diseases like blight. Regularly inspect your plants for signs of infestation or disease. Consider using organic pest control methods, such as insecticidal soap or neem oil, to address pest problems. Good air circulation and proper watering can help prevent fungal diseases.
Can I grow chili peppers indoors?
Yes, you can definitely grow chili peppers indoors! You’ll need a sunny location, such as a south-facing window, and a pot that’s large enough to accommodate the plant’s roots. Consider using grow lights to supplement natural sunlight, especially during winter months. Indoor growing requires careful attention to watering and humidity levels.
What should I do if my chili pepper plants aren’t producing many peppers?
Several factors can affect chili pepper production. Insufficient sunlight, improper watering, nutrient deficiencies, or pest infestations can all reduce yields. Ensure your plants are receiving adequate sunlight, water, and nutrients. Address any pest or disease problems promptly. Consider using a balanced fertilizer to provide the necessary nutrients for optimal fruit production. Remember that some varieties naturally produce fewer peppers than others.
Can I save seeds from my homegrown chili peppers to plant next year?
Absolutely! Allow the peppers to fully ripen on the plant before harvesting. Remove the seeds and allow them to dry completely in a warm, dry place. Once dry, store the seeds in a cool, dark, and dry location in an airtight container. Properly stored seeds can retain their viability for several years.

Leave a Comment