

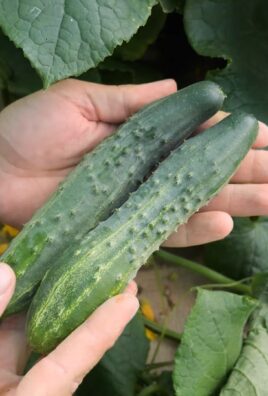
Tomato planting guide: Are you dreaming of sun-ripened, juicy tomatoes bursting with flavor, fresh from your own backyard? Forget those bland, store-bought imposters! I’m here to tell you that cultivating your own thriving tomato patch is easier than you think, even if you’re a complete beginner. This isn’t just about growing tomatoes; it’s about connecting with nature, enjoying the satisfaction of nurturing life, and savoring the unmatched taste of homegrown goodness.
For centuries, tomatoes have held a special place in cultures around the world. Originating in South America, they were initially met with suspicion in Europe, but eventually, their vibrant color and delicious taste won everyone over. Now, they’re a staple in cuisines worldwide, from Italian pasta sauces to Mexican salsas.
But why bother with the effort of growing your own? Well, for starters, the taste difference is undeniable. Plus, you have complete control over what goes into your tomatoes, ensuring they’re free from harmful pesticides and chemicals. And let’s be honest, there’s something incredibly rewarding about harvesting your own food. This tomato planting guide will equip you with simple, effective DIY tricks and hacks to maximize your yield and minimize common problems. I’ll walk you through everything from choosing the right variety to troubleshooting common issues, so you can enjoy a bountiful harvest of delicious tomatoes all season long. Get ready to get your hands dirty and experience the joy of homegrown tomatoes!
DIY Tomato Planting Guide: From Seed to Sauce!
Hey there, fellow gardening enthusiasts! I’m so excited you’re diving into the wonderful world of growing your own tomatoes. There’s nothing quite like the taste of a sun-ripened, homegrown tomato, and trust me, it’s easier than you think! This guide will walk you through every step, from starting seeds indoors to harvesting your delicious bounty. Let’s get our hands dirty!
Section 1: Starting Tomato Seeds Indoors
Starting your tomato seeds indoors gives them a head start, especially if you live in a region with a shorter growing season. This allows you to have mature plants ready to go into the ground as soon as the weather warms up.
* Timing is Key: Start your seeds 6-8 weeks before the last expected frost in your area. You can usually find this information online by searching for your local frost dates.
* Choosing the Right Seeds: Select tomato varieties that are well-suited to your climate and growing conditions. Consider factors like disease resistance, size, and intended use (slicing, sauce, cherry tomatoes, etc.).
* Gather Your Supplies: You’ll need seed starting trays or small pots, seed starting mix (not regular potting soil!), a spray bottle, a heat mat (optional, but helpful), and a grow light (also optional, but highly recommended).
Step-by-Step Instructions:
1. Prepare Your Seed Starting Trays: Fill your seed starting trays or pots with seed starting mix. Gently tap the trays to settle the mix, but don’t pack it down too tightly.
2. Sow the Seeds: Make a small indentation (about ¼ inch deep) in the center of each cell or pot. Place 2-3 tomato seeds in each indentation. This increases the chances of at least one seed germinating.
3. Cover the Seeds: Gently cover the seeds with a thin layer of seed starting mix.
4. Water Thoroughly: Use a spray bottle to mist the soil until it’s evenly moist. Avoid overwatering, as this can lead to damping off, a fungal disease that can kill seedlings.
5. Provide Warmth: Place the seed starting trays on a heat mat, if using. The ideal soil temperature for tomato seed germination is between 75-85°F (24-29°C).
6. Provide Light: If you’re using a grow light, position it a few inches above the seed starting trays. If you’re relying on natural light, place the trays in a south-facing window that receives at least 6 hours of sunlight per day.
7. Maintain Moisture: Keep the soil consistently moist, but not soggy. Check the soil moisture daily and mist with a spray bottle as needed.
8. Monitor Germination: Tomato seeds typically germinate within 5-10 days. Once the seedlings emerge, remove the heat mat (if using) and adjust the grow light to maintain a distance of a few inches above the plants.
9. Thin the Seedlings: Once the seedlings have their first set of true leaves (the leaves that appear after the initial seed leaves), thin them to one seedling per cell or pot. Choose the strongest, healthiest-looking seedling and carefully snip off the others at the soil line with scissors. Don’t pull them out, as this can disturb the roots of the remaining seedling.
10. Harden Off the Seedlings: About a week before you plan to transplant the seedlings outdoors, begin hardening them off. This process gradually acclimates the plants to outdoor conditions. Start by placing the trays outdoors in a sheltered location for a few hours each day, gradually increasing the amount of time they spend outside. Protect them from direct sunlight and strong winds.
Section 2: Preparing Your Garden Bed
A well-prepared garden bed is crucial for healthy tomato plants. Tomatoes need plenty of sunlight, well-drained soil, and adequate nutrients.
* Sunlight: Choose a location that receives at least 6-8 hours of direct sunlight per day.
* Soil: Tomatoes prefer well-drained, slightly acidic soil with a pH of 6.0-6.8.
* Nutrients: Tomatoes are heavy feeders, so it’s important to amend the soil with plenty of organic matter, such as compost or well-rotted manure.
Step-by-Step Instructions:
1. Clear the Area: Remove any weeds, grass, rocks, and debris from the planting area.
2. Test the Soil: If you haven’t already, test your soil pH. You can purchase a soil testing kit at most garden centers. If the pH is too high (alkaline), you can lower it by adding sulfur or peat moss to the soil.
3. Amend the Soil: Spread a 2-3 inch layer of compost or well-rotted manure over the planting area.
4. Till or Dig: Use a garden fork or tiller to incorporate the compost into the soil to a depth of 8-12 inches. This will improve drainage, aeration, and nutrient availability.
5. Create Planting Holes: Dig planting holes that are slightly larger than the root balls of your tomato seedlings. Space the holes according to the mature size of the tomato variety you’re growing. Generally, indeterminate varieties (those that continue to grow throughout the season) need more space than determinate varieties (those that grow to a certain size and then stop). Check the seed packet or plant tag for specific spacing recommendations.
6. Add Fertilizer (Optional): If desired, add a small amount of slow-release fertilizer to each planting hole. Choose a fertilizer that is specifically formulated for tomatoes.
Section 3: Transplanting Tomato Seedlings Outdoors
Transplanting your tomato seedlings outdoors is a critical step. Handle the seedlings carefully to avoid damaging their delicate roots.
* Timing: Transplant your tomato seedlings outdoors after the last expected frost and when the soil has warmed up to at least 60°F (16°C).
* Weather: Choose a cloudy or overcast day to transplant your seedlings. This will help to reduce transplant shock.
* Watering: Water the seedlings thoroughly before transplanting.
Step-by-Step Instructions:
1. Remove Seedlings from Trays: Gently remove the tomato seedlings from their seed starting trays or pots. Be careful not to damage the roots. If the seedlings are root-bound (the roots are circling around the bottom of the pot), gently loosen the roots before planting.
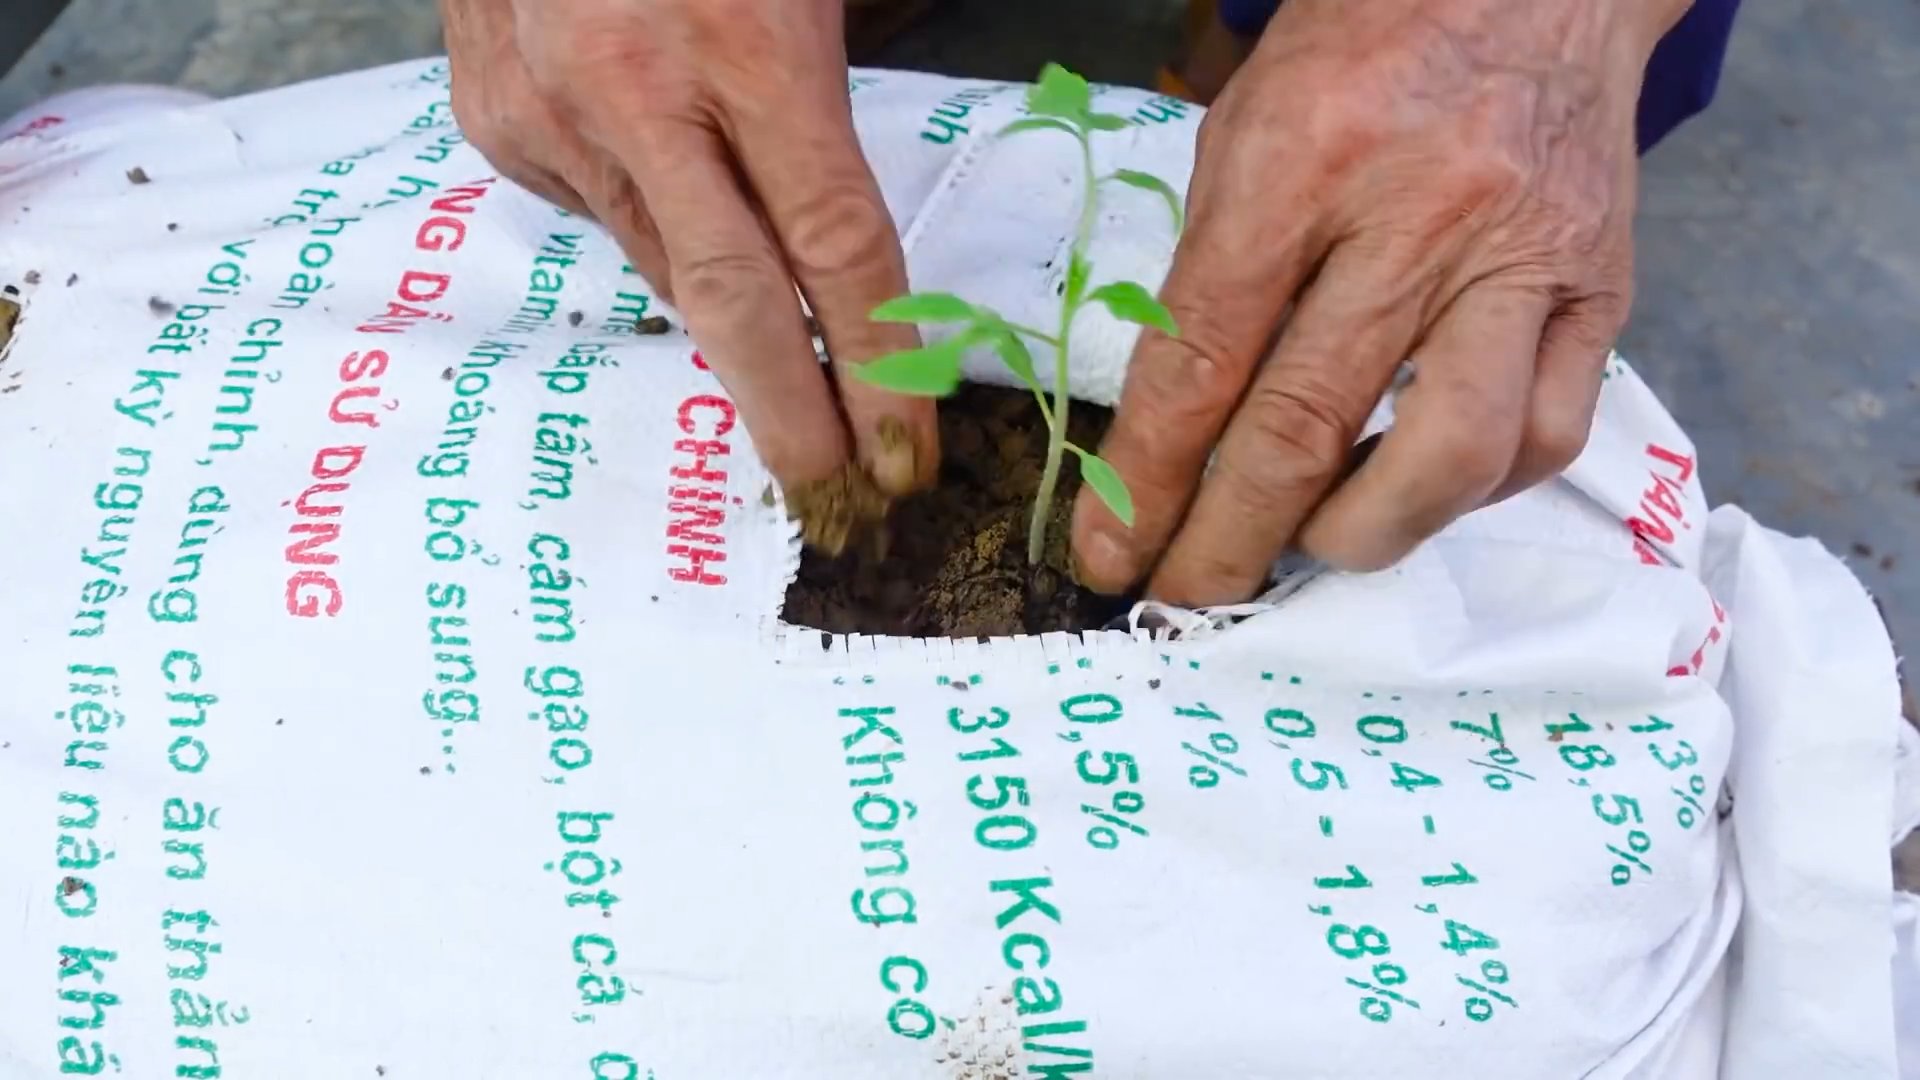
2. Plant the Seedlings: Place each seedling in a planting hole. Plant the seedlings slightly deeper than they were growing in their seed starting trays. You can even bury the bottom set of leaves. This will encourage the development of more roots along the buried stem, resulting in a stronger, more vigorous plant.
3. Backfill the Holes: Fill the planting holes with soil, gently firming the soil around the base of the plants.
4. Water Thoroughly: Water the newly transplanted seedlings thoroughly.
5. Add Support: Install stakes, cages, or trellises to support the tomato plants as they grow. This will help to prevent the plants from falling over and will also improve air circulation, reducing the risk of disease.
6. Mulch: Apply a layer of mulch around the base of the plants. Mulch helps to retain moisture, suppress weeds, and regulate soil temperature. Organic mulches, such as straw, hay, or wood chips, will also decompose over time, adding nutrients to the soil.
Section 4: Caring for Your Tomato Plants
Once your tomato plants are in the ground, it’s important to provide them with proper care to ensure a bountiful harvest.
* Watering: Water your tomato plants deeply and regularly, especially during hot, dry weather. Aim to water at the base of the plants to avoid wetting the foliage, which can increase the risk of disease.
* Fertilizing: Fertilize your tomato plants every 2-3 weeks with a fertilizer that is specifically formulated for tomatoes.
* Pruning: Prune your tomato plants regularly to remove suckers (the small shoots that grow between the main stem and the branches). Pruning helps to improve air circulation and allows the plants to focus their energy on producing fruit.
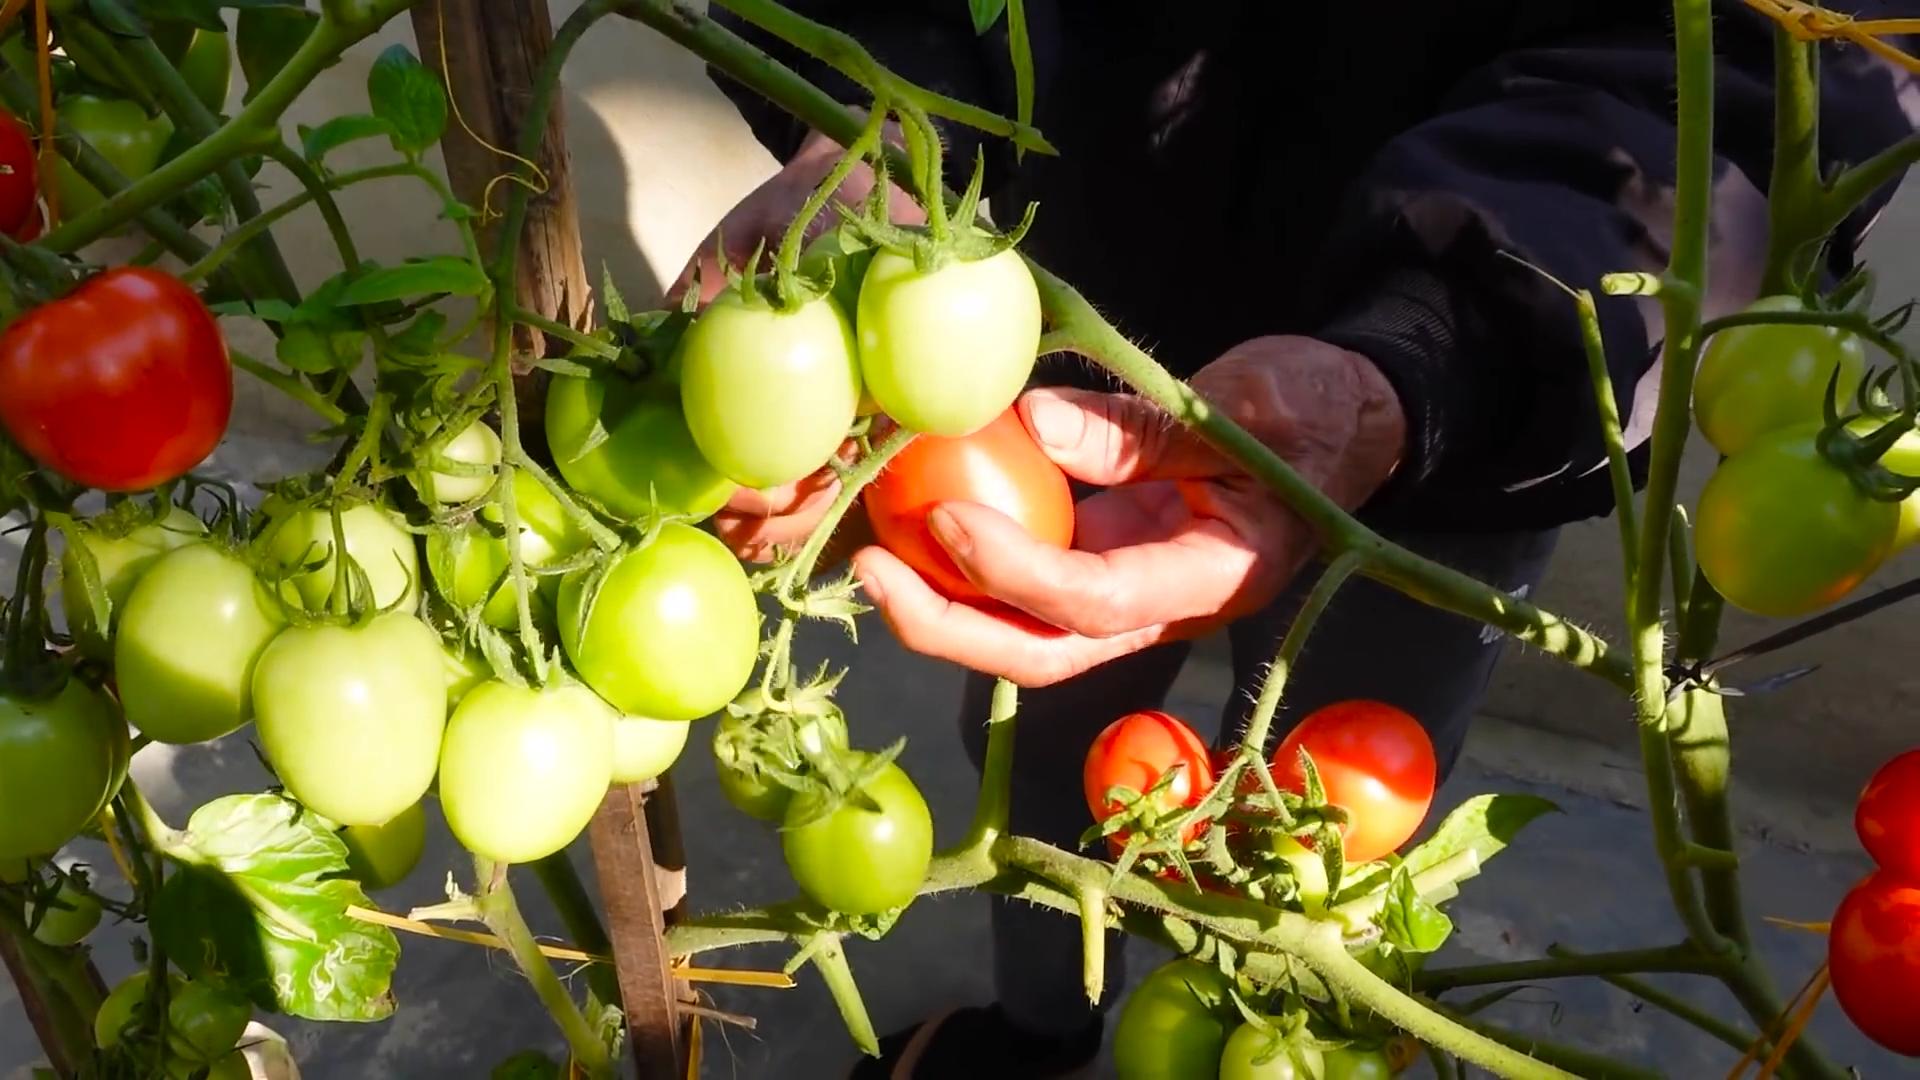
* Pest and Disease Control: Monitor your tomato plants regularly for pests and diseases. Common tomato pests include aphids, tomato hornworms, and whiteflies. Common tomato diseases include early blight, late blight, and blossom end rot. Take action to control pests and diseases as soon as they are detected.
Step-by-Step Instructions:
1. Watering Schedule: Water deeply when the top inch of soil feels dry to the touch. Avoid frequent, shallow watering, as this can encourage shallow root growth.
2. Fertilizing Application: Follow the instructions on the fertilizer label for application rates and frequency.
3. Pruning Technique: Use clean pruning shears to remove suckers. Snap them off when they are small, or cut them
Conclusion
So, there you have it! This simple yet effective DIY trick for planting tomatoes is a game-changer for any gardener, regardless of experience level. We’ve walked you through the steps, explained the science behind why it works, and hopefully, inspired you to ditch the traditional planting methods and embrace this innovative approach.
Why is this a must-try? Because it’s more than just a planting technique; it’s an investment in the future health and productivity of your tomato plants. By providing a nutrient-rich environment right from the start, you’re setting your tomatoes up for success, leading to stronger roots, healthier foliage, and, most importantly, a bountiful harvest of delicious, juicy tomatoes. Imagine biting into a sun-ripened tomato, bursting with flavor, knowing that you played a crucial role in its creation, all thanks to this simple DIY trick.
But don’t just take our word for it. The real magic happens when you try it yourself. And the beauty of this method is its adaptability. Feel free to experiment with variations to suit your specific needs and preferences. For example, if you’re planting in particularly acidic soil, consider adding a small amount of lime to the planting hole to balance the pH. Or, if you’re concerned about pests, you could incorporate some diatomaceous earth into the mix to deter slugs and snails.
Variations and Suggestions:
* Compost Tea Boost: Instead of plain water, use diluted compost tea to water the seedlings after planting. This will provide an extra boost of beneficial microbes and nutrients.
* Mycorrhizae Magic: Sprinkle mycorrhizal fungi granules into the planting hole before placing the seedling. These fungi form a symbiotic relationship with the tomato roots, enhancing nutrient uptake.
* Companion Planting Power: Plant basil or marigolds near your tomatoes. These companion plants can help deter pests and improve the overall health of your tomato plants.
* Epsom Salt Enhancement: For an extra boost of magnesium, dissolve a tablespoon of Epsom salt in a gallon of water and use it to water your tomato plants every few weeks. Magnesium is essential for chlorophyll production and overall plant health.
* Different Burial Depths: Experiment with burying different amounts of the stem. Some gardeners swear by burying a significant portion of the stem to encourage more root growth, while others prefer a shallower planting depth. Observe your plants and adjust accordingly.
We are confident that this DIY trick will revolutionize your tomato gardening experience. It’s a simple, cost-effective, and highly effective way to ensure a thriving tomato crop. So, grab your seedlings, gather your supplies, and get ready to witness the incredible results firsthand.
We encourage you to try this tomato planting guide and share your experiences with us! Let us know how it worked for you, what variations you tried, and any tips or tricks you discovered along the way. Your feedback is invaluable and will help us refine and improve this guide for future gardeners. Share your photos and stories on social media using [Your Hashtag] and let’s create a community of thriving tomato growers! Happy gardening!
Frequently Asked Questions (FAQ)
What kind of fertilizer should I use in the planting hole?
The best type of fertilizer to use in the planting hole is a slow-release organic fertilizer. This will provide a steady supply of nutrients to your tomato plants over time. Look for a fertilizer that is specifically formulated for tomatoes or vegetables. Bone meal is also a great addition, as it provides phosphorus, which is essential for root development. Avoid using synthetic fertilizers, as they can burn the roots of your seedlings. A balanced fertilizer with an NPK ratio of around 5-10-5 or 10-10-10 is a good starting point. Remember to follow the instructions on the fertilizer package carefully.
How deep should I bury the tomato seedling?
This is a great question and a point of debate among gardeners! The beauty of tomatoes is that they can grow roots along their stems. Many gardeners recommend burying the seedling deep, up to the first set of leaves. This encourages the plant to develop a more extensive root system, leading to a stronger and more productive plant. However, if you’re planting in heavy clay soil, burying the seedling too deep can lead to root rot. In that case, a shallower planting depth might be preferable. Experiment and see what works best for your soil conditions.
What if I don’t have compost? Can I use something else?
Absolutely! Compost is ideal, but there are several alternatives you can use. Well-rotted manure is a great substitute, as it provides similar nutrients and organic matter. You can also use peat moss or coconut coir to improve soil drainage and aeration. If you don’t have any of these options, you can simply use a good quality potting mix. Just make sure to amend the soil with some organic matter to improve its fertility and water-holding capacity.
How often should I water my tomato plants after planting?
Watering frequency depends on several factors, including the weather, soil type, and the size of your plants. In general, you should water your tomato plants deeply whenever the top inch of soil feels dry to the touch. During hot, dry weather, you may need to water them every day. In cooler, wetter weather, you may only need to water them every few days. Avoid overwatering, as this can lead to root rot. A good rule of thumb is to water deeply and less frequently, rather than shallowly and more often.
What are some common tomato pests and diseases, and how can I prevent them?
Tomato plants are susceptible to a variety of pests and diseases. Some common pests include aphids, tomato hornworms, and whiteflies. Common diseases include early blight, late blight, and blossom end rot. To prevent these problems, choose disease-resistant varieties, practice good sanitation (remove any diseased leaves or plants), and water your plants from the base to avoid wetting the foliage. You can also use organic pest control methods, such as insecticidal soap or neem oil, to control pests. For blossom end rot, ensure your plants are getting enough calcium.
Can I use this method for other plants besides tomatoes?
While this method is particularly beneficial for tomatoes, it can also be adapted for other plants that benefit from deep planting and nutrient-rich soil, such as peppers and eggplants. The key is to adjust the amount of fertilizer and compost to suit the specific needs of the plant. Research the specific nutrient requirements of the plant you’re growing and adjust the planting hole mixture accordingly.
What if my tomato seedlings are leggy?
Leggy tomato seedlings are tall and spindly, often due to insufficient light. This DIY trick is especially helpful for leggy seedlings because you can bury a significant portion of the stem, which will encourage root growth along the buried stem. When planting, gently remove the lower leaves and bury the stem up to the first set of leaves. This will result in a stronger, more compact plant.
How long will it take to see results from this planting method?
You should start to see results within a few weeks of planting. Your tomato plants should be growing vigorously and developing healthy foliage. You may also notice that they are more resistant to pests and diseases. The ultimate result, of course, will be a bountiful harvest of delicious tomatoes! The exact timing will depend on factors such as the weather, soil conditions, and the variety of tomato you are growing.
Leave a Comment