

Growing Kohlrabi at Home might sound intimidating, but trust me, it’s easier than you think! Imagine harvesting crisp, slightly sweet, and delightfully crunchy kohlrabi straight from your own backyard. Forget those bland supermarket veggies – we’re talking about garden-fresh goodness that will elevate your salads, stir-fries, and even your snacking game!
Kohlrabi, sometimes called a German turnip (though it’s not a turnip at all!), has a fascinating history. Originating in Europe, it’s been a staple in German and Eastern European cuisine for centuries. Think of hearty stews and vibrant slaws – kohlrabi has been adding its unique flavor to these dishes for generations. But you don’t need to be a culinary historian to appreciate this versatile vegetable.
So, why should you bother growing kohlrabi at home? Well, for starters, it’s incredibly rewarding to nurture something from seed to table. Plus, homegrown kohlrabi tastes infinitely better than anything you can buy in a store. More importantly, in today’s world, knowing where your food comes from and having control over what goes into it is more important than ever. This DIY guide will provide you with simple, effective tricks and hacks to ensure a bountiful harvest, even if you’re a complete beginner. Let’s get our hands dirty and unlock the secrets to successful kohlrabi cultivation!
Growing Kohlrabi: A Beginner’s Guide to This Underrated Veggie
Okay, let’s talk kohlrabi! It’s that weird-looking, almost alien-like vegetable you might have seen at the farmer’s market. But trust me, it’s delicious and surprisingly easy to grow at home. Think of it as a cross between a turnip and a cabbage, with a mild, slightly sweet flavor. I’m going to walk you through everything you need to know to successfully grow kohlrabi in your own garden.
Choosing Your Kohlrabi Variety
First things first, let’s pick a variety. There are a few different types of kohlrabi, and they come in different colors and sizes. Here are a few popular options:
- Early White Vienna: This is a classic, fast-maturing variety that produces pale green bulbs. It’s a great choice for beginners.
- Early Purple Vienna: Similar to the White Vienna, but with a beautiful purple skin. The flesh is still white.
- Grand Duke: This is a larger variety that’s known for its disease resistance. It’s a good option if you’ve had trouble with pests or diseases in the past.
- Kossak: This is a giant variety that can grow to be quite large without becoming woody. If you want to impress your neighbors, this is the one to grow!
I usually go with the Early White Vienna because it’s reliable and matures quickly. But feel free to experiment and see which variety you like best!
Starting Your Kohlrabi Seeds
You can either start your kohlrabi seeds indoors or direct sow them in your garden. I prefer to start them indoors because it gives them a head start, especially if you live in a cooler climate.
Starting Seeds Indoors
1. Gather Your Supplies: You’ll need seed starting trays or small pots, seed starting mix, kohlrabi seeds, a spray bottle, and a grow light (optional, but recommended).
2. Fill Your Trays: Fill your seed starting trays or pots with seed starting mix. Gently pat it down to remove any air pockets.
3. Sow the Seeds: Make a small indentation in the soil (about ¼ inch deep) and drop in 2-3 kohlrabi seeds per cell or pot. Cover the seeds with a thin layer of soil.
4. Water Gently: Use a spray bottle to gently moisten the soil. You don’t want to overwater, just keep the soil consistently damp.
5. Provide Light: Place your seed starting trays under a grow light or in a sunny window. If you’re using a grow light, keep it about 2-4 inches above the seedlings.
6. Keep Warm: Kohlrabi seeds germinate best at temperatures between 65-75°F (18-24°C).
7. Thin the Seedlings: Once the seedlings have emerged and have a couple of true leaves (the second set of leaves), thin them to one seedling per cell or pot. Choose the strongest, healthiest-looking seedling and snip off the others at the soil line.
Direct Sowing Seeds Outdoors
1. Prepare the Soil: Choose a sunny spot in your garden with well-drained soil. Amend the soil with compost or other organic matter to improve its fertility.
2. Sow the Seeds: Sow the seeds directly into the soil, about ½ inch deep and 1-2 inches apart.
3. Water Gently: Water the soil gently to keep it moist.
4. Thin the Seedlings: Once the seedlings have emerged and have a couple of true leaves, thin them to 4-6 inches apart.
Transplanting Your Kohlrabi Seedlings
If you started your seeds indoors, you’ll need to transplant them into your garden once they’re big enough.
1. Harden Off the Seedlings: Before transplanting, you’ll need to harden off the seedlings. This means gradually exposing them to outdoor conditions over a period of 7-10 days. Start by placing them outside for a few hours each day, gradually increasing the amount of time they spend outdoors.
2. Prepare the Planting Area: Choose a sunny spot in your garden with well-drained soil. Amend the soil with compost or other organic matter to improve its fertility.
3. Dig Holes: Dig holes that are slightly larger than the root balls of your seedlings. Space the holes 4-6 inches apart.
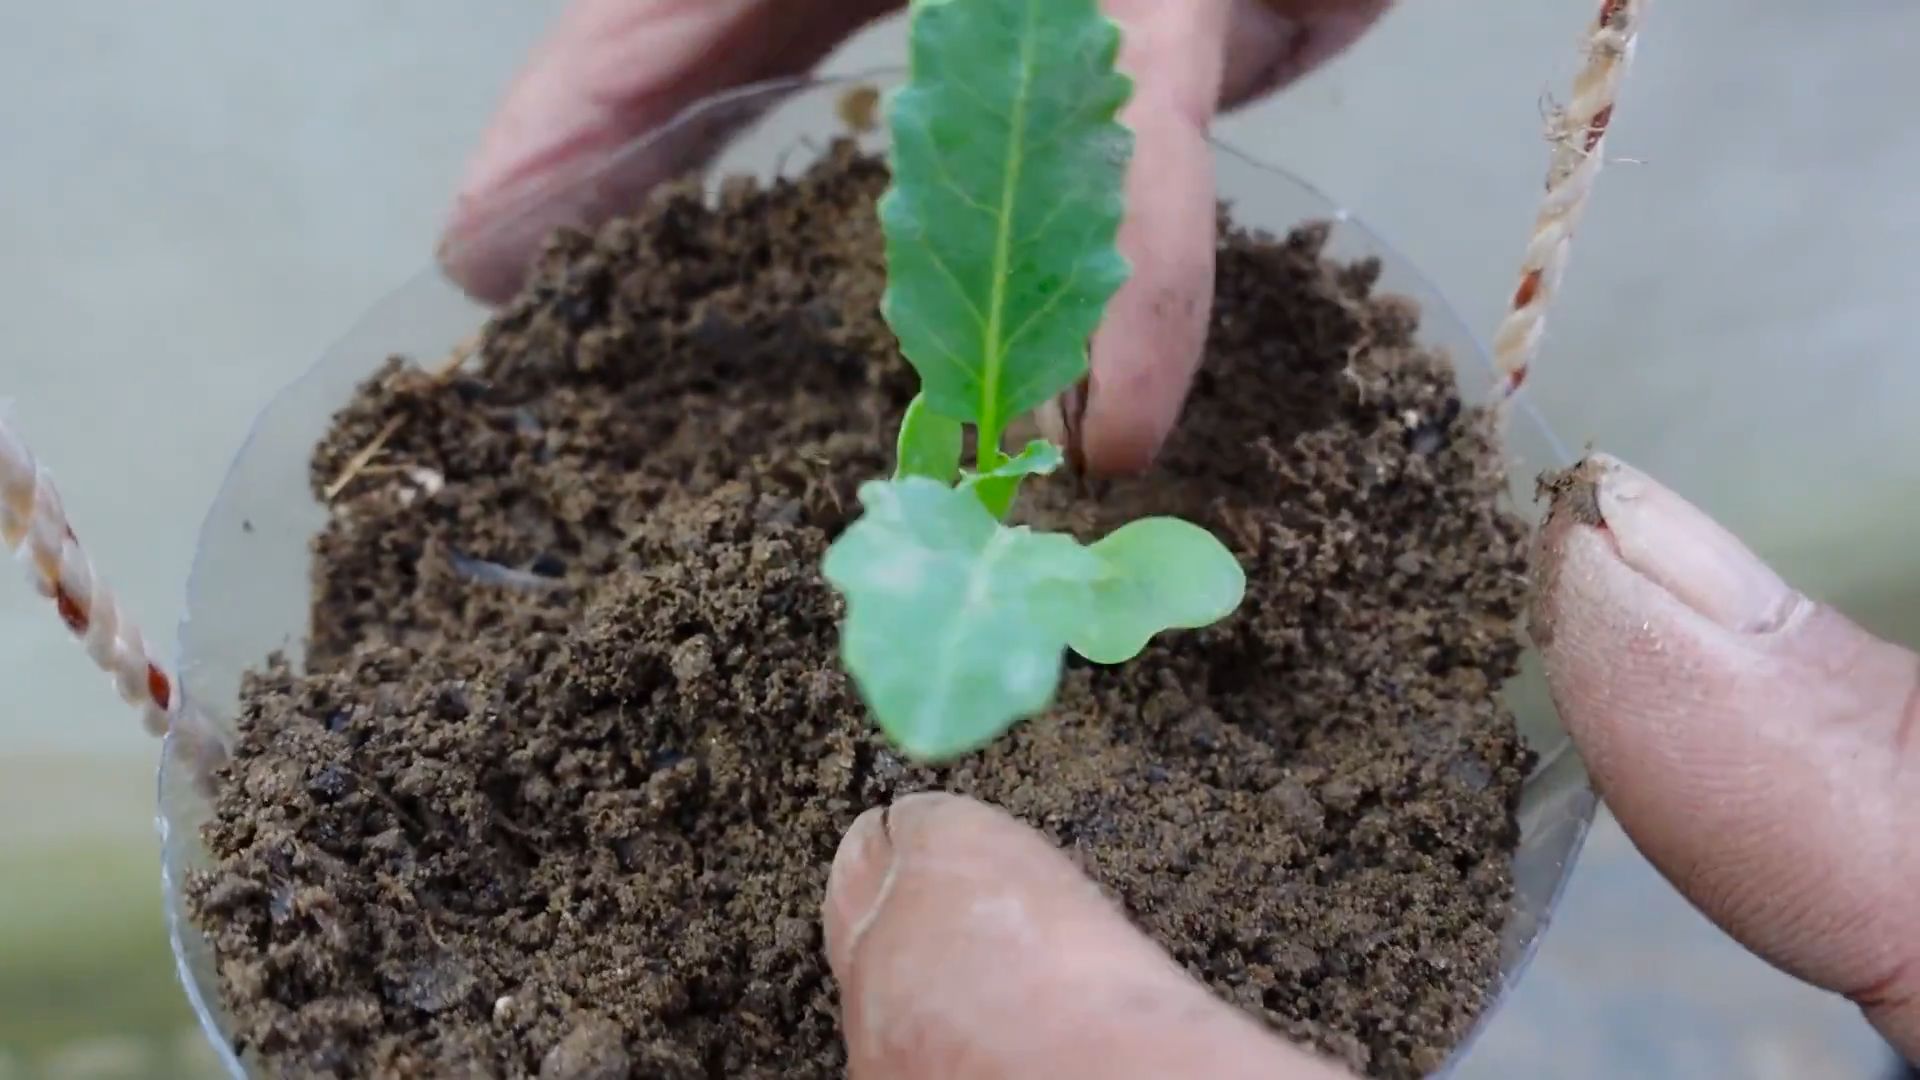
4. Transplant the Seedlings: Gently remove the seedlings from their trays or pots and place them in the holes. Make sure the top of the root ball is level with the soil surface.
5. Fill the Holes: Fill the holes with soil and gently pat it down.
6. Water Thoroughly: Water the seedlings thoroughly after transplanting.
Caring for Your Kohlrabi Plants
Once your kohlrabi plants are in the ground, there are a few things you need to do to keep them healthy and productive.
1. Water Regularly: Kohlrabi needs consistent moisture to grow well. Water deeply whenever the soil feels dry to the touch. Aim for about 1 inch of water per week.
2. Fertilize: Kohlrabi is a heavy feeder, so it benefits from regular fertilization. Use a balanced fertilizer or side-dress with compost every few weeks.
3. Weed Regularly: Keep the area around your kohlrabi plants free of weeds. Weeds can compete with the kohlrabi for nutrients and water.
4. Mulch: Apply a layer of mulch around your kohlrabi plants to help retain moisture, suppress weeds, and regulate soil temperature.
5. Protect from Pests: Kohlrabi can be susceptible to pests like cabbage worms, aphids, and flea beetles. Inspect your plants regularly and take action if you see any signs of infestation. You can use insecticidal soap, neem oil, or row covers to protect your plants.
Harvesting Your Kohlrabi
Kohlrabi is ready to harvest when the bulbs are about 2-3 inches in diameter. Don’t let them get too big, or they can become woody and tough.
1. Loosen the Soil: Use a garden fork or trowel to loosen the soil around the base of the plant.
2. Pull the Plant: Gently pull the plant out of the ground.
3. Cut Off the Leaves: Cut off the leaves, leaving about 1-2 inches of stem attached to the bulb.
4. Store the Kohlrabi: Store the kohlrabi in the refrigerator for up to several weeks.
Troubleshooting Common Kohlrabi Problems
Even with the best care, you might encounter some problems when growing kohlrabi. Here are a few common issues and how to deal with them:
- Bolting: Bolting is when the plant prematurely goes to seed. This can happen if the weather is too hot or if the plant is stressed. To prevent bolting, choose a bolt-resistant variety and provide consistent moisture.
- Cracking: Cracking can occur if the soil is too dry or if the plant is exposed to sudden changes in moisture. To prevent cracking, water regularly and mulch around the plants.
- Pests: As mentioned earlier, kohlrabi can be susceptible to pests. Inspect your plants regularly and take action if you see any signs of infestation.
- Diseases: Kohlrabi can also be susceptible to diseases like clubroot and black rot. Choose disease-resistant varieties and practice good crop rotation to prevent these diseases.
Enjoying Your Homegrown Kohlrabi
Now for the best part – eating your homegrown kohlrabi! There are so many ways to enjoy this versatile vegetable.
- Raw: Kohlrabi is delicious raw, sliced thinly and added to salads or slaws. It has a crisp, slightly sweet flavor that’s similar to a radish or turnip.
- Roasted: Roasting kohlrabi brings out its sweetness and makes it tender and delicious. Simply toss it with olive oil, salt, and pepper, and roast it at 400°F (200°C) for about 20-30 minutes.
- Steamed: Steaming kohlrabi is a quick and easy way to cook it. Steam it until it’s tender-crisp, about 5-10 minutes.
- Mashed: Mashed kohlrabi is a great alternative to mashed potatoes. Simply boil or steam the kohlrabi until it’s tender, then mash it with butter, milk, and seasonings.
- In Soups and Stews: Kohlrabi adds a delicious flavor and texture to soups and stews. Add it to your favorite recipes for a
Conclusion
So, there you have it! Growing kohlrabi at home isn’t just a gardening project; it’s a gateway to fresh, flavorful, and incredibly versatile produce right at your fingertips. We’ve walked through the process, from selecting the right seeds to harvesting your own crisp, delicious bulbs. But why should you bother with this particular vegetable?
Simply put, the taste of homegrown kohlrabi is unparalleled. The subtle sweetness and crisp texture are amplified when you’ve nurtured the plant yourself, free from the stresses of long-distance transportation and extended storage. You’ll notice a significant difference compared to store-bought varieties, which can sometimes be woody or bitter. Plus, you have complete control over the growing process, ensuring that your kohlrabi is organic and free from harmful pesticides.
Beyond the superior flavor, growing kohlrabi at home is incredibly rewarding. It’s a relatively quick and easy crop to cultivate, making it perfect for beginner gardeners. The satisfaction of watching those little seedlings sprout and develop into plump, edible bulbs is truly something special. And let’s not forget the health benefits! Kohlrabi is packed with vitamins, minerals, and fiber, making it a nutritious addition to your diet.
But the real beauty of growing kohlrabi at home lies in its versatility. You can enjoy it raw in salads, thinly sliced in slaws, or grated into fritters. It can be steamed, roasted, stir-fried, or even added to soups and stews. The leaves are also edible and can be used like spinach or kale.
Ready to take your kohlrabi game to the next level? Consider these variations:
* Purple Vienna Kohlrabi: For a visually stunning addition to your garden and plate, try growing the Purple Vienna variety. It has a beautiful purple skin and a slightly sweeter flavor than the green varieties.
* White Vienna Kohlrabi: A classic choice, the White Vienna is known for its mild flavor and crisp texture. It’s a reliable and easy-to-grow variety.
* Early White Vienna Kohlrabi: If you’re looking for a quick harvest, the Early White Vienna matures faster than other varieties.
* Experiment with Companion Planting: Plant kohlrabi alongside herbs like dill, chamomile, or mint to deter pests and improve growth. Marigolds are also excellent companion plants.
* Fermented Kohlrabi: For a probiotic-rich treat, try fermenting your kohlrabi. It’s a simple process that results in a tangy and delicious condiment.Don’t be afraid to experiment and find what works best for you and your garden. The key is to provide your kohlrabi with plenty of sunlight, well-drained soil, and consistent watering.
We truly believe that growing kohlrabi at home is a must-try for any gardener or food enthusiast. It’s a rewarding experience that will provide you with fresh, flavorful, and nutritious produce. So, grab some seeds, get your hands dirty, and start growing!
We’re eager to hear about your experiences! Share your tips, tricks, and photos in the comments below. Let’s build a community of kohlrabi growers and learn from each other. What varieties did you try? What challenges did you face? What delicious recipes did you create? Your insights will help others succeed in their kohlrabi growing journey. Happy gardening!
Frequently Asked Questions (FAQ)
What are the most common problems when growing kohlrabi, and how can I prevent them?
One of the most frequent issues is bolting, where the plant prematurely goes to seed, resulting in a tough and less flavorful bulb. This is often caused by inconsistent watering or extreme temperature fluctuations. To prevent bolting, ensure consistent watering, especially during hot weather. Mulching around the plants can help retain moisture and regulate soil temperature. Choosing bolt-resistant varieties can also be beneficial. Another common problem is pest infestations, such as cabbage worms or aphids. Regularly inspect your plants for signs of pests and take action promptly. Organic pest control methods, like introducing beneficial insects or using insecticidal soap, are effective. Crop rotation can also help prevent pest buildup in the soil. Finally, nutrient deficiencies can lead to stunted growth or yellowing leaves. Ensure your soil is rich in organic matter and fertilize regularly with a balanced fertilizer.
How often should I water my kohlrabi plants?
Kohlrabi needs consistent moisture to thrive. Aim to water your plants deeply about once or twice a week, depending on the weather and soil conditions. The goal is to keep the soil consistently moist but not waterlogged. A good rule of thumb is to water when the top inch of soil feels dry to the touch. During hot, dry periods, you may need to water more frequently. Mulching around the plants can help retain moisture and reduce the need for frequent watering. Using a soaker hose or drip irrigation can also be an efficient way to deliver water directly to the roots.
When is the best time to harvest kohlrabi?
The ideal time to harvest kohlrabi is when the bulbs are about 2-3 inches in diameter. At this size, they are typically tender and flavorful. Larger bulbs can become tough and woody. Check the seed packet for the expected maturity date, but also monitor the size of the bulbs. To harvest, simply cut the bulb from the stem just above the soil line. You can also harvest the leaves, which are edible and can be used like spinach or kale. Harvest the leaves when they are young and tender.
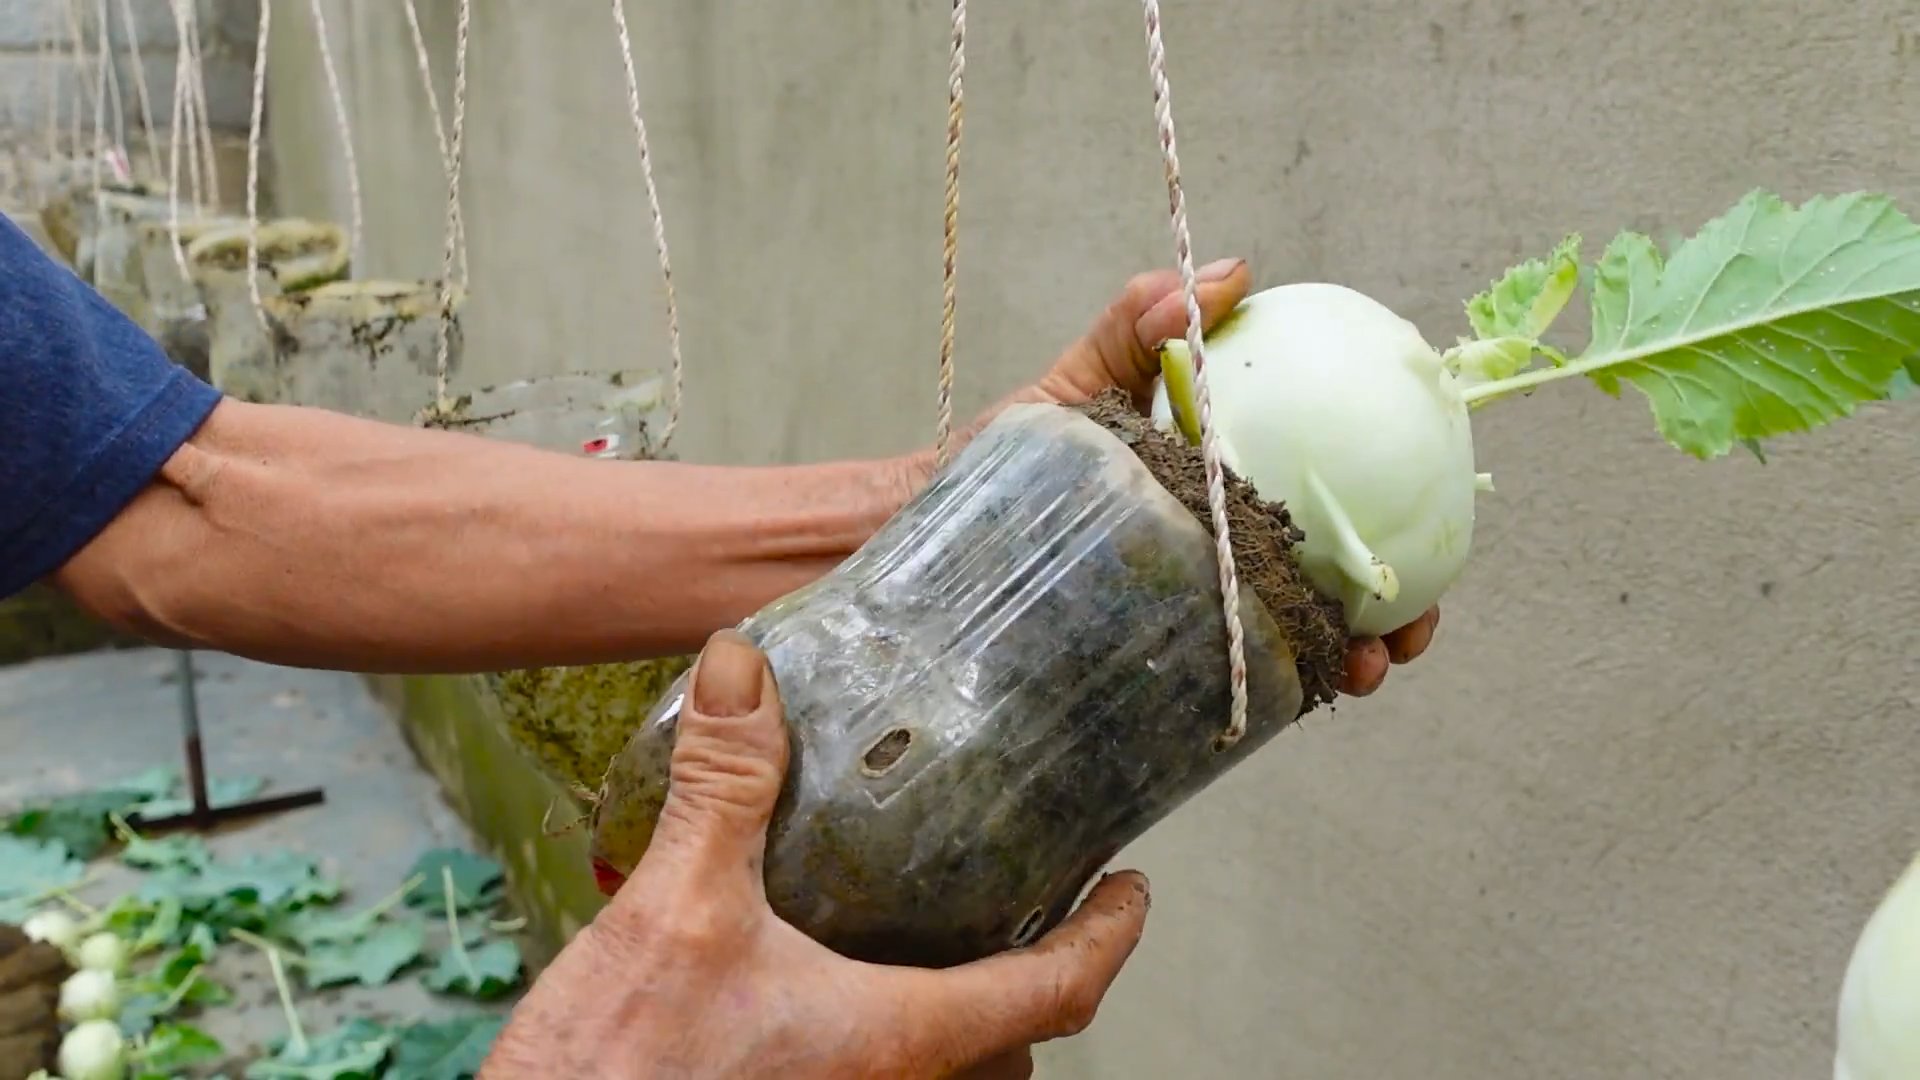
Can I grow kohlrabi in containers?
Yes, kohlrabi can be successfully grown in containers, making it a great option for gardeners with limited space. Choose a container that is at least 12 inches deep and wide to provide enough room for the roots to develop. Use a well-draining potting mix and ensure the container has drainage holes. Water regularly and fertilize every few weeks with a balanced fertilizer. Place the container in a sunny location that receives at least 6 hours of sunlight per day.
What are some creative ways to use kohlrabi in cooking?
Kohlrabi is incredibly versatile in the kitchen. You can enjoy it raw in salads, thinly sliced in slaws, or grated into fritters. It can be steamed, roasted, stir-fried, or even added to soups and stews. The leaves are also edible and can be used like spinach or kale. Try roasting kohlrabi with olive oil, salt, and pepper for a simple and delicious side dish. You can also make kohlrabi fries by cutting the bulbs into strips, tossing them with oil and spices, and baking them in the oven. For a refreshing summer salad, combine grated kohlrabi with carrots, apples, and a light vinaigrette. Don’t be afraid to experiment and find your favorite ways to enjoy this unique vegetable.
How do I store kohlrabi after harvesting?
To store kohlrabi, remove the leaves and store the bulbs in the refrigerator. They will keep for several weeks if stored properly. You can also store the leaves separately in a plastic bag in the refrigerator. To extend the shelf life of kohlrabi, you can blanch and freeze it. Cut the bulbs into cubes or slices, blanch them in boiling water for 2-3 minutes, and then transfer them to an ice bath to stop the cooking process. Drain the kohlrabi and store it in freezer bags or containers. Frozen kohlrabi can be used in soups, stews, and stir-fries.
Is kohlrabi a cool-season crop?
Yes, kohlrabi is a cool-season crop, meaning it thrives in cooler temperatures. It’s best to plant kohlrabi in early spring or late summer for a fall harvest. Hot weather can cause kohlrabi to bolt, so it’s important to time your planting accordingly. In areas with mild winters, you may be able to grow kohlrabi throughout the winter.
What kind of soil is best for growing kohlrabi?
Kohlrabi prefers well-drained soil that is rich in organic matter. Amend your soil with compost or other organic materials before planting to improve drainage and fertility. The ideal soil pH for kohlrabi is between 6.0 and 7.5.
How much sunlight does kohlrabi need?
Kohlrabi needs at least 6 hours of sunlight per day to thrive. Choose a sunny location in your garden for planting. If you are growing kohlrabi in containers, make sure to place the containers in a sunny spot.
What are the nutritional benefits of kohlrabi?
Kohlrabi is a nutritional powerhouse, packed with vitamins, minerals, and fiber. It’s a good source of vitamin C, potassium, and vitamin B6. It’s also low in calories and fat, making it a healthy addition to your diet. The fiber in kohlrabi can help improve digestion and promote satiety.

Leave a Comment