

Growing onions at home can seem daunting, but trust me, it’s more rewarding than you might think! Imagine plucking fresh, flavorful onions straight from your backyard, ready to elevate your culinary creations. Forget those bland, store-bought onions – we’re talking about homegrown goodness bursting with taste.
For centuries, onions have been a staple in cuisines worldwide, dating back to ancient civilizations like Egypt and Rome. They weren’t just a food source; they were valued for their medicinal properties and even used in religious ceremonies. Now, you can continue this rich history by cultivating your own onion patch!
Why should you bother with this DIY project? Well, for starters, growing onions at home allows you to control the quality and freshness of your produce. You’ll avoid harmful pesticides and enjoy a superior flavor that store-bought onions simply can’t match. Plus, it’s incredibly satisfying to nurture a plant from seed to harvest. In this article, I’ll share some simple yet effective tricks and hacks to help you grow plump, juicy onions, even if you’re a complete beginner. Get ready to unleash your inner gardener and enjoy the delicious rewards!
Growing Onions From Scraps: A Beginner’s Guide
Hey there, fellow gardening enthusiasts! Ever find yourself tossing away the root end of an onion? Stop right there! Did you know you can actually regrow onions from those scraps? It’s a super easy and rewarding DIY project, and I’m here to guide you through every step. Get ready to have a never-ending supply of fresh onions right from your kitchen!
What You’ll Need
Before we dive in, let’s gather our supplies. This is a pretty low-cost project, which is always a win in my book!
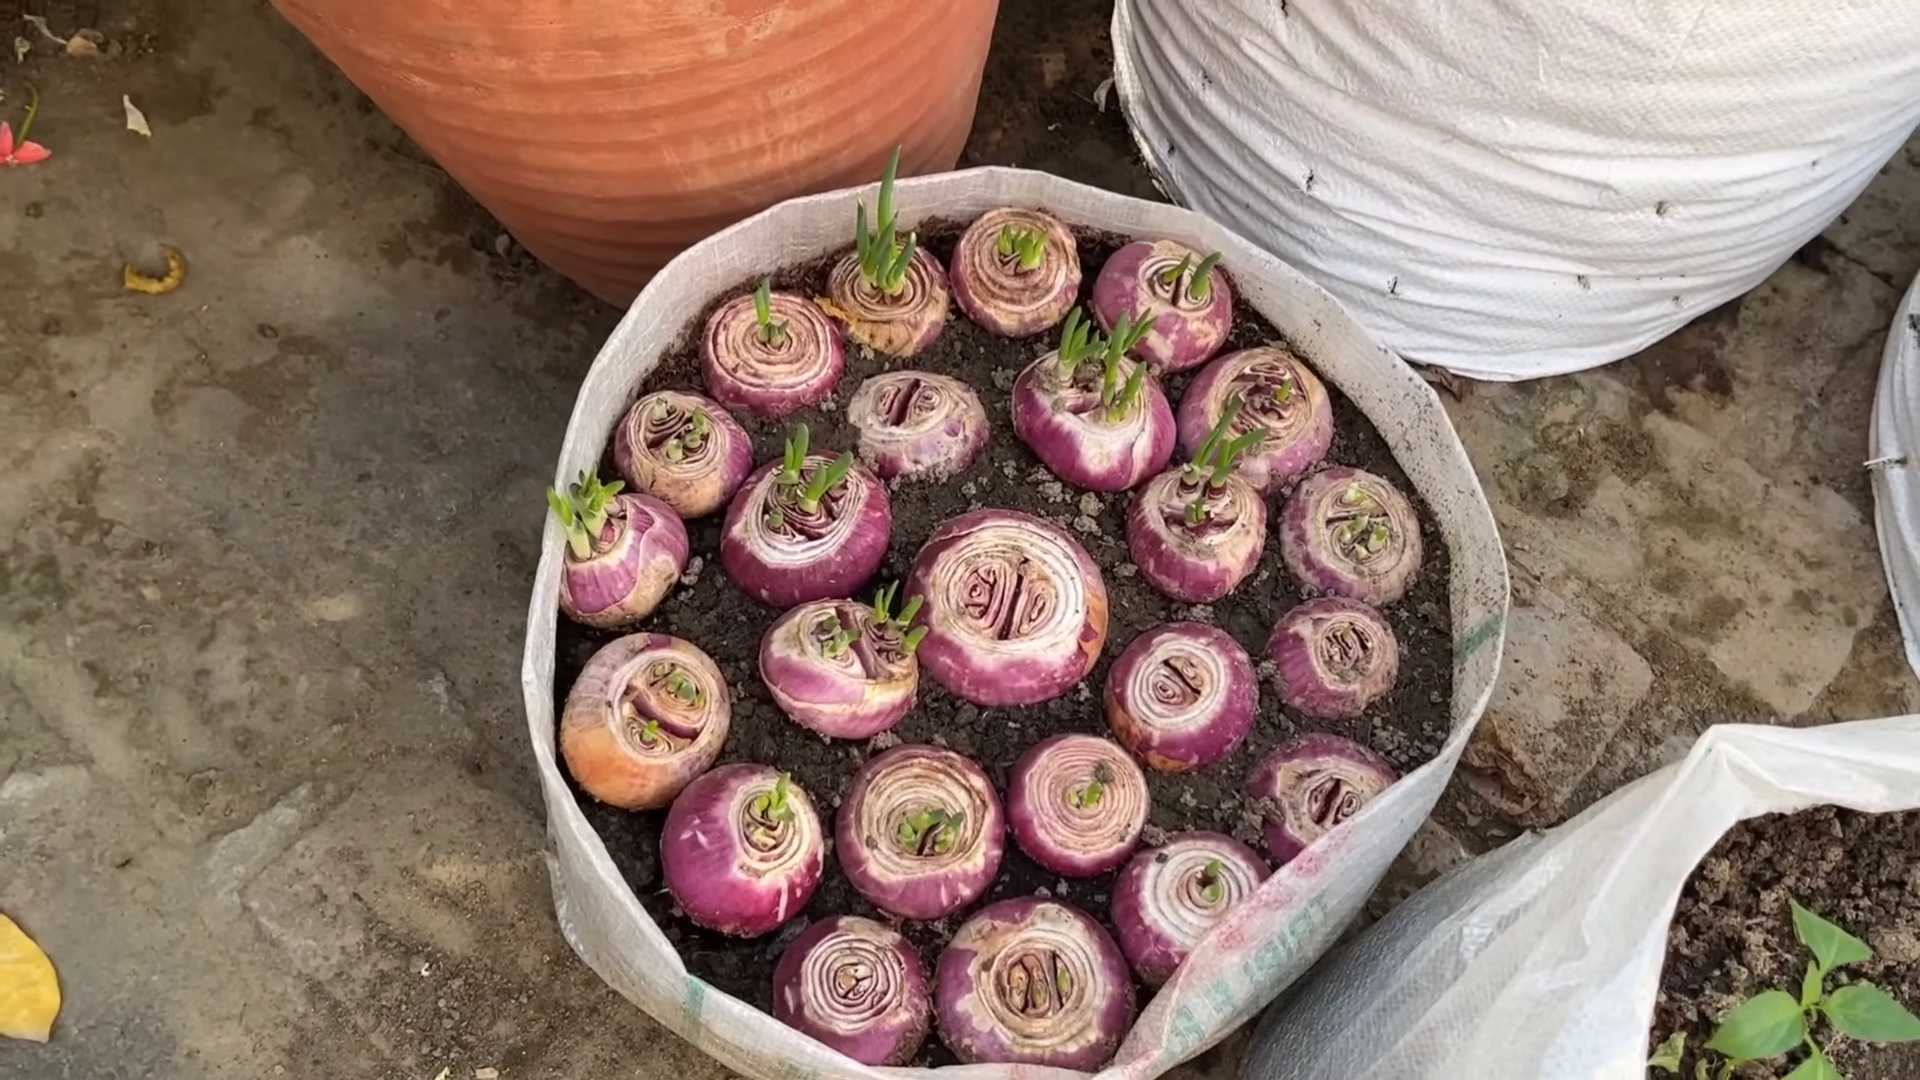
* Onion Scraps: The star of the show! You’ll need the bottom 1-2 inches of an onion, with the roots still attached. Any type of onion will work – yellow, white, red, even shallots!
* A Small Container: A glass jar, a plastic cup, or even a yogurt container will do. Just make sure it’s clean.
* Water: Tap water is perfectly fine.
* Potting Soil: Regular potting soil is best for transplanting.
* A Pot or Garden Bed: For planting your regrown onion.
* Optional: Rooting Hormone: While not essential, rooting hormone can help speed up the process.
Phase 1: Sprouting Your Onion Scrap
This is where the magic begins! We’re going to coax those onion scraps into sprouting new roots and green shoots.
1. Prepare the Onion Scrap: Carefully peel away any loose or decaying outer layers of the onion scrap. You want to expose the fresh, firm layers underneath. Don’t remove all the layers, just the ones that are clearly past their prime.
2. Place in Water: Fill your chosen container with enough water to cover the bottom half of the onion scrap. You only want the roots to be submerged, not the entire onion.
3. Position Properly: Place the onion scrap, root-side down, in the water. Make sure the cut end is facing up. You can use toothpicks inserted into the sides of the onion to suspend it over the water if needed, but I usually find it sits just fine on its own.
4. Find a Sunny Spot: Place the container in a bright, sunny location. A windowsill is ideal. Onions need plenty of light to grow.
5. Change the Water Regularly: This is crucial! Change the water every 1-2 days to prevent bacteria growth and keep the water fresh. Stagnant water can lead to rot.
6. Observe and Wait: Now comes the patience part. Within a few days, you should start to see new roots emerging from the bottom of the onion and green shoots sprouting from the top. This process can take anywhere from 3 days to a week, depending on the onion and the conditions.
Phase 2: Transplanting to Soil
Once your onion scrap has developed a good root system and some healthy green shoots, it’s time to move it to soil. This will give it the nutrients it needs to grow into a full-sized onion.
1. Prepare Your Pot or Garden Bed: Choose a pot that’s at least 6 inches in diameter, or find a sunny spot in your garden bed. Onions prefer well-drained soil, so make sure your pot has drainage holes. If you’re planting in the garden, amend the soil with compost or other organic matter to improve drainage and fertility.
2. Fill with Potting Soil: Fill your pot or garden bed with potting soil, leaving about an inch of space at the top.
3. Create a Hole: Use your finger or a small trowel to create a hole in the soil that’s large enough to accommodate the onion scrap and its roots.
4. Carefully Remove the Onion: Gently remove the onion scrap from the water. Be careful not to damage the delicate roots.
5. Plant the Onion: Place the onion scrap in the hole, making sure the roots are spread out. Cover the onion with soil, leaving the green shoots exposed. You want the top of the original onion scrap to be just barely covered with soil.
6. Water Thoroughly: Water the soil thoroughly after planting. This will help settle the soil around the roots and provide the onion with the moisture it needs to get started.
Phase 3: Caring for Your Growing Onion
Now that your onion is planted, it’s time to provide it with the care it needs to thrive.
1. Sunlight: Onions need at least 6 hours of sunlight per day. Make sure your pot or garden bed is in a sunny location.
2. Watering: Water your onion regularly, especially during dry periods. The soil should be consistently moist, but not waterlogged. Overwatering can lead to rot. A good rule of thumb is to water when the top inch of soil feels dry to the touch.
3. Fertilizing: Onions are heavy feeders, so they benefit from regular fertilization. You can use a balanced fertilizer, such as 10-10-10, or an organic fertilizer like compost tea or fish emulsion. Follow the instructions on the fertilizer package. I personally prefer organic options!
4. Weeding: Keep the area around your onion free of weeds. Weeds compete with onions for nutrients and water.
5. Pest Control: Keep an eye out for pests, such as onion maggots and thrips. If you notice any pests, take action immediately. You can use insecticidal soap or neem oil to control pests.
6. Mulching: Adding a layer of mulch around your onion can help retain moisture, suppress weeds, and regulate soil temperature. Straw, wood chips, or shredded leaves are all good options for mulch.
Harvesting Your Onions
This is the moment you’ve been waiting for! When to harvest depends on what you’re hoping to get from your onion.
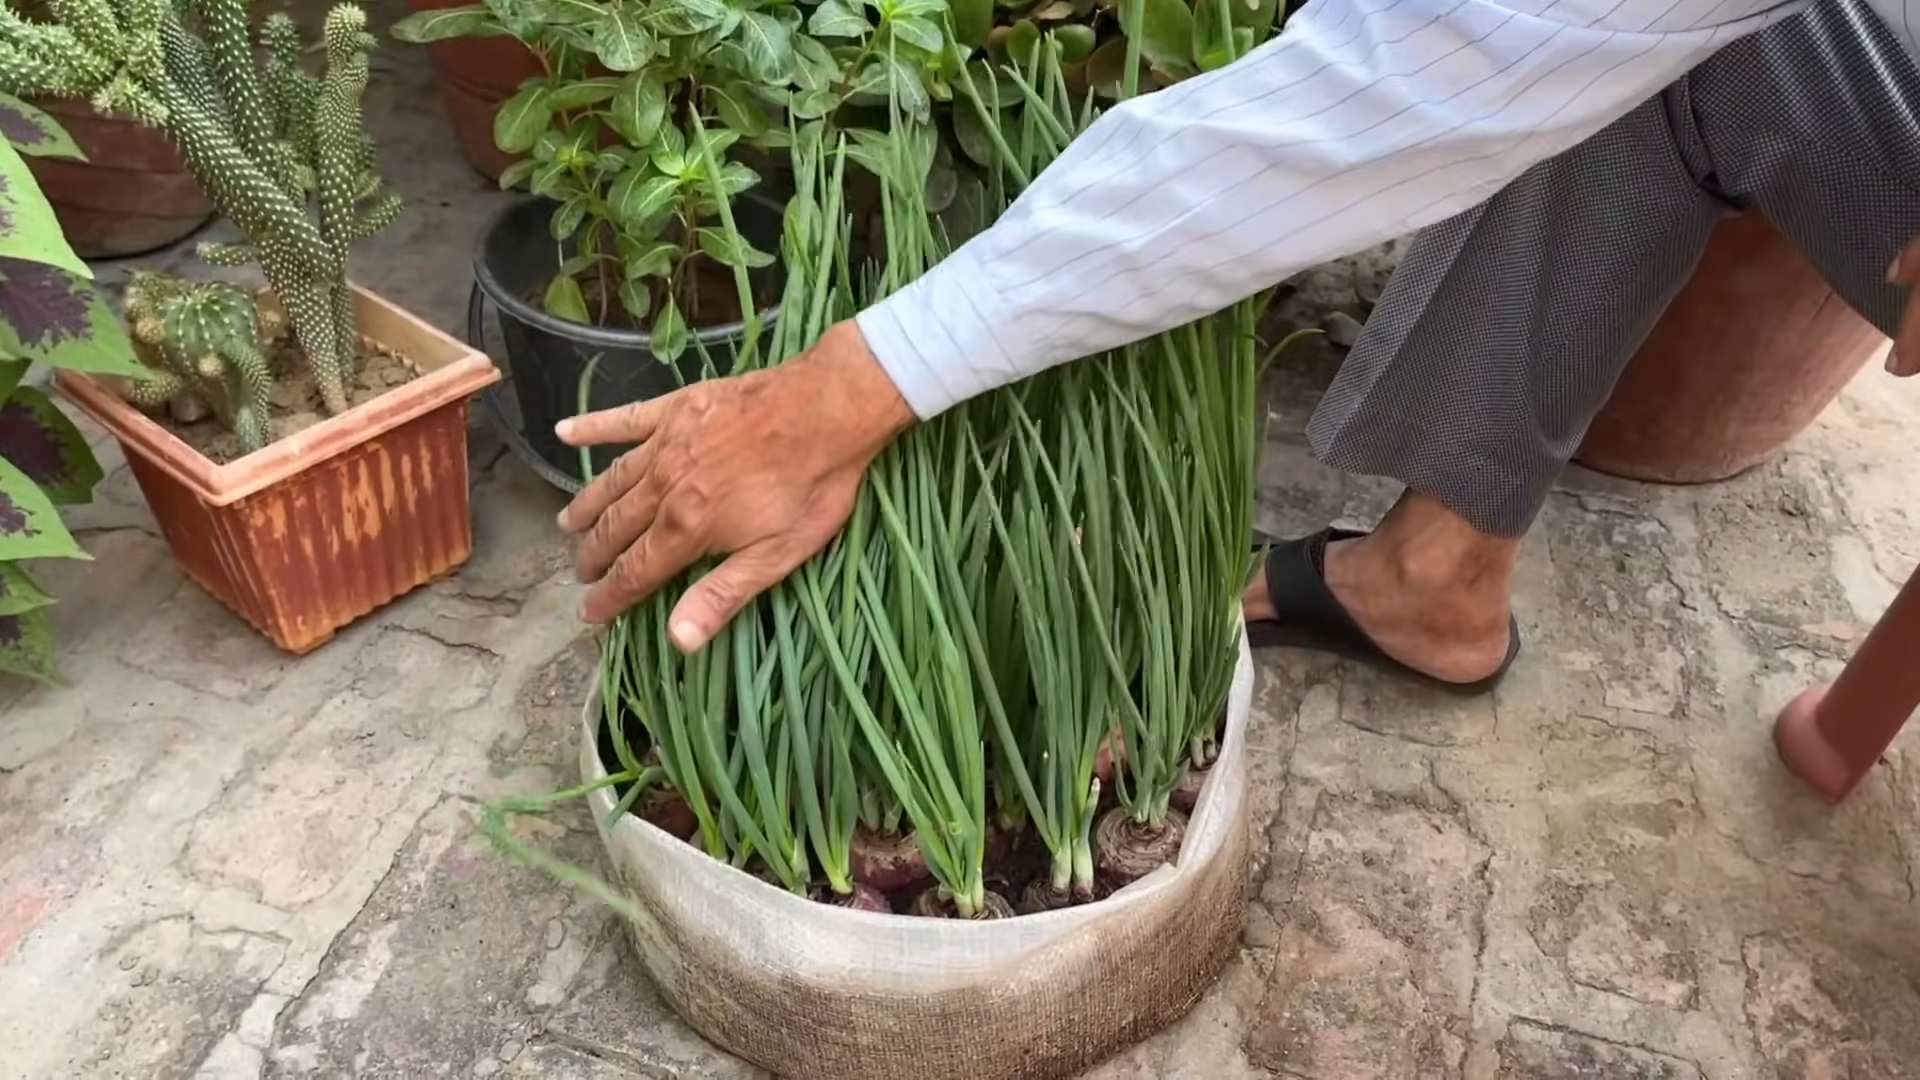
* Green Onions (Scallions): You can harvest green onions at any time once they’re large enough to use. Simply snip off the green tops with scissors. The onion will continue to grow.
* Bulb Onions: If you want to grow a full-sized bulb onion, you’ll need to wait longer. The onion is ready to harvest when the tops start to turn yellow and fall over. This usually happens in late summer or early fall.
1. Loosen the Soil: Before harvesting, loosen the soil around the onion with a garden fork.
2. Gently Pull: Gently pull the onion from the soil.
3. Cure the Onions: After harvesting, cure the onions by laying them out in a dry, well-ventilated place for a week or two. This will help them to dry out and prevent them from rotting.
Troubleshooting
Even with the best care, you might encounter some problems along the way. Here are a few common issues and how to address them:
* Yellowing Leaves: Yellowing leaves can be a sign of overwatering, underwatering, or nutrient deficiency. Check the soil moisture and adjust your watering accordingly. If the soil is dry, water more frequently. If the soil is waterlogged, water less frequently. You can also try fertilizing your onion with a balanced fertilizer.
* Slow Growth: Slow growth can be caused by a lack of sunlight, poor soil, or pests. Make sure your onion is getting enough sunlight and that the soil is well-drained and fertile. Check for pests and take action if necessary.
* Rotting: Rotting can be caused by overwatering or poor drainage. Make sure the soil is well-drained and avoid overwatering. If you notice any signs of rot, remove the affected leaves or bulbs immediately.
Tips for Success
Here are a few extra tips to help you succeed with your onion-growing project:
* Start with Healthy Onions: Choose onions that are firm and free of blemishes. Avoid onions that are soft or have signs of rot.
* Use Fresh Water: Always use fresh water when sprouting your onion scraps. Stagnant water can lead to bacteria growth.
* Be Patient: Growing onions from scraps takes time and patience. Don’t get discouraged if you don’t see results immediately.
* Experiment: Try growing different types of onions to see which ones you like best.
* Enjoy the Process: Growing your own food is a rewarding experience. Take the time to enjoy the process and learn from your mistakes.
Why Grow Onions From Scraps?
Besides being a fun and easy DIY project, there are several benefits to growing onions from scraps:
* It’s Sustainable: You’re reducing food waste by regrowing something you would normally throw away.
* It’s Cost-Effective: You’re saving money by growing your own onions instead of buying them from the store.
* It’s Rewarding: There’s nothing quite like the feeling of harvesting
Conclusion
So, there you have it! Growing onions at home, from humble scraps no less, is not just a fun gardening experiment; it’s a gateway to fresher, more flavorful meals and a more sustainable lifestyle. We’ve walked you through the simple steps, highlighting the ease and accessibility of this rewarding DIY project. Forget those bland, store-bought onions that have been sitting on shelves for weeks. Imagine the satisfaction of snipping fresh, vibrant green onion tops right from your windowsill or garden bed, adding a burst of flavor to your salads, soups, and stir-fries.
This isn’t just about saving a few dollars; it’s about connecting with your food source, reducing waste, and experiencing the joy of nurturing something from practically nothing. The vibrant green shoots are a welcome sight, especially during the colder months, bringing a touch of spring indoors. Plus, it’s a fantastic way to get kids involved in gardening, teaching them about the life cycle of plants and the importance of reducing food waste.
But the benefits don’t stop there. Consider the variations you can explore. Experiment with different types of onions – red, yellow, or white – to see which ones thrive best in your environment. Try planting them in different containers or garden beds to observe how sunlight and soil conditions affect their growth. You can even let some of your onions mature fully to harvest bulbs, although this will take longer and require more space.
For those with limited space, growing green onions in water is an excellent option. Simply place the root ends in a glass of water, ensuring the water level covers the roots but not the entire bulb. Change the water every few days to prevent bacterial growth. You’ll be amazed at how quickly they regrow!
And for those with a bit more gardening experience, consider companion planting. Onions are known to deter certain pests, making them excellent companions for crops like tomatoes, carrots, and lettuce. Planting them together can create a healthier and more productive garden ecosystem.
Growing onions at home is more than just a trend; it’s a practical and rewarding skill that anyone can master. It’s a small step towards a more sustainable and self-sufficient lifestyle. So, gather your onion scraps, follow our simple guide, and prepare to be amazed at the results.
We encourage you to give this DIY trick a try. It’s easy, inexpensive, and incredibly rewarding. And most importantly, don’t forget to share your experiences with us! We’d love to hear about your successes, challenges, and any variations you’ve discovered. Share your photos and stories on social media using [Your Hashtag Here], and let’s inspire others to embrace the joy of growing their own food. Happy gardening!
Frequently Asked Questions (FAQ)
What part of the onion do I need to regrow it?
You need the root end of the onion, the part with the small, stringy roots attached. This is the part that’s usually discarded when you’re prepping onions for cooking. Make sure to leave about an inch or two of the onion attached to the root end. This provides the necessary nutrients for the onion to start regrowing.
How long does it take for the onion to start regrowing?
You should start seeing new green shoots emerging from the top of the onion within a few days to a week. The exact timeframe depends on factors like temperature, sunlight, and the variety of onion. Be patient, and make sure the root end is kept consistently moist.
Can I regrow any type of onion?
Yes, you can regrow most types of onions, including yellow, white, red, and even shallots. Green onions (scallions) are particularly easy to regrow. The key is to have a healthy root end with some of the onion base still attached.
How often should I water the regrowing onion?
If you’re growing the onion in soil, water it regularly to keep the soil consistently moist but not waterlogged. If you’re growing it in water, change the water every few days to prevent bacterial growth and ensure the roots have access to fresh water.
How much sunlight does the regrowing onion need?
Onions need plenty of sunlight to thrive. Aim for at least 6 hours of direct sunlight per day. If you’re growing them indoors, place them near a sunny window. If you don’t have enough natural light, you can supplement with a grow light.
Can I grow onions indoors year-round?
Yes, you can grow onions indoors year-round, as long as you provide them with enough light and water. Indoor growing is a great option for those who live in colder climates or have limited outdoor space.
When can I harvest the regrown onions?
You can start harvesting the green shoots (onion tops) as soon as they’re long enough to use. Simply snip off the amount you need with scissors. The onion will continue to produce new shoots. If you want to grow full-sized onion bulbs, you’ll need to transplant the regrown onion into a larger container or garden bed and allow it to mature for several months.
Can I use the same onion root end multiple times?
While it’s possible to get multiple harvests from a single onion root end, the subsequent growth may be less vigorous. For best results, it’s recommended to start with a fresh root end each time.
What if my onion starts to rot?
If you notice that your onion is starting to rot, it’s likely due to overwatering or poor drainage. Remove the rotting onion immediately to prevent the spread of bacteria. Start with a fresh onion root end and make sure to provide proper drainage and avoid overwatering.
Are there any pests or diseases that affect regrowing onions?
Onions are generally resistant to pests and diseases, but they can occasionally be affected by onion maggots or fungal diseases. To prevent these problems, make sure to use well-draining soil, avoid overwatering, and practice crop rotation. If you notice any signs of pests or diseases, treat them promptly with an appropriate organic pesticide or fungicide.
Can I fertilize my regrowing onions?
Yes, fertilizing your regrowing onions can help them grow faster and produce more flavorful greens. Use a balanced organic fertilizer, such as compost tea or fish emulsion, every few weeks. Follow the instructions on the fertilizer label for proper application rates.
What kind of soil is best for growing onions?
Onions prefer well-draining, fertile soil that is rich in organic matter. Amend your soil with compost or other organic materials before planting. A slightly acidic to neutral pH (6.0-7.0) is ideal.
Can I grow onions from seed instead of scraps?
Yes, you can definitely grow onions from seed. Starting from seed allows you to choose from a wider variety of onion types. However, it takes longer to grow onions from seed than from scraps. You’ll need to start the seeds indoors several weeks before the last frost and then transplant them outdoors once the weather warms up.
Is it better to grow onions in water or soil?
Both methods have their advantages. Growing onions in water is a quick and easy way to get fresh green onions, especially if you have limited space. Growing onions in soil allows them to develop larger bulbs and may result in more flavorful greens. Ultimately, the best method depends on your preferences and available resources.
How can I make my regrown onions taste better?
The flavor of regrown onions can be enhanced by providing them with plenty of sunlight, well-draining soil, and regular fertilization. You can also try growing different varieties of onions to see which ones you prefer. Experiment with different growing conditions to find what works best for you.
Leave a Comment