

Grow Red Dragon Fruit at Home? Absolutely! Imagine plucking a vibrant, exotic dragon fruit, bursting with flavor, straight from your own backyard. Sounds like a tropical dream, right? Well, it’s more attainable than you might think! For centuries, dragon fruit, also known as pitaya, has been cultivated in Southeast Asia and Latin America, revered not only for its delicious taste but also for its stunning beauty and purported health benefits.
But why should you embark on this exciting home gardening adventure? Let’s face it, store-bought dragon fruit can be expensive and sometimes lacks the freshness and flavor of homegrown varieties. Plus, there’s something incredibly rewarding about nurturing a plant from a small cutting to a fruit-bearing beauty. I’m here to guide you through simple, effective DIY tricks and hacks that will empower you to successfully grow red dragon fruit at home, regardless of your gardening experience.
This isn’t just about adding another plant to your garden; it’s about creating a sustainable source of delicious, nutritious fruit and adding a touch of the exotic to your everyday life. So, grab your gardening gloves, and let’s dive into the wonderful world of dragon fruit cultivation! I promise, with a little know-how and some simple DIY techniques, you’ll be enjoying your own homegrown dragon fruit in no time!
Grow Your Own Red Dragon Fruit: A Complete DIY Guide
Okay, dragon fruit lovers, listen up! I’m going to walk you through everything you need to know to grow your very own red dragon fruit at home. It might seem intimidating, but trust me, with a little patience and the right information, you’ll be enjoying homegrown dragon fruit before you know it!
What You’ll Need: The Essentials
Before we dive into the nitty-gritty, let’s gather our supplies. Here’s a checklist to make sure you’re prepared:
* Dragon Fruit Cutting or Seedling: This is the most crucial part! You can either start from a cutting (a piece of an existing plant) or a seedling (a young plant grown from seed). Cuttings are generally faster and more reliable.
* Large Pot (at least 20 gallons): Dragon fruit needs plenty of room for its roots to grow. A large pot is essential.
* Well-Draining Soil Mix: Dragon fruit hates soggy roots! A mix of cactus potting mix, perlite, and a bit of compost works wonders.
* Support Structure (Trellis or Post): Dragon fruit is a climbing cactus, so it needs something to climb on. A sturdy trellis or a strong post will do the trick.
* Gardening Gloves: Protect your hands from thorns!
* Watering Can or Hose: For, well, watering!
* Pruning Shears: For trimming and shaping your plant.
* Slow-Release Fertilizer: To give your dragon fruit a nutritional boost.
* Optional: Rooting Hormone (for cuttings): This can help cuttings root faster.
Section 1: Starting from a Cutting
Starting from a cutting is the fastest and most reliable way to get your dragon fruit journey underway. Here’s how I do it:
Step 1: Selecting and Preparing Your Cutting
1. Source a Healthy Cutting: Find a reputable source for your cutting. Look for a healthy, mature stem that’s at least 12 inches long. The thicker, the better! Make sure it’s free from any signs of disease or pests.
2. Let the Cutting Callous: This is crucial! After you get your cutting, let the cut end dry out and callous over for about a week. This prevents rot. Place it in a dry, shaded area. I usually lean mine against a wall in my garage.
3. Apply Rooting Hormone (Optional): If you want to give your cutting an extra boost, dip the calloused end in rooting hormone powder. This isn’t strictly necessary, but it can speed up the rooting process.
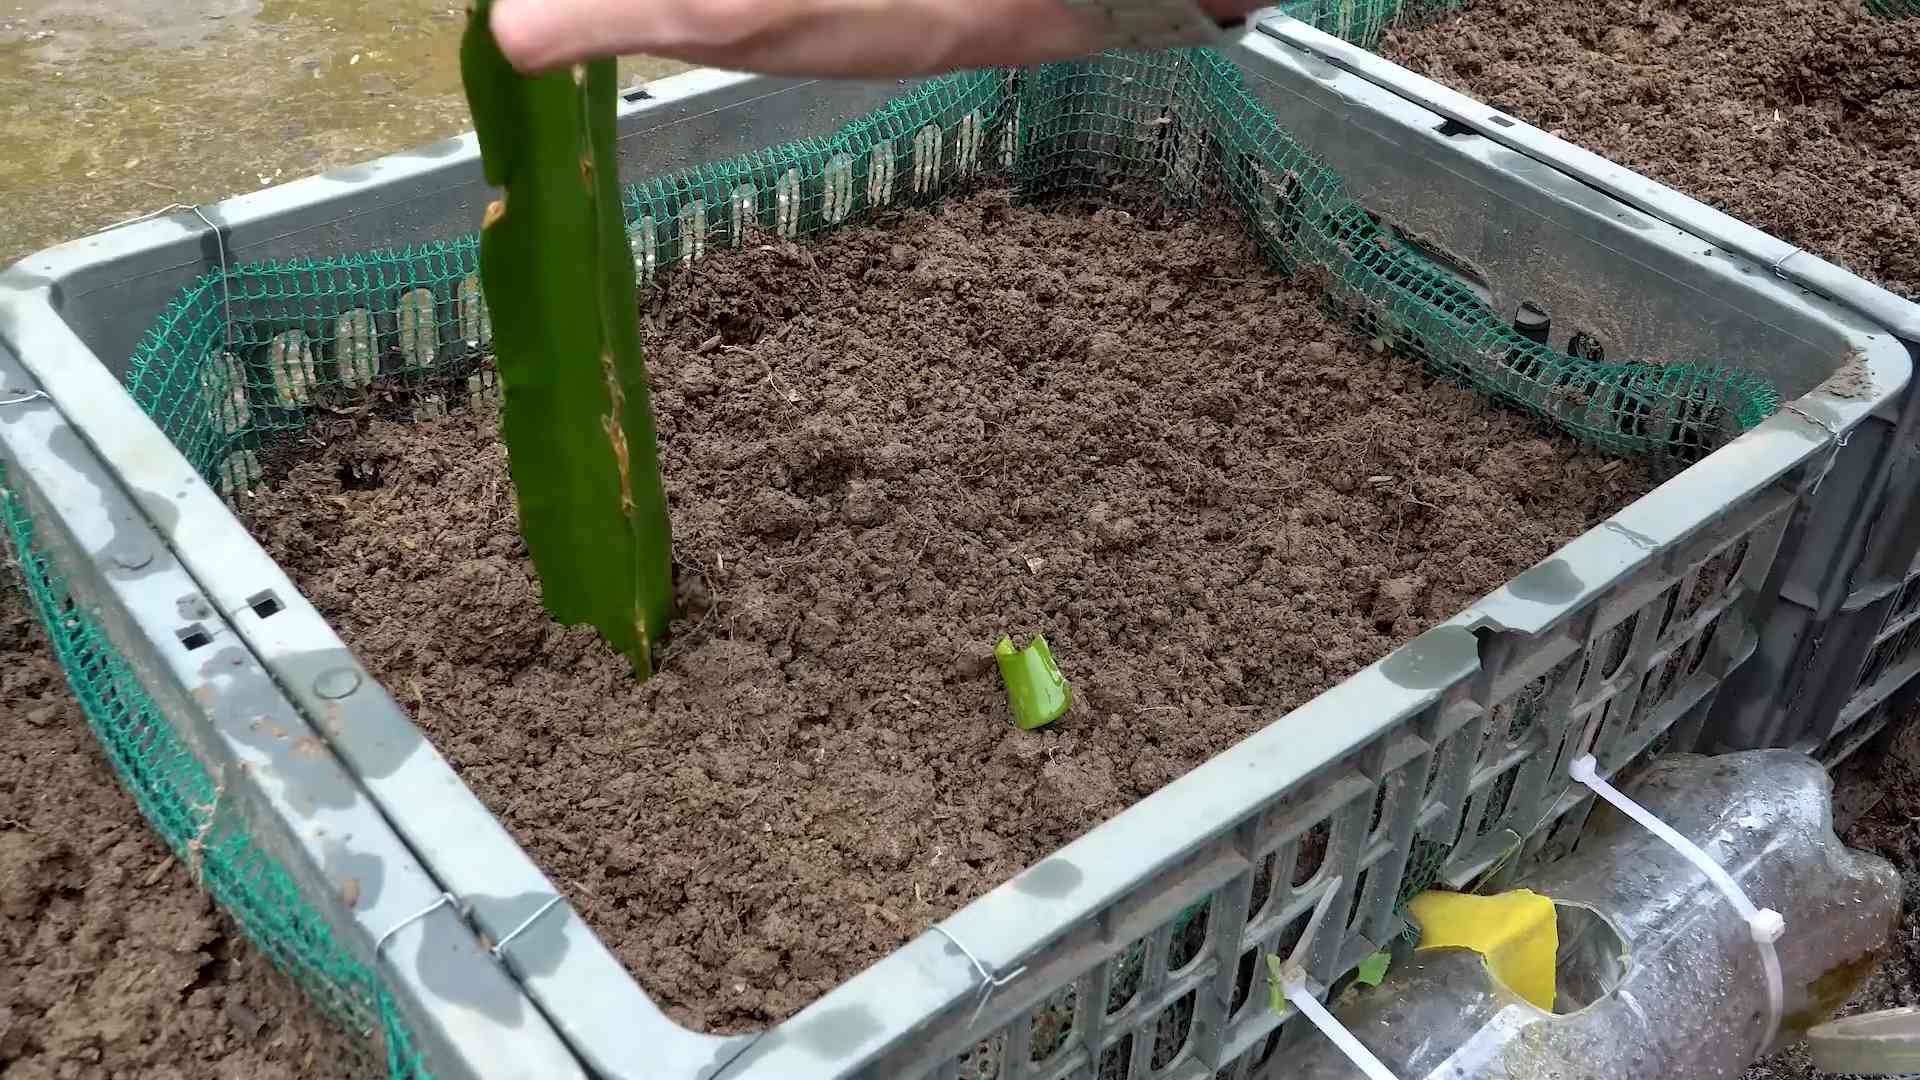
Step 2: Planting Your Cutting
1. Prepare Your Pot: Fill your large pot with your well-draining soil mix. Leave a few inches of space at the top.
2. Plant the Cutting: Dig a hole in the center of the pot that’s deep enough to bury about 2-3 inches of the cutting. Gently place the cutting in the hole and backfill with soil.
3. Water Lightly: Water the soil lightly, just enough to moisten it. Avoid overwatering, as this can lead to rot.
4. Provide Support: Immediately place your trellis or post in the pot, close to the cutting. This will give it something to climb on as it grows. I like to use a sturdy wooden post.
5. Secure the Cutting (Optional): You can gently tie the cutting to the support structure with soft twine or plant ties. This will help it stay upright.
Step 3: Caring for Your Cutting
1. Place in a Sunny Location: Dragon fruit loves sunlight! Place your pot in a location that receives at least 6-8 hours of direct sunlight per day.
2. Water Sparingly: Water only when the soil is dry to the touch. Overwatering is a common mistake that can kill your dragon fruit. I usually check the soil moisture every few days.
3. Be Patient: It can take several weeks or even months for your cutting to root. Don’t be discouraged if you don’t see new growth right away. Just keep the soil lightly moist and be patient.
4. Fertilize Lightly: Once you see new growth, you can start fertilizing your dragon fruit with a slow-release fertilizer. Follow the instructions on the fertilizer package.
Section 2: Starting from Seed
Growing dragon fruit from seed is a bit more challenging and takes longer, but it’s definitely doable! Here’s how I approach it:
Step 1: Extracting and Preparing the Seeds
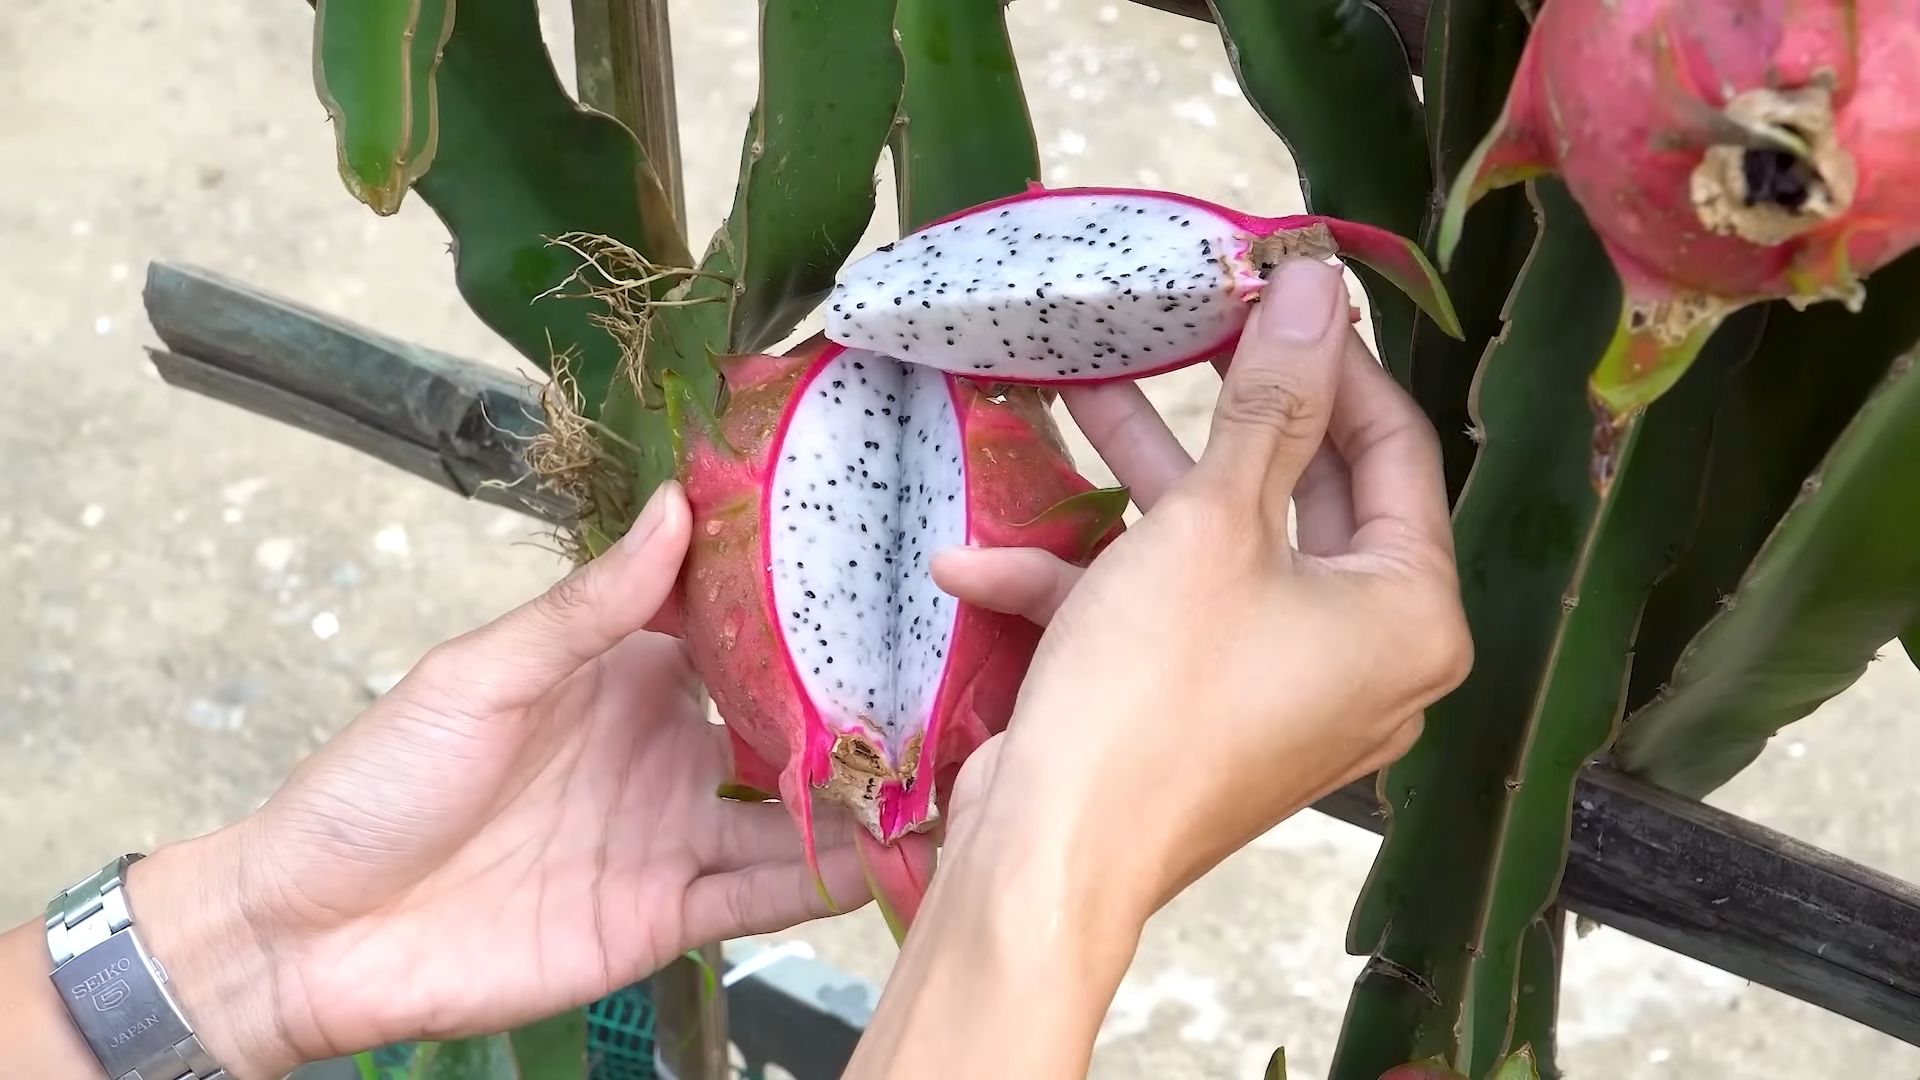
1. Choose a Ripe Dragon Fruit: Select a ripe dragon fruit from the store or your garden. The skin should be bright pink or red and slightly soft to the touch.
2. Scoop Out the Pulp: Cut the dragon fruit in half and scoop out the pulp with a spoon.
3. Separate the Seeds: Place the pulp in a bowl and add some water. Gently rub the pulp between your fingers to separate the seeds from the flesh.
4. Rinse the Seeds: Pour the mixture through a fine-mesh sieve to separate the seeds from the pulp. Rinse the seeds thoroughly with water.
5. Dry the Seeds: Spread the seeds out on a paper towel and let them dry completely for several days.
Step 2: Sowing the Seeds
1. Prepare a Seed Starting Tray: Fill a seed starting tray with a well-draining seed starting mix.
2. Sow the Seeds: Sprinkle the seeds evenly over the surface of the soil.
3. Cover Lightly: Cover the seeds with a very thin layer of soil.
4. Water Gently: Water the soil gently with a spray bottle to avoid disturbing the seeds.
5. Cover with a Humidity Dome: Cover the seed starting tray with a humidity dome or plastic wrap to create a humid environment.
Step 3: Caring for the Seedlings
1. Place in a Warm, Bright Location: Place the seed starting tray in a warm, bright location, but avoid direct sunlight.
2. Keep the Soil Moist: Keep the soil consistently moist, but not soggy. Water gently with a spray bottle as needed.
3. Remove the Humidity Dome: Once the seedlings emerge (usually in a week or two), gradually remove the humidity dome over a period of several days.
4. Thin the Seedlings: Once the seedlings have a few sets of true leaves, thin them out, leaving only the strongest seedlings.
5. Transplant to Individual Pots: Once the seedlings are large enough to handle, transplant them to individual small pots filled with well-draining potting mix.
Step 4: Growing the Seedlings
1. Provide Support: As the seedlings grow, provide them with small stakes or trellises to climb on.
2. Water Regularly: Water the seedlings regularly, allowing the soil to dry out slightly between waterings.
3. Fertilize Lightly: Fertilize the seedlings with a diluted liquid fertilizer every few weeks.
4. Transplant to a Larger Pot: Once the seedlings have outgrown their small pots, transplant them to a larger pot (at least 20 gallons) with a sturdy support structure.
Section 3: General Care for Your Dragon Fruit Plant
Whether you started from a cutting or a seed, the general care for your dragon fruit plant is the same. Here’s what you need to know:
* Sunlight: Dragon fruit loves sunlight! Aim for at least 6-8 hours of direct sunlight per day. If you live in a very hot climate, you may need to provide some afternoon shade to prevent sunburn.
* Watering: Water your dragon fruit plant regularly during the growing season (spring and summer), allowing the soil to dry out slightly between waterings. Reduce watering during the dormant season (fall and winter).
* Soil: Use a well-draining soil mix to prevent root rot. A mix of cactus potting mix, perlite, and compost works well.
* Fertilizing: Fertilize your dragon fruit plant with a slow-release fertilizer in the spring and summer. You can also supplement with a liquid fertilizer every few weeks.
* Pruning: Prune your dragon fruit plant regularly to encourage branching and fruit production. Remove any dead or damaged stems. I usually prune mine in the late winter or early spring.
* Support: Make sure your dragon fruit plant has a sturdy support structure to climb on. A trellis or post works well.
* Pests and Diseases: Dragon fruit plants are generally resistant to pests and diseases, but they can be susceptible to mealybugs, scale, and fungal infections. Inspect your plant regularly and treat any problems promptly.
* Pollination: Dragon fruit flowers are nocturnal and are typically pollinated by bats and moths. If you don’t have these
Conclusion
So, there you have it! Growing Red Dragon Fruit at home might seem like an exotic endeavor reserved for tropical climates and seasoned gardeners, but with a little patience, the right knowledge, and this straightforward DIY trick, you can cultivate your own vibrant, delicious fruit right in your backyard or even indoors. We’ve demystified the process, breaking it down into manageable steps that anyone can follow, regardless of their gardening experience.
Why is this DIY trick a must-try? Because it empowers you to take control of your food source, offering a sustainable and rewarding way to enjoy the unique flavor and health benefits of Red Dragon Fruit. Imagine the satisfaction of harvesting your own organically grown fruit, knowing exactly where it came from and what went into its cultivation. Beyond the practical benefits, growing Red Dragon Fruit is a fascinating journey, a chance to connect with nature and witness the miracle of life unfolding before your eyes. Plus, it’s a conversation starter! How many people can say they grow their own dragon fruit?
But the adventure doesn’t stop here! Feel free to experiment with different varieties of Red Dragon Fruit. Some are sweeter, some are tangier, and some have different colored flesh. You can also explore different trellising methods to find what works best for your space and aesthetic preferences. Consider adding companion plants to your dragon fruit garden to attract pollinators and deter pests naturally. For example, marigolds are known to repel nematodes, which can be a problem for dragon fruit.
Don’t be afraid to get creative with your growing medium. While our recommended mix works well, you can adjust it based on your local soil conditions and available resources. Some gardeners swear by adding compost tea to their watering routine to boost nutrient levels and promote healthy growth. Others prefer using organic fertilizers specifically formulated for cacti and succulents.
The key is to observe your plants closely and adapt your approach as needed. Pay attention to their growth patterns, leaf color, and overall health. If you notice any signs of stress or disease, address them promptly. Remember, growing Red Dragon Fruit is a learning process, and every challenge is an opportunity to expand your knowledge and refine your skills.
We are confident that with this DIY trick, you’ll be well on your way to enjoying your own homegrown Red Dragon Fruit. So, grab your supplies, get your hands dirty, and embark on this exciting gardening adventure. We can’t wait to hear about your experiences! Share your progress, photos, and tips with us in the comments below. Let’s build a community of Red Dragon Fruit enthusiasts and inspire others to try this rewarding DIY project. Remember, the sweetest fruits are always the ones you grow yourself! This **DIY trick** is your gateway to a tropical paradise in your own home.
Frequently Asked Questions (FAQ)
1. What is the best climate for growing Red Dragon Fruit?
Red Dragon Fruit thrives in warm, tropical, and subtropical climates. They prefer temperatures between 65°F and 80°F (18°C and 27°C). However, they can tolerate short periods of cooler temperatures, but prolonged exposure to frost can be damaging. If you live in a colder climate, you can still grow Red Dragon Fruit in containers and bring them indoors during the winter months. Ensure they receive plenty of sunlight or supplement with grow lights.
2. How much sunlight does Red Dragon Fruit need?
Red Dragon Fruit requires at least six hours of direct sunlight per day to produce fruit. If you’re growing them indoors, place them near a sunny window or use grow lights to provide adequate illumination. Insufficient sunlight can lead to stunted growth and reduced fruit production.
3. What type of soil is best for Red Dragon Fruit?
Red Dragon Fruit prefers well-draining soil that is slightly acidic to neutral (pH 6.0-7.0). A mix of potting soil, perlite, and compost works well. Avoid heavy clay soils, as they can retain too much moisture and lead to root rot. Good drainage is crucial for the health of your dragon fruit plants.
4. How often should I water my Red Dragon Fruit plant?
Water your Red Dragon Fruit plant thoroughly when the top inch of soil feels dry to the touch. Avoid overwatering, as this can lead to root rot. During the growing season (spring and summer), you may need to water more frequently than during the dormant season (fall and winter). Always check the soil moisture before watering.
5. What kind of fertilizer should I use for Red Dragon Fruit?
Use a balanced fertilizer (e.g., 10-10-10) during the growing season, applying it every 2-3 months. You can also use a fertilizer specifically formulated for cacti and succulents. Avoid over-fertilizing, as this can burn the roots. Consider using organic fertilizers like compost tea or worm castings to provide essential nutrients and improve soil health.
6. How long does it take for Red Dragon Fruit to produce fruit?
Red Dragon Fruit plants typically start producing fruit within 6-12 months of planting, provided they are grown under optimal conditions. However, it may take longer for plants grown from seed to bear fruit. Proper care, including adequate sunlight, water, and fertilization, is essential for promoting fruit production.
7. How do I pollinate Red Dragon Fruit flowers?
Red Dragon Fruit flowers are nocturnal and typically open at night. While some varieties are self-pollinating, others require cross-pollination to produce fruit. If you’re growing a variety that requires cross-pollination, you’ll need to hand-pollinate the flowers using a small brush to transfer pollen from one flower to another. This is best done at night when the flowers are open.
8. What are some common pests and diseases that affect Red Dragon Fruit?
Common pests that can affect Red Dragon Fruit include aphids, mealybugs, and spider mites. These pests can be controlled with insecticidal soap or neem oil. Root rot is a common disease that can occur if the soil is not well-draining or if the plant is overwatered. To prevent root rot, ensure good drainage and avoid overwatering.
9. How do I prune my Red Dragon Fruit plant?
Pruning is essential for maintaining the shape and health of your Red Dragon Fruit plant. Remove any dead, damaged, or diseased branches. You can also prune to encourage branching and promote fruit production. Prune after the fruiting season to allow the plant to recover before the next growing season.
10. Can I grow Red Dragon Fruit in a container?
Yes, Red Dragon Fruit can be successfully grown in containers. Choose a large container with good drainage holes. Use a well-draining potting mix and provide a sturdy trellis for the plant to climb on. Container-grown plants may require more frequent watering and fertilization than plants grown in the ground.
11. How do I know when my Red Dragon Fruit is ripe?
A ripe Red Dragon Fruit will have a vibrant, even color and will be slightly soft to the touch. The “wings” or scales on the fruit will start to dry out and turn brown. You can also gently twist the fruit; if it comes off easily, it’s ripe.
12. What are the health benefits of Red Dragon Fruit?
Red Dragon Fruit is a good source of antioxidants, vitamins, and minerals. It is low in calories and high in fiber, making it a healthy addition to your diet. Some studies suggest that Red Dragon Fruit may help lower cholesterol levels and improve blood sugar control.
13. Where can I buy Red Dragon Fruit cuttings or seeds?
You can purchase Red Dragon Fruit cuttings or seeds from reputable nurseries, garden centers, or online retailers. Ensure that you are buying from a reliable source to ensure the quality and authenticity of the plant material.
14. What is the best trellising method for Red Dragon Fruit?
Red Dragon Fruit plants are climbing cacti and require a sturdy trellis to support their growth. A simple T-post trellis is a popular option, but you can also use a circular trellis or a custom-built structure. The trellis should be strong enough to support the weight of the mature plant and its fruit.
15. How do I protect my Red Dragon Fruit plant from frost?
If you live in an area with occasional frost, you can protect your Red Dragon Fruit plant by covering it with a frost blanket or bringing it indoors. Container-grown plants are easier to move indoors during cold weather. You can also wrap the base of the plant with burlap to insulate the roots.
Leave a Comment