

Growing Sweet Potatoes in Bags: Imagine harvesting a bounty of delicious, homegrown sweet potatoes right from your patio or balcony! Forget sprawling gardens and back-breaking digging; this DIY guide unlocks the secret to cultivating these nutritional powerhouses in the most unexpected of places – bags!
For centuries, sweet potatoes have been a staple in diets across the globe, from their origins in Central and South America to their widespread cultivation in Asia and Africa. They’re not just delicious; they’re packed with vitamins, minerals, and antioxidants. But what if you don’t have acres of land to dedicate to this amazing crop? That’s where this simple, yet effective, DIY trick comes in.
Many people are intimidated by the thought of growing their own food, especially root vegetables. They envision vast fields and complicated techniques. But the truth is, growing sweet potatoes in bags is surprisingly easy and accessible, even for beginners. This method is perfect for urban dwellers, apartment residents, or anyone with limited space. I’m going to show you how to bypass the traditional garden setup and enjoy the satisfaction of harvesting your own sweet potatoes, all from the comfort of your own home. Get ready to ditch the grocery store and embrace the joy of homegrown goodness!
Growing Sweet Potatoes in Bags: A Gardener’s Guide
Hey there, fellow gardening enthusiasts! I’m so excited to share one of my favorite gardening hacks with you: growing sweet potatoes in bags! It’s a fantastic way to cultivate these delicious and nutritious tubers, especially if you’re short on space or have challenging soil conditions. Trust me, even if you’re a beginner, you can totally nail this. Let’s dive in!
Why Grow Sweet Potatoes in Bags?
Before we get our hands dirty, let’s talk about why this method is so awesome:
* Space-Saving: Perfect for balconies, patios, or small gardens. You don’t need a huge plot of land!
* Soil Control: You get to create the perfect growing medium, ensuring optimal conditions for your sweet potatoes.
* Easy Harvesting: No more back-breaking digging! Simply tip the bag over and collect your bounty.
* Pest and Disease Management: Easier to monitor and control pests and diseases in a contained environment.
* Portability: You can move the bags around to chase the sun or protect them from harsh weather.
What You’ll Need
Alright, let’s gather our supplies. Here’s what you’ll need to get started:
* Large Grow Bags: I recommend using bags that are at least 20 gallons in size. Fabric grow bags are ideal because they allow for good drainage and aeration.
* Sweet Potato Slips: These are sprouts grown from sweet potatoes. You can buy them online, at your local nursery, or even grow your own (more on that later!).
* Potting Mix: A well-draining potting mix is crucial. I like to use a mix of compost, peat moss (or coco coir), and perlite.
* Compost: This will provide essential nutrients for your sweet potatoes.
* Slow-Release Fertilizer: A balanced slow-release fertilizer will give your plants a steady supply of nutrients throughout the growing season.
* Watering Can or Hose: For keeping your sweet potatoes hydrated.
* Gardening Gloves: To protect your hands.
* Trowel or Small Shovel: For planting the slips.
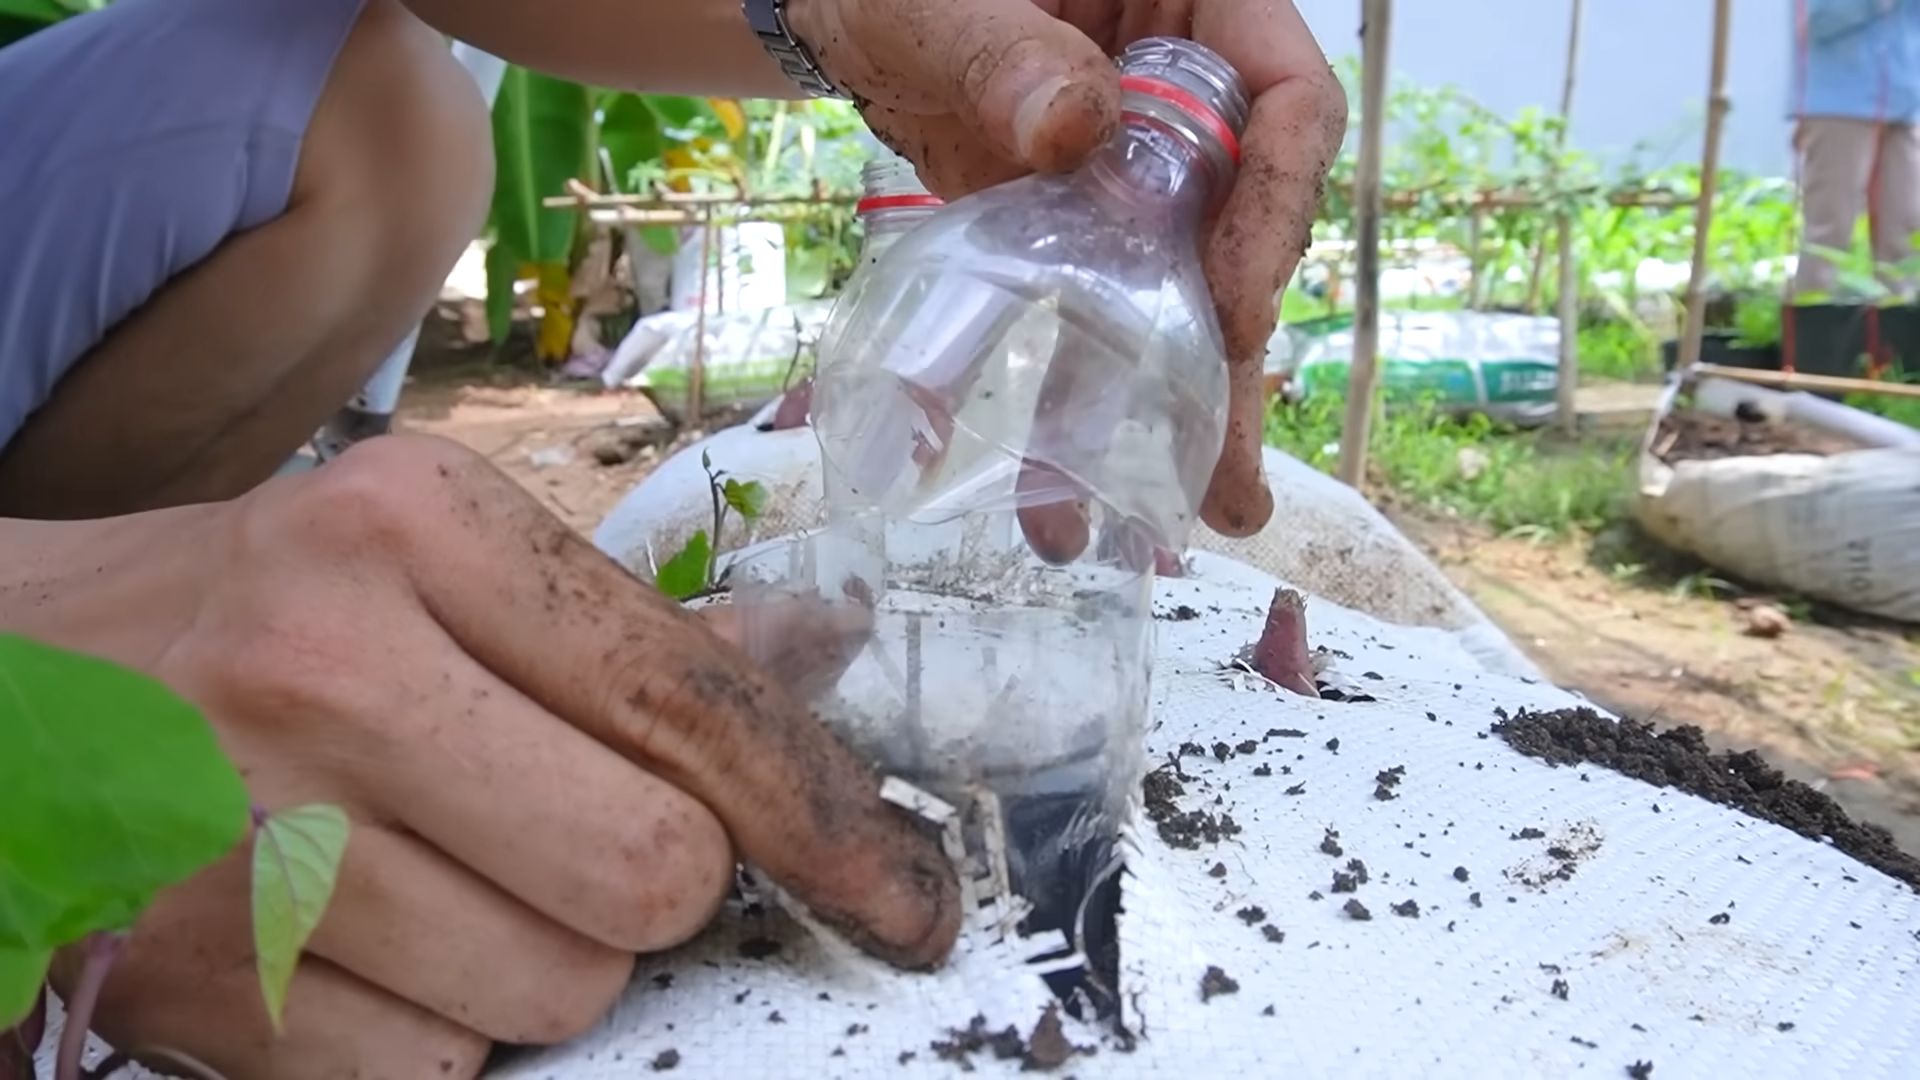
Growing Your Own Sweet Potato Slips (Optional)
If you’re feeling adventurous, you can grow your own sweet potato slips. It’s a fun and rewarding process!
1. Choose a Sweet Potato: Select a healthy, organic sweet potato from the grocery store or farmer’s market.
2. Prepare the Sweet Potato: Wash the sweet potato thoroughly. You can cut it in half or leave it whole, depending on its size.
3. Suspend the Sweet Potato: Use toothpicks to suspend the sweet potato over a jar or glass filled with water. The bottom half of the sweet potato should be submerged in water.
4. Place in a Warm Location: Put the jar in a warm, sunny spot.
5. Wait for Sprouts: In a few weeks, you should start to see sprouts (slips) emerging from the sweet potato.
6. Remove the Slips: Once the slips are about 6-8 inches long, gently twist them off the sweet potato.
7. Root the Slips: Place the slips in a jar of water, making sure the bottom inch or two is submerged. Roots should develop in a few days.
8. Plant the Slips: Once the roots are about an inch long, they’re ready to be planted in your grow bags!
Planting Your Sweet Potato Slips
Okay, now for the main event! Let’s get those slips planted.
1. Prepare the Grow Bags: Fill your grow bags with the potting mix, leaving about 4-6 inches of space at the top. Mix in a generous amount of compost and slow-release fertilizer. I usually go for about 1/4 compost to 3/4 potting mix.
2. Water the Soil: Thoroughly water the soil in the grow bags. This will help settle the soil and provide moisture for the slips.
3. Plant the Slips: Dig small holes in the soil, about 4-6 inches apart. Gently place the sweet potato slips in the holes, making sure the roots are covered with soil.
4. Water Again: Water the newly planted slips gently.
5. Mulch (Optional): Add a layer of mulch around the base of the plants to help retain moisture and suppress weeds. Straw or shredded leaves work well.
Caring for Your Sweet Potato Plants
Now that your sweet potatoes are planted, it’s time to provide them with the care they need to thrive.
1. Watering: Sweet potatoes need consistent moisture, especially during hot weather. Water deeply whenever the top inch of soil feels dry to the touch. Avoid overwatering, as this can lead to root rot.
2. Sunlight: Sweet potatoes need at least 6-8 hours of sunlight per day. Place your grow bags in a sunny location.
3. Fertilizing: Sweet potatoes are heavy feeders. In addition to the slow-release fertilizer you added at planting, you can supplement with a liquid fertilizer every few weeks. Look for a fertilizer that is high in potassium, which promotes tuber development.
4. Weeding: Keep the grow bags free of weeds. Weeds can compete with your sweet potatoes for nutrients and water.
5. Pest and Disease Control: Keep an eye out for pests and diseases. Common pests of sweet potatoes include aphids, flea beetles, and sweet potato weevils. Diseases can include fungal infections like stem rot and leaf spot. If you notice any problems, treat them promptly with appropriate organic pesticides or fungicides. Neem oil is a great all-purpose solution.
6. Vine Management: Sweet potato vines can grow quite long. You can let them trail along the ground or provide them with a trellis or support to climb. Pruning the vines is generally not necessary, but you can trim them back if they become too unruly.
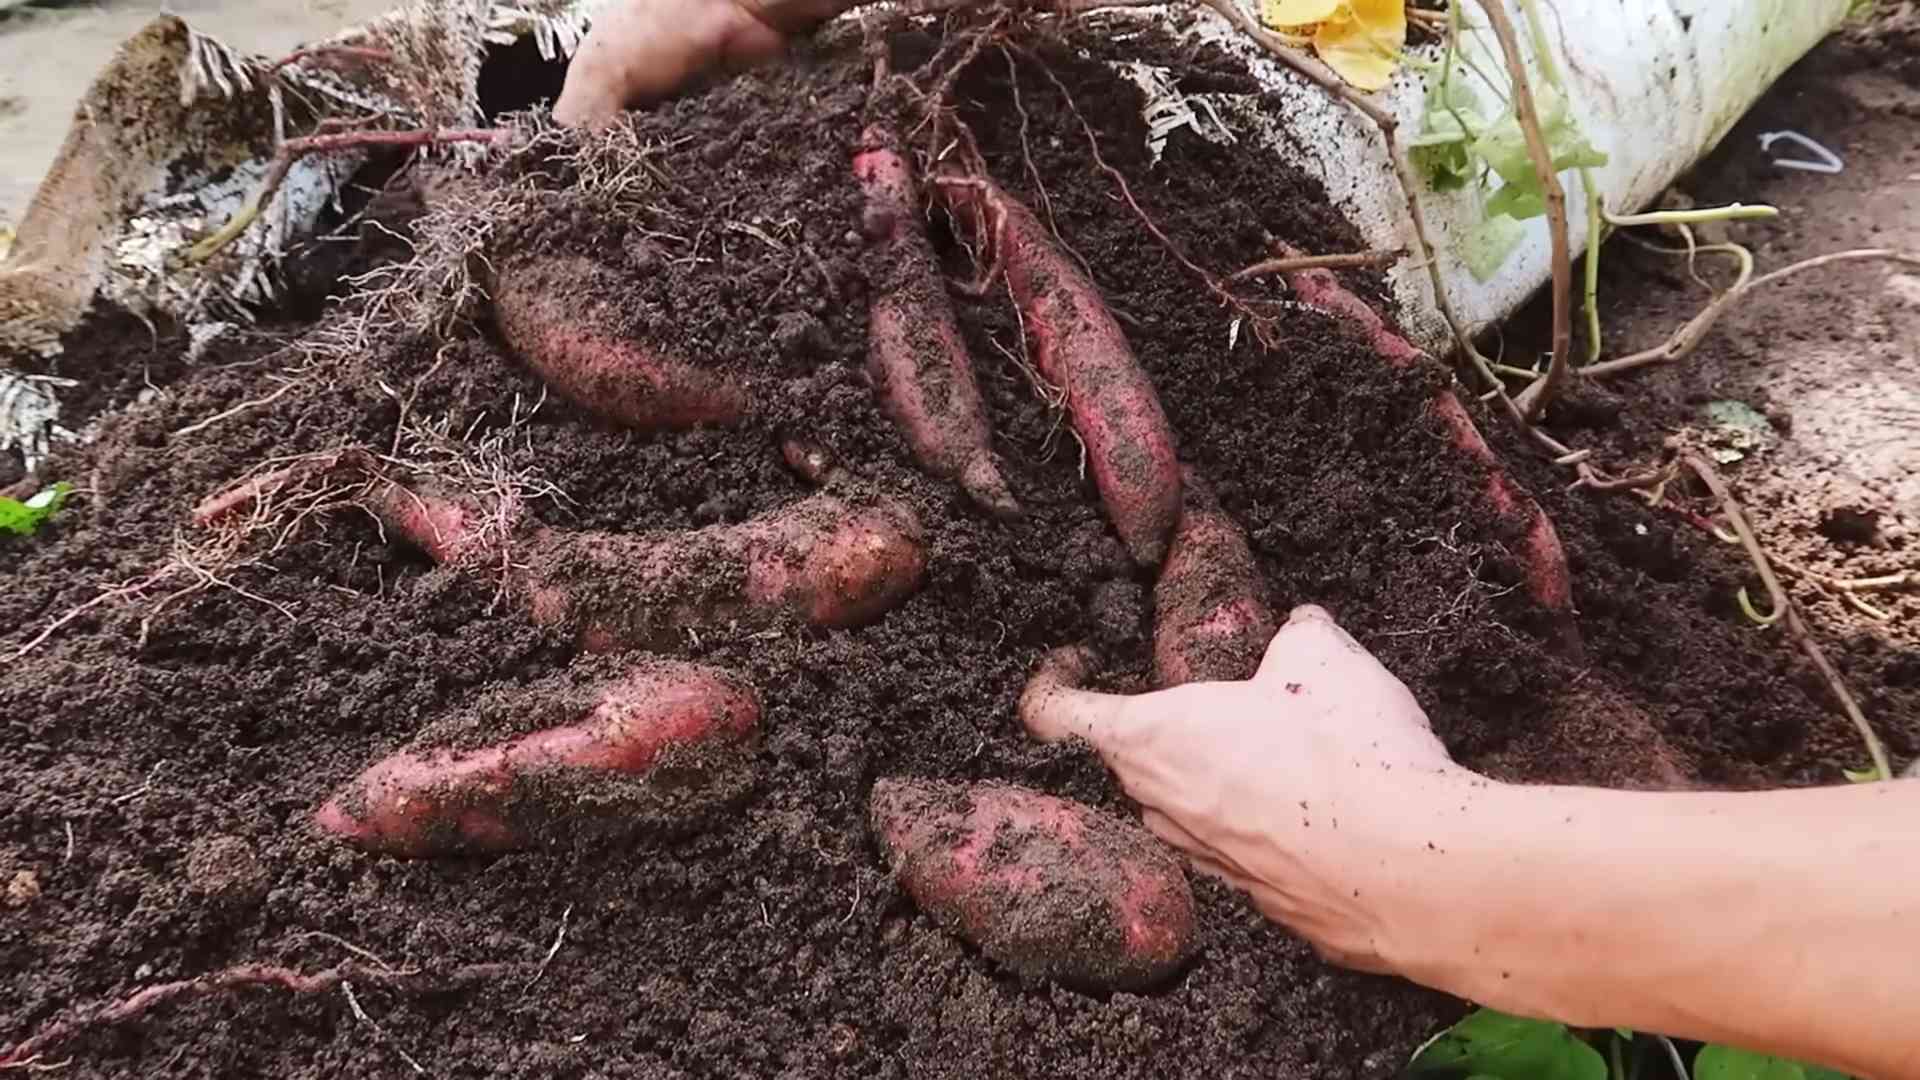
Harvesting Your Sweet Potatoes
The moment we’ve all been waiting for! Harvesting your sweet potatoes is the most rewarding part of the process.
1. Timing: Sweet potatoes typically take 90-120 days to mature. You’ll know they’re ready to harvest when the vines start to turn yellow and die back.
2. Harvesting: Gently tip the grow bag over and carefully remove the sweet potatoes from the soil. Be careful not to damage the tubers.
3. Curing: Curing sweet potatoes is essential for improving their flavor and storage life. To cure them, place them in a warm, humid location (80-85°F and 85-90% humidity) for 7-10 days. A greenhouse or enclosed porch works well.
4. Storing: After curing, store your sweet potatoes in a cool, dry, and dark place (55-60°F). They should keep for several months.
Troubleshooting
Even with the best planning, things can sometimes go wrong. Here are a few common problems and how to fix them:
* Yellowing Leaves: This could be a sign of nutrient deficiency. Try fertilizing with a balanced liquid fertilizer.
* Slow Growth: Make sure your sweet potatoes are getting enough sunlight and water. Also, check the soil pH. Sweet potatoes prefer a slightly acidic soil (pH 6.0-6.5).
* Small Tubers: This could be due to insufficient nutrients or water. Make sure you’re fertilizing regularly and watering deeply.
* Pest Infestation: Identify the pest and treat it with an appropriate organic pesticide.
* Root Rot: This is usually caused by overwatering. Make sure your grow bags have good drainage and avoid watering too frequently.
Tips for Success
Here are a few extra tips to help you grow the best sweet potatoes ever:
* Choose the Right Variety: Some sweet potato varieties are better suited for container growing than others. Beauregard, Georgia Jet, and Centennial are all good choices.
* Use High-Quality Potting Mix: Don’t skimp on the potting mix! A well-draining, nutrient-rich mix is essential for healthy growth.
* Water Consistently: Sweet potatoes need consistent moisture, especially during hot weather.
* Fertilize Regularly: Sweet potatoes are heavy feeders, so make sure you’re providing them with enough nutrients.
* Be Patient: Sweet potatoes take time to mature. Don’t get discouraged if you don’t see results right away.
Enjoy Your Harvest!
Growing sweet potatoes in bags is a fun and rewarding experience. With a little bit of care and attention, you can enjoy a bountiful harvest of delicious and nutritious sweet potatoes. So get out there and get growing! I can’t wait to hear about your success! Happy gardening!
Conclusion
So, there you have it! Growing sweet potatoes in bags isn’t just a gardening trend; it’s a game-changer for anyone with limited space, challenging soil, or simply a desire for a more controlled and rewarding harvest. We’ve walked you through the process, from selecting the right bag and preparing the perfect soil mix to nurturing your slips and anticipating that glorious harvest.
Why is this DIY trick a must-try? Because it democratizes sweet potato cultivation. You don’t need acres of farmland or perfectly loamy soil. A sunny patio, a balcony, or even a well-lit deck can become your personal sweet potato patch. The bag method offers unparalleled control over the growing environment, allowing you to tailor the soil composition, drainage, and even temperature to optimize sweet potato production. This translates to healthier plants, fewer pests, and a more abundant yield. Plus, the sheer convenience of being able to move your sweet potatoes around to chase the sun or protect them from unexpected frost is a huge advantage.
But the benefits extend beyond practicality. There’s a unique satisfaction in nurturing a plant from a small slip to a bountiful harvest, especially when you’ve done it yourself, in a container you’ve chosen, with a soil mix you’ve perfected. It’s a connection to the earth, a lesson in patience, and a delicious reward all rolled into one.
Ready to take your sweet potato game to the next level? Consider these variations:
* Vertical Gardening: Experiment with tiered planters or hanging bags to maximize space and create a stunning visual display.
* Companion Planting: Plant herbs like basil or rosemary around the base of your sweet potato plants to deter pests and enhance flavor.
* Different Varieties: Don’t limit yourself to the standard orange sweet potato. Explore other varieties like Japanese purple sweet potatoes or white-fleshed sweet potatoes for a diverse and colorful harvest.
* Organic Amendments: Incorporate compost tea or worm castings into your watering routine for an extra boost of nutrients and beneficial microbes.
We’re confident that you’ll find growing sweet potatoes in bags to be a surprisingly easy and incredibly rewarding experience. The key is to start with healthy slips, provide consistent moisture and sunlight, and be patient. The sweet potatoes will do the rest.
Now, it’s your turn! Grab a bag, prepare your soil, and get those slips planted. We can’t wait to hear about your success stories. Share your photos, tips, and experiences in the comments below. Let’s build a community of bag-grown sweet potato enthusiasts and inspire others to embrace this simple yet transformative gardening technique. Happy growing!
Frequently Asked Questions (FAQ)
Q: What size bag is best for growing sweet potatoes?
A: The ideal bag size is typically between 10 and 20 gallons. This provides ample space for the sweet potatoes to develop without becoming root-bound. A larger bag (closer to 20 gallons) is preferable if you plan to grow multiple slips in the same bag or if you’re aiming for larger sweet potatoes. Fabric grow bags are highly recommended as they allow for better drainage and aeration, preventing root rot and promoting healthier growth. Avoid using bags that are too small, as this can restrict root development and result in smaller, less abundant yields.
Q: What type of soil mix should I use?
A: Sweet potatoes thrive in well-draining, slightly acidic soil. A good mix consists of equal parts of the following:
* Potting soil: Provides a base for the mix and retains moisture.
* Compost: Adds nutrients and improves soil structure.
* Perlite or vermiculite: Enhances drainage and aeration.
Avoid using heavy garden soil, as it can become compacted and hinder root growth. You can also add a slow-release fertilizer to the mix to provide a steady supply of nutrients throughout the growing season. Ensure the pH of the soil is between 5.5 and 6.5 for optimal sweet potato growth.
Q: How often should I water my sweet potato plants in bags?
A: Water your sweet potato plants regularly, especially during hot and dry weather. The soil should be kept consistently moist but not waterlogged. Check the moisture level by sticking your finger into the soil about an inch deep. If it feels dry, it’s time to water. Overwatering can lead to root rot, so ensure the bag has adequate drainage. During cooler periods, you may need to water less frequently. A good rule of thumb is to water deeply when the top inch of soil feels dry.
Q: How much sunlight do sweet potatoes need?
A: Sweet potatoes require at least 6-8 hours of direct sunlight per day to thrive. Choose a location that receives ample sunlight throughout the growing season. If you live in a particularly hot climate, providing some afternoon shade can help prevent the plants from overheating. If you’re growing sweet potatoes indoors, supplement with grow lights to ensure they receive sufficient light. Insufficient sunlight can result in leggy growth and reduced yields.
Q: When is the best time to harvest sweet potatoes grown in bags?
A: Sweet potatoes are typically ready to harvest about 90-120 days after planting the slips. The leaves will start to turn yellow and the vines may begin to die back, indicating that the sweet potatoes are mature. To harvest, gently tip the bag over and carefully remove the sweet potatoes from the soil. Avoid damaging the skins, as this can shorten their storage life. Cure the sweet potatoes for 7-10 days in a warm, humid place (80-85°F and 85-90% humidity) to allow the skins to harden and the starches to convert to sugars, resulting in a sweeter flavor.
Q: Can I reuse the soil from my sweet potato bags?
A: While you can reuse the soil, it’s important to amend it with fresh compost and fertilizer to replenish the nutrients that were used by the sweet potato plants. You should also check the soil for any signs of pests or diseases and treat accordingly. Alternatively, you can use the old soil as a base for a new compost pile. If you suspect the soil is contaminated, it’s best to discard it and start with fresh soil.
Q: What are some common pests and diseases that affect sweet potatoes?
A: Common pests that affect sweet potatoes include sweet potato weevils, aphids, and spider mites. Diseases include fusarium wilt, black rot, and scurf. Regularly inspect your plants for signs of pests or diseases and take appropriate action. Organic pest control methods, such as neem oil or insecticidal soap, can be effective for controlling pests. Ensure good air circulation and avoid overwatering to prevent fungal diseases.
Q: Can I grow sweet potatoes in bags in colder climates?
A: Yes, you can grow sweet potatoes in bags in colder climates, but you may need to start them indoors and provide extra protection during cooler periods. Start the slips indoors 6-8 weeks before the last expected frost. Once the weather warms up, transplant them into bags and place them in a sunny location. If temperatures drop unexpectedly, cover the bags with frost blankets or move them indoors to protect the plants from frost damage. Choose a shorter-season variety of sweet potato to ensure they have enough time to mature before the first frost.
Q: How do I store sweet potatoes after harvesting?
A: After curing the sweet potatoes, store them in a cool, dry, and well-ventilated place (55-60°F and 80-85% humidity). Avoid storing them in the refrigerator, as this can cause them to develop a hard core and lose their flavor. Properly cured and stored sweet potatoes can last for several months. Check them periodically for any signs of spoilage and discard any that are soft or moldy.

Leave a Comment