

Easy Cleaning Hacks: Who doesn’t love a sparkling clean home? But let’s be honest, the thought of spending hours scrubbing and scouring isn’t exactly appealing. I totally get it! We all lead busy lives, and sometimes, cleaning falls to the bottom of the to-do list. But what if I told you that achieving a spotless home doesn’t have to be a grueling chore?
Throughout history, people have sought clever ways to maintain cleanliness. From ancient civilizations using natural remedies to modern innovations in cleaning products, the quest for a tidy space is timeless. Think about it – our ancestors relied on ingenuity and readily available resources to keep their homes healthy and hygienic. Now, we can tap into that same spirit of resourcefulness with some modern twists!
That’s where these easy cleaning hacks come in! I’m going to share some of my favorite DIY tricks that will save you time, money, and a whole lot of elbow grease. Whether you’re battling stubborn stains, tackling grimy surfaces, or simply looking for ways to streamline your cleaning routine, these tips are designed to make your life easier. Imagine having more free time to relax, pursue your hobbies, or simply enjoy a clutter-free and sparkling clean home. Ready to transform your cleaning game? Let’s dive in!
Easy Cleaning Hacks to Make Your Life Easier!
Okay, let’s be honest, cleaning isn’t exactly anyone’s favorite pastime. But a clean home is a happy home, right? So, I’ve compiled some of my absolute favorite, tried-and-true cleaning hacks that will save you time, effort, and maybe even a little sanity. Get ready to transform your cleaning routine!
Cleaning Your Microwave Like a Pro
Microwaves. They’re lifesavers for reheating leftovers, but they can quickly become a splattered, sticky mess. Forget scrubbing for hours! This hack is a game-changer.
- The Goal: To loosen up all that baked-on food and grime so you can wipe it away with minimal effort.
- What You’ll Need: A microwave-safe bowl, water, vinegar or lemon juice, and a sponge or cloth.
- Prepare the Cleaning Solution: Fill your microwave-safe bowl with about 1 cup of water. Add 2 tablespoons of white vinegar or lemon juice. The vinegar or lemon juice helps to break down the grease and deodorize the microwave. I personally prefer lemon juice for the fresh scent!
- Microwave the Solution: Place the bowl in the microwave and heat it on high for 5-7 minutes. You want the water to boil and create steam. This steam is what will loosen all the gunk.
- Let it Sit (Important!): After microwaving, DO NOT open the door immediately. Let the bowl sit inside the microwave for another 3-5 minutes. This allows the steam to really work its magic.
- Wipe it Clean: Carefully remove the bowl (it will be hot!). Use a sponge or cloth to wipe down the inside of the microwave. You’ll be amazed at how easily the grime comes off. For stubborn spots, you might need a little extra elbow grease, but it should be significantly easier than scrubbing without the steam.
- Clean the Turntable: Don’t forget to remove the turntable and wash it separately with soap and water. You can even pop it in the dishwasher if it’s dishwasher-safe.
- Final Touches: Wipe down the outside of the microwave with a damp cloth. And voila! A sparkling clean microwave with minimal effort.
De-Gunking Your Showerhead for Better Water Pressure
Low water pressure in the shower? It’s probably your showerhead clogged with mineral deposits. This hack is super simple and effective.
- The Goal: To dissolve mineral buildup and restore your showerhead’s water pressure.
- What You’ll Need: A plastic bag (sandwich bag or larger, depending on the size of your showerhead), white vinegar, a rubber band or zip tie, and an old toothbrush (optional).
- Fill the Bag with Vinegar: Pour enough white vinegar into the plastic bag to completely submerge the showerhead.
- Secure the Bag: Carefully attach the bag to the showerhead, making sure the showerhead is fully immersed in the vinegar. Use a rubber band or zip tie to secure the bag tightly around the showerhead’s neck.
- Soak Overnight: Let the showerhead soak in the vinegar overnight (or for at least a few hours). This allows the vinegar to dissolve the mineral deposits.
- Remove and Rinse: Remove the bag and discard the vinegar. Turn on the shower and let the water run for a few minutes to flush out any remaining vinegar and loosened debris.
- Scrub (If Needed): If you still see some stubborn deposits, use an old toothbrush to gently scrub them away.
- Enjoy Your Improved Water Pressure: That’s it! You should now have significantly better water pressure in your shower.
Cleaning Your Blender Like a Pro
Blenders can be tricky to clean, especially after making smoothies with sticky ingredients. This hack makes it a breeze.
- The Goal: To quickly and easily clean your blender without having to disassemble it completely.
- What You’ll Need: Dish soap, water.
- Rinse Immediately: After using your blender, rinse it out as soon as possible to prevent food from drying and sticking.
- Fill with Soap and Water: Fill the blender jar about halfway with warm water. Add a squirt of dish soap.
- Blend: Secure the lid and blend on high speed for about 30-60 seconds. This will create a soapy vortex that cleans the blades and the inside of the jar.
- Rinse Thoroughly: Pour out the soapy water and rinse the blender jar thoroughly with clean water.
- Dry: Let the blender jar air dry or dry it with a clean towel.
- For Stubborn Residue: If you have any stubborn residue, you can use a sponge or brush to scrub the inside of the jar.
Freshening Up Your Garbage Disposal
Garbage disposals can get pretty stinky. Here’s how to freshen them up naturally.
- The Goal: To eliminate odors and clean your garbage disposal.
- What You’ll Need: Ice cubes, lemon or lime wedges, salt, and water.
- Ice Cubes and Salt: Throw a handful of ice cubes and a tablespoon of salt into the garbage disposal. The ice helps to dislodge any stuck-on food particles, and the salt acts as an abrasive to scrub the disposal blades.
- Run the Disposal: Turn on the cold water and run the garbage disposal for about 30 seconds.
- Citrus Power: Toss in a few lemon or lime wedges. The citrus will help to freshen the disposal and eliminate odors.
- Run Again: Run the cold water and the garbage disposal for another 30 seconds.
- Optional: Baking Soda and Vinegar: For extra cleaning power, you can pour 1/2 cup of baking soda down the disposal, followed by 1 cup of white vinegar. Let it fizz for about 5 minutes, then flush with hot water.
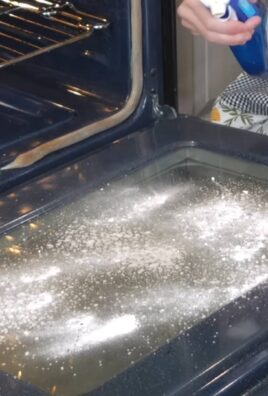
Cleaning Burnt Food from Pots and Pans
Burnt food stuck to your pots and pans? Don’t despair! This hack can save your cookware.
- The Goal: To loosen and remove burnt food without damaging your pots and pans.
- What You’ll Need: Water, baking soda, dish soap, and a non-abrasive sponge or scraper.
- Soak the Pan: Fill the burnt pot or pan with water and add a generous amount of baking soda (about 2-3 tablespoons).
- Boil the Mixture: Bring the water and baking soda mixture to a boil on the stovetop. Let it simmer for about 10-15 minutes. This will help to loosen the burnt food.
- Let it Cool: Remove the pan from the heat and let it cool down slightly.
- Scrub Gently: Use a non-abrasive sponge or scraper to gently scrub away the burnt food. The baking soda should have loosened it enough that it comes off easily.
- Wash as Usual: Wash the pot or pan with dish soap and water as usual.
- For Stubborn Burns: If some burnt food remains, repeat the process or try adding a little vinegar to the water and baking soda mixture.
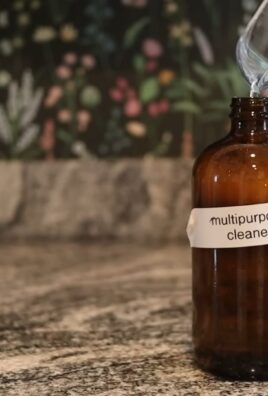
Making Your Own All-Purpose Cleaner
Why buy expensive cleaning products when you can make your own effective all-purpose cleaner with ingredients you probably already have?
- The Goal: To create a safe, effective, and affordable all-purpose cleaner.
- What You’ll Need: Spray bottle, water, white vinegar, essential oils (optional).
- Combine Ingredients: In a spray bottle, combine equal parts water and white vinegar. For example, you can use 1 cup of water and 1 cup of white vinegar.
- Add Essential Oils (Optional): If you want to add a pleasant scent, you can add a few drops of your favorite essential oils. Lemon, lavender, and tea tree oil are all great choices for cleaning.
- Shake Well: Shake the spray bottle well to mix the ingredients.
- Use as Needed: Spray the cleaner onto surfaces and wipe clean with a cloth or sponge.
- Test First: Before using the cleaner on delicate surfaces, test it in an inconspicuous area to make sure it doesn’t cause any damage.
Cleaning Your Dishwasher Effectively
A clean dishwasher means cleaner dishes! Here’s how to keep yours in tip-top shape

Conclusion
So, there you have it! Mastering these easy cleaning hacks isn’t just about saving time and money; it’s about reclaiming your weekends and creating a healthier, happier home environment. We’ve explored simple, effective solutions using everyday ingredients, proving that you don’t need harsh chemicals or expensive gadgets to achieve sparkling results. From banishing stubborn stains to revitalizing tired surfaces, these DIY tricks are game-changers.
Why is this a must-try? Because it empowers you to take control of your cleaning routine. You know exactly what’s going into your cleaning solutions, avoiding potentially harmful chemicals and reducing your environmental impact. Plus, the satisfaction of creating something yourself and seeing it work wonders is incredibly rewarding. It’s a win-win for your home, your health, and your wallet.
But the fun doesn’t stop here! Feel free to experiment and adapt these hacks to suit your specific needs and preferences. For instance, if you’re tackling a particularly greasy stovetop, add a few drops of lemon essential oil to your baking soda paste for extra degreasing power and a refreshing scent. Or, if you’re cleaning your microwave, try adding a cinnamon stick to the water and vinegar mixture for a warm, inviting aroma. The possibilities are endless!
Consider these variations:
* Citrus Power: Infuse your vinegar cleaning solution with citrus peels (lemon, orange, grapefruit) for a natural fragrance and added cleaning boost. Simply steep the peels in vinegar for a week or two before using.
* Essential Oil Enhancements: Add a few drops of your favorite essential oils to your cleaning solutions for aromatherapy benefits. Lavender, tea tree, and eucalyptus are popular choices for their antibacterial and antiviral properties.
* DIY Disinfectant: For a natural disinfectant, combine equal parts white vinegar and water in a spray bottle. Add a few drops of tea tree oil for extra germ-fighting power.
* Fabric Freshener: Create a simple fabric freshener by mixing water with a few drops of your favorite essential oil in a spray bottle. Lightly mist your linens, upholstery, and carpets to eliminate odors and refresh your home.
We’re confident that once you try these easy cleaning hacks, you’ll wonder how you ever lived without them. They’re simple, effective, and eco-friendly – the perfect combination for a modern, conscious home.
Now, it’s your turn! We encourage you to try these DIY tricks and share your experiences with us. What worked best for you? Did you discover any new variations or adaptations? Let us know in the comments below! We’re eager to hear your success stories and learn from your insights. Together, we can create a community of savvy cleaners who are passionate about creating healthy, happy homes. So, grab your ingredients, roll up your sleeves, and get ready to transform your cleaning routine! You won’t regret it.
Frequently Asked Questions (FAQs)
Q: Are these easy cleaning hacks safe for all surfaces?
A: While most of these hacks are generally safe, it’s always a good idea to test them on an inconspicuous area first, especially on delicate surfaces like marble, granite, or wood. Vinegar, for example, can be too acidic for some natural stone surfaces. Always dilute vinegar with water, and avoid using abrasive cleaners on easily scratched materials. When in doubt, consult the manufacturer’s instructions for your specific surface.
Q: Can I use these cleaning hacks if I have allergies or sensitivities?
A: If you have allergies or sensitivities, it’s crucial to be cautious when trying new cleaning products, even natural ones. Always read the ingredient list carefully and avoid using anything you know you’re allergic to. Consider wearing gloves and a mask while cleaning to minimize exposure to potential allergens. If you experience any adverse reactions, such as skin irritation or respiratory problems, discontinue use immediately and consult a doctor. You can also try substituting ingredients with hypoallergenic alternatives. For example, if you’re sensitive to vinegar, you might try using lemon juice instead.
Q: How often should I use these easy cleaning hacks?
A: The frequency of cleaning depends on your lifestyle, habits, and the specific area you’re cleaning. High-traffic areas like kitchens and bathrooms may require more frequent cleaning than less-used spaces. As a general guideline, aim to clean your kitchen countertops and sink daily, your bathroom weekly, and your floors every one to two weeks. However, you can adjust this schedule based on your individual needs and preferences. The beauty of these DIY hacks is that they’re gentle enough for frequent use, so you can clean as often as you like without worrying about harsh chemicals damaging your surfaces.
Q: Can I store these DIY cleaning solutions for later use?
A: While some DIY cleaning solutions can be stored for later use, it’s generally best to make them fresh each time for optimal effectiveness. Solutions containing perishable ingredients like lemon juice or essential oils may degrade over time. If you do choose to store a cleaning solution, be sure to label it clearly with the ingredients and date, and store it in a cool, dark place. Discard any solutions that show signs of spoilage, such as discoloration or a foul odor. As a general rule, vinegar-based solutions can be stored for a few weeks, while solutions containing fresh ingredients should be used within a few days.
Q: Are these easy cleaning hacks effective for tough stains and messes?
A: Yes, many of these hacks are surprisingly effective for tackling tough stains and messes. However, the effectiveness may vary depending on the type of stain and the surface it’s on. For stubborn stains, you may need to repeat the cleaning process or try a combination of different hacks. For example, a paste of baking soda and water can be effective for removing grease stains, while a solution of vinegar and water can help dissolve hard water stains. It’s also important to act quickly when dealing with spills and stains, as the longer they sit, the harder they will be to remove.
Q: Can I use these cleaning hacks on my appliances?
A: Yes, many of these hacks are safe and effective for cleaning appliances. For example, you can use a solution of vinegar and water to clean your microwave, dishwasher, and coffee maker. However, it’s important to follow the manufacturer’s instructions for your specific appliance and avoid using abrasive cleaners that could damage the finish. Always unplug appliances before cleaning them, and be sure to dry them thoroughly before using them again. For stainless steel appliances, you can use a microfiber cloth and a small amount of olive oil to polish the surface and remove fingerprints.
Q: How can I make these easy cleaning hacks more eco-friendly?
A: There are several ways to make these hacks even more eco-friendly. First, use reusable containers and spray bottles instead of disposable ones. Second, choose organic and sustainably sourced ingredients whenever possible. Third, compost any food scraps or peels that you use in your cleaning solutions. Fourth, avoid using paper towels and opt for reusable microfiber cloths instead. Finally, consider using a greywater system to recycle water from your cleaning activities for watering plants or flushing toilets. By making these small changes, you can significantly reduce your environmental impact and create a more sustainable cleaning routine.
Leave a Comment