

Grow Arugula Indoors? Absolutely! Imagine fresh, peppery arugula, bursting with flavor, ready to be harvested right from your windowsill, even in the dead of winter. Forget those limp, overpriced greens at the grocery store. I’m going to show you how to cultivate your own thriving arugula patch, no matter where you live.
Arugula, also known as rocket, has a rich history dating back to Roman times, where it was prized for its distinctive taste and medicinal properties. It was even believed to be an aphrodisiac! While I can’t promise those results, I can guarantee a delicious and readily available source of vitamins and minerals.
In today’s busy world, access to fresh, healthy food can be a challenge. That’s where this DIY guide comes in. Learning how to grow arugula indoors is a game-changer. It’s not just about saving money; it’s about connecting with nature, reducing your carbon footprint, and enjoying the unparalleled satisfaction of eating something you’ve nurtured from seed to salad. Plus, it’s incredibly easy! So, let’s ditch the store-bought greens and embark on this exciting journey to cultivate your own indoor arugula garden!
Grow Your Own Arugula Indoors: A Spicy Salad Adventure!
Hey there, fellow plant enthusiasts! Are you craving that peppery, zesty bite of fresh arugula but don’t have a garden or the weather isn’t cooperating? No problem! I’m going to show you how to easily grow your own arugula indoors, right on your windowsill or under grow lights. It’s a super rewarding project, and you’ll have delicious, fresh greens at your fingertips whenever you want them. Let’s get started!
What You’ll Need: The Arugula Arsenal
Before we dive in, let’s gather our supplies. This is a pretty low-key project, so you probably already have most of this stuff lying around.
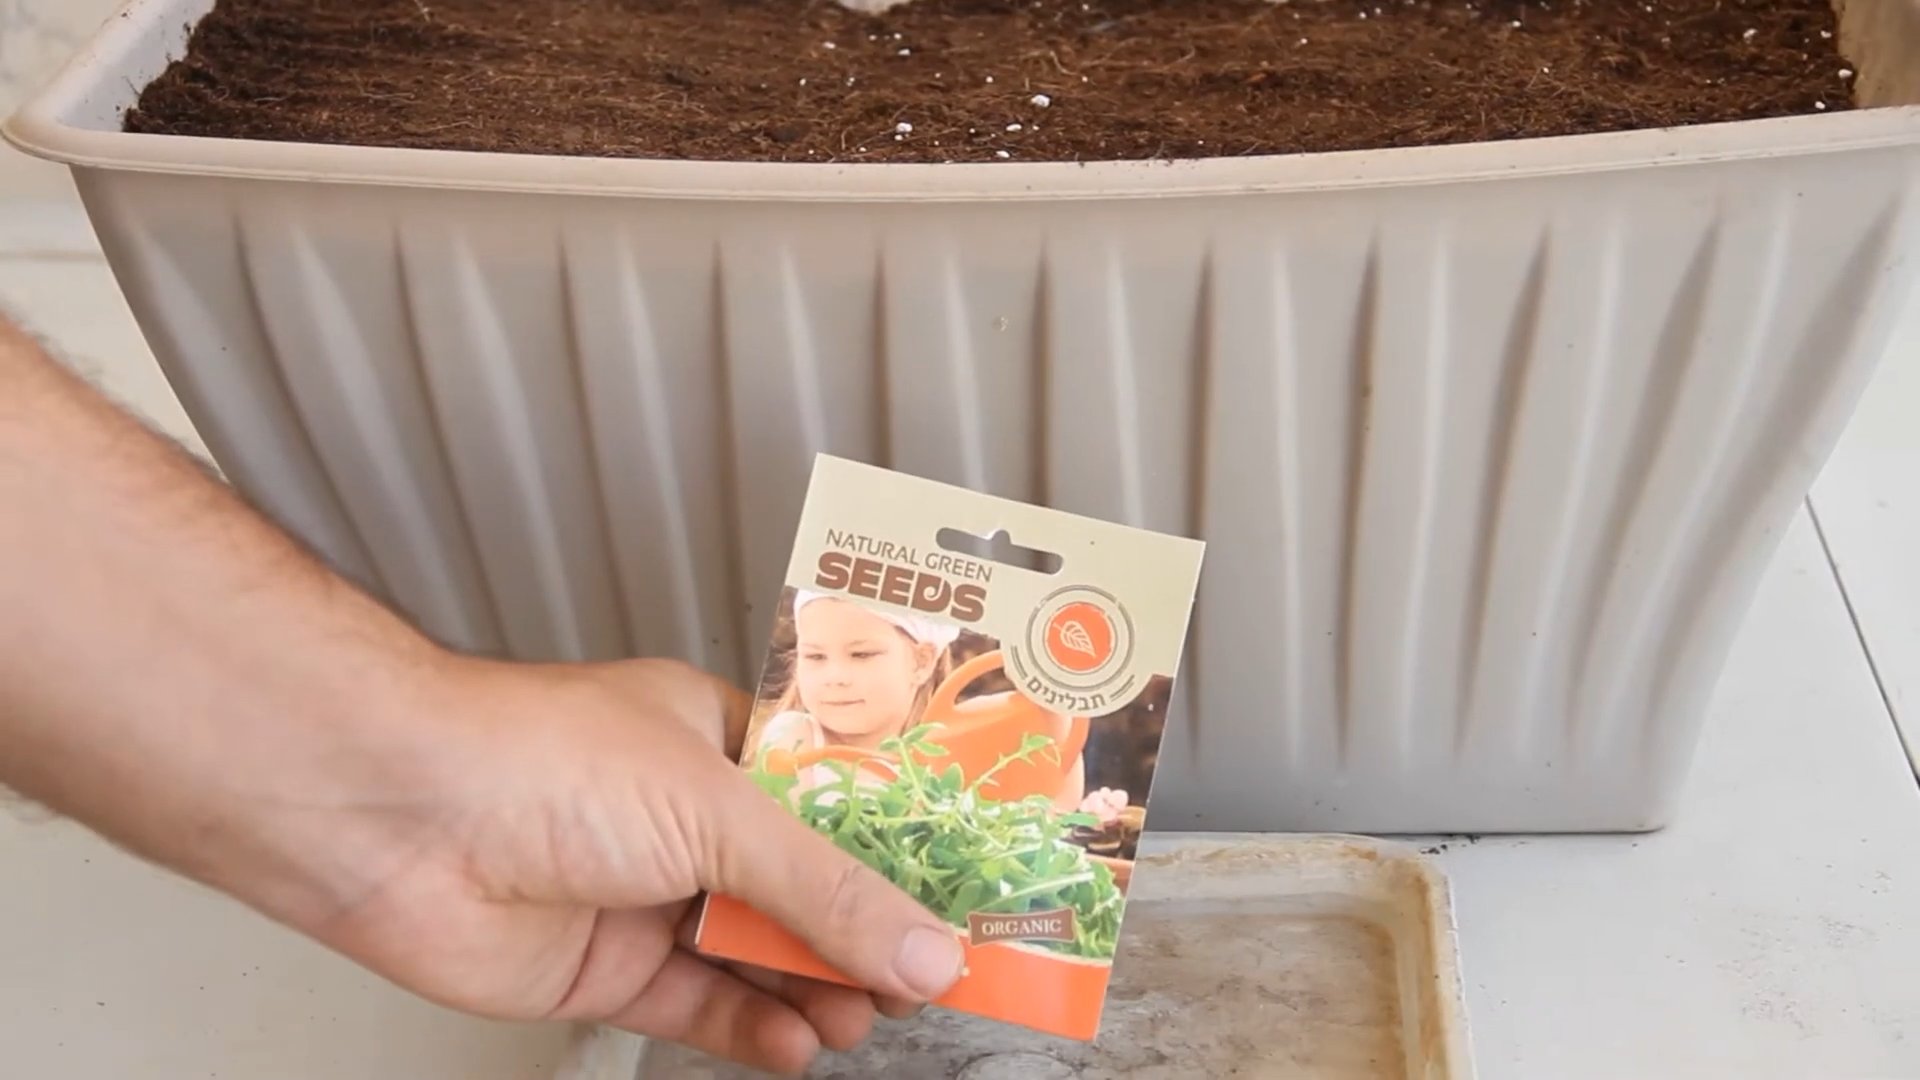
* **Arugula Seeds:** Obviously! You can find these at most garden centers or online. Look for varieties specifically suited for container gardening if possible, but honestly, most arugula seeds will work just fine.
* **Containers:** You’ll need something to grow your arugula in. I recommend using containers that are at least 6 inches deep to give the roots plenty of room. You can use plastic pots, terracotta pots, or even recycled containers like yogurt tubs or plastic takeout containers (just make sure they’re clean and have drainage holes!).
* **Potting Mix:** Don’t use garden soil! It’s too heavy and compacts easily, which isn’t good for arugula. Instead, use a good quality potting mix that’s light and well-draining.
* **Watering Can or Spray Bottle:** For keeping your arugula happy and hydrated.
* **Grow Lights (Optional but Recommended):** If you don’t have a sunny windowsill, or if you want to ensure consistent growth, grow lights are a great investment.
* **Small Shovel or Trowel:** For filling your containers with potting mix.
* **Seed Starting Tray (Optional):** If you want to start your seeds indoors before transplanting them to larger containers.
* **Spray bottle with water:** To keep the soil moist during germination.
Planting Your Arugula Seeds: From Tiny Seeds to Spicy Greens
Okay, now for the fun part! We’re going to plant those tiny seeds and watch them sprout into delicious arugula.
1. **Prepare Your Containers:** First, fill your containers with potting mix, leaving about an inch of space at the top. Gently pat down the soil to remove any air pockets.
2. **Sow the Seeds:** Arugula seeds are small, so you don’t need to plant them too deep. Sprinkle the seeds evenly over the surface of the soil. I usually aim for about 10-15 seeds per container, depending on the size.
3. **Cover the Seeds:** Lightly cover the seeds with a thin layer of potting mix, about ¼ inch deep.
4. **Water Gently:** Use your watering can or spray bottle to gently water the soil. You want to moisten the soil without disturbing the seeds.
5. **Provide Light and Warmth:** Place your containers in a warm, sunny location. A south-facing windowsill is ideal, but if you don’t have one, you can use grow lights. Arugula seeds germinate best at temperatures between 60-70°F (15-21°C).
6. **Keep the Soil Moist:** The key to successful germination is keeping the soil consistently moist. Check the soil daily and water as needed. Don’t let the soil dry out completely, but also avoid overwatering, which can lead to rot.
7. **Wait for Germination:** Arugula seeds typically germinate within 5-7 days. Be patient! Once you see those tiny seedlings emerge, you’ll know you’re on the right track.
Caring for Your Arugula: Keeping Those Greens Growing Strong
Now that your arugula has sprouted, it’s time to provide the care it needs to thrive.
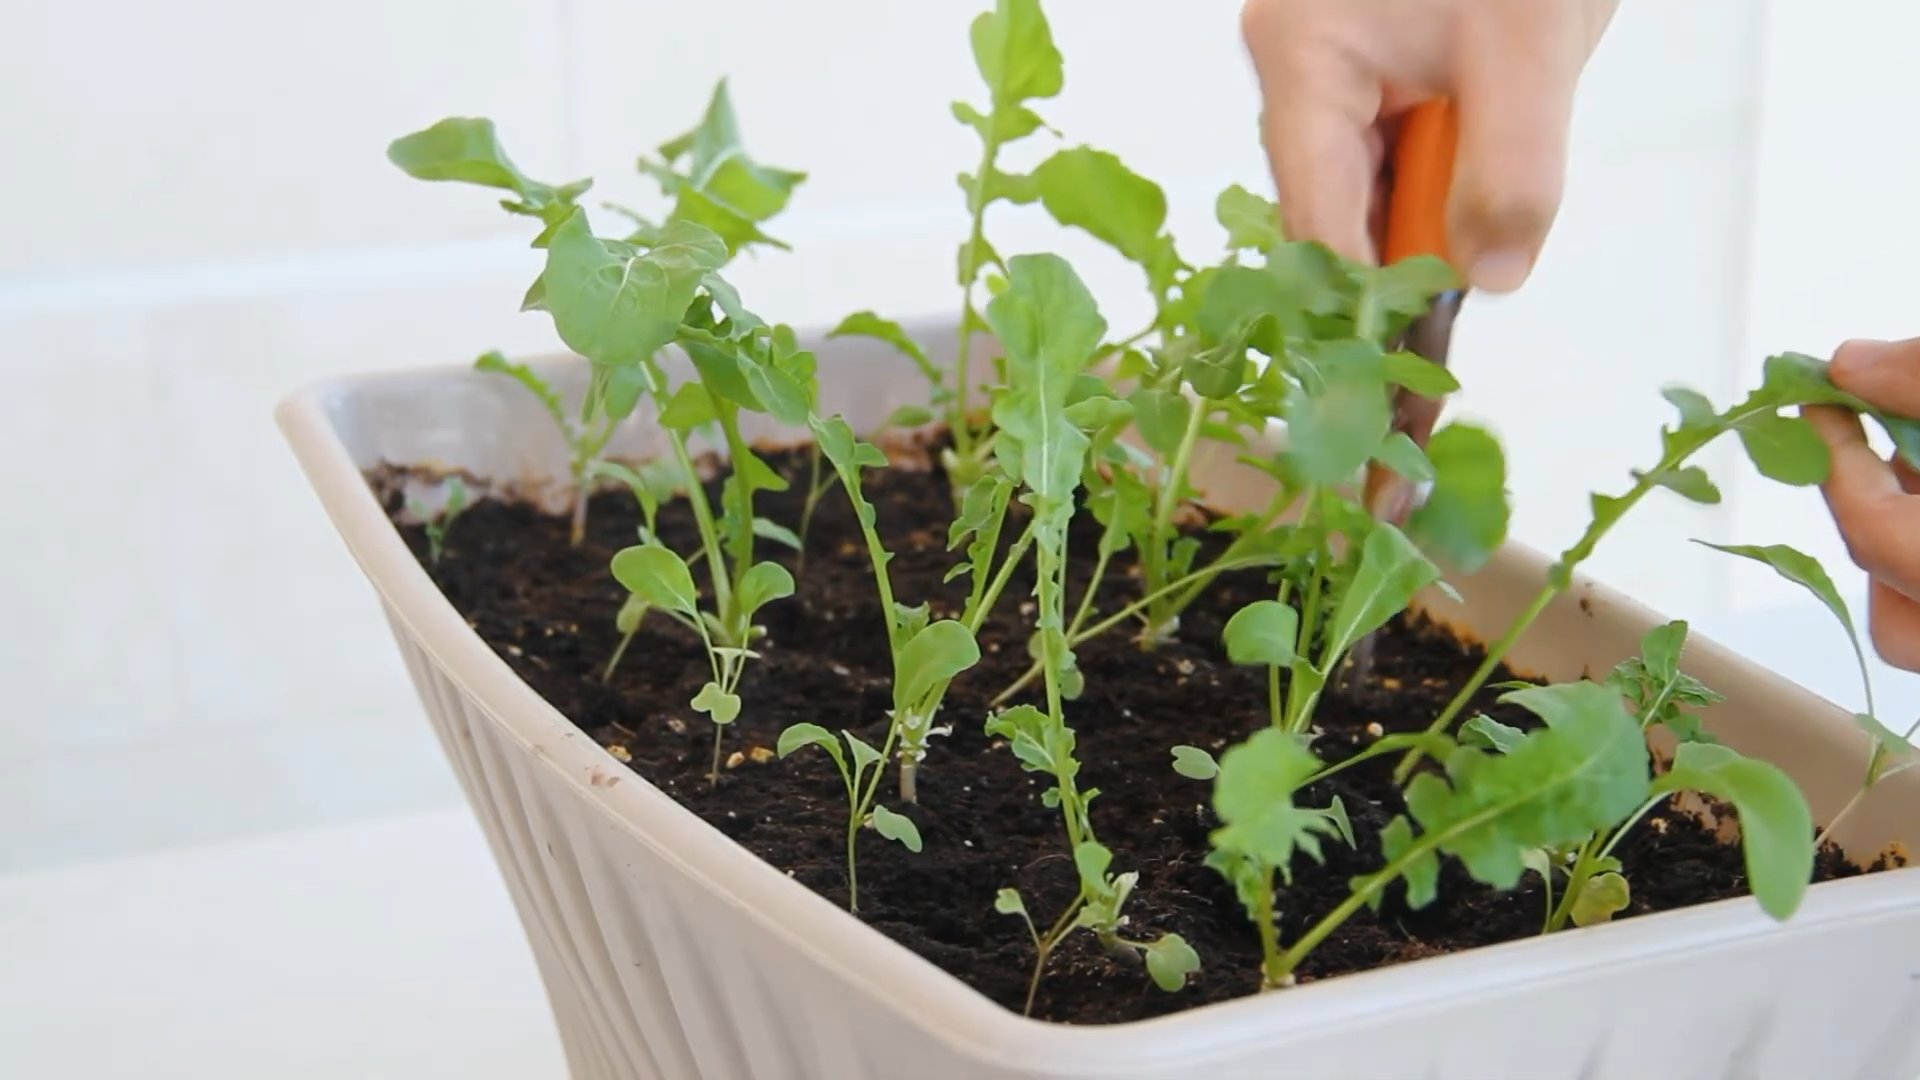
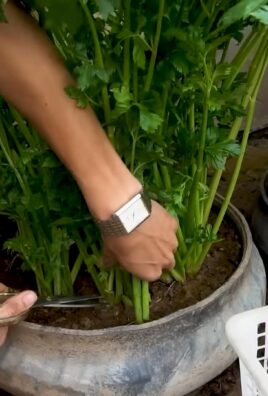
1. **Thinning (If Necessary):** If your seedlings are too crowded, you’ll need to thin them out. This will give the remaining plants more room to grow. Use small scissors to snip off the weaker seedlings at the soil line, leaving about 1-2 inches between plants.
2. **Watering:** Continue to water your arugula regularly, keeping the soil moist but not soggy. Check the soil moisture by sticking your finger into the soil. If the top inch feels dry, it’s time to water.
3. **Light:** Arugula needs plenty of light to grow well. If you’re using a windowsill, rotate the containers regularly to ensure that all sides of the plants receive equal light. If you’re using grow lights, keep them on for about 12-14 hours per day.
4. **Fertilizing (Optional):** Arugula isn’t a heavy feeder, but you can give it a boost with a diluted liquid fertilizer every few weeks. Look for a fertilizer that’s specifically formulated for leafy greens.
5. **Pest Control:** Arugula is generally pest-resistant, but you may occasionally encounter aphids or other small pests. If you notice any pests, you can try spraying them with a solution of soapy water or using an insecticidal soap.
Harvesting Your Arugula: Time to Enjoy Your Spicy Bounty!
The best part of growing your own arugula is, of course, harvesting it and enjoying its delicious flavor!
1. **When to Harvest:** You can start harvesting arugula leaves when they are about 2-3 inches long. The younger leaves will have a milder flavor, while the older leaves will be more peppery.
2. **How to Harvest:** Use scissors or your fingers to snip off the outer leaves, leaving the inner leaves to continue growing. This is called a “cut-and-come-again” method, and it allows you to harvest arugula multiple times from the same plant.
3. **Harvest Regularly:** The more you harvest, the more your arugula will produce. Try to harvest leaves at least once a week to encourage new growth.
4. **Enjoy Your Harvest:** Use your fresh arugula in salads, sandwiches, pizzas, or as a garnish for your favorite dishes. It’s also delicious sautéed with garlic and olive oil.
Troubleshooting: Common Arugula Growing Problems and Solutions
Even with the best care, you might encounter a few challenges along the way. Here are some common problems and how to fix them:
* **Leggy Seedlings:** This usually happens when the seedlings aren’t getting enough light. Move them to a sunnier location or use grow lights.
* **Yellowing Leaves:** This could be a sign of overwatering or nutrient deficiency. Make sure your containers have good drainage and consider fertilizing your arugula.
* **Slow Growth:** This could be due to a variety of factors, including insufficient light, water, or nutrients. Make sure you’re providing your arugula with the right conditions.
* **Pests:** As mentioned earlier, aphids and other pests can sometimes be a problem. Use soapy water or insecticidal soap to control them.
Arugula Varieties to Consider
While most arugula varieties will grow well indoors, here are a few that are particularly well-suited for container gardening:
* **’Astro’:** A fast-growing variety with a mild, nutty flavor.
* **’Slow Bolt’:** A heat-tolerant variety that’s less likely to bolt (go to seed) in warm weather.
* **’Wasabi’:** A variety with a particularly spicy, wasabi-like flavor.
* **’Italian Cress’:** This isn’t technically arugula, but it has a similar peppery flavor and is easy to grow indoors.
Tips for Success: Arugula Growing Wisdom
Here are a few extra tips to help you grow the best arugula possible:
* **Use a good quality potting mix:** This is essential for healthy growth.
* **Don’t overwater:** Arugula prefers moist soil, but it doesn’t like to be waterlogged.
* **Provide plenty of light:** Arugula needs at least 6 hours of sunlight per day, or 12-14 hours of grow light.
* **Harvest regularly:** This will encourage new growth and prevent the leaves from becoming too bitter.
* **Succession Planting:** Plant new seeds every few weeks to ensure a continuous supply of fresh arugula.
Section: Advanced Arugula Techniques
Want to take your indoor arugula growing to the next level? Here are a few advanced techniques to try:
1. **Hydroponics:** Grow your arugula without soil using a hydroponic system. This can be a fun and efficient way to grow greens indoors.
2. **Vertical Gardening:** Maximize your space by growing arugula in a vertical garden. This is a great option for small apartments or homes.
3. **Companion Planting:** Plant arugula alongside other herbs and vegetables that benefit from its presence. For example, arugula can help repel pests from tomatoes and other plants.
4. **Seed Saving:** Save your own arugula seeds to plant next year. This is a great way to save money and ensure that you always have a supply of your favorite arugula variety.
Growing arugula indoors is a simple and rewarding project that anyone can do. With a little bit of care and
Conclusion
So, there you have it! Growing arugula indoors is not only achievable but also incredibly rewarding. Forget those limp, overpriced greens from the grocery store. Imagine fresh, peppery arugula, bursting with flavor, readily available right in your kitchen. This DIY trick is a must-try for anyone who values fresh, healthy ingredients and enjoys a touch of green in their home.
Why is this a must-try? Because it puts you in control. You control the quality of the soil, the amount of sunlight, and the overall growing environment. This translates to arugula that is fresher, tastier, and potentially more nutritious than anything you can buy. Plus, it’s a sustainable practice, reducing your reliance on commercially grown produce and minimizing your carbon footprint.
But the benefits don’t stop there. Growing arugula indoors is also a fantastic way to add a touch of life and vibrancy to your living space. The sight of those tiny seedlings sprouting and maturing into leafy greens is a constant reminder of the beauty and resilience of nature. It’s a small but significant way to connect with the natural world, even when you’re stuck indoors.
Looking for variations? Absolutely! Experiment with different types of arugula seeds. Some varieties are spicier than others, while some have a milder, more delicate flavor. You can also try growing arugula in different types of containers, from simple plastic pots to more decorative ceramic planters. Consider using a self-watering system to make the process even easier and more hands-off. For an extra boost, try supplementing with a diluted liquid fertilizer specifically formulated for leafy greens. You can even try companion planting with other herbs like basil or chives in the same container, creating a mini indoor herb garden.
Don’t be intimidated if you’ve never grown anything before. Growing arugula indoors is surprisingly easy, even for beginners. With just a few simple supplies and a little bit of patience, you can enjoy a continuous supply of fresh, peppery greens all year round.
We wholeheartedly encourage you to give this DIY trick a try. Start small, experiment with different techniques, and don’t be afraid to make mistakes. The most important thing is to have fun and enjoy the process. And once you’ve harvested your first batch of homegrown arugula, be sure to share your experience with us! We’d love to hear about your successes, your challenges, and any tips or tricks you’ve discovered along the way. Share your photos and stories on social media using #IndoorArugula and let’s inspire others to embrace the joy of growing their own food. So, grab some seeds, get your hands dirty, and start growing arugula indoors today! You won’t regret it.
Frequently Asked Questions (FAQ)
What kind of soil should I use for growing arugula indoors?
The best soil for growing arugula indoors is a well-draining potting mix. Avoid using garden soil, as it can be too heavy and may contain pests or diseases. Look for a potting mix that is specifically formulated for vegetables or herbs. A mix containing peat moss, perlite, and vermiculite is a good option. You can also amend your potting mix with compost to add extra nutrients. Ensure the pH level is slightly acidic to neutral, ideally between 6.0 and 7.0.
How much sunlight does arugula need when grown indoors?
Arugula requires at least 6 hours of direct sunlight per day to thrive. If you don’t have a sunny window, you can supplement with artificial light. A grow light specifically designed for plants is ideal, but a fluorescent or LED light can also work. Position the light a few inches above the plants and keep it on for 12-16 hours per day. Rotate the plants regularly to ensure even light exposure. Insufficient light can lead to leggy growth and a less flavorful harvest.
How often should I water my indoor arugula plants?
Water your arugula plants regularly, keeping the soil consistently moist but not waterlogged. Check the soil moisture by sticking your finger about an inch into the soil. If it feels dry, it’s time to water. Water deeply, allowing the excess water to drain out of the bottom of the pot. Avoid overwatering, as this can lead to root rot. The frequency of watering will depend on factors such as the size of the pot, the type of soil, and the temperature and humidity of your home. Generally, watering every 2-3 days is a good starting point.
When can I harvest my indoor arugula?
You can start harvesting arugula leaves when they are about 2-3 inches long. This typically takes about 3-4 weeks after planting. Harvest the outer leaves first, leaving the inner leaves to continue growing. You can harvest arugula multiple times from the same plant. To encourage continued growth, avoid harvesting more than one-third of the plant at a time. Regular harvesting will also help to prevent the plants from bolting (going to seed), which can make the leaves bitter.
What are some common problems when growing arugula indoors, and how can I fix them?
Some common problems include:
* **Leggy growth:** This is usually caused by insufficient light. Provide more sunlight or supplement with artificial light.
* **Yellowing leaves:** This can be caused by overwatering, underwatering, or nutrient deficiencies. Adjust your watering schedule and consider fertilizing with a balanced liquid fertilizer.
* **Pests:** Aphids and spider mites are common pests that can affect arugula. Inspect your plants regularly and treat any infestations with insecticidal soap or neem oil.
* **Bolting:** This is when the plant starts to produce flowers and the leaves become bitter. It’s often caused by hot weather or stress. Keep the plants well-watered and provide shade during the hottest part of the day. Harvest regularly to delay bolting.
Can I grow arugula indoors year-round?
Yes, you can grow arugula indoors year-round, provided you have adequate light and temperature control. Arugula prefers cooler temperatures, so avoid placing the plants near heat sources. If your home is very dry, you may need to increase the humidity by misting the plants regularly or using a humidifier. With proper care, you can enjoy a continuous supply of fresh arugula all year long.
How do I prevent arugula from becoming too spicy?
The spiciness of arugula is influenced by several factors, including temperature, water stress, and the age of the leaves. To reduce the spiciness, try to keep the plants cool and well-watered. Harvest the leaves when they are young and tender, as older leaves tend to be spicier. You can also try growing arugula in partial shade, which can help to reduce the intensity of the flavor.
Is it better to start arugula from seed or buy seedlings?
Starting arugula from seed is generally the preferred method, as it’s more economical and allows you to choose from a wider variety of cultivars. Arugula seeds germinate quickly and easily, making it a relatively simple process. However, if you’re short on time or want a head start, you can also purchase arugula seedlings from a nursery or garden center. Just be sure to choose healthy, vigorous seedlings that are free from pests and diseases.
How do I store harvested arugula?
To store harvested arugula, gently wash and dry the leaves. Wrap them in a paper towel and place them in a plastic bag or container in the refrigerator. Arugula is best used within a few days of harvesting, but it can last for up to a week if stored properly. Avoid storing arugula near fruits that produce ethylene gas, such as apples and bananas, as this can cause the leaves to wilt and spoil more quickly.
Leave a Comment