

Time-Saving Cleaning Secrets: Who doesn’t dream of a sparkling clean home without spending their entire weekend scrubbing? I know I do! For generations, the quest for efficient cleaning methods has been a constant, evolving from ancient remedies using natural ingredients to the modern marvels of today’s cleaning products. Think about our grandmothers, armed with vinegar and baking soda, tackling grime with resourcefulness and elbow grease. Their ingenuity paved the way for the time-saving cleaning secrets we’re about to explore.
In today’s fast-paced world, time is a precious commodity. Spending hours cleaning feels like a luxury most of us simply can’t afford. That’s why I’ve compiled a collection of DIY cleaning hacks that will revolutionize your routine. These aren’t just random tips; they’re tried-and-true methods designed to cut down on cleaning time without sacrificing cleanliness. Imagine having more free time to pursue your hobbies, spend with loved ones, or simply relax in a spotless home. Ready to reclaim your weekends? Let’s dive in!
Time-Saving Cleaning Secrets: My Favorite DIY Hacks!
Okay, friends, let’s be honest: cleaning isn’t exactly anyone’s favorite pastime. But a clean home is a happy home, right? So, I’ve compiled a list of my absolute favorite, tried-and-true DIY cleaning hacks that will save you time and energy. Get ready to ditch those all-day cleaning marathons and embrace a sparkling home with minimal effort!
Hack 1: The Microwave Deep Clean (Without Scrubbing!)
This is a game-changer. I used to dread cleaning the microwave, but now it’s a breeze. This hack uses the power of steam to loosen up all that splattered food, making it super easy to wipe away.
What You’ll Need:
* 1 cup of water
* 1 tablespoon of white vinegar or lemon juice (vinegar is my go-to!)
* Microwave-safe bowl
Step-by-Step Instructions:
1. Combine Water and Vinegar/Lemon Juice: In your microwave-safe bowl, mix the water and vinegar (or lemon juice). The vinegar helps to deodorize and break down grease, while lemon juice adds a fresh scent.
2. Microwave for 5-7 Minutes: Place the bowl in the microwave and heat on high for 5-7 minutes. You want the water to boil and create a lot of steam. Don’t open the door immediately! Let the steam work its magic for a few more minutes.
3. Carefully Remove the Bowl: Using oven mitts (because the bowl will be HOT!), carefully remove the bowl from the microwave.
4. Wipe Clean: Now, grab a clean cloth or sponge and easily wipe away all the loosened food particles. You’ll be amazed at how effortlessly everything comes off! For stubborn spots, you might need a little extra elbow grease, but trust me, it’s nothing compared to the scrubbing you’d normally have to do.
5. Wipe Down the Turntable: Don’t forget to remove and wash the turntable! You can usually just wash it with soap and water in the sink.
Hack 2: Streak-Free Window Cleaning (Goodbye, Smudges!)
I used to spend hours trying to get my windows clean, only to be left with annoying streaks. This simple DIY solution is my secret weapon for sparkling, streak-free windows.
What You’ll Need:
* Spray bottle
* 1 part white vinegar
* 10 parts warm water
* Microfiber cloths (these are essential!)
* Optional: Squeegee
Step-by-Step Instructions:
1. Mix the Solution: In your spray bottle, combine the white vinegar and warm water. Give it a gentle shake to mix.
2. Spray the Windows: Generously spray the window surface with the vinegar solution.
3. Wipe with a Microfiber Cloth: Using a clean microfiber cloth, wipe the window in overlapping strokes. Make sure to wring out the cloth frequently to avoid spreading dirty water.
4. Optional: Use a Squeegee: For larger windows, a squeegee can help you achieve a truly streak-free finish. Overlap each stroke slightly and wipe the squeegee blade clean after each pass.
5. Buff Dry: Finally, use a dry microfiber cloth to buff the windows dry. This will remove any remaining streaks and leave your windows sparkling.
Pro Tip: Avoid cleaning windows on a hot, sunny day. The solution will dry too quickly and leave streaks.
Hack 3: The Shower Head Detox (No More Mineral Buildup!)
Hard water can wreak havoc on your shower head, causing mineral buildup that reduces water pressure. This simple hack will dissolve those deposits and restore your shower head to its former glory.
What You’ll Need:
* Plastic bag (gallon-sized works well)
* White vinegar
* Rubber band or twist tie
Step-by-Step Instructions:
1. Fill the Bag with Vinegar: Pour enough white vinegar into the plastic bag to completely submerge the shower head.
2. Attach the Bag to the Shower Head: Carefully position the bag over the shower head, ensuring that the entire head is submerged in the vinegar. Secure the bag with a rubber band or twist tie.
3. Soak Overnight: Let the shower head soak in the vinegar overnight (or for at least a few hours). The vinegar will dissolve the mineral deposits.
4. Remove and Rinse: Remove the bag and discard the vinegar. Rinse the shower head thoroughly with water to remove any remaining vinegar and loosened debris.
5. Wipe Clean: Use a clean cloth to wipe down the shower head. You should notice a significant improvement in water pressure!
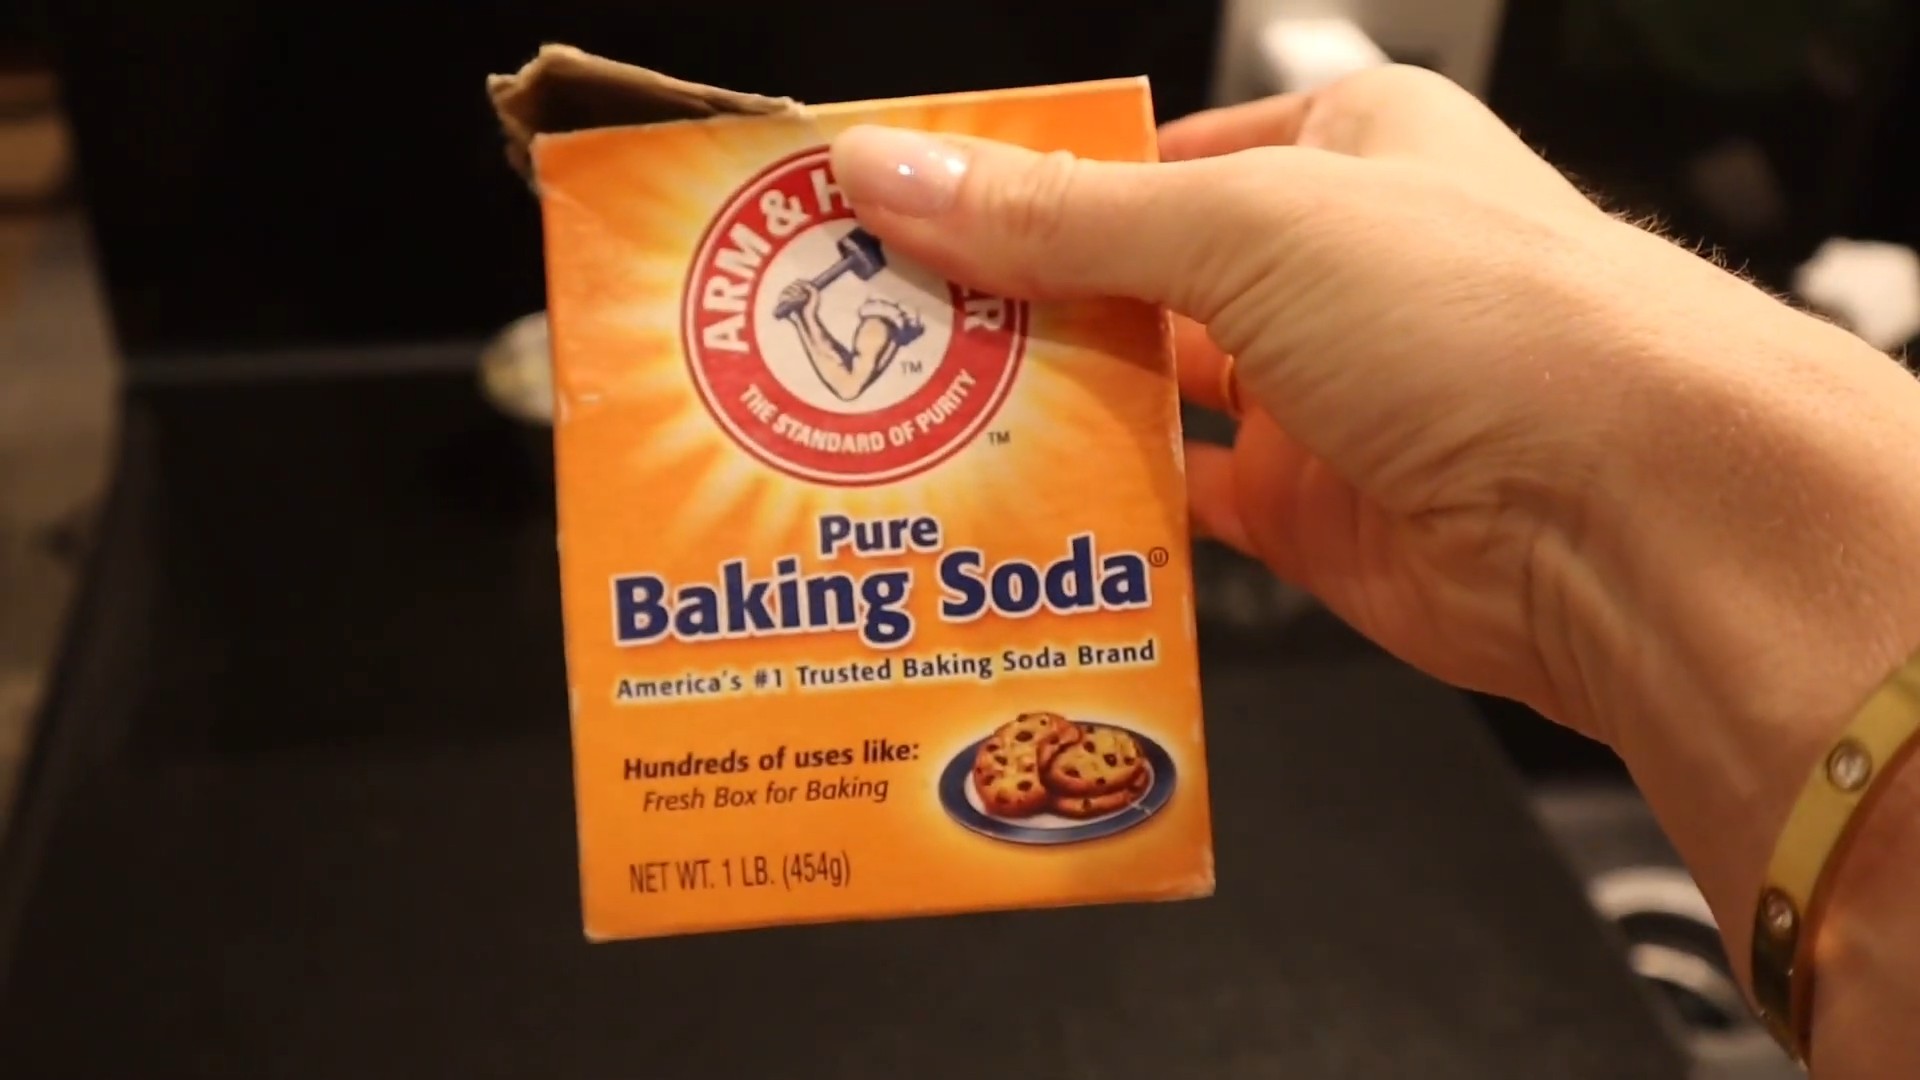
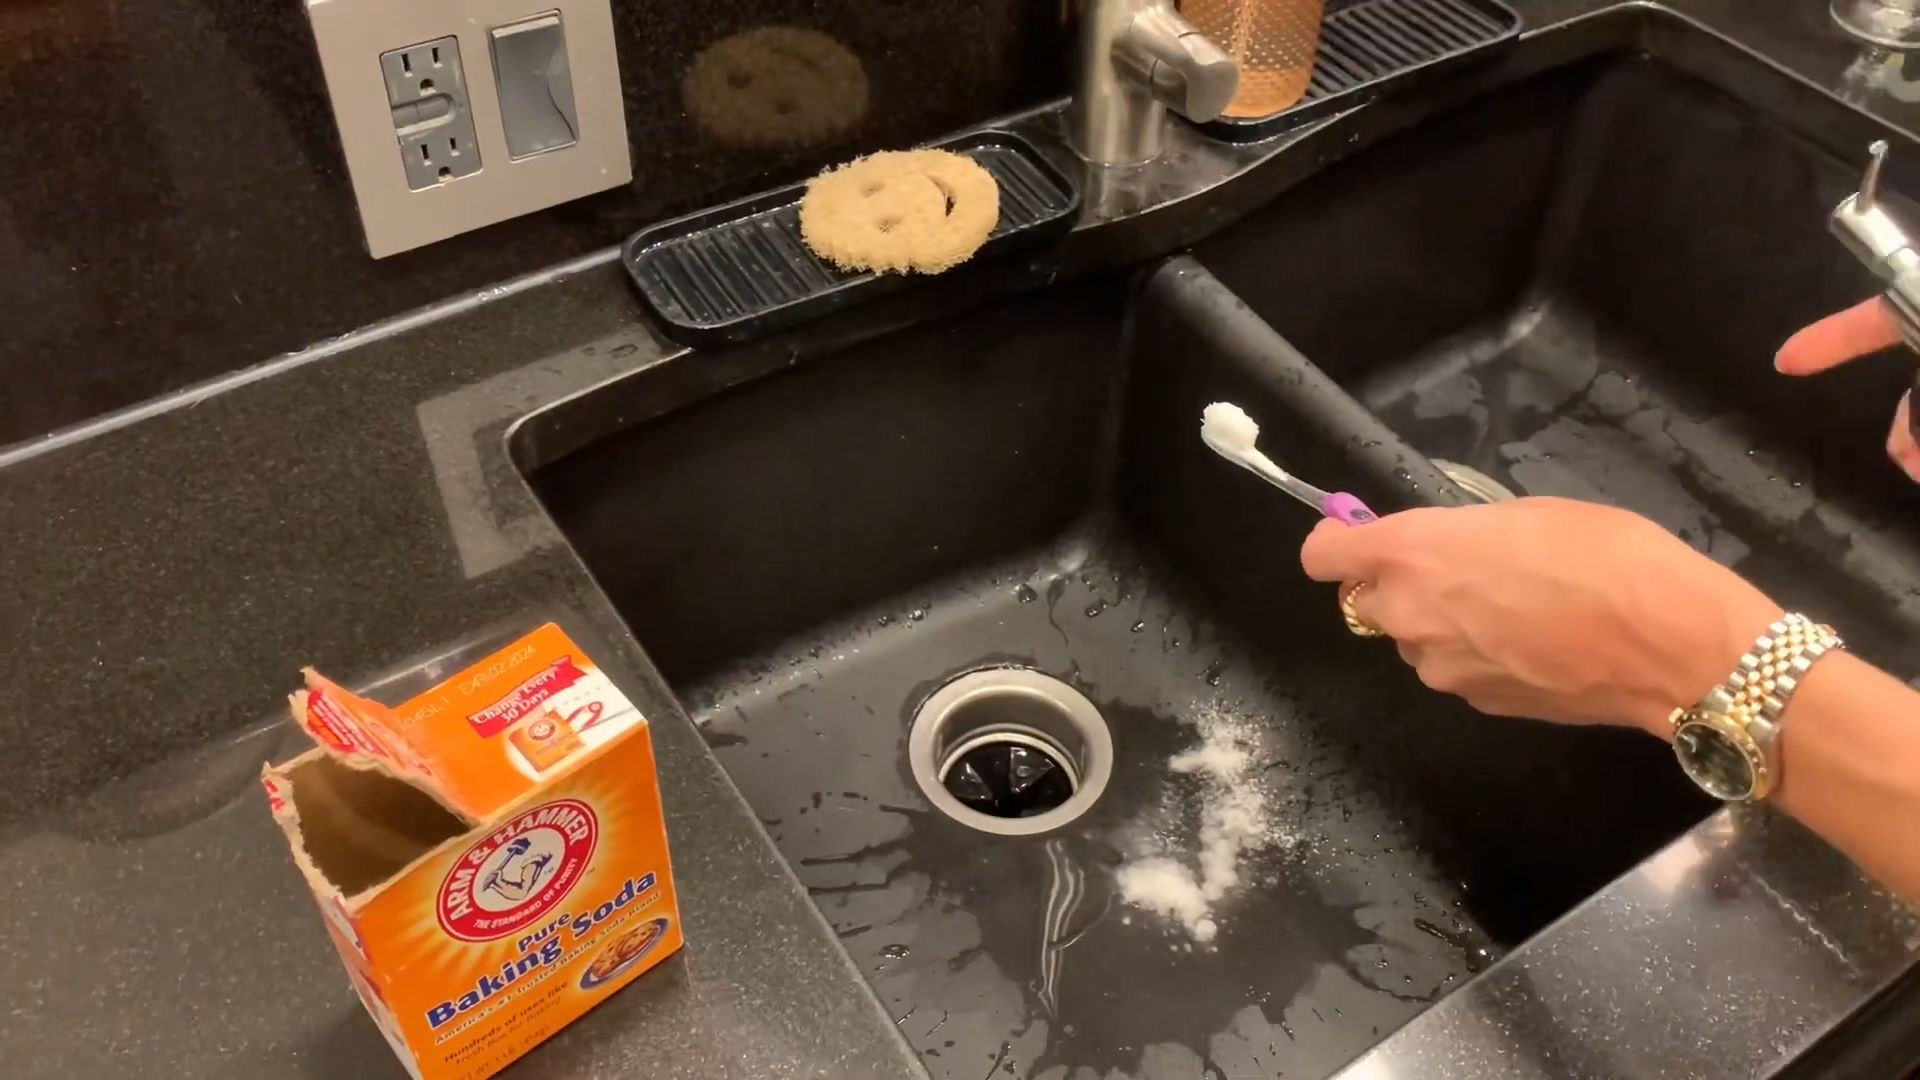
Hack 4: The Baking Soda and Vinegar Drain Cleaner (Skip the Harsh Chemicals!)
Clogged drains are a common household problem, and harsh chemical drain cleaners can be damaging to your pipes and the environment. This natural alternative is effective and safe.
What You’ll Need:
* 1 cup baking soda
* 2 cups white vinegar
* Hot water
Step-by-Step Instructions:
1. Pour Baking Soda Down the Drain: Pour one cup of baking soda down the clogged drain.
2. Pour Vinegar Down the Drain: Immediately follow with two cups of white vinegar.
3. Let it Fizz: The baking soda and vinegar will react and create a fizzing action. Let this mixture sit for about 30 minutes. This fizzing action helps to loosen up the clog.
4. Flush with Hot Water: After 30 minutes, flush the drain with a pot of boiling water. The hot water will help to dissolve any remaining debris and clear the drain.
5. Repeat if Necessary: If the drain is still clogged, repeat the process. For stubborn clogs, you may need to repeat it several times.
Hack 5: The Magic Dust Cloth (For Quick Dusting!)
Dusting can be a real chore, but this simple trick makes it much faster and more effective.
What You’ll Need:
* Microfiber cloth
* A few drops of lemon oil or furniture polish
Step-by-Step Instructions:
1. Dampen the Cloth: Lightly dampen a microfiber cloth with water. Make sure it’s not soaking wet, just slightly damp.
2. Add Lemon Oil or Furniture Polish: Add a few drops of lemon oil or furniture polish to the damp cloth.
3. Wipe Down Surfaces: Use the cloth to wipe down dusty surfaces. The dampness helps to trap the dust, and the lemon oil or furniture polish adds a nice shine and helps to prevent dust from settling.
4. Rinse and Repeat: Rinse the cloth frequently with water to remove accumulated dust.
Pro Tip: This works great on furniture, shelves, and even baseboards!
Hack 6: Cleaning Your Blender (Effortlessly!)
Cleaning a blender can be a pain, especially if you’ve just made a smoothie with sticky ingredients. This hack makes it super easy.
What You’ll Need:
* Warm water
* Dish soap
Step-by-Step Instructions:
1. Fill the Blender Halfway with Warm Water: After using your blender, immediately fill it about halfway with warm water.
2. Add a Drop of Dish Soap: Add a small drop of dish soap to the water.
3. Blend for 30 Seconds: Secure the lid and blend on high speed for about 30 seconds.
4. Rinse Thoroughly: Pour out the soapy water and rinse the blender thoroughly with clean water.
5. Dry: Let the blender air dry or dry it with a clean towel.
Pro Tip: For extra cleaning power, you can add a tablespoon of baking soda to the water.
Hack 7: The Oven Cleaning Power of Ammonia (Use with Caution!)
Okay, this one requires a bit of caution, but it’s incredibly effective for cleaning a really dirty oven. Ammonia fumes can be strong, so make sure you have proper ventilation.
What You’ll Need:
* 1/2 cup ammonia
* Oven-safe bowl
* Pot of boiling water
Step-by-Step Instructions:
1. Boil Water: Boil a pot of water on the stove.
2. Turn Off Oven and Place Ammonia: Turn off your oven. Place the 1/2 cup of ammonia in an oven-safe bowl on the top rack of your oven.
3. Place Boiling Water: Place the pot of boiling water on the bottom rack of your oven.
4. Close Oven Door: Close the oven door and let it sit overnight. The ammonia fumes will loosen the baked-on grime.
5. Ventilate and Clean: The next morning, open
Conclusion
So, there you have it! These time-saving cleaning secrets aren’t just about making your life easier; they’re about reclaiming your precious time and energy. Imagine spending less time scrubbing and more time doing the things you truly enjoy. That’s the power of working smarter, not harder, when it comes to household chores.
The beauty of these DIY cleaning solutions lies in their simplicity and accessibility. You likely already have most, if not all, of the ingredients you need sitting in your pantry or bathroom cabinet. No more expensive, chemical-laden cleaners that promise the world but often fall short. These natural alternatives are not only effective but also gentler on your home, your family, and the environment.
Why is this a must-try? Because it’s a game-changer. It’s about transforming the way you approach cleaning, turning it from a dreaded chore into a manageable task. Think of the satisfaction of knowing you’re using safe, natural ingredients to create a sparkling clean home. Think of the money you’ll save by ditching those pricey store-bought cleaners. And most importantly, think of the time you’ll gain back to spend on what truly matters.
But don’t just take our word for it. We encourage you to experiment and find what works best for you.
Variations and Suggestions
* **Lemon Power:** For extra cleaning power and a fresh scent, add a few drops of lemon essential oil to your vinegar cleaning solution. Lemon is a natural degreaser and disinfectant.
* **Baking Soda Boost:** For stubborn stains or grime, create a paste of baking soda and water. Apply it to the affected area, let it sit for a few minutes, and then scrub gently.
* **Tea Tree Triumph:** Add a few drops of tea tree oil to your cleaning solutions for its antibacterial and antifungal properties. This is especially useful in bathrooms and kitchens.
* **Essential Oil Blends:** Experiment with different essential oil blends to create your own signature cleaning scents. Lavender, eucalyptus, and peppermint are all great options.
* **DIY Cleaning Caddy:** Create a dedicated cleaning caddy with all your essential supplies, so you’re always ready to tackle messes as they arise. This will save you time and effort in the long run.
* Vinegar Infusions: Infuse your vinegar with citrus peels or herbs for added fragrance and cleaning power. Simply place the peels or herbs in a jar of vinegar and let it steep for a few weeks before straining and using.
We are confident that these time-saving cleaning secrets will revolutionize your cleaning routine. They are simple, effective, and eco-friendly.
Now, it’s your turn! We challenge you to try these DIY cleaning tricks and share your experiences with us. What worked best for you? Did you discover any new variations or tips? We’d love to hear your feedback and learn from your experiences. Share your thoughts in the comments below, and let’s create a community of clean-living enthusiasts!
FAQ
Q: Are these DIY cleaning solutions safe for all surfaces?
A: While most of these solutions are safe for a wide range of surfaces, it’s always a good idea to test them in an inconspicuous area first, especially on delicate materials like marble, granite, or wood. Vinegar, in particular, can be acidic and may damage certain surfaces. Avoid using vinegar on natural stone countertops. For wood surfaces, use a diluted solution and wipe dry immediately. Baking soda can be abrasive, so use it gently on delicate surfaces to avoid scratching. When in doubt, consult the manufacturer’s instructions for your specific surfaces.
Q: How long will these DIY cleaning solutions last?
A: Most DIY cleaning solutions have a relatively short shelf life due to the absence of preservatives. Vinegar-based solutions can typically last for several months if stored in a cool, dark place. Baking soda solutions are best used immediately. Solutions containing fresh ingredients like lemon juice should be used within a week or two. To maximize the shelf life of your DIY cleaners, store them in airtight containers and label them with the date they were made. If you notice any changes in color, odor, or consistency, it’s best to discard the solution and make a fresh batch.
Q: Can I use these DIY cleaning solutions if I have allergies or sensitivities?
A: If you have allergies or sensitivities, it’s crucial to be cautious when using any new cleaning product, including DIY solutions. Always read the ingredient list carefully and avoid using ingredients that you know you are allergic to. When working with essential oils, start with a small amount and test your reaction before using them more extensively. Wear gloves and a mask if necessary to minimize exposure. If you experience any adverse reactions, such as skin irritation, respiratory problems, or headaches, discontinue use immediately and consult a healthcare professional.
Q: Are these DIY cleaning solutions as effective as commercial cleaners?
A: In many cases, DIY cleaning solutions can be just as effective as commercial cleaners, and sometimes even more so. Vinegar, for example, is a powerful disinfectant and degreaser. Baking soda is an excellent abrasive cleaner and deodorizer. Essential oils can provide antibacterial and antifungal benefits. However, it’s important to note that DIY cleaners may not be as effective against certain types of bacteria or viruses as some commercial disinfectants. If you are concerned about disinfecting surfaces, you may want to consider using a commercial disinfectant in addition to your DIY cleaners.
Q: Can I use these DIY cleaning solutions in my laundry?
A: Yes, many of these DIY ingredients can be used in your laundry. Vinegar can be used as a natural fabric softener and odor remover. Baking soda can be added to your laundry detergent to boost its cleaning power. Lemon juice can be used as a natural bleach alternative for whitening clothes. However, it’s important to use these ingredients in moderation and to test them on a small, inconspicuous area of fabric first to ensure they don’t cause any damage or discoloration. Avoid mixing vinegar and bleach, as this can create harmful fumes.
Q: What are the best essential oils to use for cleaning?
A: There are many essential oils that have antibacterial, antifungal, and antiviral properties, making them ideal for cleaning. Some of the most popular and effective essential oils for cleaning include:
* **Lemon:** A natural degreaser and disinfectant with a fresh, uplifting scent.
* **Tea Tree:** A powerful antibacterial and antifungal oil that is great for cleaning bathrooms and kitchens.
* **Lavender:** A calming and relaxing scent with antiseptic properties.
* **Eucalyptus:** A strong disinfectant with a refreshing scent that can help clear congestion.
* **Peppermint:** A refreshing and invigorating scent with antibacterial properties.
* **Orange:** A natural degreaser with a cheerful and uplifting scent.
When using essential oils for cleaning, be sure to dilute them properly with water or another carrier oil. A general guideline is to use 10-15 drops of essential oil per cup of water.
Q: How can I make my own all-purpose cleaner?
A: Making your own all-purpose cleaner is easy and affordable. Here’s a simple recipe:
* 1 cup white vinegar
* 1 cup water
* 10-15 drops of your favorite essential oil (optional)
Combine all ingredients in a spray bottle and shake well. To use, spray the cleaner onto the surface you want to clean and wipe with a clean cloth.
Q: How can I clean my microwave naturally?
A: Cleaning your microwave naturally is simple and effective. Here’s one method:
1. Combine 1 cup of water and 1 tablespoon of vinegar in a microwave-safe bowl.
2. Microwave on high for 5 minutes.
3. Let the bowl sit in the microwave for another 5 minutes to allow the steam to loosen any stuck-on food.
4. Carefully remove the bowl and wipe down the inside of the microwave with a clean cloth.
Q: How can I remove hard water stains?
A: Hard water stains can be stubborn, but vinegar is a great natural solution.
1. Soak a cloth or paper towel in white vinegar.
2. Place the cloth or paper towel over the hard water stain and let it sit for 30 minutes to an hour.
3. Scrub the stain with a non-abrasive sponge or brush.
4. Rinse with water and dry with a clean cloth.
For tougher stains, you may need to repeat the process or use a stronger solution of vinegar.
Leave a Comment