

Soil Free Rosemary Growing: Imagine fresh, fragrant rosemary sprigs always at your fingertips, ready to elevate your culinary creations. What if I told you that you don’t even need soil to achieve this? That’s right! This article unveils a simple, yet revolutionary DIY trick for cultivating thriving rosemary plants without the mess and fuss of traditional gardening.
For centuries, rosemary has been revered not only for its culinary uses but also for its medicinal and symbolic significance. From ancient Greece, where it was believed to enhance memory, to medieval Europe, where it symbolized remembrance and fidelity, rosemary has a rich and fascinating history. Now, you can easily bring this historical herb into your home, regardless of your gardening experience.
Many people struggle with traditional gardening due to limited space, poor soil quality, or simply a lack of time. That’s where this soil free rosemary growing hack comes in. It’s perfect for apartment dwellers, busy individuals, or anyone looking for a low-maintenance way to enjoy fresh herbs. I’m going to show you how to bypass the common challenges of soil-based gardening and unlock a simpler, cleaner, and equally effective method for growing your own rosemary. Get ready to transform your kitchen into a fragrant oasis with this easy DIY project!
Growing Rosemary Without Soil: A DIY Hydroponic Adventure!
Hey there, fellow plant enthusiasts! Ever thought about ditching the dirt and trying something a little different with your rosemary? I’m talking about hydroponics – growing plants without soil, using nutrient-rich water. It might sound intimidating, but trust me, it’s a fun and rewarding project, and rosemary thrives in a hydroponic setup. I’m going to walk you through how to build your own simple hydroponic system and get your rosemary flourishing.
What You’ll Need
Before we dive in, let’s gather our supplies. This is a simple setup, so you won’t need anything too fancy.
* **Rosemary Cuttings:** You can take cuttings from an existing rosemary plant or buy them from a nursery. Look for healthy, vibrant green stems.
* **Net Pots:** These are small, plastic pots with holes that allow the roots to access the nutrient solution. I recommend 2-3 inch net pots.
* **Hydroponic Grow Medium:** This provides support for the roots. Clay pebbles (LECA), rockwool, or coco coir are all good options. I personally prefer clay pebbles because they’re reusable and provide excellent drainage.
* **A Container:** This will hold your nutrient solution and the net pots. A dark-colored plastic storage bin or bucket works perfectly. The size depends on how many rosemary plants you want to grow.
* **Air Pump and Air Stone:** These are essential for oxygenating the nutrient solution, which is crucial for root health.
* **Hydroponic Nutrients:** Specifically formulated for hydroponics. Look for a balanced nutrient solution designed for herbs or leafy greens.
* **pH Meter or pH Testing Kit:** Maintaining the correct pH level is vital for nutrient absorption.
* **pH Up and pH Down Solutions:** To adjust the pH of the nutrient solution.
* **Measuring Cups and Spoons:** For accurately measuring nutrients.
* **Water:** Filtered or dechlorinated tap water is best.
* **Optional: Grow Light:** If you don’t have a sunny spot, a grow light will provide the necessary light for your rosemary.
* **Optional: Timer:** To automate the grow light cycle.
Taking Rosemary Cuttings (If You Don’t Have Them Already)
If you’re starting from scratch, you’ll need to take rosemary cuttings. This is a simple process, but it’s important to do it right to ensure successful rooting.
1. **Choose Healthy Stems:** Select healthy, non-flowering stems from a mature rosemary plant. The stems should be about 4-6 inches long.
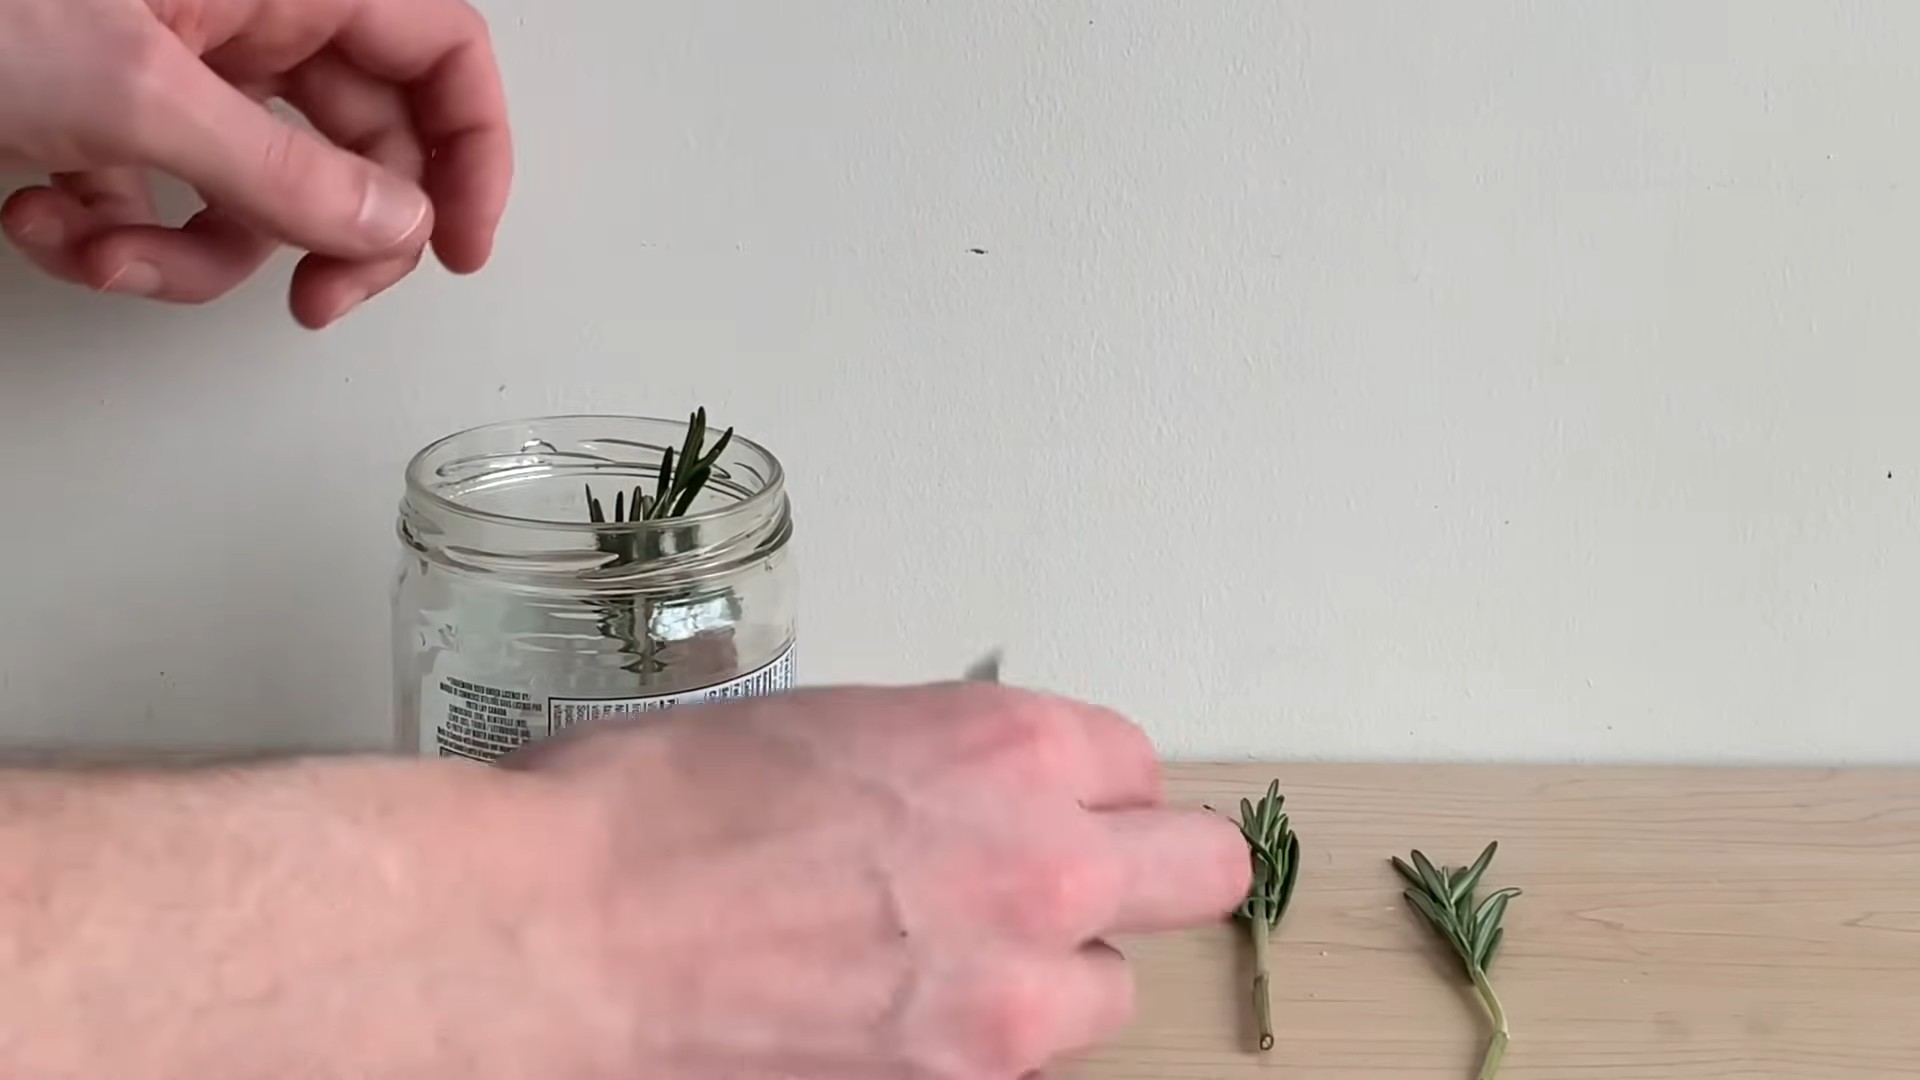
2. **Prepare the Cuttings:** Remove the leaves from the bottom inch or two of the stem. This is where the roots will emerge.
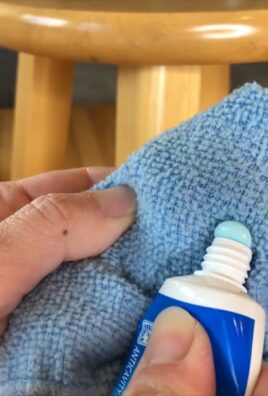
3. **Rooting Hormone (Optional):** Dip the cut end of the stem in rooting hormone powder or liquid. This will encourage faster and more reliable root development. I’ve had success both with and without rooting hormone, but it definitely speeds things up.
4. **Rooting Medium:** You can root the cuttings in water or directly in a rooting medium like perlite or vermiculite. For water rooting, place the cuttings in a glass of water, ensuring that the leaves are above the water line. Change the water every few days. For rooting medium, moisten the perlite or vermiculite and insert the cuttings.
5. **Provide Humidity:** Cover the cuttings with a plastic bag or humidity dome to create a humid environment. This helps prevent the cuttings from drying out.
6. **Wait for Roots:** Place the cuttings in a warm, bright location, but avoid direct sunlight. It usually takes about 2-4 weeks for roots to develop. You’ll know they’re ready when you see several roots that are at least an inch long.
Building Your Simple Hydroponic System
Now for the fun part – putting together your hydroponic setup! We’re going to create a simple Deep Water Culture (DWC) system, which is perfect for beginners.
1. **Prepare the Container:** Clean your container thoroughly with soap and water to remove any dirt or debris. Rinse it well.
2. **Drill Holes (If Necessary):** If your container doesn’t have a lid, you’ll need to create one. You can use a piece of cardboard or plastic. Drill holes in the lid that are slightly smaller than the diameter of your net pots. This will allow the net pots to sit securely in the lid. If you are using a container with a lid, drill holes in the lid to accommodate the net pots.
3. **Assemble the Air Pump and Air Stone:** Connect the air tubing to the air pump and the air stone. Place the air stone at the bottom of the container. This will oxygenate the nutrient solution.
4. **Add Water:** Fill the container with water, leaving a few inches of space at the top.
5. **Add Nutrients:** Follow the instructions on your hydroponic nutrient solution to add the correct amount of nutrients to the water. Be precise with your measurements. Too much or too little nutrients can harm your plants. I usually start with half the recommended dose and gradually increase it as the plants grow.
6. **Adjust pH:** Use your pH meter or testing kit to check the pH of the nutrient solution. Rosemary prefers a pH between 5.5 and 6.5. If the pH is too high, add a small amount of pH down solution. If it’s too low, add pH up solution. Always add the solutions gradually and retest the pH after each addition.
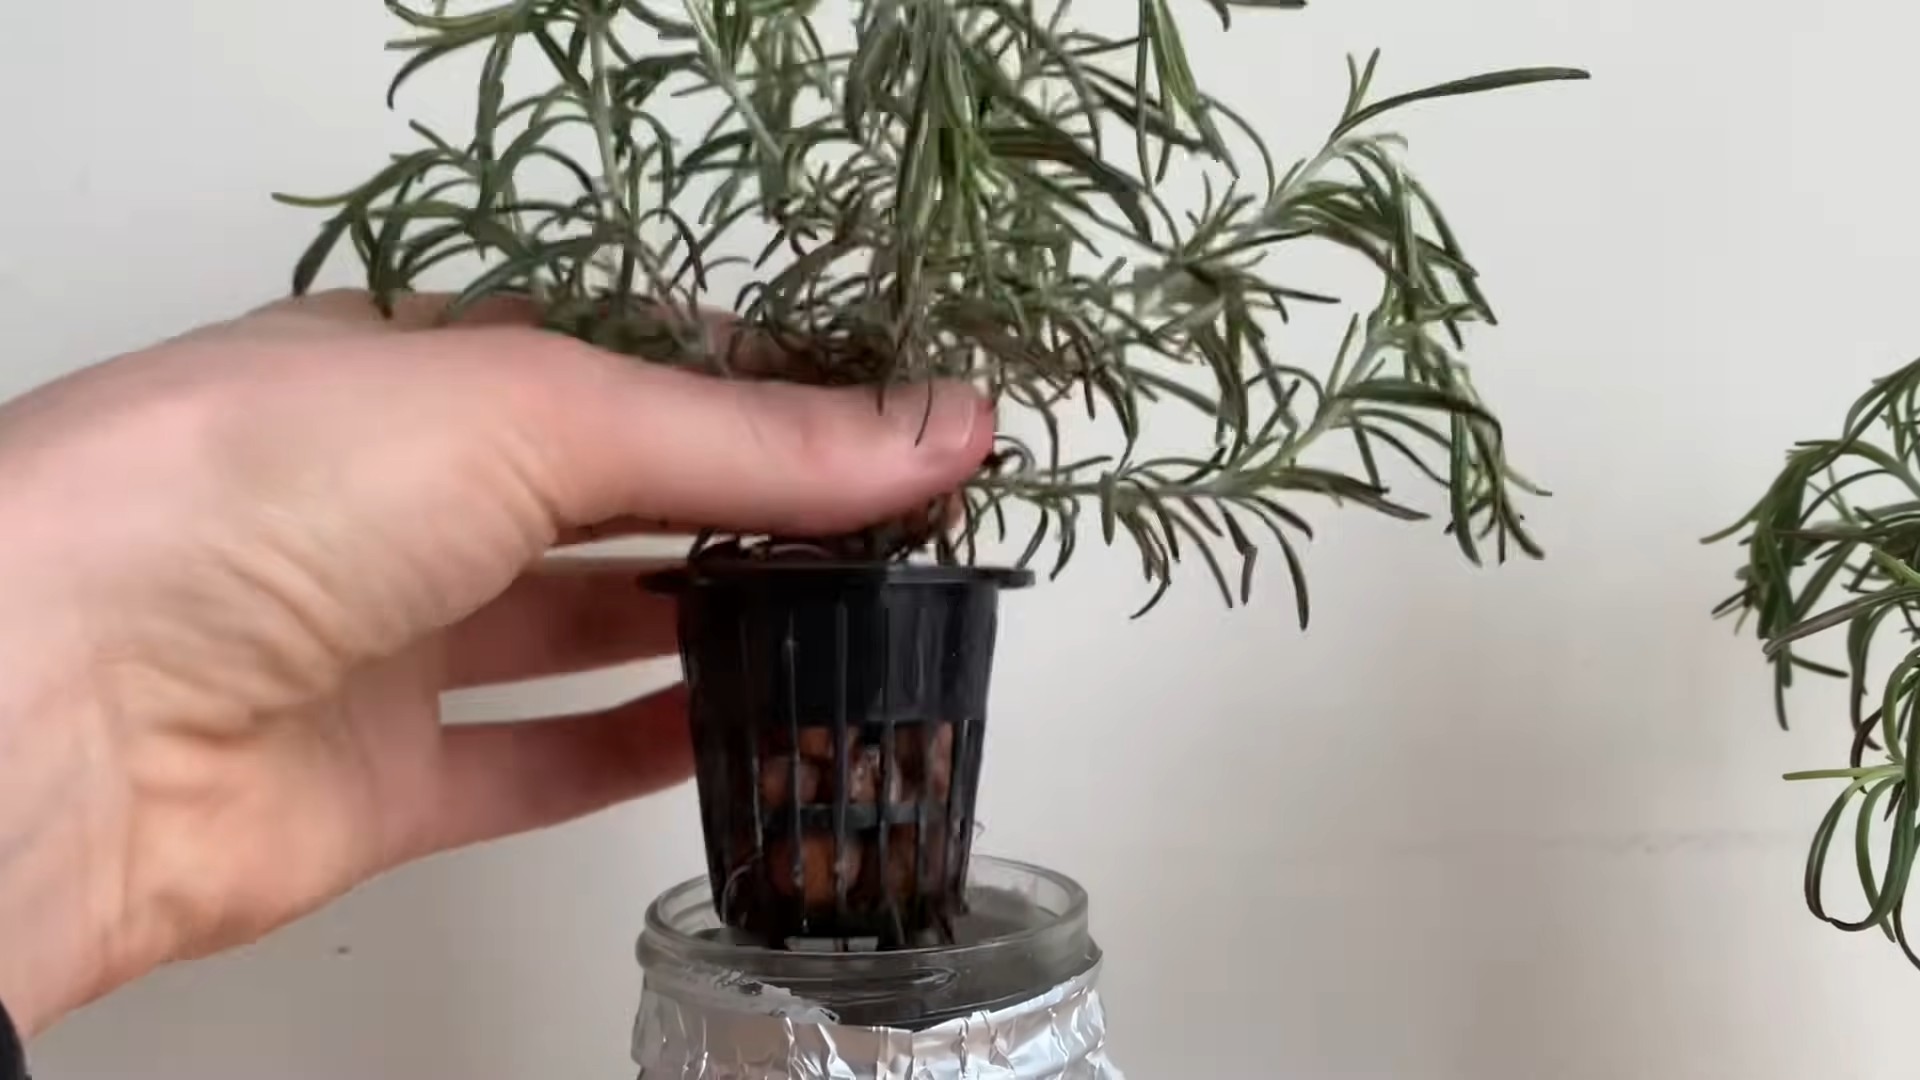
7. **Prepare the Net Pots:** Fill the net pots with your chosen hydroponic grow medium (clay pebbles, rockwool, or coco coir). Rinse the clay pebbles thoroughly before use to remove any dust or debris.
8. **Plant the Rosemary Cuttings:** Gently place the rooted rosemary cuttings into the net pots, ensuring that the roots are surrounded by the grow medium. If you rooted your cuttings in water, be extra careful when transferring them to the net pots.
9. **Place the Net Pots in the Container:** Place the net pots into the holes in the lid of the container. The bottom of the net pots should be submerged in the nutrient solution.
10. **Position the Grow Light (If Using):** If you’re using a grow light, position it above the plants, following the manufacturer’s instructions for distance and light cycle. I usually set my grow light to run for 14-16 hours per day.
Caring for Your Hydroponic Rosemary
Once your system is set up, it’s important to provide proper care to ensure your rosemary thrives.
* **Monitor the Nutrient Solution:** Check the nutrient solution regularly (at least once a week) and replenish it as needed. The water level will decrease as the plants absorb water. Add fresh nutrient solution to maintain the correct level.
* **Check pH Regularly:** Monitor the pH of the nutrient solution regularly and adjust it as needed to maintain the optimal range of 5.5 to 6.5.
* **Change the Nutrient Solution:** Completely change the nutrient solution every 2-3 weeks to prevent the buildup of salts and other impurities.
* **Provide Adequate Light:** Rosemary needs plenty of light to grow. If you’re not using a grow light, place your hydroponic system in a sunny location that receives at least 6 hours of direct sunlight per day.
* **Maintain Air Circulation:** Good air circulation helps prevent fungal diseases. You can use a small fan to circulate the air around your plants.
* **Prune Regularly:** Prune your rosemary plants regularly to encourage bushier growth. You can use the pruned stems for cooking or propagation.
* **Watch for Pests and Diseases:** Keep an eye out for pests and diseases. If you notice any problems, address them promptly. Insecticidal soap or neem oil can be used to control pests.
Troubleshooting
Even with the best care, you might encounter some challenges along the way. Here are a few common problems and how to fix them:
* **Yellowing Leaves:** This could be a sign of nutrient deficiency. Check the nutrient solution and make sure you’re using the correct concentration. It could also be a sign of overwatering or poor drainage.
* **Slow Growth:** This could be due to insufficient light, incorrect pH, or nutrient deficiency. Make sure your plants are getting enough light, the pH is within the optimal range, and you’re using the correct nutrient solution.
* **Root Rot:** This is a fungal disease that can occur if the roots are not properly oxygenated. Make sure your air pump and air stone are working properly and that the nutrient solution is not stagnant.
* **Pests:** Common pests that can affect rosemary include aphids, spider mites, and whiteflies. Use insecticidal soap or neem oil to control these pests.
Harvesting Your Hydroponic Rosemary
The best part of growing your own rosemary is harvesting it! You can start harvesting your rosemary once the plants are established and have grown to a reasonable size.
1. **Harvesting:** Simply snip off the stems you need with a pair of scissors or pruning shears.
2. **Use Fresh or Dried:** You can use the rosemary
Conclusion
So, there you have it! Growing rosemary without soil might sound like something out of a science fiction novel, but it’s surprisingly simple, incredibly rewarding, and a fantastic way to bring the fresh, aromatic scent and flavor of this beloved herb into your home. We’ve walked you through the process, highlighting the ease and efficiency of this method. But why is this DIY trick a must-try?
Firstly, it’s a game-changer for those with limited space. Forget lugging around heavy bags of soil or worrying about messy potting. This method allows you to cultivate rosemary in even the smallest of apartments or balconies. Secondly, it’s a fantastic way to control the growing environment. You have complete command over the nutrients your rosemary receives, minimizing the risk of overwatering, underwatering, or soilborne diseases. This leads to healthier, more vibrant plants. Thirdly, it’s just plain fun! There’s a certain satisfaction that comes from nurturing a plant in such an unconventional way. It’s a conversation starter, a unique hobby, and a testament to your green thumb (or lack thereof – this method is incredibly forgiving!).
This soil-free rosemary growing technique is a must-try for anyone looking to simplify their gardening, maximize space, and enjoy fresh herbs year-round.
But the possibilities don’t stop there! Feel free to experiment with different nutrient solutions. Some gardeners swear by specific hydroponic blends, while others prefer organic options like diluted seaweed extract or compost tea. You can also play around with the lighting. While a sunny windowsill is ideal, you can supplement with grow lights, especially during the darker winter months. Consider using different containers too! Mason jars, repurposed plastic bottles, or even decorative glass vases can all work beautifully. The key is to ensure proper drainage and adequate support for the roots.
And don’t forget about propagation! Once your soil-free rosemary plant is thriving, you can easily take cuttings and start new plants. This is a great way to expand your herb garden or share your bounty with friends and family. Imagine gifting a beautifully grown rosemary plant, nurtured without soil, to a loved one. It’s a thoughtful and unique present that’s sure to be appreciated.
We are confident that you’ll find this method of growing rosemary to be both enjoyable and successful. The benefits are numerous, from the convenience and space-saving aspects to the control you have over the plant’s health and growth.
Now, it’s your turn! We encourage you to give this DIY trick a try. Gather your supplies, follow the steps outlined in this article, and watch your rosemary flourish. And most importantly, share your experience with us! We’d love to hear about your successes, your challenges, and any variations you’ve tried. Post photos of your soil-free rosemary plants on social media using #SoilFreeRosemary and tag us so we can see your amazing results. Let’s create a community of soil-free rosemary growers and inspire others to embrace this innovative and rewarding technique. Happy growing!
Frequently Asked Questions (FAQ)
What exactly is soil-free growing, and how does it work for rosemary?
Soil-free growing, often referred to as hydroponics or soilless culture, is a method of growing plants without using soil. Instead, the roots are suspended in a nutrient-rich solution that provides all the essential elements the plant needs to thrive. For rosemary, this means the roots are constantly bathed in a carefully balanced mix of water and nutrients, allowing the plant to absorb what it needs directly, without having to search for it in the soil. This can lead to faster growth and healthier plants because the rosemary isn’t expending energy searching for nutrients.
What kind of nutrient solution should I use for my soil-free rosemary?
There are several options for nutrient solutions. You can purchase commercially available hydroponic nutrient solutions specifically formulated for herbs. These are generally well-balanced and easy to use. Look for solutions that are designed for leafy greens or herbs, as they will have the appropriate nitrogen, phosphorus, and potassium ratios. Alternatively, you can create your own nutrient solution using readily available ingredients. A diluted solution of seaweed extract or compost tea can work well, providing a natural source of nutrients. However, it’s important to monitor the pH of the solution and adjust it as needed to ensure optimal nutrient uptake. The ideal pH range for rosemary is between 6.0 and 6.5.
How often should I change the nutrient solution?
The frequency of changing the nutrient solution depends on several factors, including the size of your container, the growth rate of your rosemary plant, and the type of nutrient solution you’re using. As a general rule, you should change the solution every 1-2 weeks. However, if you notice the solution becoming cloudy or developing an odor, it’s best to change it more frequently. Regularly monitoring the water level and topping it off with fresh, pH-balanced water is also important.
What kind of lighting does soil-free rosemary need?
Rosemary thrives in bright, sunny conditions. Ideally, your soil-free rosemary plant should receive at least 6-8 hours of direct sunlight per day. A south-facing windowsill is often the best location. However, if you don’t have access to sufficient natural light, you can supplement with grow lights. LED grow lights are a great option because they are energy-efficient and produce very little heat. Position the grow light about 12-18 inches above the plant and leave it on for 12-16 hours per day.
Can I grow other herbs using this soil-free method?
Absolutely! Many herbs thrive in soil-free environments. Basil, mint, oregano, thyme, and chives are all excellent candidates. The principles are the same: provide a nutrient-rich solution, adequate lighting, and proper support for the roots. You may need to adjust the nutrient solution slightly depending on the specific needs of each herb. For example, basil tends to be a heavier feeder than thyme, so it may require a slightly stronger nutrient solution.
Is soil-free rosemary growing susceptible to pests and diseases?
While soil-free growing can minimize the risk of soilborne diseases, it’s still possible for pests and diseases to affect your rosemary plant. Common pests include aphids, spider mites, and whiteflies. Regularly inspect your plant for signs of infestation and take action promptly if you notice any problems. You can use insecticidal soap or neem oil to control pests. To prevent diseases, ensure good air circulation around the plant and avoid overwatering.
How do I know if my soil-free rosemary is getting enough nutrients?
The appearance of your rosemary plant can provide clues about its nutrient status. If the leaves are pale green or yellow, it may be a sign of nutrient deficiency, particularly nitrogen. If the leaves are dark green but the plant is growing slowly, it may be getting too much nitrogen. If the leaves develop brown spots or edges, it could be a sign of potassium deficiency. Adjust the nutrient solution accordingly based on these observations.
Can I transplant my soil-free rosemary into soil later on?
Yes, you can transplant your soil-free rosemary into soil if you wish. However, it’s important to acclimate the plant gradually to its new environment. Start by gradually introducing the plant to soil over a period of several days. You can do this by adding small amounts of soil to the nutrient solution or by transplanting the plant into a small pot of soil and gradually increasing the amount of soil over time. Be sure to use a well-draining potting mix and water the plant regularly.
What are the benefits of growing rosemary without soil compared to traditional methods?
There are several key benefits. Soil-free growing offers greater control over the plant’s environment, allowing you to optimize nutrient levels and minimize the risk of soilborne diseases. It’s also a space-saving method, making it ideal for small apartments or balconies. Additionally, soil-free growing can lead to faster growth and higher yields because the plant has direct access to the nutrients it needs. Finally, it’s a cleaner and less messy method than traditional soil-based gardening.


Leave a Comment