

Growing Parsley Indoors can seem daunting, but trust me, with a few simple tricks, you can have a thriving herb garden right on your windowsill! Imagine fresh, vibrant parsley always at your fingertips, ready to elevate your culinary creations. No more sad, wilted bunches from the grocery store – just the bright, peppery flavor of homegrown parsley whenever you need it.
Parsley has been cherished for centuries, not just for its culinary uses, but also for its medicinal properties. The ancient Greeks even crowned victors with parsley wreaths! Today, while we might not be crowning anyone, we can certainly appreciate the convenience and satisfaction of having this versatile herb readily available.
But why bother with growing parsley indoors? Well, for starters, it’s incredibly rewarding! Plus, it allows you to enjoy fresh herbs year-round, regardless of the weather outside. And let’s be honest, who doesn’t love the idea of saving money by growing their own herbs instead of constantly buying them? This DIY guide will equip you with the knowledge and simple hacks you need to successfully cultivate parsley indoors, even if you don’t have a green thumb. I’m here to show you that it’s easier than you think, and the results are absolutely worth it!
Growing Parsley Indoors: A Beginner’s Guide
Hey there, fellow plant enthusiasts! Ever dreamt of having fresh, vibrant parsley right at your fingertips, no matter the season? Well, you’re in the right place! I’m going to walk you through everything you need to know to successfully grow parsley indoors. It’s easier than you might think, and the reward of snipping fresh herbs for your culinary creations is totally worth it.
Choosing the Right Parsley Variety
Before we dive into the nitty-gritty, let’s talk parsley types. There are two main varieties you’ll encounter: curly parsley and flat-leaf (Italian) parsley.
* Curly Parsley: This is the kind you often see as a garnish. It has a slightly milder flavor than its flat-leaf cousin.
* Flat-Leaf (Italian) Parsley: This variety boasts a more robust, peppery flavor that many chefs prefer.
Honestly, the choice is yours! Both grow well indoors, so pick the one that tickles your taste buds the most. I personally prefer flat-leaf parsley for its intense flavor.
Gathering Your Supplies
Okay, let’s get our hands dirty (figuratively, for now!). Here’s what you’ll need to get started:
* Parsley Seeds or a Parsley Plant: You can start from seeds, which is more economical, or buy a small established plant for quicker results. I’ll cover both methods.
* A Pot with Drainage Holes: This is crucial! Parsley hates soggy feet. Choose a pot that’s at least 6 inches in diameter and depth.
* High-Quality Potting Mix: Don’t skimp on this! Use a well-draining potting mix specifically formulated for containers. Avoid using garden soil, as it can compact and hinder drainage.
* Grow Lights (Optional but Recommended): Parsley needs plenty of light, especially indoors. A grow light will ensure your plant thrives, especially during the darker months.
* Watering Can or Spray Bottle: For gentle watering.
* Small Shovel or Trowel: For planting.
* Fertilizer (Optional): A balanced liquid fertilizer can give your parsley a boost, but it’s not strictly necessary.
Starting from Seeds: A Step-by-Step Guide
Starting from seeds takes a little more patience, but it’s a rewarding experience. Parsley seeds can be a bit slow to germinate, so don’t get discouraged if you don’t see sprouts right away.
1. Soaking the Seeds (Optional but Recommended): Parsley seeds have a hard outer shell, so soaking them in warm water for 24 hours before planting can significantly improve germination rates. I usually put them in a small bowl with water and let them sit overnight.
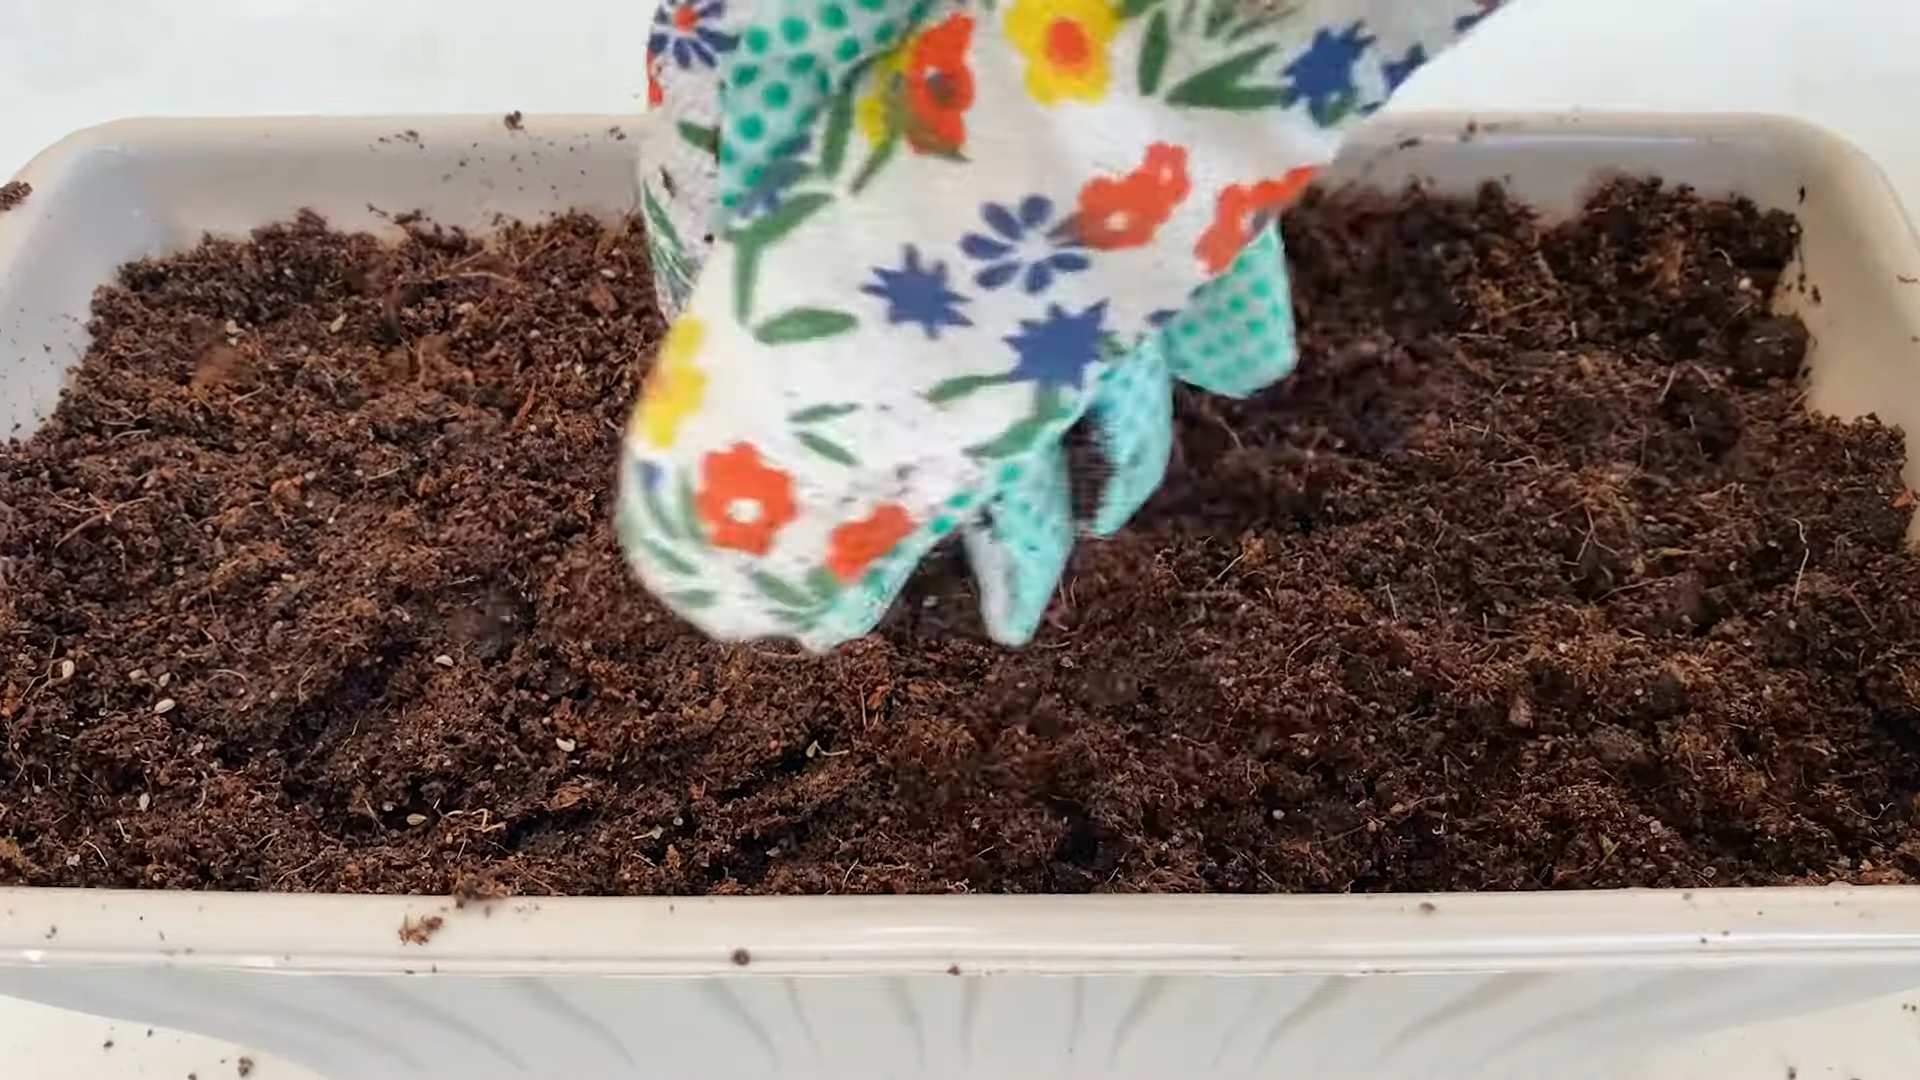
2. Preparing the Pot: Fill your pot with potting mix, leaving about an inch of space at the top. Gently pat down the soil to remove any large air pockets.
3. Sowing the Seeds: Sprinkle the parsley seeds evenly over the surface of the soil. You don’t need to bury them too deep; about 1/4 inch is perfect.
4. Covering the Seeds: Lightly cover the seeds with a thin layer of potting mix.
5. Watering: Gently water the soil using a spray bottle or watering can with a gentle nozzle. The goal is to moisten the soil without disturbing the seeds.
6. Creating a Humid Environment: Cover the pot with plastic wrap or a clear plastic bag to create a humid environment. This will help the seeds germinate. Make sure to poke a few holes in the plastic for ventilation.
7. Finding the Right Spot: Place the pot in a warm location with indirect sunlight. A temperature of around 70-75°F (21-24°C) is ideal.
8. Monitoring and Watering: Check the soil moisture daily. Keep the soil consistently moist, but not soggy. Remove the plastic wrap once the seeds start to germinate.
9. Germination Time: Be patient! Parsley seeds can take anywhere from 2 to 4 weeks to germinate.
10. Thinning Seedlings: Once the seedlings have developed a few sets of true leaves, thin them out, leaving the strongest seedlings spaced about 2-3 inches apart. This will give them enough room to grow.
Planting a Parsley Plant: A Simpler Approach
If you’re short on time or patience, buying a small parsley plant is a great option.
1. Preparing the Pot: Fill your pot with potting mix, leaving about an inch of space at the top.
2. Removing the Plant from its Container: Gently squeeze the sides of the nursery pot to loosen the plant. Carefully remove the plant, being mindful not to damage the roots.
3. Loosening the Roots: Gently loosen the roots of the parsley plant. If the roots are tightly bound, you can carefully tease them apart with your fingers.
4. Planting: Place the parsley plant in the center of the pot. The top of the root ball should be level with the surface of the soil.
5. Filling in the Gaps: Fill in the remaining space around the plant with potting mix. Gently pat down the soil.
6. Watering: Water the plant thoroughly until water drains out of the drainage holes.
Caring for Your Indoor Parsley
Now that your parsley is planted, it’s time to provide it with the care it needs to thrive.
* Light: Parsley needs at least 6-8 hours of sunlight per day. If you don’t have a sunny window, supplement with a grow light. I use a simple LED grow light that clips onto my shelf.
* Watering: Water your parsley when the top inch of soil feels dry to the touch. Avoid overwatering, as this can lead to root rot. Make sure the pot has good drainage.
* Temperature: Parsley prefers temperatures between 60-75°F (15-24°C).
* Humidity: Parsley likes humidity, but it’s not essential. You can increase humidity by placing the pot on a tray filled with pebbles and water, or by misting the plant occasionally.
* Fertilizing (Optional): If you want to give your parsley a boost, you can fertilize it every 2-3 weeks with a balanced liquid fertilizer diluted to half strength. I usually use a fertilizer specifically formulated for herbs.
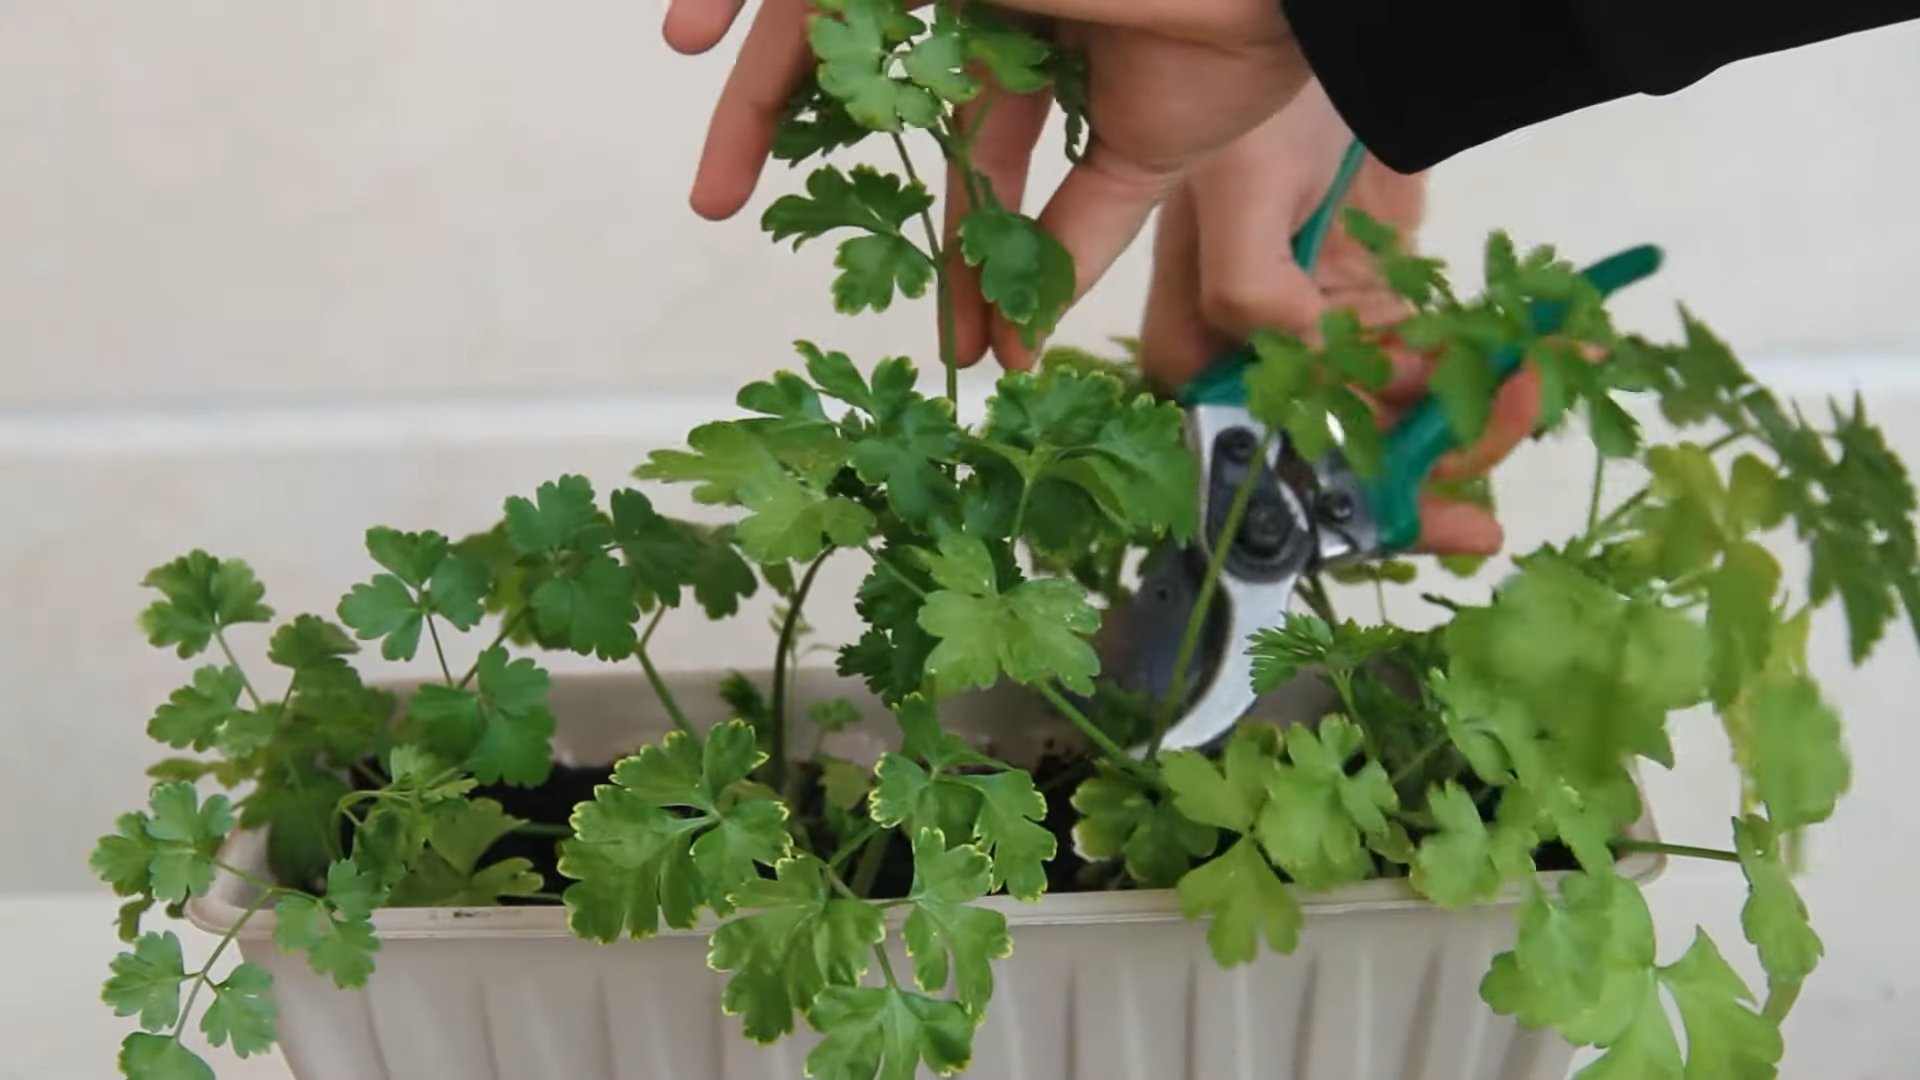
* Pruning: Regular pruning is essential for keeping your parsley plant healthy and productive. Pinch off the top leaves to encourage bushier growth.
Harvesting Your Parsley
The best part! You can start harvesting parsley once the plant has reached about 6 inches in height.
1. Harvesting Technique: Use scissors or pruning shears to cut the outer stems near the base of the plant. Avoid cutting more than one-third of the plant at a time.
2. Regular Harvesting: Regular harvesting encourages the plant to produce more leaves.
3. Storage: Freshly harvested parsley can be stored in the refrigerator for up to a week. Wrap it in a damp paper towel and place it in a plastic bag. You can also freeze parsley for longer storage.
Troubleshooting Common Problems
Even with the best care, you might encounter a few problems along the way. Here are some common issues and how to address them:
* Yellowing Leaves: This could be a sign of overwatering, underwatering, or nutrient deficiency. Check the soil moisture and adjust your watering accordingly. If the problem persists, try fertilizing the plant.
* Leggy Growth: This usually indicates insufficient light. Move the plant to a sunnier location or supplement with a grow light.
* Pests: Parsley can be susceptible to pests like aphids and spider mites. Inspect your plant regularly and treat any infestations promptly with insecticidal soap or neem oil. I prefer neem oil because it’s a natural solution.
* Root Rot: This is caused by overwatering and poor drainage. Make sure your pot has drainage holes and avoid letting the soil stay soggy.
Extending the Life of Your Parsley Plant
Parsley is a biennial plant, meaning it typically lives for two years. However, it often bolts (goes to seed) in its second year, which can make the leaves bitter. To extend the life of your parsley plant and keep it producing flavorful leaves, follow these tips:
* Pinch off Flower Buds: If you see flower buds forming, pinch them off immediately. This will prevent the plant from bolting.
* Repotting: If your parsley plant outgrows its pot, repot it into a larger container.
* Winter Care: During the winter months, reduce watering and fertilizing. Provide your parsley with as much light as possible.
Enjoying Your Homegrown Parsley
Now that you’ve successfully grown your own parsley indoors, it
Conclusion
So, there you have it! Growing parsley indoors is not only achievable but also incredibly rewarding. Imagine having fresh, vibrant parsley readily available, regardless of the season, to elevate your culinary creations. No more wilted, expensive bunches from the grocery store – just a snip away from garden-fresh flavor.
This DIY trick is a must-try for several compelling reasons. First, it empowers you to control the quality of your parsley. You know exactly what goes into its growth – no harmful pesticides or questionable fertilizers. Second, it’s a sustainable and cost-effective solution. A single packet of parsley seeds can yield months, even years, of fresh herbs, significantly reducing your grocery bill and environmental impact. Third, it’s a fantastic way to bring a touch of green into your home, especially during the colder months when outdoor gardening is limited. The vibrant green of the parsley plant can brighten up any windowsill and add a touch of life to your indoor space.
But the benefits don’t stop there. Growing your own parsley allows for experimentation and personalization. Want to try different varieties? Go for it! Curly parsley, flat-leaf parsley (also known as Italian parsley), or even a less common variety – the choice is yours. You can also tailor the growing conditions to your specific environment. If you live in a particularly dry climate, consider using a self-watering pot or misting the leaves regularly. If you have limited sunlight, supplement with a grow light to ensure optimal growth.
Consider these variations to further enhance your indoor parsley growing experience:
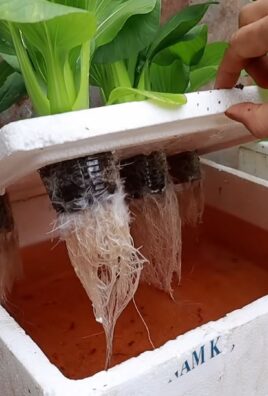
* Hydroponics: For a more advanced approach, try growing your parsley hydroponically. This method involves growing plants without soil, using nutrient-rich water solutions. It can be a fun and efficient way to grow herbs indoors.
* Companion Planting: Plant your parsley alongside other herbs that thrive in similar conditions, such as chives or oregano. This can create a mini indoor herb garden and maximize your growing space.
* Succession Planting: To ensure a continuous supply of fresh parsley, sow new seeds every few weeks. This will prevent you from running out of parsley when your older plants start to decline.
* Parsley Tea: Don’t forget that parsley isn’t just for cooking! You can also use fresh parsley to make a refreshing and healthy tea. Simply steep a handful of fresh parsley leaves in hot water for a few minutes.
Ultimately, the success of growing parsley indoors hinges on your willingness to experiment and adapt. Pay attention to your plants, observe their growth patterns, and adjust your care routine accordingly. Don’t be afraid to make mistakes – that’s how you learn and improve.
We are confident that you’ll find growing parsley indoors to be a rewarding and enjoyable experience. It’s a simple yet impactful way to connect with nature, enhance your cooking, and add a touch of green to your home. So, grab a pot, some soil, and a packet of parsley seeds, and get started today!
We encourage you to try this DIY trick and share your experience with us. Let us know what varieties you’re growing, what challenges you’ve faced, and what tips you’ve discovered. Share your photos and stories on social media using #IndoorParsley or tag us in your posts. We can’t wait to see your thriving indoor parsley gardens! Remember, fresh, flavorful parsley is just a few steps away with this easy and effective method of growing parsley indoors.
Frequently Asked Questions (FAQ)
What kind of pot should I use for growing parsley indoors?
The ideal pot for growing parsley indoors should be at least 6 inches in diameter and have drainage holes. Parsley needs room for its roots to grow, and good drainage is essential to prevent root rot. Terracotta pots are a good option as they allow for better air circulation, but plastic pots are also suitable and retain moisture better, which can be beneficial if you tend to underwater. Consider using a self-watering pot if you often forget to water your plants.
What type of soil is best for indoor parsley?
Parsley thrives in well-draining, nutrient-rich soil. A good potting mix specifically formulated for herbs or vegetables is ideal. You can also create your own mix by combining equal parts of potting soil, compost, and perlite or vermiculite. The compost provides essential nutrients, while the perlite or vermiculite improves drainage and aeration. Avoid using garden soil, as it can be too heavy and may contain pests or diseases.
How much sunlight does indoor parsley need?
Parsley needs at least 6 hours of sunlight per day to thrive. A south-facing window is usually the best option, but an east- or west-facing window can also work. If you don’t have enough natural light, you can supplement with a grow light. Place the grow light a few inches above the plants and keep it on for 12-14 hours per day. Rotate the pot regularly to ensure that all sides of the plant receive adequate light.
How often should I water my indoor parsley?
Water your parsley when the top inch of soil feels dry to the touch. Avoid overwatering, as this can lead to root rot. Water deeply, until water drains out of the drainage holes. Allow the soil to dry out slightly between waterings. During the winter months, when growth slows down, you may need to water less frequently. Check the soil moisture regularly and adjust your watering schedule accordingly.
How do I fertilize my indoor parsley?
Parsley benefits from regular fertilization, especially when grown indoors. Use a balanced liquid fertilizer diluted to half strength every 2-4 weeks during the growing season (spring and summer). Alternatively, you can use a slow-release fertilizer at the time of planting. Avoid over-fertilizing, as this can burn the roots. Look for fertilizers specifically formulated for herbs or vegetables.
How do I harvest parsley from my indoor plant?
Harvest parsley by snipping off the outer stems near the base of the plant. Avoid cutting more than one-third of the plant at a time, as this can stunt its growth. Regular harvesting encourages the plant to produce more leaves. You can use scissors or pruning shears to harvest the parsley. Harvest in the morning, when the essential oils are most concentrated, for the best flavor.
Why is my indoor parsley turning yellow?
Yellowing leaves on indoor parsley can be caused by several factors, including overwatering, underwatering, nutrient deficiencies, or pests. Check the soil moisture to ensure that you are not overwatering or underwatering. If the soil is consistently wet, reduce your watering frequency. If the soil is dry, water more deeply. If the yellowing is accompanied by stunted growth, consider fertilizing the plant with a balanced liquid fertilizer. Inspect the plant for pests, such as aphids or spider mites, and treat accordingly.
How do I prevent pests from attacking my indoor parsley?
To prevent pests from attacking your indoor parsley, start with healthy plants and use clean potting soil. Regularly inspect your plants for signs of pests, such as aphids, spider mites, or whiteflies. If you find pests, treat them promptly with insecticidal soap or neem oil. You can also try washing the leaves with a strong stream of water to dislodge the pests. Avoid overcrowding your plants, as this can create a favorable environment for pests.
Can I grow parsley from cuttings indoors?
While it’s more common to grow parsley from seeds, you can also try propagating it from cuttings. Take a 4-6 inch cutting from a healthy parsley plant, removing the lower leaves. Dip the cut end in rooting hormone and plant it in a small pot filled with moist potting mix. Cover the pot with a plastic bag to create a humid environment and place it in a warm, bright location. Keep the soil moist but not soggy. After a few weeks, the cutting should develop roots.
How long will my indoor parsley plant last?
With proper care, an indoor parsley plant can last for several months, even a year or more. Parsley is a biennial plant, meaning that it typically lives for two years. However, after the first year, it may start to bolt (produce flowers), which can affect the flavor of the leaves. To prolong the life of your parsley plant, pinch off any flower buds as soon as they appear.

Leave a Comment